
“I swear, it was just a lazy Sunday afternoon when I tossed together what would become my go-to dessert for every gathering,” I said to my friend as we dug into layers of creamy goodness and crisp wafers. Honestly, I didn’t expect much when I grabbed the last ripe bananas from the fruit bowl and a box of Nilla Wafers that had been sitting forgotten in the pantry. A quick mix, a chill in the fridge, and the next thing I knew, this creamy banana pudding icebox cake was stealing the show at every dinner party.
The funny thing? I was skeptical at first—banana pudding always seemed a little too simple, or sometimes soggy, if you know what I mean. But the crisp texture of those Nilla Wafers layered between the silky pudding and fresh bananas created this delightful contrast that made me want to make this dessert again and again. I ended up making it at least three times that week; it was that addictive.
Late afternoon sunlight filtering through the kitchen window, the sweet smell of vanilla pudding mingling with ripe bananas, and the satisfying crunch of those wafers—there’s something quietly comforting about this dessert. It’s the kind of treat that feels like a warm hug after a long day, or like a little reward you give yourself just for making it through the week. No fuss, no elaborate baking, just pure, simple pleasure.
Over time, this creamy banana pudding icebox cake stuck with me because it’s the dessert I trust to bring smiles without stress. It’s forgiving, easy to whip up, and always impressive enough that people ask me for the recipe. That subtle promise of creamy, crispy, sweet layers is exactly why it deserves a spot in your dessert rotation too.
Why You’ll Love This Recipe
This creamy banana pudding icebox cake with crispy Nilla Wafers is one of those recipes that feels both nostalgic and fresh—perfect for anyone who loves classic desserts with a twist. Here’s why I keep coming back to it:
- Quick & Easy: You can have it ready to chill in under 20 minutes—ideal for busy weeknights or last-minute guests.
- Simple Ingredients: No scavenging specialty stores here—bananas, pudding, and Nilla Wafers are pantry staples in many homes.
- Perfect for Any Occasion: Whether it’s a casual family dinner, a potluck, or a summer barbecue, this icebox cake fits right in.
- Crowd-Pleaser: Kids and adults alike keep asking for seconds. The creamy layers and crispy wafers hit all the right notes.
- Unbelievably Delicious: The silky pudding, fresh bananas, and that irresistible crunch create a texture combo that feels luxurious but not fussy.
What sets this recipe apart? The secret is in layering the pudding and Nilla Wafers just right—letting the wafers stay crispy rather than soggy while still soaking up just enough creaminess. I’ve tested different pudding brands and found that using a classic vanilla pudding mix with a touch of cream cheese folded in gives the filling an extra tang and depth. It’s a small trick that makes a big difference.
This isn’t just another banana pudding. It’s the kind that makes you close your eyes at the first bite and think, “Yep, this is the one.” Plus, it’s a dessert you can assemble ahead and trust to hold up beautifully, unlike some other creamy treats that need last-minute prep.
What Ingredients You Will Need
This recipe uses simple, wholesome ingredients to deliver bold flavor and satisfying texture without the fuss. Most of these are pantry staples, and you can easily swap a few items to suit your preferences or dietary needs.
- For the Creamy Pudding Layer:
- Vanilla pudding mix (one 3.4 oz/96 g package) – I prefer Jell-O for its smooth texture
- Whole milk (2 cups/480 ml) – for richness, but skim or dairy-free milk works too
- Cream cheese (4 oz/115 g, softened) – adds a subtle tang and creaminess
- Powdered sugar (1/3 cup/40 g) – balances the tang of cream cheese
- Pure vanilla extract (1 tsp) – for depth of flavor
- Banana Layer:
- Ripe bananas (3 medium, sliced) – not too mushy, but perfectly ripe for sweetness
- Crunchy Layers:
- Nilla Wafers (about 60 wafers) – the star for that crispy texture; if needed, you can substitute with gluten-free vanilla cookies
Optional add-ins or swaps:
- Use Greek yogurt in place of some cream cheese for a lighter option
- Swap powdered sugar with honey or maple syrup if you want a more natural sweetener
- For a dairy-free version, try coconut cream pudding and dairy-free cream cheese alternatives
One tip: choose firm, ripe bananas to avoid sogginess, and buy Nilla Wafers fresh if possible, as older wafers can get stale and lose that crisp snap.
Equipment Needed
- 9×13 inch (23×33 cm) glass or ceramic baking dish – a classic choice for layering and chilling
- Mixing bowls – one large for pudding mixture, another for whipping cream or cream cheese blending
- Hand mixer or stand mixer – to get that pudding and cream cheese blend smooth and fluffy
- Measuring cups and spoons – for accuracy in pudding and sugar quantities
- Rubber spatula – perfect for folding ingredients gently without deflating the mixture
- Knife and cutting board – to slice bananas evenly
If you don’t have a hand mixer, a sturdy whisk can work but expect to put in a bit more elbow grease. Glass dishes are preferred because you can see the beautiful layers, but a metal or ceramic pan will do just fine. For budget-friendly options, consider borrowing or picking up an inexpensive hand mixer—you’ll get more use out of it than you think!
Preparation Method
- Prepare the pudding mix: In a large bowl, whisk together the vanilla pudding mix and milk (2 cups/480 ml) until it thickens—about 2 minutes. Set aside for 5 minutes to fully set.
- Blend the cream cheese and sugar: While pudding sets, beat the softened cream cheese (4 oz/115 g) with powdered sugar (1/3 cup/40 g) and 1 tsp vanilla extract until smooth and creamy. This usually takes about 2-3 minutes with a mixer.
- Combine pudding with cream cheese: Gently fold the pudding into the cream cheese mixture. Don’t overmix—just enough to make a smooth, creamy filling. If the mixture feels too thick, you can add a splash of milk (1-2 tbsp) to loosen it.
- Slice the bananas: Peel and slice 3 medium ripe bananas into about 1/4-inch (0.6 cm) thick rounds. Set aside.
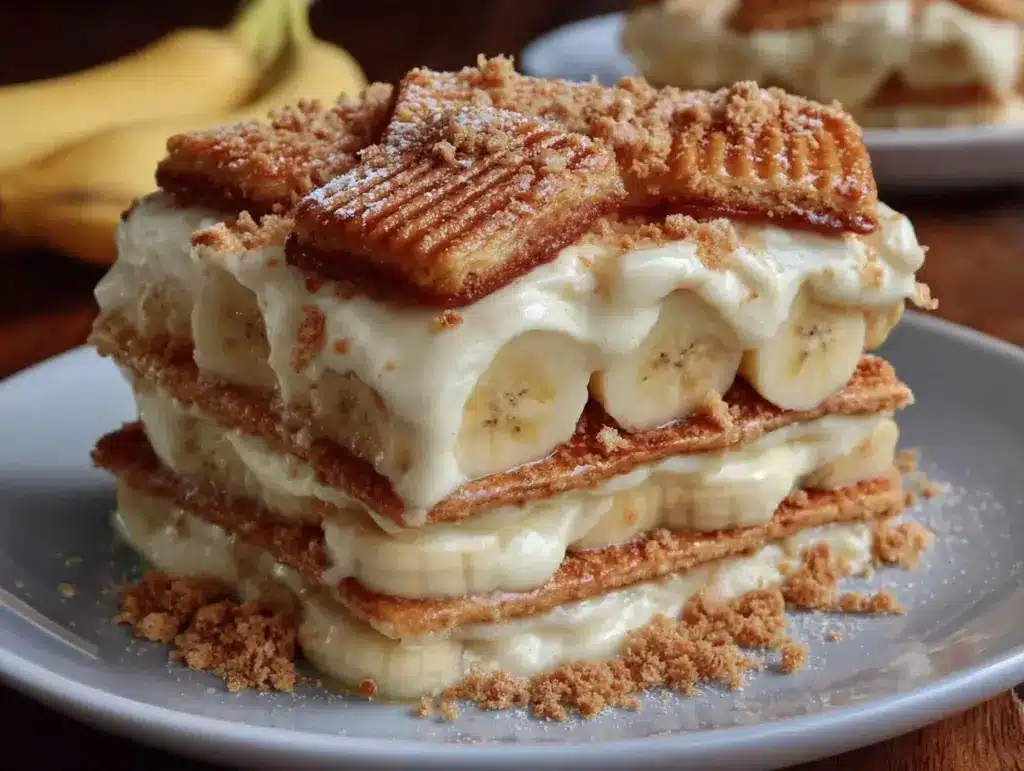
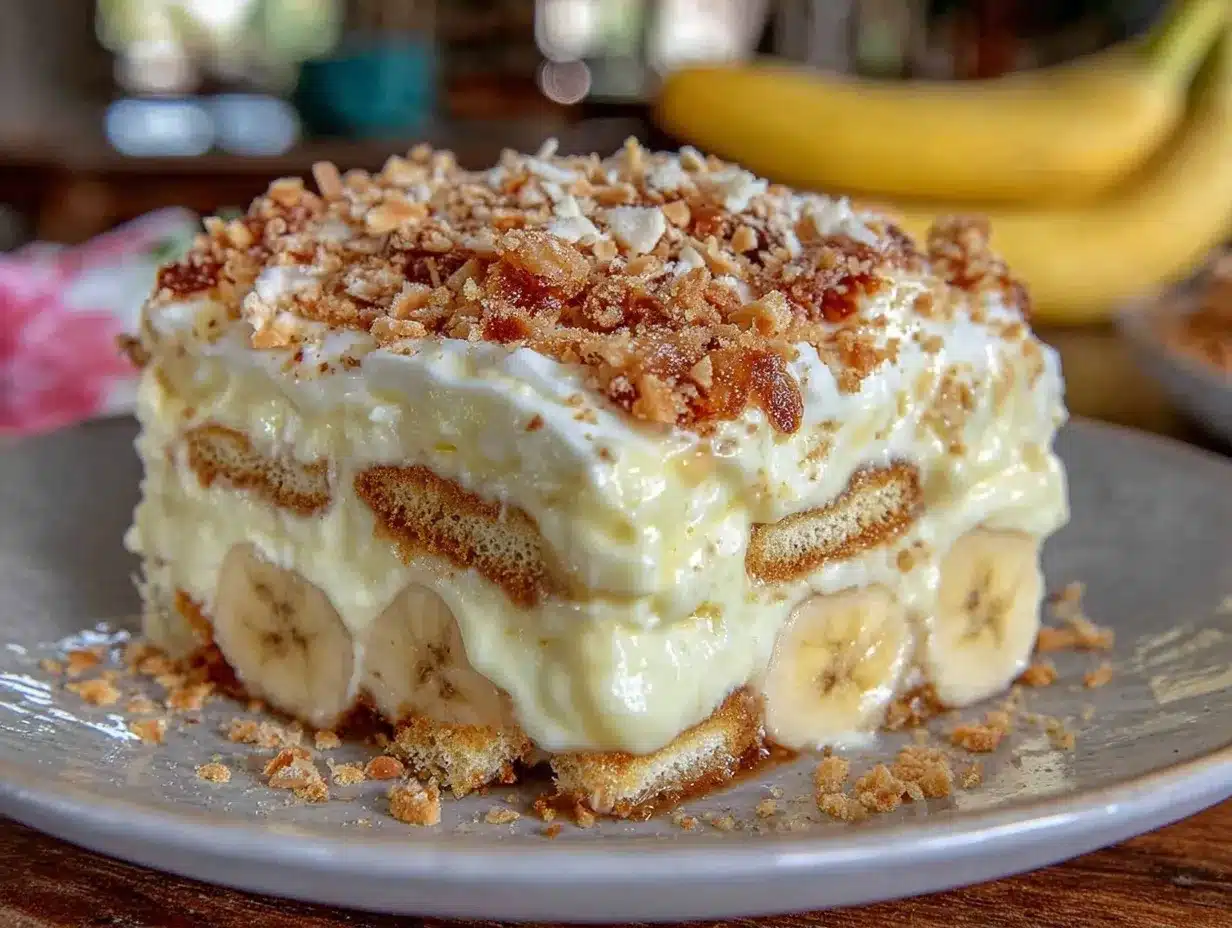
- Layer your icebox cake: Spread a thin layer of the pudding mixture across the bottom of your 9×13 inch dish. Then, arrange a single layer of Nilla Wafers over the pudding, making sure to cover the surface but not overcrowd.
- Add banana slices: Place a layer of banana slices over the wafers.
- Repeat layering: Add another layer of pudding mixture, then wafers, then bananas, until you run out of ingredients or fill the dish. Finish with a final layer of pudding on top.
- Chill: Cover the dish tightly with plastic wrap and refrigerate for at least 4 hours, preferably overnight. This allows the wafers to soften slightly but still maintain a pleasant crunch, and the flavors to meld.
- Serve: Just before serving, you can garnish with a few whole Nilla Wafers or banana slices for presentation.
Some troubleshooting tips: if your pudding mixture is too runny, chill it longer before layering. If bananas brown quickly, toss them in a little lemon juice to keep that fresh look. And remember, don’t overlayer the wafers; too thick a wafer layer can make the cake harder to cut and eat.
Cooking Tips & Techniques
Here’s what I’ve learned making this creamy banana pudding icebox cake over and over:
- Use ripe but firm bananas: Too mushy and you risk a soggy cake; too green and they won’t be sweet enough.
- Don’t skip the cream cheese: It adds a lovely tang and richness that keeps this dessert from tasting too flat or overly sweet.
- Layer with care: Don’t overcrowd the wafers; let them breathe between layers so they soften just right without turning to mush.
- Chill at least 4 hours: Patience is key here. I’ve tried serving it sooner, but the flavors and texture really come together with a good chill.
- Mix pudding and cream cheese gently: Overmixing can make the filling too runny or dense. Fold with a spatula until just combined.
- Multitasking tip: While pudding sets, prepare bananas and cream cheese mixture to save time.
- For extra flair: Toasted coconut or chopped pecans on top give a lovely crunch contrast.
Honestly, I once tried substituting vanilla wafers with graham crackers, and while it’s tasty, you lose that iconic crunch. For a different spin, some friends have layered in sliced strawberries or fresh berries, which made me think of the creamy no-churn strawberry ice cream recipe I shared earlier—similar creamy textures but with a fruity twist.
Variations & Adaptations
This icebox cake is a flexible dessert that you can tweak based on what you have or your preferences:
- Dairy-Free Version: Use coconut milk pudding and dairy-free cream cheese alternatives. Swap traditional Nilla Wafers with gluten-free vanilla cookies.
- Chocolate Banana Pudding: Add a layer of chocolate pudding or sprinkle mini chocolate chips between layers for a richer dessert.
- Berry Banana Mix: Add fresh raspberries or sliced strawberries with the bananas for a fresh, tangy contrast reminiscent of my balsamic roasted strawberry shortcake.
- Individual Servings: Assemble in small mason jars or cups for easy portion control and presentation.
- Crunch Upgrade: Swap Nilla Wafers for crispy ginger snaps or honey graham crackers for a spicy or honeyed note.
One favorite variation I keep coming back to is layering in a thin spread of peanut butter between the bananas and wafers. It adds a nutty depth that’s unexpectedly delicious and reminiscent of some creamy, nutty desserts I’ve enjoyed before.
Serving & Storage Suggestions
This creamy banana pudding icebox cake is best served chilled straight from the fridge. The contrast of cool creaminess and crisp wafers is at its peak when slightly cold but not frozen. Serve it with a dollop of whipped cream or a sprinkle of crushed wafers on top for extra texture.
Pair this dessert with a cup of black coffee or a light herbal tea to balance the sweetness. It also makes a lovely finish after a savory meal like a comforting chicken and dumplings dinner.
To store, cover tightly with plastic wrap or transfer to an airtight container and refrigerate for up to 3 days. The texture will soften as the wafers absorb more moisture, but it remains delicious. If you want to keep the wafers crisp longer, add a fresh layer of wafers on top just before serving.
Reheating isn’t recommended, but if you want a warm twist, serve spoonfuls alongside warm caramel sauce or melted chocolate for a decadent treat. Over time, the flavors meld and deepen, making leftovers even better the next day.
Nutritional Information & Benefits
Each serving of this creamy banana pudding icebox cake (about 1/8th of the dish) contains approximately:
| Calories | 280 |
|---|---|
| Fat | 10g |
| Carbohydrates | 42g |
| Protein | 4g |
| Fiber | 2g |
| Sugar | 28g |
Bananas provide potassium and vitamin C, while the cream cheese adds calcium and a bit of protein. Using low-fat milk or dairy-free milk can reduce fat content if desired. This dessert is naturally gluten-free if you choose gluten-free wafers, making it accessible for many dietary needs.
From a personal wellness perspective, I appreciate that this recipe balances indulgence with fresh fruit and simple ingredients. It’s a dessert that feels like a treat without going overboard, ideal for mindful eating on special occasions.
Conclusion
This creamy banana pudding icebox cake with crispy Nilla Wafers is one of those rare desserts that’s both effortless and unforgettable. The layers of smooth, tangy pudding, fresh banana slices, and that signature wafer crunch come together in a way that feels like a nostalgic favorite and a fresh surprise all at once.
Feel free to customize this recipe based on what you love—swap flavors, add your favorite toppings, or make it dairy-free. It’s forgiving and welcoming to your own twists. Honestly, it’s the kind of dessert that makes you want to keep experimenting and sharing.
I love this recipe because it’s the sweet ending that makes any meal feel special, even on the busiest days. If you give it a try, I’d love to hear how you make it your own or what memories it sparks in your kitchen.
Happy baking and savoring every creamy, crispy bite!
Frequently Asked Questions
Can I make this banana pudding icebox cake ahead of time?
Absolutely! In fact, it tastes better after chilling overnight, allowing the flavors to meld and the wafers to soften just enough without losing their crunch.
What can I use if I don’t have Nilla Wafers?
You can substitute with vanilla cookies, graham crackers, or even crispy ginger snaps depending on your flavor preference and dietary needs.
How do I keep the bananas from browning?
Toss the banana slices lightly in lemon juice before layering to slow browning and keep the dessert looking fresh.
Is it possible to make this dessert dairy-free?
Yes! Use dairy-free milk, coconut or soy-based pudding mixes, and dairy-free cream cheese substitutes to make a delicious dairy-free version.
Can I freeze the banana pudding icebox cake?
Freezing isn’t recommended as the bananas and wafers change texture. It’s best enjoyed fresh after chilling in the fridge.
Pin This Recipe!
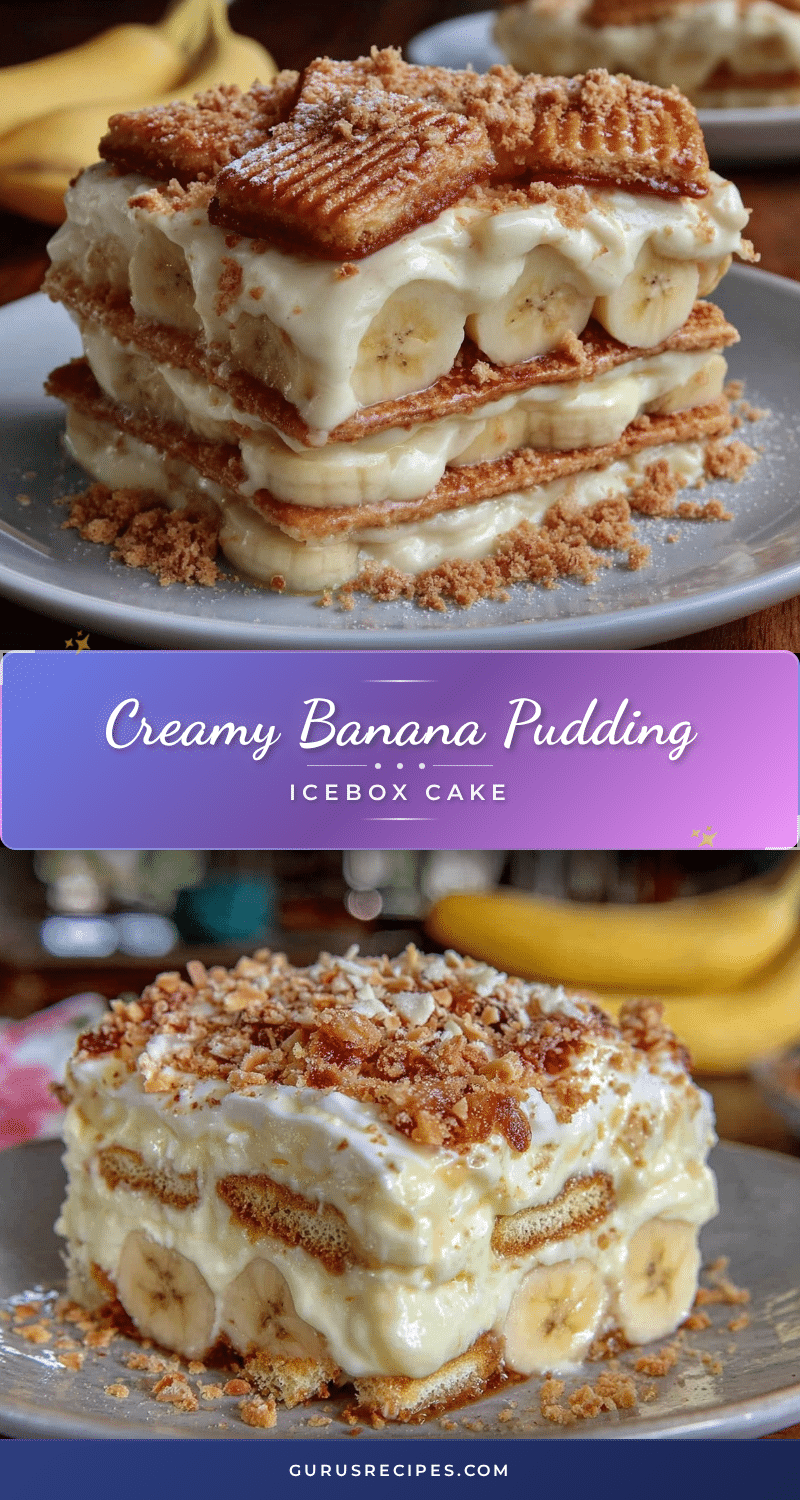

Creamy Banana Pudding Icebox Cake Recipe with Crispy Nilla Wafers
A quick and easy no-bake dessert featuring layers of creamy vanilla pudding, tangy cream cheese, ripe bananas, and crispy Nilla Wafers. Perfect for gatherings and sure to be a crowd-pleaser.
- Total Time: 4 hours 15 minutes
- Yield: 8 servings 1x
Ingredients
- 1 (3.4 oz) package vanilla pudding mix (preferably Jell-O)
- 2 cups whole milk (or skim/dairy-free milk)
- 4 oz cream cheese, softened
- 1/3 cup powdered sugar
- 1 tsp pure vanilla extract
- 3 medium ripe bananas, sliced
- About 60 Nilla Wafers (or gluten-free vanilla cookies as substitute)
Instructions
- In a large bowl, whisk together the vanilla pudding mix and 2 cups milk until thickened, about 2 minutes. Set aside for 5 minutes to fully set.
- Beat the softened cream cheese with powdered sugar and vanilla extract until smooth and creamy, about 2-3 minutes.
- Gently fold the pudding into the cream cheese mixture until smooth. Add 1-2 tablespoons milk if mixture is too thick.
- Peel and slice bananas into 1/4-inch thick rounds. Set aside.
- Spread a thin layer of pudding mixture across the bottom of a 9×13 inch dish.
- Arrange a single layer of Nilla Wafers over the pudding, covering the surface without overcrowding.
- Place a layer of banana slices over the wafers.
- Repeat layering pudding, wafers, and bananas until ingredients are used or dish is filled. Finish with a final layer of pudding on top.
- Cover tightly with plastic wrap and refrigerate for at least 4 hours, preferably overnight.
- Before serving, optionally garnish with whole Nilla Wafers or banana slices.
Notes
Use firm ripe bananas to avoid sogginess. Toss banana slices in lemon juice to prevent browning. Do not overcrowd wafer layers to maintain crispness. Chill at least 4 hours for best texture. Substitute dairy-free ingredients for a dairy-free version. For extra flair, add toasted coconut or chopped pecans on top.
- Prep Time: 15 minutes
- Cook Time: 0 minutes
- Category: Dessert
- Cuisine: American
Nutrition
- Serving Size: 1/8th of the 9x13 in
- Calories: 280
- Sugar: 28
- Fat: 10
- Carbohydrates: 42
- Fiber: 2
- Protein: 4
Keywords: banana pudding, icebox cake, Nilla Wafers, creamy dessert, no bake, easy dessert, layered dessert


