
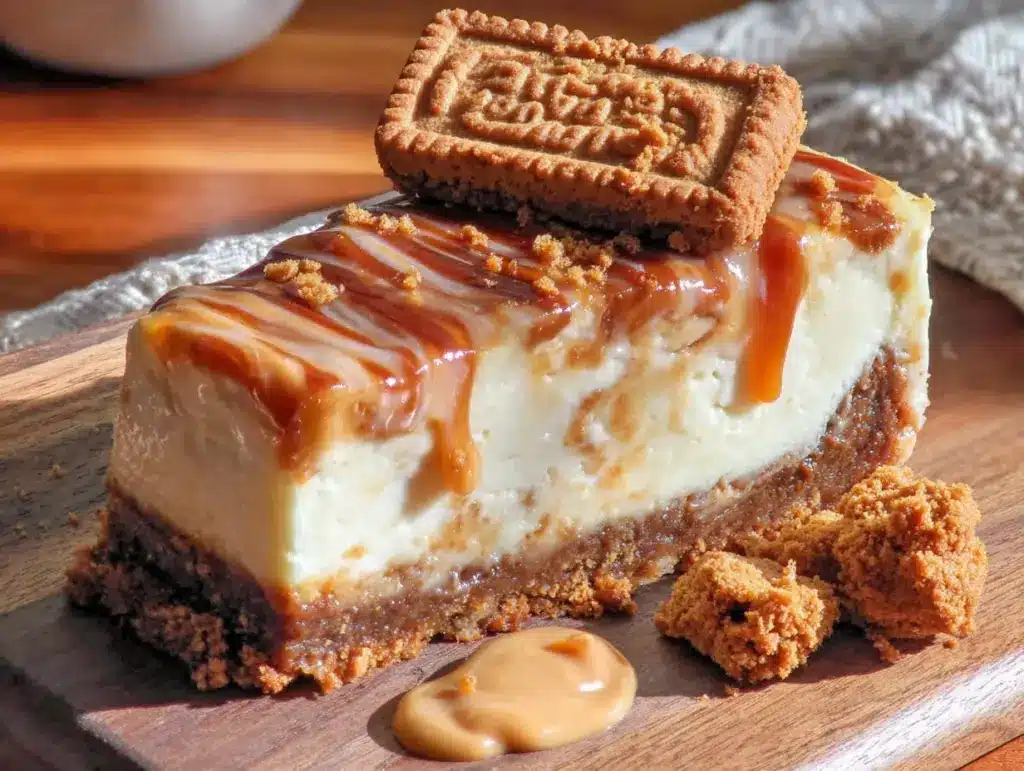
The crackle of the Biscoff crust as you press it into the pan—that’s the sound that starts this whole thing. It’s not a loud sound, more of a quiet, sandy crunch that tells you the butter and crumbs have become one. And honestly, that’s the foundation of everything good here. The crust has to feel like a promise.
I found myself standing in my kitchen last Tuesday, staring at a jar of cookie butter like it held the answers to a question I hadn’t asked yet. You know that feeling? When you want something sweet, but not chocolate-sweet, and not fruit-sweet, but something that tastes like a warm hug from a European bakery? That’s Biscoff. It’s this impossibly smooth, spiced spread that makes you wonder why you ever bothered with peanut butter. I had a block of cream cheese softening on the counter, and that jar of cookie butter just sort of… winked at me.
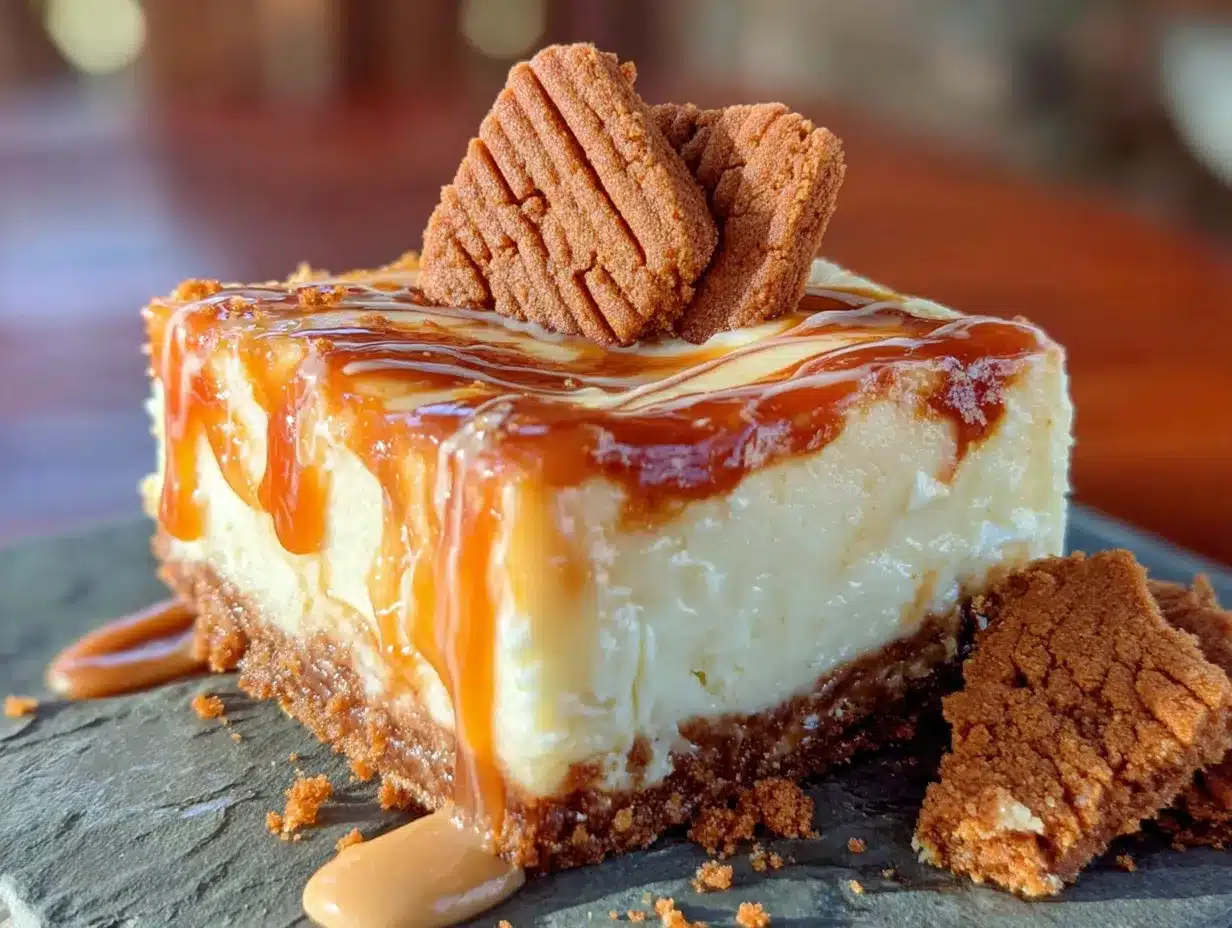
These creamy Biscoff cheesecake bars with cookie butter swirl came from that stare-down. I wanted the dense, velvety texture of a classic cheesecake but without the fuss of a water bath or a springform pan. Bars are more honest, you know? They don’t pretend to be fancy. They just show up, taste incredible, and let you cut yourself a second piece without any judgment. The swirl on top isn’t just for looks—it’s a little ribbon of caramelized, spiced goodness that cuts through the tang of the cream cheese. It’s the kind of dessert that makes you close your eyes on the second bite, not the first. The first bite is for checking the temperature. The second is for pure, unguarded pleasure. I promise, this recipe delivers on that second bite.
Why You’ll Love This Recipe
I’ve tested this recipe four times to get the texture just right. Cheesecake bars can be tricky—too dry and they crumble, too wet and they never set. This version hits that sweet spot of being creamy, dense, and sliceable without any of the stress. Here’s why it works:
- No Water Bath Needed: Seriously. You don’t need to wrap your pan in foil or worry about steam ruining your crust. These bars bake low and slow, and they come out perfectly smooth every time.
- Pantry-Friendly Ingredients: Besides the cream cheese and Biscoff cookies, you probably have everything else in your kitchen right now. No fancy extracts or hard-to-find dairy products.
- Perfect for Feeding a Crowd: These bars slice cleanly and travel well. I brought a batch to a friend’s potluck last weekend, and the pan came back empty. People kept asking for the recipe, which is always the highest compliment.
- That Cookie Butter Swirl: This isn’t just a topping—it’s a thick, luscious ribbon of pure Lotus Biscoff spread that gets gently folded into the cheesecake batter. It creates pockets of spiced sweetness that make every bite a little different.
- Beginner-Friendly: If you’ve never made cheesecake before, start here. The bar format is forgiving, and the instructions are straightforward. I’ve included all the little tricks I learned the hard way so you don’t have to.
This recipe isn’t just good—it’s the kind of dessert that makes you feel like a rockstar without spending all day in the kitchen. It’s comfort food reimagined: rich, creamy, and full of that unmistakable Biscoff warmth.
What Ingredients You Will Need
This recipe uses simple, wholesome ingredients to create something truly special. The magic comes from how the tangy cream cheese plays off the sweet, spiced cookie butter. Let’s break it down.
For the Biscoff Crust
- 2 cups (200g) Biscoff cookie crumbs: You can crush whole cookies in a food processor or smash them in a zip-top bag with a rolling pin. I prefer the food processor for a finer, more even crumb. (Pro tip: use the original caramelized biscuits, not the filled ones.)
- 5 tablespoons (70g) unsalted butter, melted: Salted butter works in a pinch, but unsalted lets you control the salt level. The butter binds the crumbs together and adds richness.
- 2 tablespoons (25g) granulated sugar: This is optional, but I find it helps the crust hold together better and adds a little extra sweetness to balance the tangy filling.
For the Cheesecake Filling
- 16 ounces (450g) full-fat cream cheese, softened: This is non-negotiable. Low-fat cream cheese has too much water and will make your bars runny. Leave the blocks out on the counter for at least an hour before you start. (I recommend Philadelphia for the most consistent results.)
- ½ cup (100g) granulated sugar: Standard white sugar dissolves cleanly and doesn’t compete with the Biscoff flavor.
- 2 large eggs, room temperature: Cold eggs can seize the batter and create lumps. Let them sit in a bowl of warm water for 5 minutes if you forgot to take them out ahead of time.
- 1 teaspoon vanilla extract: Pure vanilla is best, but imitation works in a pinch. It rounds out the flavor profile beautifully.
- ¼ cup (60ml) sour cream, room temperature: This is my secret weapon. Sour cream adds moisture and a slight tang that keeps the cheesecake from being too heavy. Greek yogurt works as a substitute.
For the Cookie Butter Swirl
- ½ cup (150g) creamy Biscoff cookie butter spread: This is the star of the show. You can find it near the peanut butter or in the international aisle. The creamy version swirls much better than the crunchy one.
- 1 tablespoon (15ml) heavy cream or milk: This thins the cookie butter just enough to make it droppable and swirlable. If your cookie butter is already soft, you might not need it.
Equipment Needed
You don’t need a professional bakery setup for these bars, but having the right tools makes the process smoother. Here’s what I use:
- 9×9-inch square baking pan: This is the perfect size for thick, satisfying bars. An 8×8 pan works too, but your bars will be taller and may need a few extra minutes in the oven.
- Parchment paper: Line your pan with two long strips that overhang on opposite sides. This creates “handles” that let you lift the entire block of cheesecake out cleanly. I learned this trick after struggling to remove bars from a pan with a spatula—never again.
- Food processor or zip-top bag and rolling pin: For crushing the cookies. A food processor gives you a finer crumb, but manual crushing is a great arm workout.
- Electric hand mixer or stand mixer: You need power to get the cream cheese smooth. A whisk and elbow grease can work, but it takes forever and you risk overworking the batter.
- Rubber spatula: For scraping down the bowl and gently folding the swirl. A stiff metal spatula can deflate the batter.
- Offset spatula or butter knife: For creating the swirl pattern on top. An offset spatula gives you more control, but a butter knife works just fine.
Preparation Method
Let’s get to the good part. Follow these steps carefully, and you’ll have a pan of the most incredible Biscoff cheesecake bars imaginable.
Step 1: Prepare the Crust (10 minutes + 10 minutes baking)
Preheat your oven to 325°F (160°C). Line your 9×9-inch baking pan with parchment paper, leaving an overhang on two opposite sides.
In a medium bowl, combine the Biscoff cookie crumbs, melted butter, and sugar. Stir with a fork until every crumb is coated and the mixture looks like wet sand. Press this mixture firmly into the bottom of your prepared pan. I use the bottom of a measuring cup to get it even and compact. Bake for 10 minutes, then set aside to cool slightly. The crust should be fragrant and just starting to darken at the edges.
Step 2: Make the Cheesecake Filling (15 minutes)
In a large mixing bowl, beat the softened cream cheese with an electric mixer on medium speed until it’s completely smooth and fluffy—about 2 minutes. Scrape down the sides and the bottom of the bowl with your rubber spatula. Add the sugar and beat for another minute until fully incorporated.
Add the eggs one at a time, beating on low speed after each addition just until the yolk disappears. Overmixing at this stage incorporates too much air, which can cause cracks. Add the vanilla extract and sour cream, and beat on low just until combined. The batter should look thick, glossy, and completely lump-free. Give it one final scrape-down to make sure everything is uniform.
Step 3: Prepare the Cookie Butter Swirl (5 minutes)
In a small microwave-safe bowl, warm the Biscoff cookie butter spread for about 15 seconds until it’s loose and drizzle-able. Stir in the heavy cream or milk until smooth. If your cookie butter was already soft at room temperature, you can skip the microwave and just stir in the cream.
Step 4: Assemble and Swirl (10 minutes)
Pour the cheesecake filling over the pre-baked crust and spread it into an even layer with your spatula. Drop spoonfuls of the thinned cookie butter all over the surface of the batter—about 8 to 10 dollops. Use a butter knife or offset spatula to gently swirl the cookie butter into the cheesecake. Don’t over-swirl or you’ll lose the distinct ribbons. A few figure-eight motions and a couple of horizontal passes are enough.
Step 5: Bake and Cool (35-40 minutes + 4 hours chilling)
Bake the bars at 325°F (160°C) for 35 to 40 minutes. The edges should look set and slightly puffed, but the center should still jiggle when you gently shake the pan. This is the sweet spot for a creamy texture. If the center is completely firm, it’s overbaked.
Let the bars cool completely on a wire rack—about 1 hour. Then transfer the pan to the refrigerator and chill for at least 4 hours, or overnight. This is crucial. The bars need time to set fully so they slice cleanly. I know it’s hard to wait, but trust me on this one.
Step 6: Slice and Serve (5 minutes)
Once fully chilled, use the parchment overhang to lift the entire block of cheesecake out of the pan. Place it on a cutting board. Use a sharp knife dipped in hot water and wiped clean between cuts for the neatest slices. Cut into 9 or 16 bars, depending on how generous you’re feeling.
Cooking Tips & Techniques
I’ve made my share of cheesecake mistakes so you don’t have to. Here are the things I wish someone had told me earlier:
- Room Temperature is Not a Suggestion: Cold cream cheese creates lumps that no amount of beating can fix. Set everything out an hour ahead. Your eggs, cream cheese, and sour cream all need to be at the same temperature for a silky batter.
- Don’t Overmix the Eggs: Once you add the eggs, mix on low and stop as soon as they’re incorporated. Too much air creates bubbles that rise to the surface and cause cracks.
- The Jiggle Test is Your Friend: Cheesecake continues to cook after you pull it out of the oven. If the center wobbles like Jell-O when you shake the pan, it’s done. A completely still center means it’s overbaked and will be dry.
- Chill Overnight for Best Results: I know four hours seems like forever, but overnight chilling gives the flavors time to meld and the texture time to become perfectly dense and creamy. I once tried to rush this step and ended up with a goopy mess.
- Warm Your Knife: Run your knife under hot water and dry it off before each cut. This gives you those beautiful, clean edges that look like they came from a bakery.
Variations & Adaptations
This base recipe is incredibly versatile. Here are a few ways I’ve adapted it depending on what I have on hand or who I’m feeding:
- Gluten-Free Option: Use gluten-free graham crackers or gluten-free Biscoff-style cookies for the crust. The filling is naturally gluten-free as long as your vanilla extract and cookie butter are certified gluten-free.
- Chocolate Biscoff Bars: Add 2 tablespoons of cocoa powder to the crust mixture for a chocolatey twist. You can also drizzle melted dark chocolate over the top after the bars have chilled.
- Vegan Adaptation: Use vegan cream cheese (I like Kite Hill), vegan butter, and a flax egg (1 tablespoon ground flaxseed + 3 tablespoons water per egg). The texture will be slightly softer but still delicious. Use a plant-based heavy cream for the swirl.
- Spiced-Up Swirl: Add ½ teaspoon of cinnamon and a pinch of nutmeg to the cookie butter before swirling. This gives the bars a cozy, fall-inspired flavor that pairs beautifully with a hot cup of coffee.
- Nutty Crunch: Sprinkle ¼ cup of chopped toasted pecans or walnuts over the top of the swirl before baking. The nuts add a lovely textural contrast to the creamy filling.
Serving & Storage Suggestions
These bars are fantastic on their own, but a little extra effort takes them to the next level.
Serving: Serve the bars chilled or at room temperature. I prefer them straight from the fridge because the texture is firmer and the flavors are more pronounced. For an indulgent dessert, top each bar with a dollop of freshly whipped cream and a dusting of cinnamon. A drizzle of warm caramel sauce is never a bad idea either.
Pairing Suggestions: These bars are begging to be served with a strong cup of black coffee or an espresso. The bitterness of the coffee cuts through the sweetness of the Biscoff perfectly. For a fun brunch spread, serve them alongside creamy strawberry cheesecake stuffed French toast for a dessert-like breakfast that will blow your mind.
Storage: Store any leftover bars in an airtight container in the refrigerator for up to 5 days. Place a layer of parchment paper between stacked bars to prevent them from sticking together.
Freezing: These bars freeze beautifully. Wrap individual slices tightly in plastic wrap, then place them in a freezer-safe bag or container. They’ll keep for up to 3 months. Thaw overnight in the refrigerator before serving. I always keep a few slices in the freezer for unexpected cravings—they’re a lifesaver when you need a last-minute dessert for guests.
Flavor Development: Honestly, these bars taste even better on day two. The Biscoff flavor deepens and melds with the cheesecake as it sits. If you can resist eating them all on day one, you’ll be rewarded with an even more complex and delicious treat on day two.
Nutritional Information & Benefits
Let’s be real—this is a dessert, and it’s meant to be enjoyed as a treat. But here’s a rough breakdown for those who like to keep track:
| Nutrient | Amount per Bar (1/9 of recipe) |
|---|---|
| Calories | ~385 |
| Fat | 26g |
| Saturated Fat | 14g |
| Carbohydrates | 33g |
| Sugar | 22g |
| Protein | 7g |
Health Highlights: Cream cheese contains a good amount of calcium and vitamin A, which supports bone health and immune function. Biscoff cookies are made with spelt flour, which is an ancient grain that some people find easier to digest than modern wheat. The sour cream adds probiotics that are beneficial for gut health. Of course, these benefits come in a package that’s also high in sugar and saturated fat, so moderation is key. I like to think of these bars as a way to nourish your soul, not just your body.
Conclusion
These creamy Biscoff cheesecake bars with cookie butter swirl are the kind of recipe that becomes a staple in your dessert rotation. They’re easy enough for a Tuesday night, impressive enough for a dinner party, and delicious enough to make you forget about all other cheesecake recipes. The combination of the crunchy, buttery crust, the velvety smooth filling, and those ribbons of spiced cookie butter is just… perfect.
I love this recipe because it’s unfussy. It doesn’t require a water bath, a springform pan, or any special technique. It’s just good, honest baking that delivers incredible results every single time. Whether you’re a seasoned baker or someone who’s never made cheesecake before, I promise you can do this.
Now, I want to hear from you! Have you made these bars? Did you try any fun variations? Drop a comment below and let me know how they turned out. And if you loved them, don’t forget to share this post with a friend who needs a little more Biscoff in their life. Happy baking, friends!
Frequently Asked Questions
Can I use a different cookie for the crust?
Absolutely! Graham crackers, vanilla wafers, or even shortbread cookies work well. Just keep in mind that the flavor will change. If you use graham crackers, add a pinch of cinnamon to mimic the warm spice of Biscoff.
Why did my cheesecake bars crack on top?
Cracks usually happen from overbaking or overmixing the batter. Make sure you pull the bars out when the center still jiggles slightly. Also, avoid beating the eggs on high speed—low and slow is the way to go. If cracks do appear, don’t worry! The cookie butter swirl hides them beautifully.
Can I make these bars in a different size pan?
Yes, but you’ll need to adjust the baking time. An 8×8 pan will give you thicker bars that need about 5 extra minutes in the oven. A 9×13 pan will give you thinner bars that bake in about 25-30 minutes. Keep an eye on the center jiggle test regardless of pan size.
How do I know when the cookie butter is thin enough to swirl?
It should be the consistency of warm honey—thick but pourable. If it’s still stiff after microwaving, add another teaspoon of cream and stir. If it’s too runny, let it sit for a minute to thicken up.
Can I double this recipe?
Definitely! Double all the ingredients and bake in a 9×13 pan. You’ll need to increase the baking time to about 45-50 minutes. The same rules apply—edges set, center jiggly. Let it cool and chill as directed, and you’ll have a bigger batch for sharing.
Pin This Recipe!
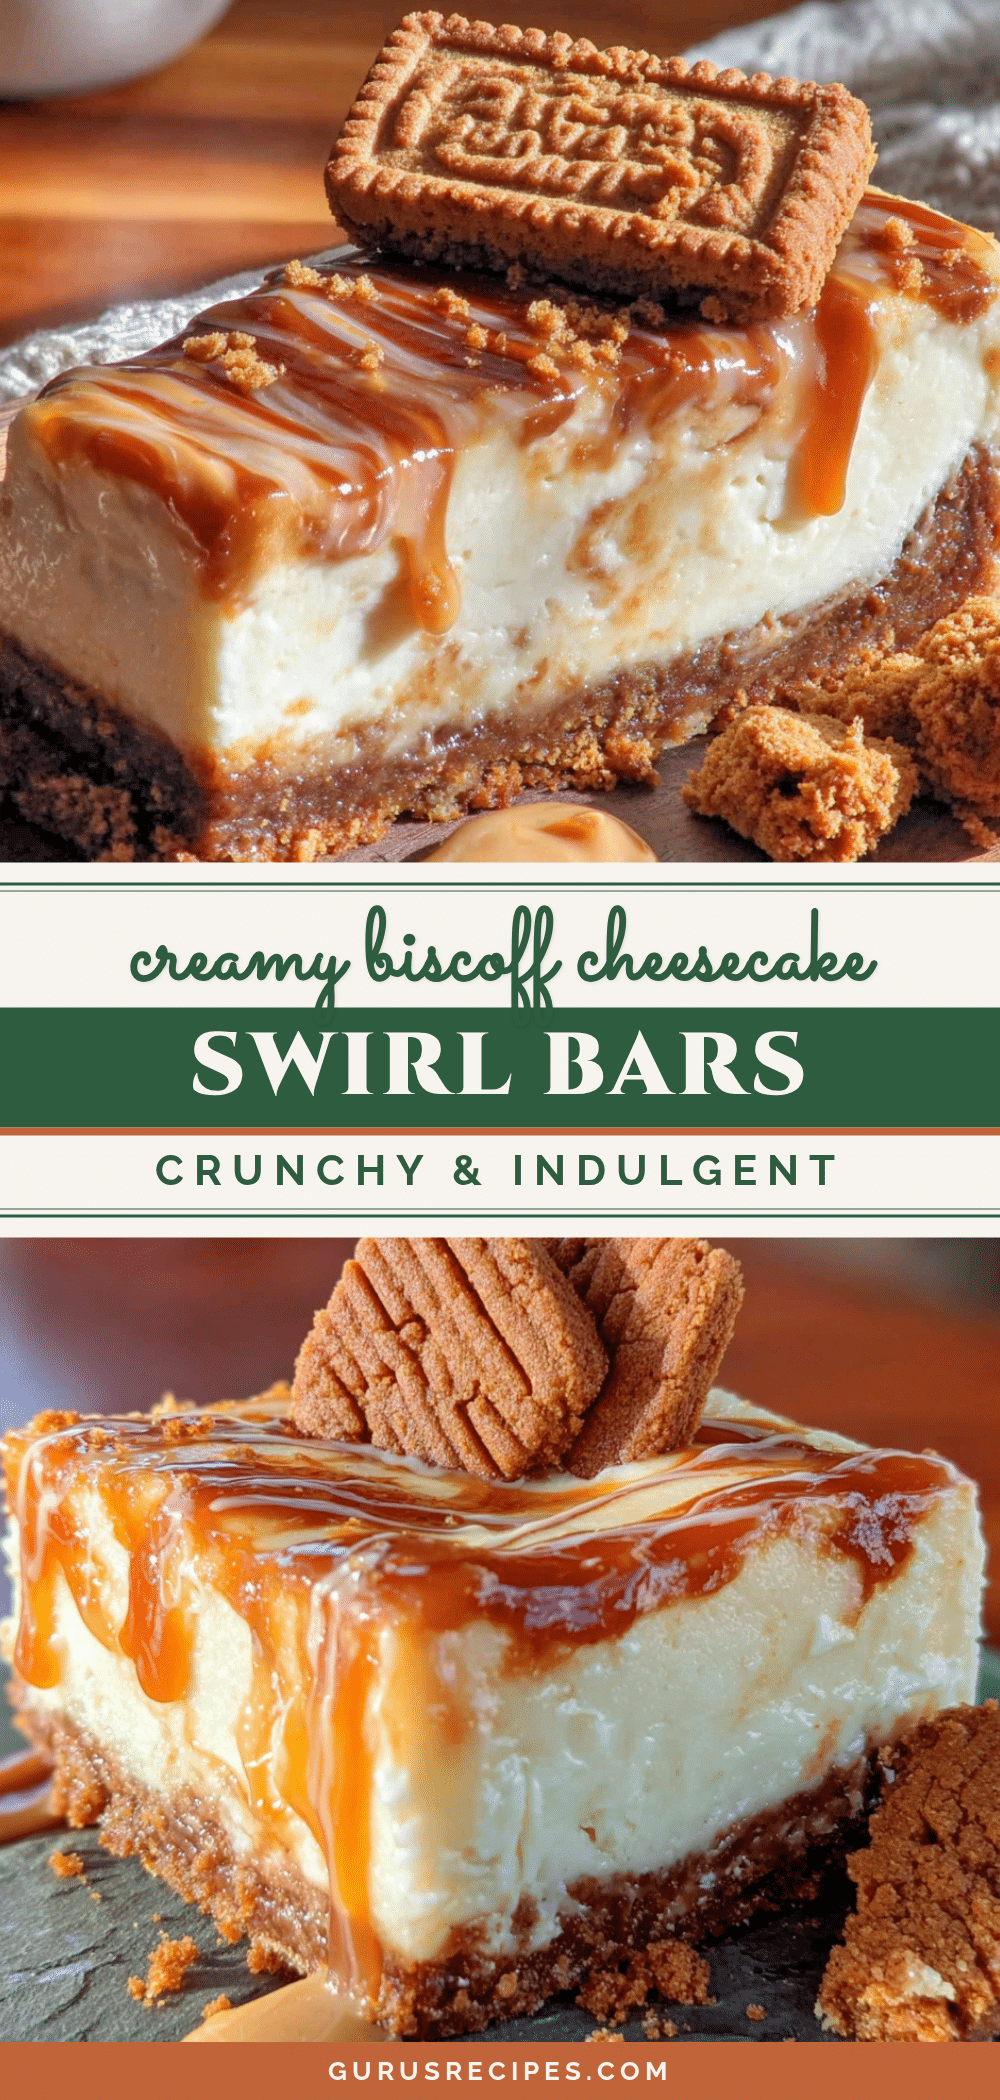

Creamy Biscoff Cheesecake Bars with Cookie Butter Swirl
These creamy Biscoff cheesecake bars feature a crunchy Biscoff crust, a velvety smooth cheesecake filling, and a luscious cookie butter swirl. They’re easy to make, require no water bath, and are perfect for feeding a crowd.
- Total Time: 4 hours 50 minutes (includes chilling)
- Yield: 9-16 servings 1x
Ingredients
- 2 cups (200g) Biscoff cookie crumbs
- 5 tablespoons (70g) unsalted butter, melted
- 2 tablespoons (25g) granulated sugar
- 16 ounces (450g) full-fat cream cheese, softened
- ½ cup (100g) granulated sugar
- 2 large eggs, room temperature
- 1 teaspoon vanilla extract
- ¼ cup (60ml) sour cream, room temperature
- ½ cup (150g) creamy Biscoff cookie butter spread
- 1 tablespoon (15ml) heavy cream or milk
Instructions
- Preheat oven to 325°F (160°C). Line a 9×9-inch baking pan with parchment paper, leaving overhang on two opposite sides.
- In a medium bowl, combine Biscoff cookie crumbs, melted butter, and 2 tablespoons sugar. Stir until mixture resembles wet sand. Press firmly into bottom of prepared pan. Bake for 10 minutes, then set aside to cool slightly.
- In a large bowl, beat softened cream cheese with an electric mixer on medium speed until smooth and fluffy, about 2 minutes. Scrape down sides and bottom. Add ½ cup sugar and beat for another minute.
- Add eggs one at a time, beating on low speed after each addition just until yolk disappears. Add vanilla extract and sour cream, beat on low until combined. Batter should be thick, glossy, and lump-free.
- In a small microwave-safe bowl, warm Biscoff cookie butter for about 15 seconds until loose. Stir in heavy cream or milk until smooth.
- Pour cheesecake filling over pre-baked crust and spread evenly. Drop spoonfuls of thinned cookie butter over surface (8-10 dollops). Use a butter knife or offset spatula to gently swirl cookie butter into cheesecake with a few figure-eight motions.
- Bake at 325°F (160°C) for 35-40 minutes. Edges should be set and slightly puffed, center should jiggle when shaken. Cool completely on a wire rack (about 1 hour), then refrigerate for at least 4 hours or overnight.
- Once fully chilled, use parchment overhang to lift cheesecake out of pan. Place on cutting board. Use a sharp knife dipped in hot water and wiped clean between cuts to slice into 9 or 16 bars.
Notes
Room temperature ingredients are crucial for a smooth batter. Don’t overmix after adding eggs. The jiggle test is key for doneness. Chill overnight for best texture and flavor. Warm knife for clean slices.
- Prep Time: 15 minutes
- Cook Time: 35-40 minutes
- Category: Dessert
- Cuisine: American
Nutrition
- Serving Size: 1 bar (1/9 of recipe
- Calories: 385
- Sugar: 22
- Fat: 26
- Saturated Fat: 14
- Carbohydrates: 33
- Protein: 7
Keywords: Biscoff cheesecake bars, cookie butter swirl, no water bath cheesecake, easy cheesecake bars, Biscoff dessert


