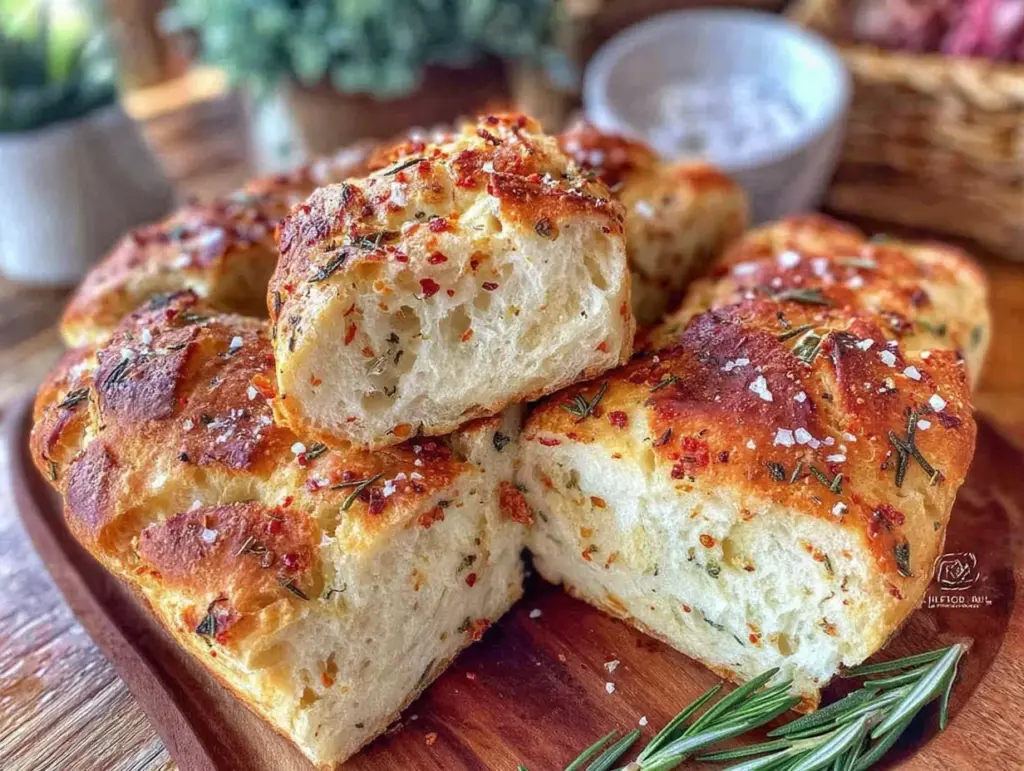
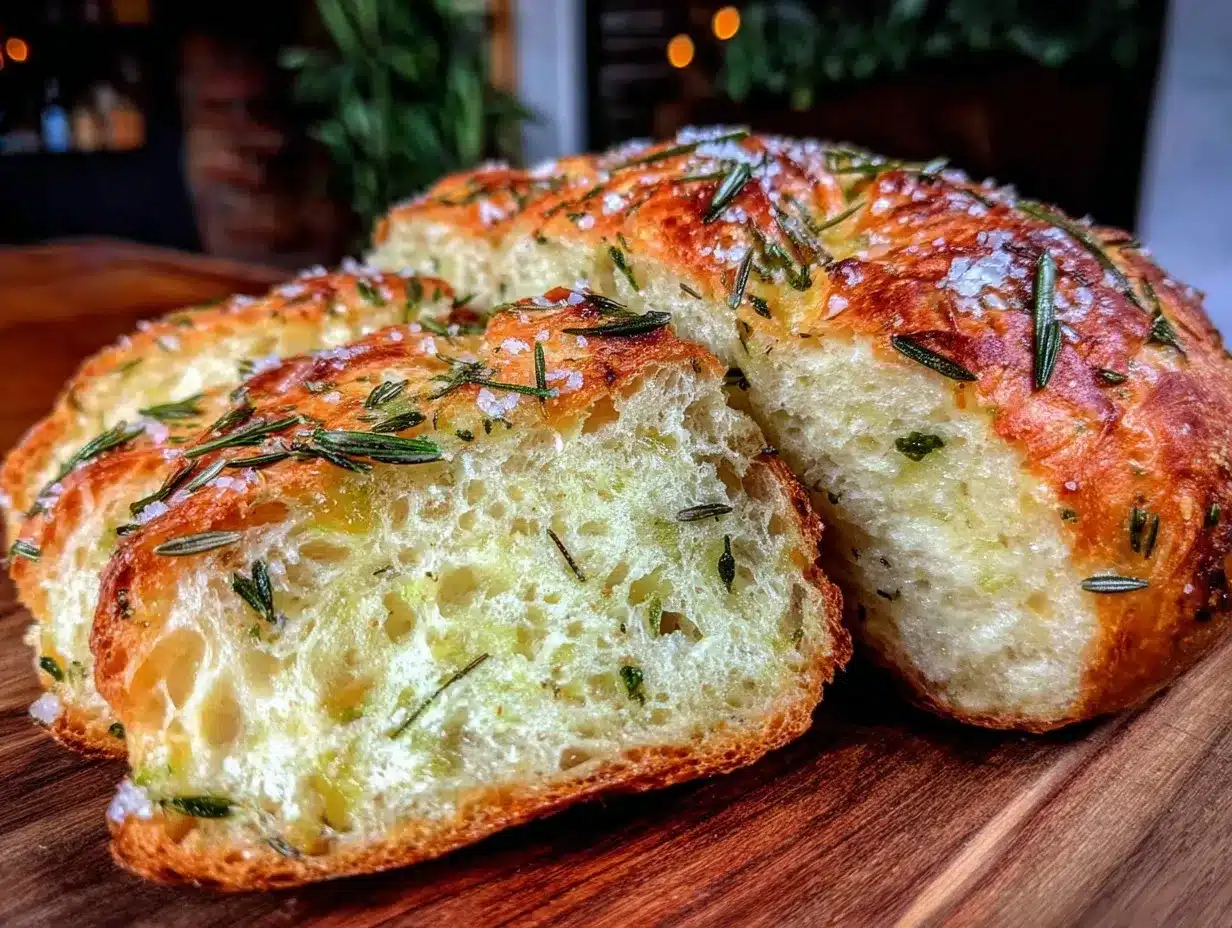
There’s something about the smell of fresh garlic and rosemary mingling in the kitchen that just stops you in your tracks. I remember one slow Sunday afternoon when I was fiddling around with some leftover bread dough, unsure of what to make next. Honestly, I wasn’t even planning to bake anything fancy. But then I found a bunch of fresh rosemary on the counter and some garlic cloves that had been hanging around for a bit. So, on a whim, I smashed the garlic, chopped the rosemary, and tossed them into the dough. The result? This crispy homemade garlic rosemary bread that turned out way better than expected.
At first, I was skeptical—garlic bread is usually something I grab from the freezer aisle or order at a restaurant. But when that loaf came out golden and crackling, the house smelled like a cozy little bakery, and the crust snapped just right, I knew I had stumbled on something special. It’s that kind of bread that makes you want to tear off a piece while it’s still warm, the garlic butter melting just so, with rosemary adding that piney, fragrant touch. It’s simple, approachable, and honest—no shortcuts, just good ingredients and a little patience.
This crispy homemade garlic rosemary bread recipe stuck with me because it’s perfect for those moments when you want something comforting but also a bit impressive without the fuss. Whether it’s dinner with friends or a quiet night in, it’s a loaf that invites you to slow down, savor, and maybe even share a slice or two.
Why You’ll Love This Recipe
- Quick & Easy: This recipe comes together in under 3 hours, including rising time—perfect for busy afternoons or last-minute dinner plans.
- Simple Ingredients: You probably have everything you need in your pantry: flour, yeast, garlic, rosemary, and a few basics. No specialty stores required.
- Perfect for Any Occasion: Whether it’s a casual weeknight, a holiday feast, or a potluck contribution, this crispy homemade garlic rosemary bread fits in effortlessly.
- Crowd-Pleaser: Friends and family always ask for the recipe after tasting it—kids love the garlicky flavor, and adults appreciate the fresh herbs and crispy crust.
- Unbelievably Delicious: The combination of a crackling crust with a tender, flavorful crumb is just next-level comfort food.
- What sets this apart: The secret is in gently infusing the dough with fresh garlic and rosemary and brushing the crust with herb butter right before baking. This gives it a crisp exterior with bursts of flavor that aren’t too overpowering.
- Why it matters: This isn’t just garlic bread slapped on top of a loaf—it’s thoughtfully made, with balance and texture that make you close your eyes after the first bite.
What Ingredients You Will Need
This recipe uses simple, wholesome ingredients to deliver bold flavor and satisfying texture without the fuss. Most are pantry staples, and fresh rosemary and garlic add that signature punch.
- All-purpose flour (3 ½ cups / 440g) – I like King Arthur brand for consistent texture.
- Active dry yeast (2 ¼ teaspoons / 1 packet) – fresh yeast works too, but dry is easier to store.
- Warm water (1 ½ cups / 360ml) – around 110°F (43°C) to activate the yeast properly.
- Granulated sugar (1 tablespoon) – feeds the yeast and adds a touch of sweetness.
- Salt (1 ½ teaspoons) – balances flavor and strengthens gluten.
- Extra virgin olive oil (2 tablespoons) – adds moisture and richness.
- Fresh garlic (3 cloves, finely minced) – the star of the show, not too much to overpower.
- Fresh rosemary (2 tablespoons, chopped) – pick tender sprigs for best aroma.
- Unsalted butter (2 tablespoons, melted) – for brushing the crust before baking.
- Coarse sea salt (optional, for sprinkling) – adds crunch and flavor on top.
Ingredient tips: If you’re out of fresh rosemary, dried can work but use about 1 tablespoon and add it to the dough early to bloom. For a dairy-free version, swap butter with vegan margarine or olive oil for brushing.
Equipment Needed
- Large mixing bowl – for combining and proofing the dough.
- Measuring cups and spoons – accuracy helps with yeast activation.
- Wooden spoon or dough whisk – sturdy enough to mix sticky dough.
- Kitchen scale (optional but recommended) – great for precise flour measurement.
- Baking sheet or stone – a heavy-duty baking sheet works fine, but a pizza stone helps crisp the bottom crust.
- Parchment paper – prevents sticking and easy cleanup.
- Clean kitchen towel or plastic wrap – for covering dough during rising.
- Pastry brush – for applying melted butter evenly.
If you don’t have a kitchen scale, measuring flour by spooning into a cup and leveling works well enough. I’ve baked this bread on both regular cookie sheets and pizza stones; pizza stones give a slightly better crust but aren’t essential.
Preparation Method
- Activate the yeast: In your mixing bowl, combine warm water (110°F / 43°C), sugar, and yeast. Stir gently and let sit for 5–10 minutes until foamy. This means the yeast is alive and ready.
- Mix dry ingredients: While waiting, whisk together flour and salt in a separate bowl.
- Combine dough: Add the flour mixture to the yeast mixture along with olive oil, minced garlic, and chopped rosemary. Stir with a wooden spoon or dough whisk until a shaggy dough forms.
- Knead the dough: Lightly flour a clean surface and knead the dough for about 8–10 minutes until smooth and elastic. It should be slightly tacky but not sticky. If too sticky, sprinkle a bit more flour, but be careful not to add too much.
- First rise: Place the dough in a lightly oiled bowl, cover with a damp towel or plastic wrap, and let it rise in a warm spot for 1 to 1 ½ hours, or until doubled in size.
- Shape the loaf: Gently punch down the dough and shape it into a round or oval loaf. Place it on a parchment-lined baking sheet.
- Second rise: Cover again and let it rest for 30–45 minutes until puffy but not doubled. Meanwhile, preheat your oven to 425°F (220°C).
- Prepare for baking: Brush the top of the loaf with melted butter, sprinkle with coarse sea salt and a few extra rosemary leaves if you like.
- Score the bread: Using a sharp knife, make shallow slashes across the top to help it expand while baking.
- Bake: Place in the oven and bake for 25–30 minutes until the crust is golden brown and crisp. The loaf should sound hollow when tapped.
- Cool: Transfer the bread to a wire rack and let it cool for at least 20 minutes before slicing. This step is crucial to keep the crumb from turning gummy.
Pro tip: Keep an eye during the last 10 minutes of baking. If the crust is browning too quickly, tent it loosely with foil. That way, you get a perfect crispy crust without burning.
Cooking Tips & Techniques
Making crispy homemade garlic rosemary bread is all about balance and attention to detail. One common mistake is rushing the rising times. Yeast needs patience; if you skimp on rest, the loaf won’t develop flavor or texture properly.
Another tip is not to overload the dough with garlic. Fresh garlic is potent, so finely mince and use just enough to get a subtle hint without overpowering the bread. Rosemary should be chopped finely too, so it distributes evenly.
I’ve learned that brushing the loaf with melted butter right before baking locks in flavor and helps the crust brown beautifully. If you try brushing after baking, the butter just soaks in and the crust loses its crispness.
For a consistent crust, preheat your oven fully and use a baking stone if you have one. It mimics traditional bread ovens by holding heat steady. Also, scoring the dough is more than just decorative—it controls expansion and prevents random cracks.
Multitasking tip: While the dough is rising, prep a simple salad or sauce. It helps keep the kitchen rhythm going and means the bread lands on the table just as everything else is ready.
Variations & Adaptations
- Gluten-Free Option: Substitute all-purpose flour with a gluten-free blend designed for bread baking. Add a tablespoon of xanthan gum if your blend doesn’t already contain it.
- Cheesy Twist: Mix in ½ cup grated Parmesan or mozzarella into the dough just before the first rise for a cheesy, aromatic loaf.
- Spicy Version: Add a pinch of crushed red pepper flakes with the garlic and rosemary to give the bread a subtle kick.
- Different Herbs: Swap rosemary for thyme, oregano, or a mix of Italian herbs to customize the flavor profile.
- Cooking Method: Try baking the dough in a cast-iron skillet for a rustic round loaf with extra thick crust.
Once, I added sun-dried tomatoes and olives to the dough for a Mediterranean flair. It was a hit at a summer picnic! Experimenting with mix-ins lets you tailor the loaf to your mood or occasion.
Serving & Storage Suggestions
Serve this garlic rosemary bread warm or at room temperature. It pairs beautifully with soups, salads, or pasta dishes. I especially love it alongside a bowl of tomato soup or drizzled with olive oil and balsamic vinegar for dipping.
To store, wrap the cooled loaf tightly in plastic wrap or place it in an airtight container. It stays fresh at room temperature for up to 2 days. For longer storage, slice and freeze in a zip-top bag for up to a month.
Reheat slices in a toaster oven or skillet to bring back that crisp crust. Avoid the microwave if you can, as it tends to make bread chewy and limp.
Interestingly, the flavors of garlic and rosemary deepen a bit after resting overnight, making the next day’s slices taste even better. So if you can wait, that’s a nice little bonus!
Nutritional Information & Benefits
This homemade garlic rosemary bread is a satisfying source of carbohydrates for energy, with healthy fats from olive oil and butter adding richness. Garlic and rosemary not only bring flavor but also antioxidants and anti-inflammatory properties.
One slice (about 60g) contains approximately:
| Calories | Carbohydrates | Fat | Protein | Fiber |
|---|---|---|---|---|
| 160 | 28g | 4g | 5g | 1g |
For those watching gluten, this recipe can be adapted with gluten-free flour blends. It’s not low-carb, but it offers wholesome ingredients without artificial additives.
Conclusion
This crispy homemade garlic rosemary bread recipe is a keeper because it’s straightforward, comforting, and reliably delicious every time. It’s the kind of loaf that makes your kitchen smell like a dream and brings people together around the table.
Feel free to tweak the garlic and herb levels or try one of the variations to make it your own. Honestly, once you start baking your own bread this way, it’s hard to go back to store-bought!
Give it a try, and let me know how your loaf turns out. I love hearing about your adaptations and favorite ways to enjoy this bread. Happy baking!
FAQs
Can I use dried rosemary instead of fresh?
Yes, but use about half the amount and add it early in the dough mixing so it can hydrate and release flavor.
How do I know when the bread is fully baked?
The crust should be golden and crisp, and the loaf should sound hollow when tapped on the bottom.
Can I make this bread without a stand mixer?
Absolutely! Kneading by hand works great and gives you a good feel for the dough texture.
What’s the best way to store leftover bread?
Wrap it tightly and keep at room temperature for a couple of days or freeze sliced for longer storage.
Can I add other herbs or spices?
Definitely! Thyme, oregano, or even a pinch of chili flakes can add interesting twists to the flavor.
Pin This Recipe!
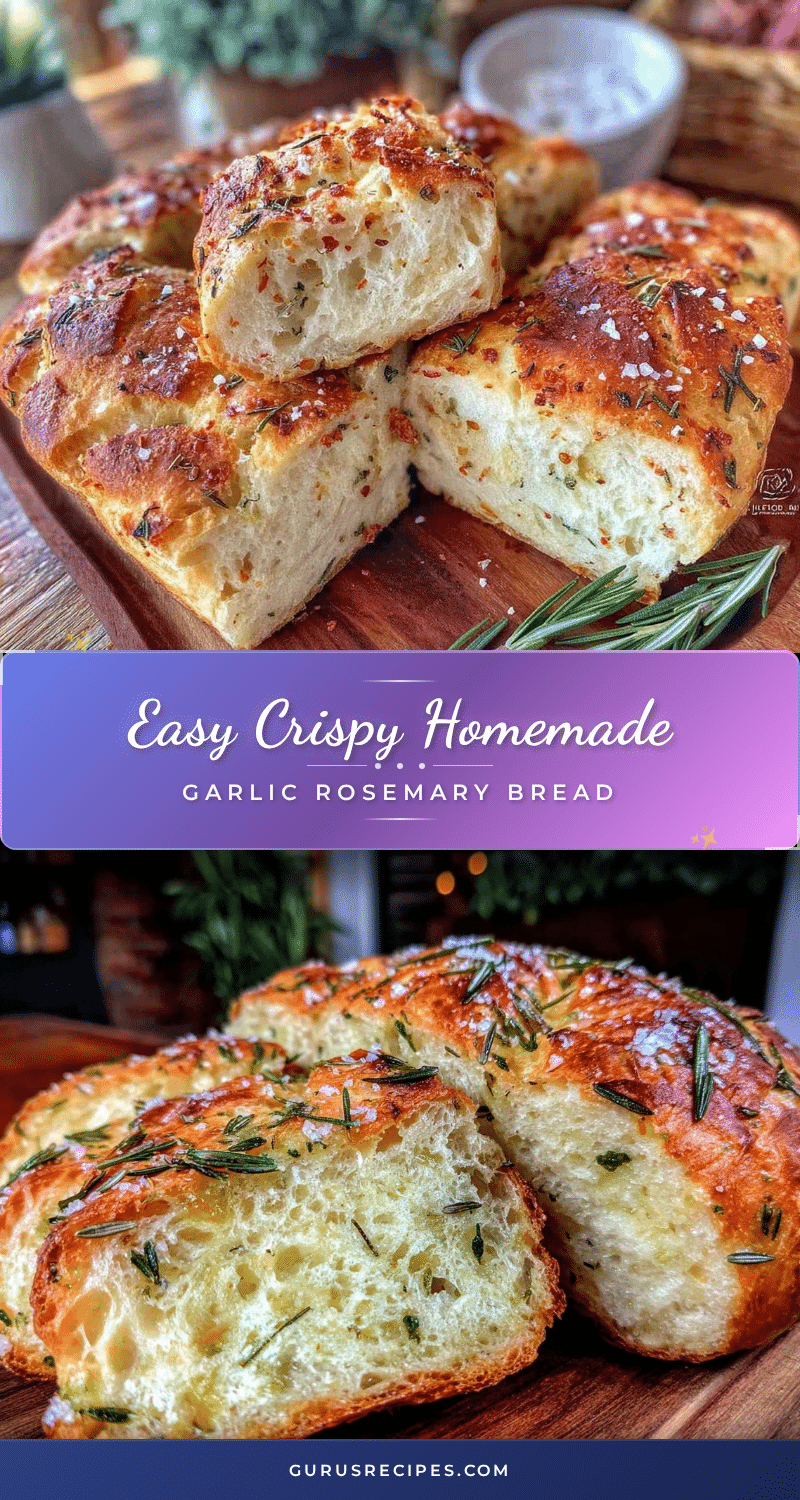

Crispy Homemade Garlic Rosemary Bread
A crispy homemade garlic rosemary bread with a crackling crust and tender crumb, infused with fresh garlic and rosemary for a fragrant, flavorful loaf perfect for any occasion.
- Total Time: 2 hours 45 minutes
- Yield: 1 loaf (about 10-12 slices) 1x
Ingredients
- 3 ½ cups (440g) all-purpose flour
- 2 ¼ teaspoons (1 packet) active dry yeast
- 1 ½ cups (360ml) warm water (around 110°F / 43°C)
- 1 tablespoon granulated sugar
- 1 ½ teaspoons salt
- 2 tablespoons extra virgin olive oil
- 3 cloves fresh garlic, finely minced
- 2 tablespoons fresh rosemary, chopped
- 2 tablespoons unsalted butter, melted
- Coarse sea salt (optional, for sprinkling)
Instructions
- Activate the yeast: In your mixing bowl, combine warm water (110°F / 43°C), sugar, and yeast. Stir gently and let sit for 5–10 minutes until foamy.
- Mix dry ingredients: Whisk together flour and salt in a separate bowl.
- Combine dough: Add the flour mixture to the yeast mixture along with olive oil, minced garlic, and chopped rosemary. Stir with a wooden spoon or dough whisk until a shaggy dough forms.
- Knead the dough: Lightly flour a clean surface and knead the dough for about 8–10 minutes until smooth and elastic. It should be slightly tacky but not sticky. Add more flour if too sticky, but sparingly.
- First rise: Place the dough in a lightly oiled bowl, cover with a damp towel or plastic wrap, and let it rise in a warm spot for 1 to 1 ½ hours, or until doubled in size.
- Shape the loaf: Gently punch down the dough and shape it into a round or oval loaf. Place it on a parchment-lined baking sheet.
- Second rise: Cover again and let it rest for 30–45 minutes until puffy but not doubled. Meanwhile, preheat your oven to 425°F (220°C).
- Prepare for baking: Brush the top of the loaf with melted butter, sprinkle with coarse sea salt and a few extra rosemary leaves if desired.
- Score the bread: Using a sharp knife, make shallow slashes across the top to help it expand while baking.
- Bake: Place in the oven and bake for 25–30 minutes until the crust is golden brown and crisp. The loaf should sound hollow when tapped.
- Cool: Transfer the bread to a wire rack and let it cool for at least 20 minutes before slicing.
Notes
If the crust browns too quickly, tent the loaf loosely with foil during the last 10 minutes of baking. For a dairy-free version, substitute butter with vegan margarine or olive oil. Use dried rosemary at half the amount if fresh is unavailable. Let the bread cool completely before slicing to avoid gummy texture.
- Prep Time: 20 minutes
- Cook Time: 30 minutes
- Category: Bread
- Cuisine: American
Nutrition
- Serving Size: 1 slice (about 60g)
- Calories: 160
- Fat: 4
- Carbohydrates: 28
- Fiber: 1
- Protein: 5
Keywords: garlic bread, rosemary bread, homemade bread, crispy bread, easy bread recipe, garlic rosemary loaf