
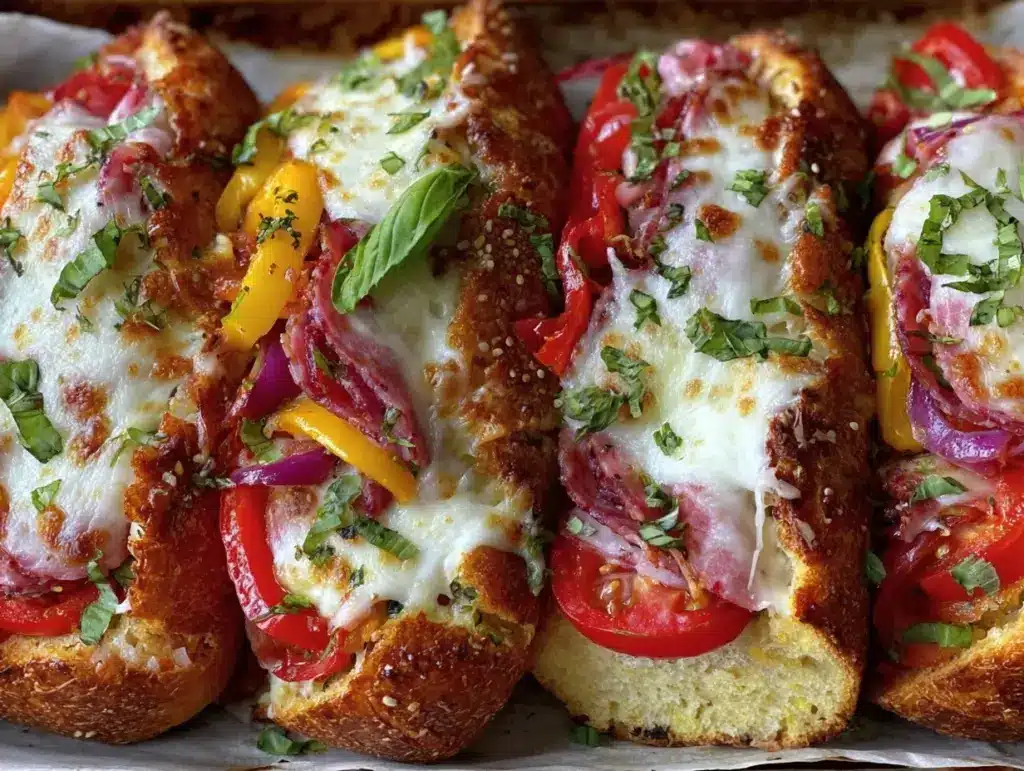
Let me tell you, the smell of freshly toasted bread mingling with melted cheese and savory deli meats wafting from my oven is enough to make anyone’s mouth water. The first time I baked these crispy sheet pan party subs, I was instantly hooked—honestly, it’s the kind of moment where you pause, take a deep breath, and just smile because you know you’re onto something truly special. Years ago, when I was knee-high to a grasshopper, my grandma used to make these big, hearty sandwiches for family get-togethers, but back then, it was a messy, one-at-a-time affair. Stumbling upon this sheet pan method changed everything for me.
My family couldn’t stop sneaking the subs off the cooling rack (and I can’t really blame them). This recipe is dangerously easy and delivers pure, nostalgic comfort with every bite. You know what? These subs are perfect for potlucks, game nights, or even a casual Sunday lunch. They brighten up your Pinterest cookie board with their golden-crisp edges and gooey insides, making them a guaranteed crowd-pleaser. After testing this recipe more times than I can count (in the name of research, of course), it’s become a staple for family gatherings and gifting to friends.
Why You’ll Love This Recipe
Honest to goodness, this crispy sheet pan party subs recipe brings together everything you want in a party snack—comfort, ease, and flavor. Having worked on this recipe through numerous trials, I can confidently say it’s a winner every time. Here’s why you’ll love it:
- Quick & Easy: Comes together in under 30 minutes, perfect for busy weeknights or last-minute gatherings.
- Simple Ingredients: No fancy grocery trips needed; you probably already have everything in your pantry and fridge.
- Perfect for Entertaining: Great for potlucks, casual parties, or a laid-back family dinner.
- Crowd-Pleaser: Kids and adults alike always go back for seconds (and thirds!).
- Unbelievably Delicious: The crispy edges paired with melty cheese and flavorful meats create a comforting texture and taste combo that’s just next-level.
What sets this recipe apart? The magic lies in the layering technique and the secret little brush of olive oil on the crust for that extra crunch. Plus, swapping in a blend of provolone and mozzarella cheese gives it a perfect melt without being too greasy. This isn’t just any sub; it’s the best version you’re going to find, hands down. Whether you’re impressing guests or feeding a hungry family, these subs will have you closing your eyes after the first bite—pure, soul-soothing satisfaction.
What Ingredients You Will Need
This recipe uses simple, wholesome ingredients to deliver bold flavor and satisfying texture without the fuss. Most are pantry staples, and substitutions are super easy if you need them.
- Sub Buns: 6 soft hoagie rolls or Italian sub rolls (look for fresh bakery-style buns for best texture)
- Deli Meats: 6 oz sliced ham, 6 oz sliced salami, 6 oz sliced turkey (feel free to swap for your favorites)
- Cheese: 8 oz shredded mozzarella and 4 oz sliced provolone (adds creamy melt and a slight tang)
- Vegetables: 1 small red onion, thinly sliced; 1 green bell pepper, thinly sliced; 1 cup sliced pepperoncini (adds that perfect tangy kick)
- Condiments: ½ cup mayonnaise; 2 tbsp yellow mustard; 2 tbsp Italian dressing (for that zesty flavor boost)
- Seasonings: 1 tsp dried oregano; 1 tsp garlic powder; ½ tsp crushed red pepper flakes (optional for a little heat)
- Olive Oil: 2 tbsp extra virgin olive oil (for brushing, helps create that crispy golden crust)
- Fresh Herbs: 2 tbsp chopped fresh parsley or basil (optional, for garnish and freshness)
Substitution tips: Use gluten-free sub rolls if needed. Swap the deli meats for a vegetarian option like grilled veggies or marinated tofu. For a dairy-free cheese alternative, shredded vegan cheese works surprisingly well here.
Equipment Needed
- Sheet Pan: A large rimmed baking sheet (at least 18×13 inches) works best to fit all subs comfortably.
- Parchment Paper or Silicone Baking Mat: Makes cleanup a breeze and prevents sticking.
- Sharp Knife: For slicing veggies and buns evenly.
- Cutting Board: A sturdy board to prep all ingredients.
- Mixing Bowls: Small bowls to mix condiments and seasonings.
- Basting Brush: Handy for brushing olive oil on the bread crusts.
If you don’t have a basting brush, a clean spoon works fine to spread olive oil. For budget-friendly options, a basic sheet pan and a sharp serrated knife from your kitchen will do just fine. Keeping your knife sharp is key for clean cuts and safer handling—trust me, I’ve learned the hard way!
Preparation Method

- Preheat your oven to 400°F (200°C). This temp crisps the bread nicely without drying out the fillings. Prep time: 10 minutes.
- Slice the sub buns in half lengthwise. Place them cut side up on the parchment-lined sheet pan. Use a basting brush to gently coat the cut sides with olive oil. This is the secret to that irresistible crispiness.
- Mix condiments. In a small bowl, combine mayonnaise, mustard, and Italian dressing. Spread this evenly over the cut sides of each bun. This adds creamy tang and moisture to every bite.
- Layer the deli meats. Start with ham, then salami, followed by turkey. Make sure to cover the entire bun for balanced flavor.
- Add cheese. Sprinkle shredded mozzarella over the meats, then layer sliced provolone on top. The combo ensures perfect melt and stretch.
- Add veggies. Scatter thinly sliced red onion, green bell pepper, and pepperoncini evenly over the cheese. These add crunch and a punch of brightness.
- Season. Sprinkle oregano, garlic powder, and crushed red pepper flakes (if using) evenly over each sub. This final touch brings depth and a little heat.
- Bake. Place the sheet pan in the oven and bake for 12-15 minutes, or until the cheese is bubbly and the bread edges are golden brown and crispy. Keep an eye on it to avoid burning.
- Garnish and serve. Remove from oven, sprinkle fresh parsley or basil on top, slice into individual servings, and enjoy warm.
Pro tip: If your cheese melts too quickly or browns unevenly, tent the subs loosely with foil halfway through baking. Also, don’t overcrowd the pan—leave space between subs for even heat circulation.
Cooking Tips & Techniques
When making these crispy sheet pan party subs, a few tricks can save you from common pitfalls. First, don’t skip the olive oil brush on the cut bread sides—it’s what gives that perfect crunch. I once skipped this step, and the subs came out soggy in the middle—lesson learned!
Using deli meats that aren’t too thick helps the subs heat evenly. Thicker slices tend to stay cold inside and mess with the texture. Also, layering the cheese on top of the meats—not underneath—prevents the bread from getting soggy while locking in moisture.
Timing is key here. The cheese melts fast, but you want to wait until the edges of the bread are golden and crispy. Multitasking helps—while the subs bake, prep your sides or drinks. And don’t underestimate the value of letting the subs rest for a minute or two after baking; it helps everything settle and makes slicing easier.
Variations & Adaptations
This recipe is super flexible, so feel free to mix it up depending on your cravings or dietary needs. Here are a few of my favorite spins:
- Vegetarian Version: Swap meats for roasted veggies like zucchini, mushrooms, and eggplant. Add a layer of hummus for extra creaminess.
- Spicy Kick: Add sliced jalapeños and swap pepperoncini for pickled banana peppers. A drizzle of hot sauce before baking amps up the heat.
- Low-Carb Option: Use low-carb or keto-friendly bread alternatives and skip the peppers if you want to keep carbs low.
For a different cooking method, you can grill the subs wrapped in foil for 10-12 minutes, flipping halfway, to get a smoky flavor. I once tried mixing smoked turkey with chipotle mayo—totally changed the game! Also, feel free to customize the cheese blend to whatever melts best for you.
Serving & Storage Suggestions
These subs are best served warm, straight from the oven, when the cheese is gooey and the bread is crispy. Slice into manageable finger-food portions perfect for passing around at parties. Pair with crunchy pickles, a fresh green salad, or crispy chips for a balanced spread.
To store, wrap leftovers tightly in foil or plastic wrap and refrigerate for up to 3 days. Reheat in a 350°F (175°C) oven for about 10 minutes to bring back the crispiness—microwaving tends to make them soggy. You can also freeze the assembled but unbaked subs for up to a month; just bake directly from frozen, adding a few extra minutes to the cooking time.
Flavor-wise, these subs hold up well, but they do taste best fresh. The spices and tangy peppers mellow just a bit overnight, making them even more harmonious the next day—if you have leftovers, that is!
Nutritional Information & Benefits
Estimated per serving (1 sub): approximately 450 calories, 22g fat, 35g carbs, 25g protein. This balance makes it a satisfying meal or hearty snack. The deli meats provide protein, while the peppers and onions contribute vitamins and antioxidants. Using fresh herbs adds a little nutritional boost and fresh aroma.
You can easily tweak this recipe for dietary preferences—swap in gluten-free buns or dairy-free cheese to fit your needs. Just watch the sodium content if you’re sensitive, as deli meats and pickled peppers can be a bit salty. Overall, this recipe strikes a nice balance between indulgence and nourishment, especially when paired with a side of fresh veggies.
Conclusion
To wrap it up, these crispy sheet pan party subs are a no-fuss, crowd-pleasing recipe that’s perfect for any casual get-together or family meal. They’re easy to customize, quick to throw together, and deliver that perfect combo of crunchy, melty, and savory that everyone loves. Honestly, I love this recipe because it brings that nostalgic comfort food feeling with zero stress in the kitchen.
Give it a try, tweak it to your taste, and let me know how your party subs turn out! Drop a comment, share your favorite add-ins, or tell me about your own twists—I love hearing from you. Remember, good food is meant to be shared and enjoyed, so don’t hold back on making these your own. Happy cooking and even happier eating!
FAQs About Crispy Sheet Pan Party Subs
Can I make these subs ahead of time?
Absolutely! You can assemble the subs and refrigerate them for a few hours before baking. Just cover tightly with plastic wrap to prevent drying out.
What can I use instead of Italian dressing?
If you don’t have Italian dressing, a simple mix of olive oil, vinegar, and dried Italian herbs works just as well.
How do I prevent the bread from getting soggy?
Brushing the cut sides of the bread with olive oil and layering cheese on top of the meats helps keep the bread crispy. Avoid overloading with wet ingredients.
Can I use other types of cheese?
Yes! Provolone and mozzarella are best for meltiness, but cheddar, Swiss, or pepper jack also work great depending on your flavor preference.
Is there a gluten-free option?
Definitely. Use gluten-free sub rolls or bread alternatives to make this recipe gluten-free without sacrificing taste or texture.
Pin This Recipe!
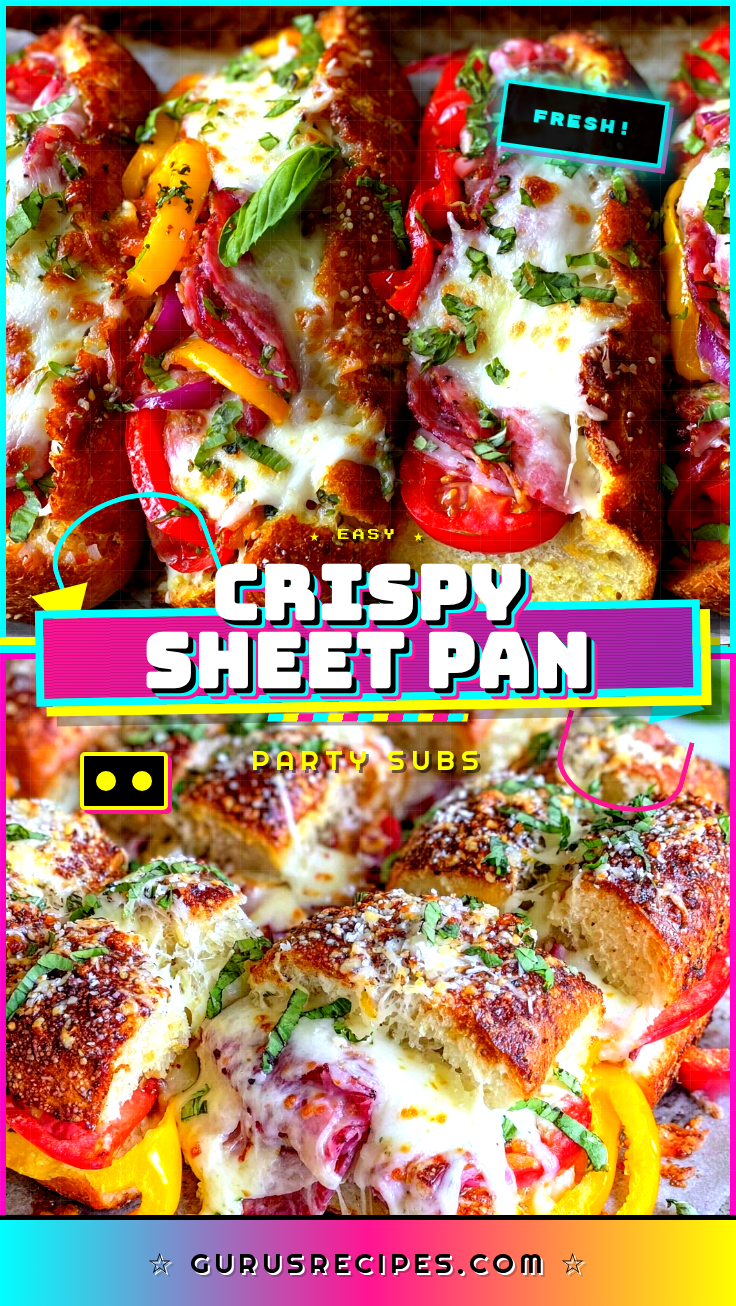

Crispy Sheet Pan Party Subs
A quick and easy recipe for crispy, melty, and savory party subs perfect for entertaining, potlucks, or casual family meals.
- Total Time: 22-25 minutes
- Yield: 6 servings 1x
Ingredients
- 6 soft hoagie rolls or Italian sub rolls
- 6 oz sliced ham
- 6 oz sliced salami
- 6 oz sliced turkey
- 8 oz shredded mozzarella cheese
- 4 oz sliced provolone cheese
- 1 small red onion, thinly sliced
- 1 green bell pepper, thinly sliced
- 1 cup sliced pepperoncini
- ½ cup mayonnaise
- 2 tbsp yellow mustard
- 2 tbsp Italian dressing
- 1 tsp dried oregano
- 1 tsp garlic powder
- ½ tsp crushed red pepper flakes (optional)
- 2 tbsp extra virgin olive oil
- 2 tbsp chopped fresh parsley or basil (optional)
Instructions
- Preheat your oven to 400°F (200°C).
- Slice the sub buns in half lengthwise and place them cut side up on a parchment-lined sheet pan.
- Brush the cut sides of the buns gently with olive oil using a basting brush.
- In a small bowl, mix mayonnaise, yellow mustard, and Italian dressing; spread evenly over the cut sides of each bun.
- Layer the deli meats starting with ham, then salami, followed by turkey, covering the entire bun.
- Sprinkle shredded mozzarella over the meats, then layer sliced provolone on top.
- Scatter thinly sliced red onion, green bell pepper, and pepperoncini evenly over the cheese.
- Sprinkle dried oregano, garlic powder, and crushed red pepper flakes (if using) evenly over each sub.
- Bake in the preheated oven for 12-15 minutes or until the cheese is bubbly and the bread edges are golden and crispy.
- Remove from oven, sprinkle fresh parsley or basil on top, slice into individual servings, and serve warm.
Notes
Brush the cut sides of the bread with olive oil to achieve a crispy crust and prevent sogginess. Layer cheese on top of meats to keep bread from getting soggy. Tent with foil if cheese browns too quickly. Do not overcrowd the pan for even baking. Leftovers can be refrigerated for up to 3 days or frozen unbaked for up to a month.
- Prep Time: 10 minutes
- Cook Time: 12-15 minutes
- Category: Main Course
- Cuisine: American
Nutrition
- Serving Size: 1 sub sandwich
- Calories: 450
- Fat: 22
- Carbohydrates: 35
- Protein: 25
Keywords: party subs, sheet pan subs, easy sandwiches, hoagie recipe, crowd-pleaser, quick dinner, deli meat sandwich


