
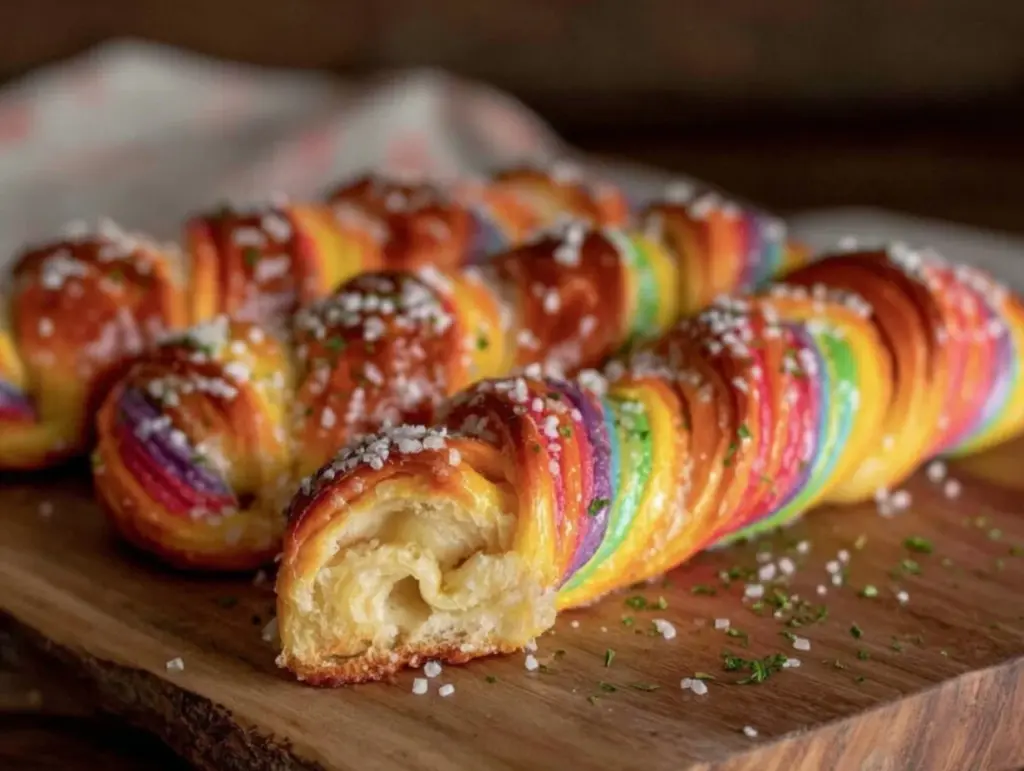
Imagine opening your oven to a swirl of color so vibrant, it looks straight out of a children’s storybook—the aroma of fresh, fluffy breadsticks weaving through the air, making your kitchen feel like a warm, whimsical bakery. The moment those Dr. Seuss Rainbow Breadsticks come out, there’s this cloud of buttery goodness and a flash of playful colors that just begs for smiles. Honestly, the first time I made these for my niece’s birthday, I was a little skeptical (could bread really be this fun?), but the excitement in her eyes as she watched me twist the rainbow dough together was worth every speck of food coloring on my hands.
That first bite—soft, pillowy, and still warm—was the kind of moment where you pause, take a deep breath, and just smile because you know you’re onto something truly special. As a kid, I remember reading Dr. Seuss books curled up on my grandma’s lap, the pages overflowing with wild colors and silly rhymes. These breadsticks bring back that pure, nostalgic comfort (only with a little more butter and a lot more sprinkles). I wish I’d stumbled on this idea years ago, honestly—it’s the perfect way to turn an ordinary day into a magical one.
Every family member (even the “I-don’t-do-carb” crowd) can’t resist pulling apart the spirals, laughing at the streaks of blue and pink, and sneaking seconds. My husband’s been caught more than once “taste-testing” before dinner, and let’s face it: these are dangerously easy to polish off. They’re perfect for potlucks, after-school snacks, or to brighten up your Pinterest board with something that’s as tasty as it is eye-catching. I’ve tested batch after batch in the name of research (of course), and these rainbow breadsticks have officially become our go-to for family gatherings, gifting, and bringing a little wonder to the dinner table. If you need a recipe that feels like a warm hug—and a party on your plate—you’re going to want to bookmark this one.
Why You’ll Love These Dr. Seuss Rainbow Breadsticks
Let’s be real—breadsticks are always a hit, but these Dr. Seuss Rainbow Breadsticks have a little extra magic that sets them apart. After years of testing everything from classic Italian breadsticks to over-the-top cheesy twists, I can honestly say this recipe is my favorite for both its looks and its taste. Here’s what makes them special—and why you’ll be baking them on repeat:
- Quick & Easy: Ready in just over an hour (with only 20 minutes of hands-on time), perfect for busy afternoons or when you need a magical snack, fast.
- Simple Ingredients: Uses pantry staples—flour, yeast, sugar, butter, milk, and a little food coloring. No fancy trips to specialty stores required.
- Perfect for Any Occasion: These are a show-stopper for birthdays, classroom parties, or even just a rainy Saturday when everyone needs a pick-me-up.
- Crowd-Pleaser: Kids go wild for the colors, but adults can’t resist the fluffy texture and buttery flavor. They always disappear first at gatherings.
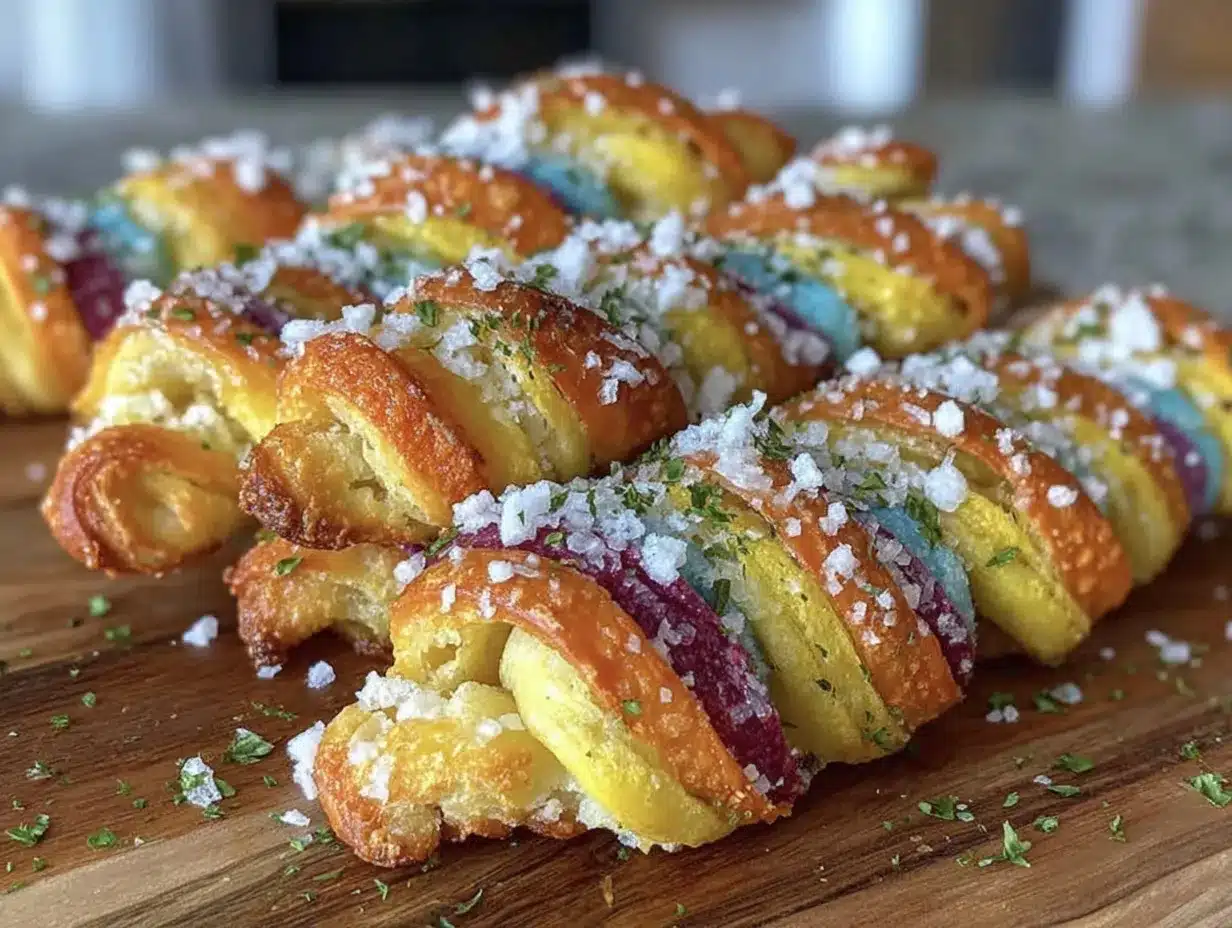
- Unbelievably Delicious: The inside is soft and cloud-like, with a golden, slightly crisp crust. The buttery finish is pure comfort food, but with a playful twist.
What really makes this recipe shine is the technique—dividing and coloring the dough, then twisting it together for that perfect Seuss-like swirl. It’s not just a breadstick, it’s an edible art project that looks fantastic on any table. I’ve played with a lot of bread recipes, but this one’s balance of lightness (thanks to a milk-enriched dough) and that vibrant, joyful appearance makes it stand out from the crowd.
There’s something about tearing into a rainbow breadstick that just feels special. It’s the kind of food that turns snack time into an experience. It’s cozy comfort with a side of playfulness—and honestly, those are the best kind of recipes to share. Whether you’re looking to impress a crowd, wow your kids, or just add some color to your kitchen routine, these Dr. Seuss Rainbow Breadsticks are a must-try. Trust me: you’ll be hooked after the first bite.
What Ingredients You Will Need
This recipe uses simple, wholesome ingredients to deliver bold color, fluffy texture, and that classic, buttery breadstick flavor—without any complicated steps. You’ll likely have most of these ingredients on hand, and you can swap in a few alternatives if needed. Here’s what you need to make your own magical batch of Dr. Seuss Rainbow Breadsticks:
- For the Dough:
- All-purpose flour (3 1/2 cups / 440g) – gives structure and fluffiness
- Instant yeast (2 1/4 tsp / 7g, or one packet) – for that classic rise
- Sugar (2 tbsp / 25g) – a touch of sweetness to feed the yeast and balance flavors
- Salt (1 tsp / 6g) – brings out all the flavors (don’t skip!)
- Whole milk, warm (1 cup / 240ml) – keeps the dough soft and tender
- Unsalted butter, melted (4 tbsp / 56g) – adds richness and that bakery-style aroma
- Egg, room temperature (1 large) – helps with structure and color
- For the Rainbow Swirls:
- Food coloring gel (red, yellow, blue, green, and purple) – gel works best for vibrant color without thinning the dough. I like Americolor or Wilton brands for reliable, bright results.
- For Brushing:
- Unsalted butter, melted (2 tbsp / 28g) – for brushing, adds flavor and helps the breadsticks shine
- Optional: Coarse sugar or rainbow sprinkles – for extra fun and a sweet crunch
Ingredient Tips:
- If you need a dairy-free version, use unsweetened almond milk and vegan butter instead. The results are still pillowy and delicious.
- Bread flour can be swapped for all-purpose if you want a chewier texture, but all-purpose keeps these breadsticks light and kid-friendly.
- Don’t have food coloring gel? You can use liquid, but you may need a little extra flour if the dough gets sticky. Gel is best for bold color.
- For a gluten-free version, use a 1:1 gluten-free all-purpose blend (I’ve had good luck with King Arthur’s blend for this recipe).
That’s it—nothing mysterious, just pantry basics and a little kitchen magic. If you want to add a bit of flavor, you can mix in a pinch of garlic powder or Italian seasoning with the flour, but honestly, the classic version is hard to beat.
Equipment Needed
You don’t need a professional bakery setup for these Dr. Seuss Rainbow Breadsticks—just a few basics most home kitchens have. Here’s what you’ll want handy:
- Large mixing bowl – for stirring and kneading the dough; a sturdy bowl is best
- Measuring cups and spoons – accuracy matters for fluffy results
- Whisk or fork – for blending the wet ingredients
- Rubber spatula or wooden spoon – makes mixing less messy
- Baking sheet (lined with parchment) – ensures even baking and easy cleanup
- Plastic wrap or clean kitchen towel – to cover the dough as it rises
- Small bowls (4-5) – for dividing and coloring the dough (I use old cereal bowls; nothing fancy needed)
- Rolling pin – for flattening the dough ropes; a clean wine bottle works in a pinch!
- Pastry brush – for buttery finishing touches
If you’ve got a stand mixer with a dough hook, feel free to use it—saves a little elbow grease, but hand mixing works just fine. I’ve made these with both a basic hand mixer and by hand (with kids helping) and they turn out fluffy every time. For clean-up, a bench scraper is handy, especially if the dough gets sticky. And if you don’t have parchment, just grease your baking sheet well.
Maintenance Tip: Wash bowls and utensils right after coloring the dough to avoid staining—learned that the hard way! And if you’re on a budget, thrift store bowls and old brushes work perfectly—no need for anything fancy here.
How to Make Fluffy Dr. Seuss Rainbow Breadsticks
-
Mix the Dough (10 minutes)
In a large mixing bowl, whisk together 3 1/2 cups (440g) all-purpose flour, 2 tbsp (25g) sugar, 2 1/4 tsp (7g) instant yeast, and 1 tsp (6g) salt. In a separate bowl, whisk 1 cup (240ml) warm milk, 4 tbsp (56g) melted butter, and 1 large egg until smooth. Pour the wet mixture into the dry ingredients and stir until a shaggy dough forms. If you’re using a stand mixer, start on low with the dough hook. -
Knead the Dough (8 minutes)
Turn the dough onto a lightly floured surface. Knead for 6-8 minutes (or mix with the dough hook for 5-6 minutes), until the dough is smooth, elastic, and just barely sticky. If it feels too wet, add flour 1 tbsp at a time. The dough should spring back when poked. -
First Rise (30 minutes)
Shape the dough into a ball and place it in a greased bowl. Cover with plastic wrap or a clean towel. Let it rise in a warm spot until doubled in size, about 30 minutes. (Tip: If your kitchen is chilly, set the bowl near a warm oven or microwave a mug of water for 1 minute and place the bowl inside—works wonders!) -
Divide and Color (10 minutes)
Punch down the risen dough and turn it out onto a lightly floured surface. Divide into 5 equal pieces (about 150g each). Place each piece in a separate small bowl. Add a few drops of food coloring gel to each piece (red, yellow, blue, green, purple). Knead each piece until the color is even—use gloves if you want to avoid rainbow hands, but I just roll with it! -
Shape the Breadsticks (15 minutes)
Roll each colored dough piece into a rope about 12 inches (30cm) long. Lay the ropes side by side and gently press them together at one end. Twist the ropes together to form a colorful swirl, then cut into 8-10 breadsticks. Place each twist on a parchment-lined baking sheet, leaving space to rise. -
Second Rise (20 minutes)
Cover the shaped breadsticks with a towel and let them rise for 20 minutes, until puffy. Preheat your oven to 375°F (190°C) during this time. -
Bake (12-15 minutes)
Bake the breadsticks for 12-15 minutes, until lightly golden and the tops feel set. Watch for the bottoms to be just turning golden—don’t overbake or you’ll lose that fluffy center. -
Finishing Touch (2 minutes)
Remove from the oven and immediately brush with 2 tbsp (28g) melted butter. Sprinkle with coarse sugar or rainbow sprinkles if you like. Let cool for 5 minutes before serving.
Notes & Troubleshooting:
- If the dough tears when twisting, let it rest for 5 minutes—sometimes it just needs to relax.
- For extra soft breadsticks, cover with a towel as they cool.
- If your dough seems sticky after coloring, dust with a bit more flour.
- Let kids help with the coloring and twisting—it’s messy, but so fun and worth it!
Cooking Tips & Techniques
Here’s where a few pro tips (and a couple of my own kitchen mishaps) can help you get perfect results every time:
- Coloring the Dough: Gel food color gives the brightest results. Too much liquid coloring can make the dough sticky (trust me, learned that the hard way!). If using liquid, go slow and add extra flour as needed.
- Don’t Over-Knead: Once your dough is smooth and elastic, stop kneading. Overworking makes breadsticks tough instead of fluffy.
- Warm Rising Spot: Yeast loves warmth, but not heat. Find a cozy spot—an off oven with the light on, or even your microwave with a mug of hot water. Avoid hot radiators (yes, I tried that once, and it started to cook the dough!).
- Even Twisting: Try to keep the ropes the same thickness for even baking. If you end up with a “monster breadstick,” just bake it a few minutes longer.
- Multitasking: While the dough rises, prep your coloring bowls and clean up. It makes the whole process feel faster and less messy.
- Finishing Touches: Brush with butter right out of the oven for the softest crust. If you want a sweet version, sprinkle with coarse sugar or colored sanding sugar before baking.
- Consistency: For perfectly fluffy breadsticks every time, measure your flour by spooning it into the cup and leveling off (instead of scooping). Too much flour = dense breadsticks.
- Batch Baking: These freeze and reheat beautifully, so make a double batch for snacks all week. Just cool completely before freezing.
And hey, if your breadsticks turn out a little wonky or your colors mix, they’ll still taste amazing. That’s the magic of Dr. Seuss—imperfections are part of the fun. Don’t stress; just enjoy the process!
Variations & Adaptations
One of my favorite parts about these Dr. Seuss Rainbow Breadsticks? There are so many ways to customize them for different tastes, diets, and occasions. Here are some fun twists I’ve tried (and loved):
- Gluten-Free Rainbow Breadsticks: Swap the all-purpose flour for a 1:1 gluten-free blend. Add a pinch of xanthan gum if your blend doesn’t include it. The texture is slightly more tender, but just as magical.
- Dairy-Free or Vegan: Use unsweetened almond milk and vegan butter. Skip the egg and add 2 tbsp extra non-dairy milk. They’ll be just as fluffy and perfect for anyone with dairy allergies.
- Seasonal Flavors: For fall, add a teaspoon of pumpkin pie spice or cinnamon to the dough. In spring, swap the colors for pastel shades and dust with powdered sugar after baking.
- Savory Twist: Add 1/2 tsp garlic powder and a sprinkle of dried Italian herbs to the dough before dividing and coloring. Brush with olive oil instead of butter and sprinkle with coarse salt for a savory snack.
- Different Cooking Methods: Air fryer fans, you can bake these breadsticks at 350°F (175°C) for 6-8 minutes—just check for doneness early.
- Personal Favorite: I love adding a sprinkle of cheese (parmesan or cheddar) right before baking. The cheesy golden top is so good—my family always fights over the cheesiest one!
If anyone has allergies, you can make these nut-free (just use regular milk and butter), and for egg allergies, use a flax egg (1 tbsp ground flax + 2.5 tbsp water). Feel free to experiment with colors—use your favorite combos, or even themed colors for holidays or school events. You really can’t go wrong.
Serving & Storage Suggestions
These rainbow breadsticks are at their absolute best warm from the oven, with the butter still glistening and the colors vibrant. Here’s how I like to serve and store them for max enjoyment:
- Serving: Serve warm, either plain or with a side of marinara, ranch, or honey butter for dipping. They look magical in a bread basket lined with a bright napkin—perfect for parties or brunch tables.
- Presentation: If you’re making these for a party, arrange in a rainbow arc on a big platter or let kids “build” their own color stacks. They’re super Pinterest-worthy, trust me!
- Complimentary Dishes: Pair with pasta, soup, or alongside a big salad. For a sweet treat, serve with cream cheese frosting or chocolate dip.
- Storage: Let breadsticks cool completely before storing. Place in an airtight container at room temperature for up to 2 days. For longer storage, freeze in a zip-top bag for up to 2 months.
- Reheating: To reheat, wrap breadsticks in foil and warm in a 300°F (150°C) oven for 5-7 minutes. Or microwave for 10-15 seconds (they’ll be super soft!).
- Flavor Development: The flavors are best on day one, but the bread stays soft for a couple days. If you sprinkle with sugar or sprinkles, they’ll keep their crunch for 24 hours.
If you ever have leftovers (rare around here), they make a fun addition to lunchboxes—just tuck a breadstick into a snack box for a midday pick-me-up.
Nutritional Information & Benefits
Here’s a rough estimate for each breadstick (assuming 10 breadsticks per batch):
- Calories: ~150 per breadstick
- Fat: 4g
- Carbs: 25g
- Protein: 4g
- Sugar: 2g
- Fiber: 1g
Health Benefits: You’re getting real, simple ingredients—no preservatives, and you can control the sugar and fat. The milk and egg add a little protein, and you can easily adjust the recipe for whole grain flour if you want a fiber boost. If you make the vegan or gluten-free versions, they fit most dietary needs for parties.
Potential allergens include wheat, dairy, and egg (but easy to sub out as mentioned earlier). From my own wellness journey, I love that these breadsticks are a fun way to get kids involved in baking and eating real, homemade bread—plus, they’re portion-friendly and easy to share.
Conclusion
Dr. Seuss Rainbow Breadsticks aren’t just a snack—they’re a little burst of magic you can bake any day of the week. Every time I pull them from the oven, I’m reminded how a simple recipe can turn snack time into a celebration. Whether you stick to the classic version or experiment with your own flavors and colors, these breadsticks are a sure-fire way to spread a little joy (and maybe a few butter stains) around the table.
I hope you’ll try these and make them your own—swap flavors, play with colors, or invite your kids to help twist and roll. That’s half the fun! If you give this recipe a whirl, leave a comment below and let me know your favorite color combo or party twist. Share your creations on social media (tag me so I can see those rainbow spirals!), or pass the recipe to a friend who needs a little Seuss-inspired cheer. Here’s to baking, laughing, and making memories—one colorful breadstick at a time.
Frequently Asked Questions
How do I make the colors in my rainbow breadsticks really vibrant?
Use gel food coloring for the brightest results. Start with a small amount and add more as needed. Knead the dough well to ensure even color throughout.
Can I make these Dr. Seuss Rainbow Breadsticks ahead of time?
Absolutely! Bake and cool completely, then store in an airtight container for up to 2 days or freeze for up to 2 months. Reheat in the oven or microwave before serving for that fresh-baked fluffiness.
What if I don’t have instant yeast?
You can use active dry yeast—just dissolve it in the warm milk with the sugar and let it sit for 5 minutes before mixing with the dry ingredients. The rise time may be slightly longer.
Can I make these breadsticks gluten-free?
Yes! Use a 1:1 gluten-free flour blend and add a pinch of xanthan gum if your blend doesn’t include it. The texture will be a little different, but still fluffy and delicious.
Are these breadsticks safe for kids with allergies?
They can be! Swap dairy for non-dairy milk and butter, and use a flax egg if needed. Always check your food coloring labels for allergens. They’re easy to adapt for most dietary needs.
Pin This Recipe!
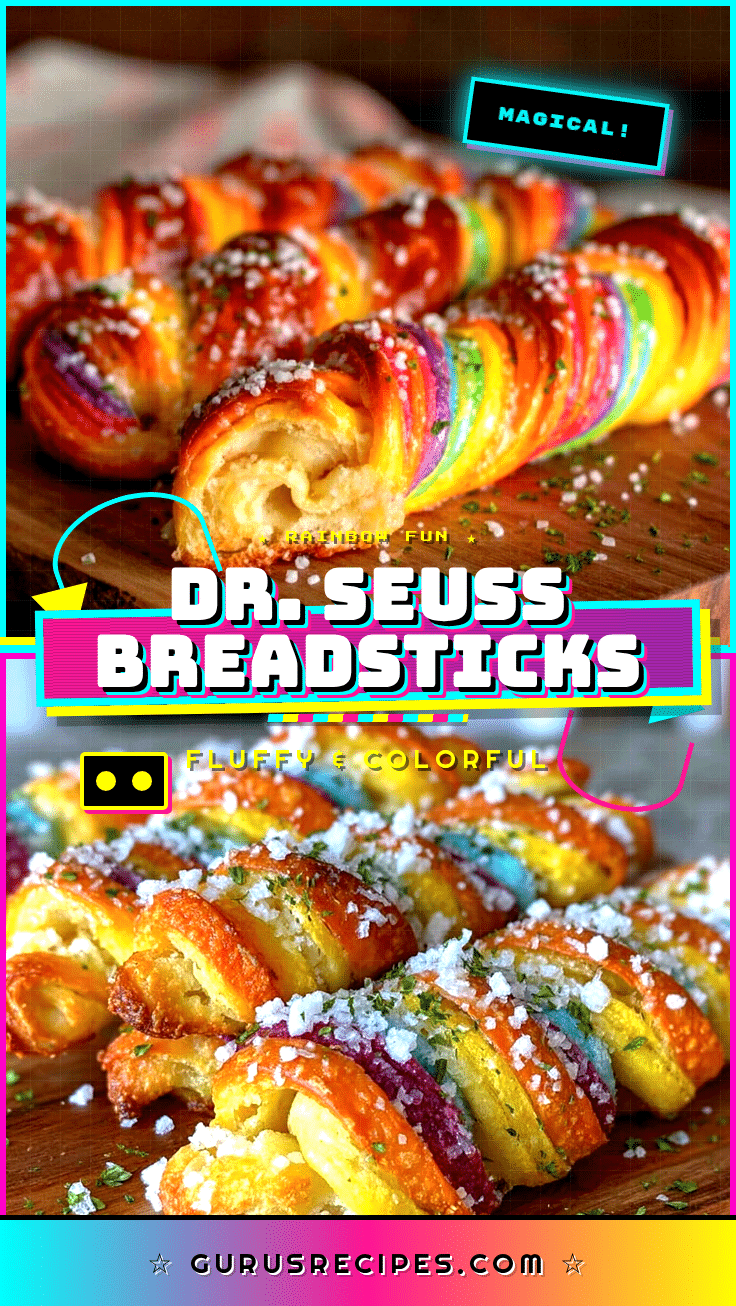

Dr. Seuss Rainbow Breadsticks: Easy Fluffy Recipe for Magical Snacks
These Dr. Seuss Rainbow Breadsticks are soft, fluffy, and bursting with vibrant color—perfect for parties, snacks, or adding a little magic to your table. Made with simple pantry ingredients, they’re as fun to make as they are to eat.
- Total Time: 1 hour 15 minutes
- Yield: 8-10 breadsticks 1x
Ingredients
- 3 1/2 cups all-purpose flour (440g)
- 2 1/4 teaspoons instant yeast (7g, or one packet)
- 2 tablespoons sugar (25g)
- 1 teaspoon salt (6g)
- 1 cup whole milk, warm (240ml)
- 4 tablespoons unsalted butter, melted (56g)
- 1 large egg, room temperature
- Food coloring gel (red, yellow, blue, green, purple)
- 2 tablespoons unsalted butter, melted (28g), for brushing
- Optional: Coarse sugar or rainbow sprinkles, for topping
Instructions
- In a large mixing bowl, whisk together flour, sugar, instant yeast, and salt.
- In a separate bowl, whisk warm milk, melted butter, and egg until smooth.
- Pour the wet mixture into the dry ingredients and stir until a shaggy dough forms.
- Turn the dough onto a lightly floured surface and knead for 6-8 minutes (or mix with a dough hook for 5-6 minutes) until smooth and elastic.
- Shape the dough into a ball and place in a greased bowl. Cover and let rise in a warm spot until doubled in size, about 30 minutes.
- Punch down the dough and divide into 5 equal pieces. Place each piece in a separate small bowl.
- Add a few drops of food coloring gel to each piece (red, yellow, blue, green, purple) and knead until the color is even.
- Roll each colored dough piece into a rope about 12 inches long. Lay the ropes side by side and gently press together at one end.
- Twist the ropes together to form a colorful swirl, then cut into 8-10 breadsticks. Place each twist on a parchment-lined baking sheet.
- Cover the shaped breadsticks with a towel and let rise for 20 minutes, until puffy. Preheat oven to 375°F (190°C).
- Bake for 12-15 minutes, until lightly golden and the tops feel set.
- Remove from oven and immediately brush with melted butter. Sprinkle with coarse sugar or rainbow sprinkles if desired. Let cool for 5 minutes before serving.
Notes
For dairy-free, use almond milk and vegan butter. For gluten-free, use a 1:1 gluten-free flour blend. If dough tears while twisting, let it rest for 5 minutes. Let kids help with coloring and twisting for extra fun. Breadsticks freeze and reheat well. For a savory version, add garlic powder and Italian herbs to the dough.
- Prep Time: 20 minutes
- Cook Time: 15 minutes
- Category: Snack
- Cuisine: American
Nutrition
- Serving Size: 1 breadstick
- Calories: 150
- Sugar: 2
- Sodium: 150
- Fat: 4
- Saturated Fat: 2
- Carbohydrates: 25
- Fiber: 1
- Protein: 4
Keywords: rainbow breadsticks, Dr. Seuss snacks, colorful bread, party food, kids baking, fluffy breadsticks, easy bread recipe, magical snacks


