Our office bake sale was in twenty-four hours and I’d completely forgotten. I mean, I’d walked past the sign-up sheet all week, told myself I’d figure it out later, and then—surprise—it was the night before and I was staring at a bunch of spotty bananas on my counter. Everyone else would be bringing those elaborate layered cakes and perfectly piped cookies they’d probably spent all weekend on. I had three overripe bananas, a stick of butter, and about forty-five minutes before I needed to be in bed.
Honestly, I almost just grabbed a box of store-bought muffins on the way in. But something made me stop. I remembered a trick my neighbor had mentioned once, about browning butter in a pan to make everything taste fancy without actually doing any real work. So I melted that butter, let it foam and turn golden, and threw everything into one bowl. No mixer, no sifting, no nonsense. I figured it would be edible at best.
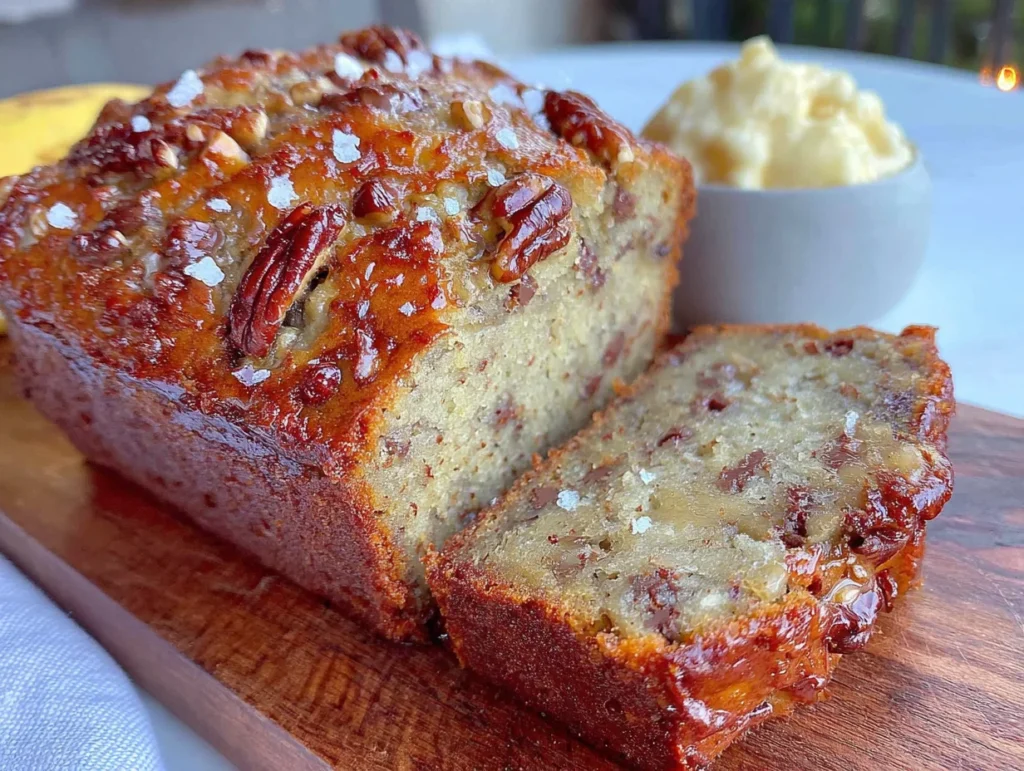
The next morning, I walked in with my loaf wrapped in foil, feeling a little embarrassed next to the display of professional-looking treats. But by lunchtime, the banana bread was gone. Completely. People kept walking by my desk asking if I had more. One woman from accounting actually tracked me down to get the recipe. The thing is, I didn’t even try to win. I was just trying to not show up empty-handed. But that brown butter—man, it did all the heavy lifting. That’s why this recipe stuck with me. It’s the one that proves you don’t need hours or fancy equipment to make something people will actually fight over. Maybe you’ve been there, scrambling at the last minute for something that doesn’t look like a last-minute effort. This one’s for you.
Why You’ll Love This Recipe
Let me tell you why this particular banana bread is different from every other recipe you’ve seen. I’ve tested this thing about a dozen times, tweaking the butter temperature and the banana ripeness until it was just right. It’s not just another recipe—it’s the one I actually trust when I’m in a hurry.
- Quick & Easy: From start to oven in under 15 minutes. No mixer to wash, no extra bowls to scrub. I mean, that’s a game-changer on a Tuesday night.
- Simple Ingredients: You probably have everything already. Butter, bananas, flour, sugar, eggs—the usual suspects. No weird specialty items that you’ll use once and forget about.
- Perfect for Last-Minute Cravings: Got unexpected guests? Need something for a school event? This recipe saves you every time.
- Crowd-Pleaser: I’ve brought this to potlucks, brunches, and even a book club meeting where everyone claimed they were “watching carbs.” The loaf was demolished.
- Unbelievably Delicious: The brown butter gives it this nutty, almost toffee-like flavor that makes people think you spent way more effort than you actually did.
What makes this version different? It’s the brown butter, honestly. Most banana bread recipes just use melted butter or oil. But taking that extra three minutes to brown the butter changes everything. It adds a depth that makes the bread taste sophisticated without being complicated. Plus, mixing everything in one bowl means less cleanup, which is basically my love language.
This recipe isn’t just good—it’s the kind that makes you close your eyes after the first bite. It’s comfort food reimagined: faster, easier, but with the same soul-soothing satisfaction. Perfect for impressing guests without stress, or turning a simple Tuesday into something memorable.
What Ingredients You Will Need
This recipe uses simple, wholesome ingredients to deliver bold flavor and satisfying texture without the fuss. Most of these are pantry staples, so you probably won’t need a special trip to the store.
- Unsalted butter – ½ cup (1 stick, 113g). You’ll brown this first, so don’t skip that step. I prefer using unsalted so I can control the salt level.
- Ripe bananas – 3 medium, mashed (about 1½ cups or 340g). The spottier, the better. Seriously, the ones that look almost black are perfect for this.
- Granulated sugar – ¾ cup (150g). Adds sweetness and helps with that golden crust.
- Large egg – 1, at room temperature. If you forgot to take it out early, just place it in a bowl of warm water for 5 minutes.
- Vanilla extract – 1 teaspoon. Pure vanilla makes a difference here, but imitation works in a pinch.
- All-purpose flour – 1½ cups (190g). Spoon and level it—don’t scoop directly from the bag or you’ll end up with dry bread.
- Baking soda – 1 teaspoon. Make sure it’s fresh. If it doesn’t fizz when you drop a bit in vinegar, get a new box.
- Salt – ½ teaspoon. Balances the sweetness and brings out the banana flavor.
- Cinnamon – 1 teaspoon (optional but highly recommended). It pairs beautifully with the brown butter.
- Milk or buttermilk – ¼ cup (60ml). Buttermilk makes it extra tender, but regular milk works fine. You can also use dairy-free milk if needed.
For the best texture, I recommend using bananas that are heavily spotted or even mostly brown. They’re sweeter and mash easier. If your bananas aren’t ripe enough, you can place them (unpeeled) on a baking sheet in a 300°F oven for 15-20 minutes until the skins turn black. Let them cool before mashing.
Ingredient tip: I usually buy the store-brand butter for everyday baking, but for this recipe, I splurge on a good European-style butter like Kerrygold. The higher fat content browns more evenly and gives a richer flavor. It’s a small upgrade that makes a big difference.
Equipment Needed
You don’t need much for this recipe, which is honestly my favorite part. Here’s what you’ll need:
- One large mixing bowl – Any bowl works, but a wide one makes mixing easier. I use a ceramic bowl that’s seen better days, but it does the job.
- A 9×5-inch loaf pan – Standard size. If you only have an 8×4-inch pan, expect a slightly taller loaf and add 5-10 minutes to the baking time.
- A small saucepan – For browning the butter. A light-colored pan helps you see the color change, but a dark one works too—just watch it carefully.
- A whisk or wooden spoon – Whisk works better for getting the batter smooth, but a sturdy spoon is fine too.
- Parchment paper – Not strictly necessary, but it makes lifting the bread out so much easier. I always use it now after a few sticky disasters.
- Measuring cups and spoons – For accurate measurements. A kitchen scale is even better for the flour.
- A fork or potato masher – For mashing the bananas. A fork works perfectly—no need for a special tool.
If you don’t have a loaf pan, you can bake this in an 8×8-inch square pan for about 30-35 minutes. Just keep an eye on it. The texture will be a bit different, but it’ll still taste amazing.
Preparation Method
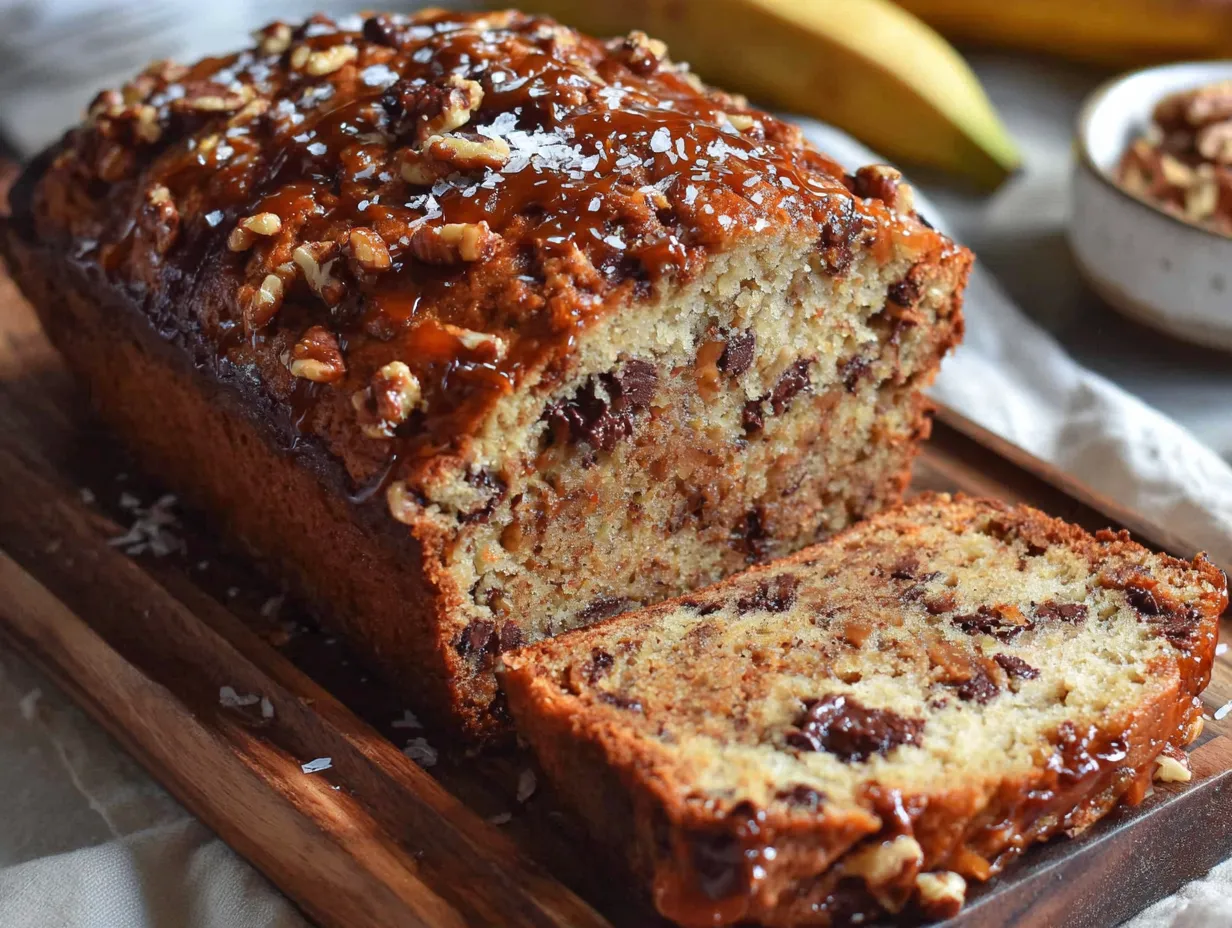
- Preheat your oven to 350°F (175°C). While it’s heating, line your loaf pan with parchment paper, leaving some overhang on the long sides. This makes lifting the bread out super easy later. If you don’t have parchment, just grease the pan well with butter or non-stick spray.
- Brown the butter. Place the ½ cup of butter in a small saucepan over medium heat. Let it melt completely, then keep cooking. Swirl the pan occasionally. You’ll see it foam up, then the foam will subside, and small brown specks will appear at the bottom. This takes about 5-7 minutes. The butter should smell nutty and look golden brown. Watch it carefully—it can go from perfect to burnt in seconds. Once it’s done, pour it into your mixing bowl to cool slightly while you prepare the other ingredients.
- Mash the bananas. In the same bowl with the browned butter, add your three ripe bananas. Mash them with a fork until mostly smooth, but leave a few small chunks for texture. You want about 1½ cups of mashed banana.
- Add the wet ingredients. To the mashed bananas and butter, add ¾ cup granulated sugar, 1 large egg, 1 teaspoon vanilla extract, and ¼ cup milk or buttermilk. Whisk everything together until smooth and well combined. The mixture should look pale and slightly glossy.
- Add the dry ingredients. Sprinkle 1½ cups all-purpose flour, 1 teaspoon baking soda, ½ teaspoon salt, and 1 teaspoon cinnamon (if using) over the wet mixture. Stir gently with a spatula or wooden spoon until just combined. Do not overmix! A few streaks of flour are fine. Overmixing will make the bread tough and dense.
- Pour the batter into the prepared pan. Use your spatula to scrape every bit of batter into the pan. Smooth the top evenly. If you want, you can sprinkle a little coarse sugar or a few banana slices on top for decoration.
- Bake for 50-60 minutes. Place the pan in the center of the oven. Bake until a toothpick inserted into the center comes out clean or with just a few moist crumbs. The top should be deep golden brown and cracked. If the top is browning too quickly after 40 minutes, tent it loosely with foil.
- Cool in the pan for 10 minutes. Then lift the bread out using the parchment paper and transfer to a wire rack. Let it cool completely before slicing—about 1 hour. I know it’s tempting to cut into it warm, but it’ll fall apart if you do. Trust me, I’ve learned this the hard way.
Troubleshooting tip: If your bread sinks in the middle after baking, it might be slightly underbaked. Next time, bake it 5 minutes longer. If the edges are dry but the center is still wet, your oven might run hot—try lowering the temperature to 325°F next time.
Cooking Tips & Techniques
Let me share some things I’ve learned through trial and error. I’ve made this recipe enough times to know exactly where things can go wrong.
Don’t rush the brown butter. I know you’re in a hurry, but this step really matters. The first time I made this, I got impatient and just melted the butter without browning it. The bread was fine, but it wasn’t special. The nutty flavor from properly browned butter is what makes people ask for the recipe. Swirl the pan constantly and take it off the heat the moment it turns golden. Pour it into your bowl immediately so it doesn’t continue cooking in the hot pan.
Measure your flour correctly. This is probably the most common mistake. If you scoop your measuring cup directly into the flour bag, you can end up with 20-30% more flour than the recipe calls for. That makes dry, crumbly bread. Instead, fluff the flour with a spoon, then spoon it into your measuring cup and level it off with a knife. Or just use a kitchen scale—it’s more accurate and less messy.
Let your bananas get really ripe. I mean really ripe. If your bananas are still yellow with just a few spots, they won’t mash smoothly and they won’t be sweet enough. The best banana bread comes from bananas that are mostly brown and smell very sweet. I keep a bag of overripe bananas in my freezer for exactly this situation. Just thaw them in the microwave for 30 seconds, then squeeze the pulp out of the skins.
One mistake I made early on: I once forgot to add the egg. The bread came out dense and almost rubbery. Don’t skip the egg—it provides structure and moisture. If you’re vegan, you can use a flax egg (1 tablespoon ground flaxseed mixed with 3 tablespoons water, let sit for 5 minutes), but the texture will be slightly different.
Variations & Adaptations
One of the best things about this recipe is how easy it is to change up. Here are some variations I’ve tried and loved:
- Chocolate Chip Banana Bread: Fold in ½ cup of chocolate chips (dark, milk, or semi-sweet) right before pouring the batter into the pan. The chocolate melts into little pockets of goodness. I’ve used mini chocolate chips and they distribute more evenly.
- Nutty Banana Bread: Add ½ cup of chopped walnuts or pecans. Toast them first in a dry pan for 3-4 minutes to bring out their flavor. Fold them in with the dry ingredients so they don’t sink to the bottom.
- Gluten-Free Version: Substitute the all-purpose flour with a 1:1 gluten-free baking flour blend. I’ve used Bob’s Red Mill and King Arthur brands with good results. The texture will be slightly more crumbly, but still delicious. Add an extra tablespoon of milk to help with moisture.
- Vegan Adaptation: Use a flax egg (as mentioned above) and substitute the butter with vegan butter or coconut oil. For the milk, use any plant-based milk. The flavor will be a bit different, but it still works well.
- Spiced Banana Bread: Add ½ teaspoon of nutmeg, ¼ teaspoon of cloves, and a pinch of cardamom along with the cinnamon. It gives the bread a warm, cozy flavor that’s perfect for fall.
My personal favorite variation is the chocolate chip version with a sprinkle of flaky sea salt on top before baking. The salty-sweet combo is irresistible. I made it for a neighbor’s birthday and she asked for the recipe three times.
Serving & Storage Suggestions
This banana bread is best served at room temperature, but it’s also amazing warm. If you want to serve it warm, just pop a slice in the microwave for 10-15 seconds or toast it lightly in a skillet with a little butter. The edges get slightly crispy while the center stays soft.
For presentation, I like to slice it into thick pieces and arrange them on a wooden board. A light dusting of powdered sugar makes it look fancy, or you can drizzle a simple glaze over the top (1 cup powdered sugar mixed with 2 tablespoons milk and ½ teaspoon vanilla).
Storage: Wrap the cooled bread tightly in plastic wrap or aluminum foil. It will keep at room temperature for up to 4 days. Do not refrigerate it—the cold air dries it out and makes it stale faster. If you live in a humid climate, store it in an airtight container instead of wrapping it.
Freezing: This bread freezes beautifully. Wrap the whole loaf or individual slices in plastic wrap, then place in a freezer bag. It will keep for up to 3 months. To thaw, just leave it at room temperature for an hour or microwave a slice for 20-30 seconds. I always keep a few slices in the freezer for when I need a quick breakfast or a snack.
The flavors actually develop over time. The second day, the banana flavor is more pronounced and the brown butter notes are deeper. So if you can wait, it’s even better the next day. Not that I’ve ever managed to keep it around that long.
Nutritional Information & Benefits
Here’s the approximate nutritional breakdown for one slice (assuming 10 slices per loaf):
| Nutrient | Amount per slice |
|---|---|
| Calories | 245 |
| Total Fat | 11g |
| Saturated Fat | 7g |
| Cholesterol | 45mg |
| Sodium | 210mg |
| Total Carbohydrates | 34g |
| Dietary Fiber | 2g |
| Sugars | 17g |
| Protein | 4g |
Bananas are a great source of potassium, vitamin B6, and vitamin C. They also provide resistant starch, which is good for gut health. The brown butter adds healthy fats that help you feel satisfied. If you’re watching your sugar intake, you can reduce the sugar to ½ cup, but the bread will be less sweet and slightly less moist.
This recipe is vegetarian and can be made vegan or gluten-free with the substitutions mentioned above. It contains dairy (butter, milk) and gluten (flour), so it’s not suitable for those with allergies unless you make the appropriate swaps.
From a personal perspective, I love that this bread feels indulgent but isn’t loaded with processed ingredients. It’s real food that happens to taste like dessert. That’s a win in my book.
Conclusion
Look, I’m not saying this banana bread will change your life. But I am saying it might change your Tuesday night. It’s the recipe I turn to when I need something fast, something reliable, and something that makes me look like I have my act together—even when I absolutely don’t.
The brown butter does the heavy lifting. The one-bowl cleanup means you’re not staring at a mountain of dishes afterward. And the fact that it comes together without a mixer means you can make it anywhere, anytime, with almost no planning. That’s the kind of recipe worth keeping around.
I’d love to hear how yours turns out. Did you add chocolate chips? Did you try the gluten-free version? Did someone at your office track you down for the recipe too? Drop a comment below and let me know. And if you take a picture, tag me—I love seeing your creations. Happy baking, friend. You’ve got this.
Frequently Asked Questions
Can I use frozen bananas for this recipe?
Absolutely! Frozen bananas work great. Just thaw them in the microwave for 30-60 seconds, then squeeze the pulp out of the skins. They’ll be very soft and may release some liquid—that’s fine. Just drain off any excess liquid before mashing.
Why did my banana bread sink in the middle?
This usually happens when the bread is underbaked. The center needs more time to set. Next time, bake it 5-10 minutes longer and check with a toothpick. It could also be from overmixing the batter, which creates too much air that collapses during baking.
Can I make this recipe without browning the butter?
You can, but it won’t taste the same. The brown butter adds a nutty, caramel-like flavor that makes this bread special. If you’re really short on time, just melt the butter and add a teaspoon of vanilla extract for extra flavor, but I promise the extra 5 minutes for browning is worth it.
How do I know when the bananas are ripe enough?
Look for bananas that are heavily spotted or mostly brown. They should feel soft when you squeeze them gently and smell very sweet. If your bananas are still yellow, you can speed up ripening by placing them in a paper bag with an apple overnight.
Can I double this recipe?
Yes! This recipe doubles easily. Just use a larger bowl and bake in two loaf pans. You can also bake it in a 9×13-inch pan for about 35-40 minutes. Just keep an eye on it and test with a toothpick for doneness.
Pin This Recipe!
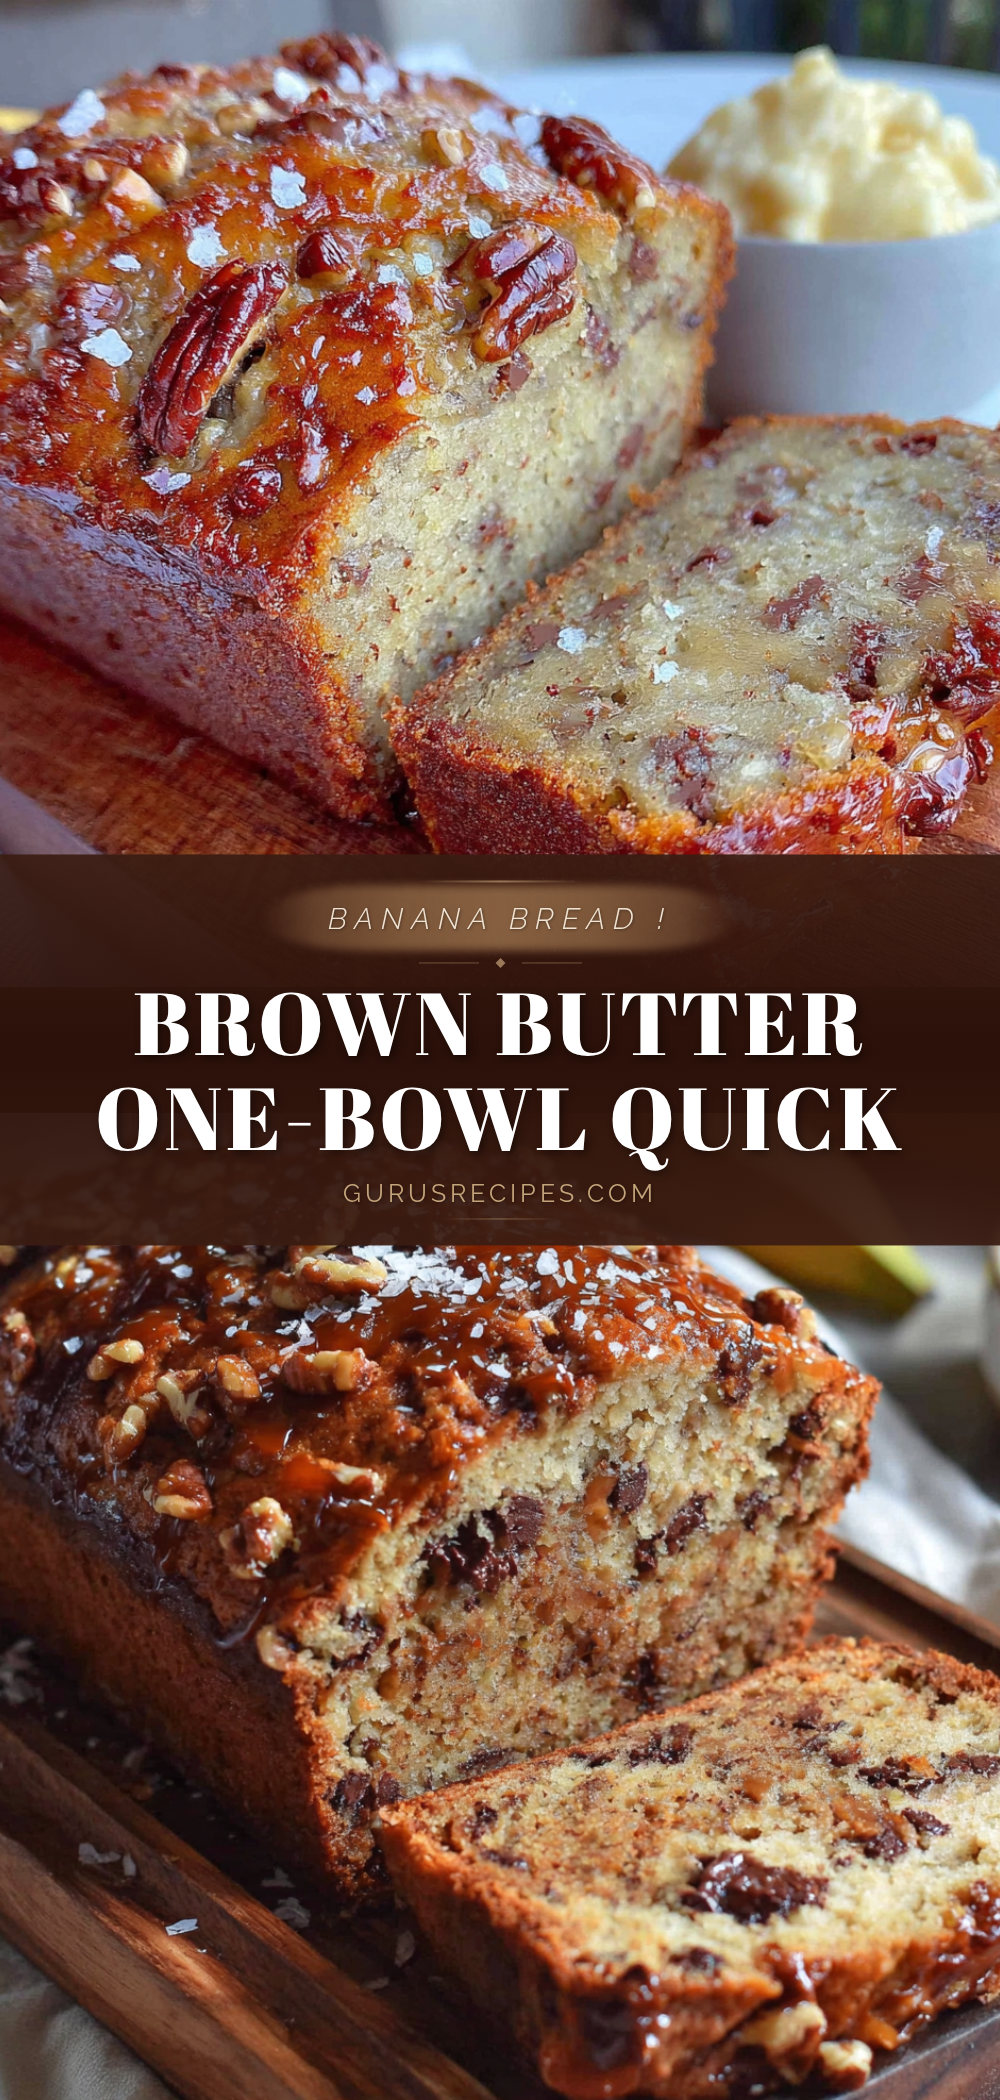

Easy Brown Butter Banana Bread: One Bowl, No Mixer
This one-bowl banana bread uses brown butter for a nutty, toffee-like flavor that makes it taste fancy without any real work. No mixer needed, and it comes together in under 15 minutes.
- Total Time: 1 hour 10 minutes
- Yield: 10 servings 1x
Ingredients
- ½ cup (1 stick, 113g) unsalted butter
- 3 medium ripe bananas, mashed (about 1½ cups or 340g)
- ¾ cup (150g) granulated sugar
- 1 large egg, at room temperature
- 1 teaspoon vanilla extract
- 1½ cups (190g) all-purpose flour
- 1 teaspoon baking soda
- ½ teaspoon salt
- 1 teaspoon cinnamon (optional but highly recommended)
- ¼ cup (60ml) milk or buttermilk
Instructions
- Preheat your oven to 350°F (175°C). Line your 9×5-inch loaf pan with parchment paper, leaving some overhang on the long sides. If you don’t have parchment, grease the pan well with butter or non-stick spray.
- Brown the butter: Place the ½ cup of butter in a small saucepan over medium heat. Let it melt completely, then keep cooking. Swirl the pan occasionally. You’ll see it foam up, then the foam will subside, and small brown specks will appear at the bottom. This takes about 5-7 minutes. The butter should smell nutty and look golden brown. Watch it carefully—it can go from perfect to burnt in seconds. Once it’s done, pour it into your mixing bowl to cool slightly.
- Mash the bananas: In the same bowl with the browned butter, add your three ripe bananas. Mash them with a fork until mostly smooth, but leave a few small chunks for texture. You want about 1½ cups of mashed banana.
- Add the wet ingredients: To the mashed bananas and butter, add ¾ cup granulated sugar, 1 large egg, 1 teaspoon vanilla extract, and ¼ cup milk or buttermilk. Whisk everything together until smooth and well combined. The mixture should look pale and slightly glossy.
- Add the dry ingredients: Sprinkle 1½ cups all-purpose flour, 1 teaspoon baking soda, ½ teaspoon salt, and 1 teaspoon cinnamon (if using) over the wet mixture. Stir gently with a spatula or wooden spoon until just combined. Do not overmix! A few streaks of flour are fine.
- Pour the batter into the prepared pan. Use your spatula to scrape every bit of batter into the pan. Smooth the top evenly. If you want, you can sprinkle a little coarse sugar or a few banana slices on top for decoration.
- Bake for 50-60 minutes. Place the pan in the center of the oven. Bake until a toothpick inserted into the center comes out clean or with just a few moist crumbs. The top should be deep golden brown and cracked. If the top is browning too quickly after 40 minutes, tent it loosely with foil.
- Cool in the pan for 10 minutes. Then lift the bread out using the parchment paper and transfer to a wire rack. Let it cool completely before slicing—about 1 hour.
Notes
For best results, use heavily spotted or mostly brown bananas. If your bananas aren’t ripe enough, place them (unpeeled) on a baking sheet in a 300°F oven for 15-20 minutes until the skins turn black. Let them cool before mashing. Do not overmix the batter or the bread will be tough. The bread keeps at room temperature for up to 4 days and freezes well for up to 3 months.
- Prep Time: 15 minutes
- Cook Time: 55 minutes
- Category: Dessert
- Cuisine: American
Nutrition
- Serving Size: 1 slice
- Calories: 245
- Sugar: 17
- Sodium: 210
- Fat: 11
- Saturated Fat: 7
- Carbohydrates: 34
- Fiber: 2
- Protein: 4
Keywords: banana bread, brown butter, one bowl, no mixer, easy banana bread, quick bread, last-minute dessert