
If you’re a coffee lover like me, you’ve probably dreamed of turning your favorite beverage into a decadent dessert. That’s exactly what this Easy Coffee Pie does! With its creamy texture, bold coffee flavor, and no-bake simplicity, this pie is the perfect treat for coffee enthusiasts who crave something sweet but don’t want to spend hours in the kitchen. Trust me, one bite of this dessert will have you hooked!
What makes this recipe even better is how quickly it comes together. You don’t need any fancy equipment or baking skills—just a few simple ingredients and a love for coffee. Whether you’re hosting a dinner party, looking for something unique to bring to a potluck, or simply indulging in your caffeine obsession, this pie is a guaranteed crowd-pleaser.
The Story Behind Coffee Pie
Coffee desserts have always held a special place in my heart. Growing up, my family had an unwritten rule: coffee was for mornings, and dessert was for evenings. But as I got older, I realized the two could coexist beautifully. That’s when I stumbled upon the idea of coffee-flavored pies.
This recipe is inspired by traditional icebox pies, which were popular in the mid-20th century for their convenience and refreshing taste. Icebox pies typically relied on condensed milk or whipped cream for their creamy texture, and that’s exactly what this coffee pie delivers. It’s a nostalgic throwback with a modern coffee twist.
I first experimented with this recipe one summer when the heat made turning on the oven unthinkable. After tweaking the coffee-to-cream ratio and playing around with toppings, I landed on this version, which has been a staple in my recipe collection ever since. It’s perfect year-round, but there’s something magical about enjoying a slice of cold, creamy coffee pie on a hot day.
Ingredients You’ll Need
Let’s talk ingredients! This Easy Coffee Pie is made with just a handful of pantry staples, yet each one plays a key role in delivering its amazing flavor and texture.
- Instant Coffee or Espresso Powder: The star of the show! Choose a variety with a bold, rich flavor. You can adjust the coffee strength to suit your taste. If you prefer decaf, go for it—this pie will still turn out delicious.
- Sweetened Condensed Milk: This ingredient gives the pie its creamy texture and sweetness. It’s the perfect base for blending with coffee. Make sure to use regular condensed milk, not evaporated milk.
- Heavy Whipping Cream: Whipped cream adds lightness and fluffiness. For best results, chill the cream before whipping—it’ll hold peaks better.
- Chocolate Cookie Crust: A ready-made crust saves time, but you can also crush chocolate cookies and press them into a pie pan for a homemade touch. Graham cracker crusts work too, but chocolate complements the coffee flavor beautifully.
- Vanilla Extract: Just a splash enhances the coffee’s richness and rounds out the flavors.
- Optional Toppings: Whipped cream, chocolate shavings, or a sprinkle of cocoa powder make the pie extra special. Feel free to get creative!
Pro Tip: If you want an even stronger coffee flavor, you can dissolve a bit of instant coffee into the heavy cream before whipping, but be careful not to overdo it.
Equipment Needed
Don’t worry—you won’t need much to make this no-bake coffee pie. Here’s what you’ll need:
- Mixing Bowls: A couple of medium-sized bowls for mixing the filling and whipping the cream.
- Whisk or Hand Mixer: A whisk works fine, but a hand mixer speeds up the process, especially for whipping cream.
- Rubber Spatula: Perfect for folding ingredients together without deflating the whipped cream.
- Pie Pan: If you’re using a store-bought crust, it’ll already be in a disposable pie pan. For homemade crusts, a standard 9-inch pie pan works best.
If you don’t have a hand mixer, you can use a blender or food processor to whip the cream, but watch closely to avoid overmixing!
Preparation Method
- Prepare the Coffee: Dissolve 2 tablespoons (10g) of instant coffee or espresso powder in 2 tablespoons (30ml) of hot water. Let it cool completely.
- Whip the Cream: In a chilled bowl, whip 1 cup (240ml) of heavy cream until stiff peaks form. Set aside in the refrigerator.
- Mix the Filling: In another bowl, combine 1 can (14oz or 396g) of sweetened condensed milk, the cooled coffee mixture, and 1 teaspoon (5ml) of vanilla extract. Stir until smooth.
- Fold in the Whipped Cream: Gently fold the whipped cream into the coffee mixture using a rubber spatula. Take your time to avoid deflating the cream.
- Fill the Crust: Pour the filling into your prepared chocolate cookie crust. Smooth the top with the spatula.
- Chill: Refrigerate the pie for at least 4 hours, or until set. Overnight chilling is even better for a firm texture and enhanced flavor.
- Decorate: Before serving, add your favorite toppings, like a dollop of whipped cream, chocolate shavings, or a dusting of cocoa powder.
And that’s it—you’ve made a delicious coffee pie without ever turning on the oven!
Cooking Tips & Techniques
Here are some handy tips to make sure your Easy Coffee Pie turns out perfectly every time:
- Use Chilled Ingredients: Cold cream whips up faster and holds its structure better.
- Don’t Rush the Folding: The key to a light, airy filling is gently folding the whipped cream into the coffee mixture.
- Taste and Adjust: If you prefer a stronger coffee flavor, increase the amount of instant coffee slightly. If you like it milder, reduce it.
- Chill Long Enough: The pie needs at least 4 hours in the fridge to set properly. Overnight is ideal.
- Decorate Just Before Serving: Whipped cream and chocolate shavings look their best when added fresh.
Variations & Adaptations
This recipe is wonderfully versatile! Try these variations to suit your taste or dietary needs:
- Decaf Version: Use decaffeinated instant coffee for all the flavor without the caffeine buzz.
- Vegan-Friendly: Swap the condensed milk for a plant-based alternative and use coconut whipped cream instead of dairy cream.
- Mocha Twist: Add 2 tablespoons (15g) of cocoa powder to the filling for a chocolate-coffee combo.
- Caramel Coffee Pie: Drizzle caramel sauce over the filling before chilling for a caramel-coffee fusion.
One of my favorites? Adding a pinch of cinnamon to the filling for a subtle spiced coffee flavor—it’s like fall in a pie!
Serving & Storage Suggestions
This coffee pie is best served chilled. Slice it up and plate each piece with a swirl of whipped cream and a sprinkle of chocolate shavings. If you’re feeling fancy, pair it with a cup of iced coffee or a caramel latte for the ultimate coffee lover’s experience.
Leftovers (if there are any!) can be stored in the refrigerator for up to 5 days. Cover the pie with plastic wrap or foil to keep it fresh. You can also freeze the pie for up to 2 months. Just thaw it in the fridge overnight before serving.
Pro Tip: The coffee flavor deepens after a day in the fridge, so if you can wait, it’s worth it!
Nutritional Information & Benefits
While this pie is a treat, it’s nice to know what you’re enjoying:
- Calories: Approximately 280 per slice (based on 8 servings)
- Protein: Around 4g per slice
- Caffeine: Moderate, depending on the coffee used
- Benefits: Includes antioxidants from coffee, which may boost energy and focus
If you’re watching your sugar intake, you can use sugar-free condensed milk and adjust the whipped cream’s sweetness as needed.
Conclusion
This Easy Coffee Pie is the dessert you didn’t know you needed. It’s creamy, rich, and packed with bold coffee flavor—all without breaking a sweat in the kitchen. Whether you’re making it for a special occasion or just treating yourself, this pie is guaranteed to satisfy your sweet tooth and coffee cravings.
I’d love to hear how you made this recipe your own! Did you try a variation? Add a unique topping? Let me know in the comments below. And if you loved this recipe, don’t forget to share it with your fellow coffee lovers!
So go ahead, whip up this pie and enjoy every delicious coffee-infused bite. You deserve it!
FAQs
Can I use regular brewed coffee instead of instant coffee?
Yes, but you’ll need to reduce the liquid significantly to avoid a runny filling. Instant coffee or espresso powder is recommended for the best flavor and texture.
Can I make this pie ahead of time?
Absolutely! This pie can be refrigerated for up to 2 days before serving, making it a great make-ahead dessert.
What’s the best topping for coffee pie?
Whipped cream, chocolate shavings, or a light dusting of cocoa powder are all excellent options. Get creative and try caramel drizzle or crushed cookies!
Is this pie gluten-free?
The filling is naturally gluten-free, but check the crust ingredients to ensure it’s gluten-free, especially if using store-bought crusts.
Can I freeze coffee pie?
Yes! Wrap it tightly and freeze for up to 2 months. Thaw in the fridge overnight before serving for best results.
Print
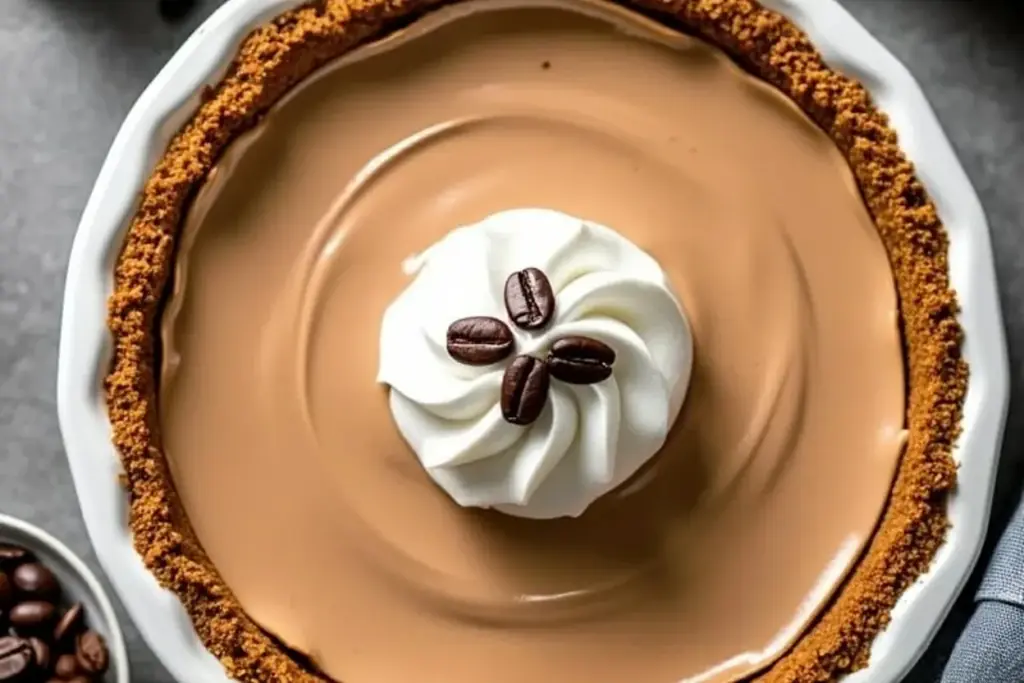
Easy Coffee Pie Recipe No-Bake Dessert for Coffee Lovers
A creamy, bold coffee-flavored no-bake pie that’s perfect for coffee enthusiasts looking for a quick and decadent dessert.
- Total Time: 4 hours 15 minutes
- Yield: 8 servings 1x
Ingredients
- 2 tablespoons (10g) instant coffee or espresso powder
- 2 tablespoons (30ml) hot water
- 1 cup (240ml) heavy whipping cream, chilled
- 1 can (14oz or 396g) sweetened condensed milk
- 1 teaspoon (5ml) vanilla extract
- 1 chocolate cookie crust (store-bought or homemade)
- Optional toppings: whipped cream, chocolate shavings, cocoa powder
Instructions
- Dissolve 2 tablespoons (10g) of instant coffee or espresso powder in 2 tablespoons (30ml) of hot water. Let it cool completely.
- In a chilled bowl, whip 1 cup (240ml) of heavy cream until stiff peaks form. Set aside in the refrigerator.
- In another bowl, combine 1 can (14oz or 396g) of sweetened condensed milk, the cooled coffee mixture, and 1 teaspoon (5ml) of vanilla extract. Stir until smooth.
- Gently fold the whipped cream into the coffee mixture using a rubber spatula. Take your time to avoid deflating the cream.
- Pour the filling into your prepared chocolate cookie crust. Smooth the top with the spatula.
- Refrigerate the pie for at least 4 hours, or until set. Overnight chilling is even better for a firm texture and enhanced flavor.
- Before serving, add your favorite toppings, like a dollop of whipped cream, chocolate shavings, or a dusting of cocoa powder.
Notes
Chill the pie overnight for the best texture and flavor. Decorate just before serving for a fresh look.
- Prep Time: 15 minutes
- Cook Time: 0 minutes
- Category: Dessert
- Cuisine: American
Nutrition
- Serving Size: 1 slice
- Calories: 280
- Sugar: 25
- Sodium: 80
- Fat: 15
- Saturated Fat: 9
- Carbohydrates: 30
- Protein: 4
Keywords: coffee pie, no-bake dessert, coffee lovers, easy dessert, icebox pie


