
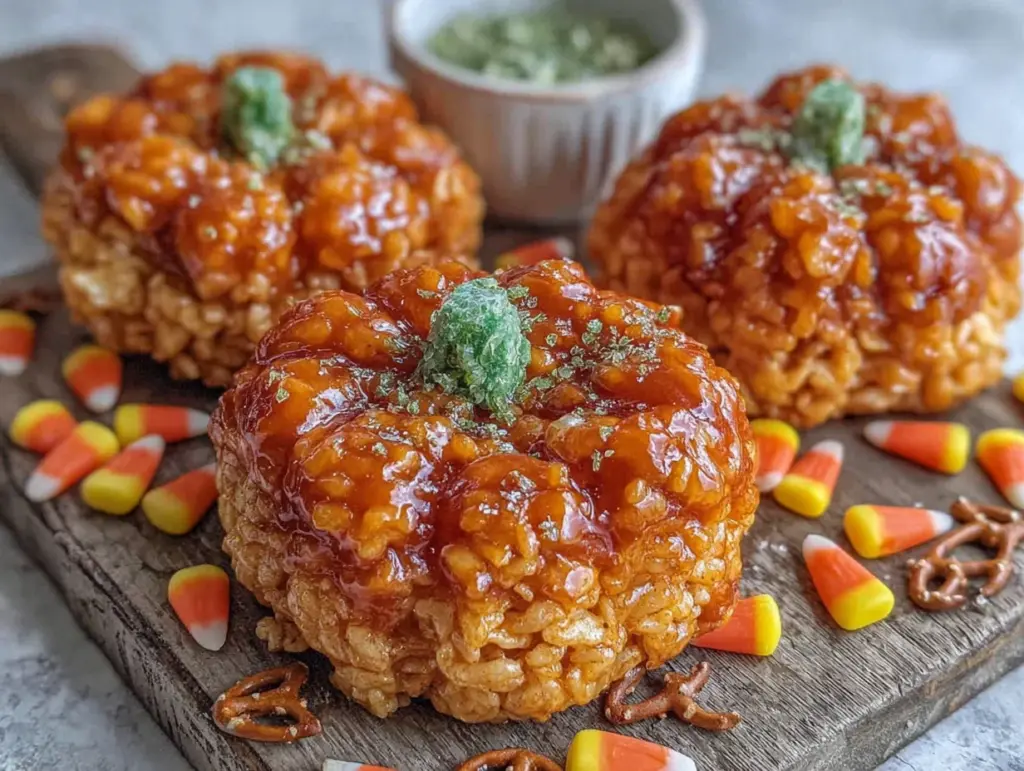
I figured making Halloween treats with my three-year-old would be a cute, manageable activity. It took about four minutes for that assumption to be covered in a fine layer of orange buttercream. We had a vision: perfectly sculpted little pumpkins with green pretzel stems, the kind you see on fancy bakery Instagram pages. What we actually ended up with was a sticky, lopsided, but undeniably charming pile of orange blobs that my daughter proudly called her “punkin patch.” And honestly? She was right. They were perfect.
That first batch taught me something crucial about holiday baking with kids. It is not about perfection. It is about the process—the way melted marshmallow stretches like taffy, the smell of butter and vanilla filling the kitchen, and the triumphant look on a little face holding up a creation that looks nothing like a pumpkin but absolutely is one. These Easy Halloween Rice Krispie Treat Pumpkins became our official October tradition that year. No fancy tools, no complicated steps, just a 15-minute recipe that delivers maximum joy with minimum stress.
These are not bakery-window pumpkins. They are better. They are the ones you make while listening to spooky playlists, the ones that get gobbled up at classroom parties before the cupcakes even come out. The marshmallow base stays soft and chewy, the orange coating adds a sweet crunch, and that little pretzel stem on top? It gives just the right salty balance. If you have ever stared at complicated Halloween dessert tutorials and felt your blood pressure rise, this recipe is for you.
Why You Will Love This Recipe
Let me tell you why these little pumpkins have earned a permanent spot in our Halloween rotation. I have tested this recipe at least a dozen times—through sticky toddler hands, humid October afternoons, and one memorable incident involving a curious golden retriever. Every single time, they come out perfect. Well, perfect in the way homemade things are perfect.
- Quick & Easy: From start to finish, you are looking at about 15 minutes of active work. The hardest part is waiting for the marshmallows to melt, and that takes maybe three minutes. This is the kind of recipe you can make after work, before the school party, or when the kids suddenly announce they need treats for tomorrow morning.
- Simple Ingredients: You probably have almost everything already. Rice Krispies cereal, marshmallows, butter, orange candy melts, and mini pretzel sticks. No exotic shopping trips required. No hunting down specialty sprinkles at three different stores.
- Perfect for Halloween: Whether it is a classroom celebration, a trunk-or-treat event, or just a cozy night watching Hocus Pocus, these pumpkins fit the occasion. They are portable, mess-free once set, and universally loved by kids and adults alike.
- Crowd-Pleaser: I brought these to a neighborhood potluck last year, and they disappeared faster than the store-bought cookies. There is something about the combination of crispy, chewy, and sweet that hits every single craving.
- Unbelievably Delicious: The texture is next-level. The marshmallow base stays perfectly soft, the orange candy coating adds a satisfying snap when you bite in, and the salty pretzel stem ties it all together. It is comfort food dressed up in a Halloween costume.
What makes this recipe different from every other pumpkin treat out there? It is the ratio. I spent three batches tweaking the marshmallow-to-butter balance until the treats held their shape without turning into concrete blocks. These stay soft for days, which is rare for homemade Rice Krispie treats. Plus, the orange candy coating is thin enough that it does not overwhelm the marshmallow flavor. You taste the classic treat first, with a hint of vanilla sweetness on top.
Honestly, this recipe is the kind that makes you close your eyes after the first bite. It is childhood nostalgia reimagined—faster, simpler, but with the same soul-soothing satisfaction. Perfect for impressing other parents without stress, or turning a regular Tuesday into something memorable.
What Ingredients You Will Need
This recipe uses simple, pantry-friendly ingredients to deliver that classic Rice Krispie treat texture with a festive Halloween twist. Most of these are probably sitting in your kitchen right now, which is exactly how I like my recipes.
For the Rice Krispie Treat Base
- 3 tablespoons unsalted butter (I use salted in a pinch, just skip the extra salt. Kerrygold gives the richest flavor, honestly.)
- 1 package (10 oz) marshmallows (Standard size, not mini. Jet-Puffed works great, but store brands are fine too. Fresh marshmallows melt smoother than stale ones.)
- 6 cups Rice Krispies cereal (Generic crispy rice cereal works fine, but the name brand holds its crunch a bit longer. Measure loosely, not packed down.)
- 1/4 teaspoon vanilla extract (Pure vanilla, not imitation. It makes a subtle but noticeable difference in the overall flavor.)
- Pinch of salt (Optional but recommended. It balances the sweetness perfectly.)
For the Pumpkin Coating
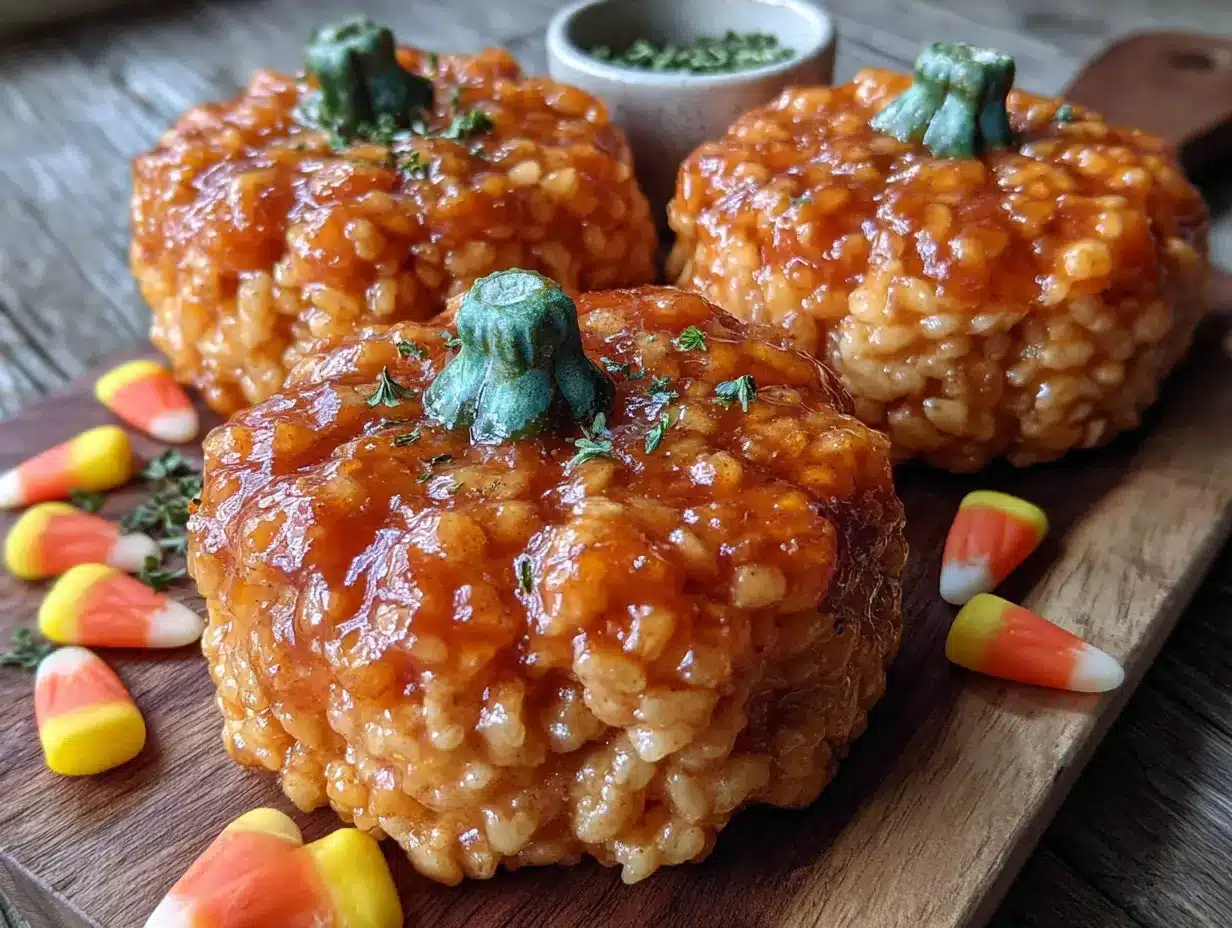
- 1 cup orange candy melts (Wilton brand melts smoothly, but any brand works. You can also use white chocolate chips with orange food coloring, though the texture is slightly different.)
- 1 tablespoon coconut oil or shortening (This thins the coating so it dips smoothly. Coconut oil adds a faint tropical note, shortening keeps it neutral.)
- Mini pretzel sticks (One per pumpkin. The salted kind gives that sweet-salty contrast. Break them in half if they are too long.)
- Green sprinkles or green candy melts (Optional for the stem. I use green sanding sugar for a little sparkle, but a dab of green candy melt works too.)
Ingredient Selection Tips
Fresh marshmallows are non-negotiable here. If your marshmallows have been sitting in the pantry for months, they will not melt as smoothly, and your treats will turn out grainy and stiff. Same goes for the cereal—check the expiration date. Stale cereal gets soft and loses that signature crunch.
For the candy melts, I recommend Wilton brand for consistent melting. Some off-brand melts seize up or turn clumpy. If you are using white chocolate chips instead, add a teaspoon of vegetable oil to help them melt smoothly. And please, please use real butter. Margarine has a higher water content that makes the treats soggy. I learned that one the hard way.
Substitution Guidance
Need a gluten-free version? Rice Krispies are made with malt flavoring, which contains gluten. Look for certified gluten-free crispy rice cereal—there are several brands out there now. For a dairy-free option, use vegan butter and dairy-free marshmallows (Dandies brand works beautifully). The candy melts are usually dairy-free, but double-check the label.
If you want to skip the candy coating entirely, you can shape the treats into balls and roll them in orange sanding sugar or crushed freeze-dried strawberries mixed with a little yellow food coloring. It gives a different texture but the same festive look.
Equipment Needed
You do not need fancy equipment for these pumpkins, which is honestly my favorite part. Here is what you will need:
- Large microwave-safe bowl (Glass or ceramic works best. Plastic can warp with hot marshmallow.)
- Rubber spatula (Silicone is ideal—it handles the sticky marshmallow without fighting you.)
- 9×13 inch baking dish (For pressing the treats flat. You can use an 8×8 dish for thicker treats, but adjust the pressing time.)
- Parchment paper or wax paper (Absolutely essential. Without it, you will be scraping marshmallow off everything for days.)
- Round cookie cutter (2-3 inches) (A biscuit cutter works too. No cutter? A clean tuna can works in a pinch.)
- Microwave or stovetop (I use the microwave for speed, but a saucepan on low heat works just as well.)
- Small microwave-safe bowl (For melting the candy coating.)
- Fork or dipping tool (For coating the pumpkins. A skewer works too.)
- Baking sheet lined with parchment (For setting the coated pumpkins.)
If you do not have a round cookie cutter, do not panic. I have used the rim of a drinking glass, a Mason jar lid, and even a plastic cup with the bottom cut out. The pumpkins do not need to be perfectly round—honestly, the slightly imperfect ones look more like real pumpkins anyway. Also, keep a bowl of warm water nearby for sticky fingers. It saves so much cleanup time.
Preparation Method
Alright, let us make some pumpkins. This whole process takes about 15 minutes of active work, plus 30 minutes for the treats to set. I recommend clearing your counter and having everything measured before you start. Hot marshmallow waits for no one.
Step 1: Make the Rice Krispie Treat Base
Grease your 9×13 baking dish lightly with butter or nonstick spray. Line it with parchment paper, leaving some overhang on the sides. This makes lifting the treats out later so much easier. In a large microwave-safe bowl, melt the 3 tablespoons of butter in the microwave for about 30 seconds. Add the entire bag of marshmallows and stir to coat them in the butter. Microwave in 30-second intervals, stirring between each, until the marshmallows are completely melted and smooth. This usually takes about 2 minutes total. Stir in the vanilla extract and pinch of salt.
Working quickly now, pour the 6 cups of Rice Krispies cereal into the bowl. Fold everything together with your rubber spatula until every piece of cereal is coated. Do not overmix—you want the marshmallow distributed evenly, but stirring too much makes the treats dense. Press the mixture firmly into your prepared dish. I use a second piece of parchment paper on top and press down with my hands. It keeps your fingers clean and gives you even pressure.
Step 2: Let the Treats Set
Let the treats cool at room temperature for about 30 minutes. Do not rush this step. If you try to cut them while they are still warm, they will fall apart. They should feel firm to the touch but not hard. If you are in a hurry, pop the dish in the refrigerator for 15 minutes, but keep an eye on them—they can get too hard if left too long.
Step 3: Cut Out Pumpkin Shapes
Once the treats are set, lift them out of the dish using the parchment overhang. Place them on a cutting board. Use your round cookie cutter to press out circles. Press straight down without twisting—twisting creates ragged edges. If the cutter sticks, dip it in warm water between cuts. You should get about 12 to 15 circles, depending on the size of your cutter. Collect the scraps and press them together to make a few more. They will not be perfectly round, but that is fine.
Step 4: Melt the Orange Coating
Place the orange candy melts and coconut oil in a small microwave-safe bowl. Microwave in 30-second intervals, stirring after each, until completely smooth. The coconut oil helps thin the coating so it dips smoothly. If the mixture seems too thick, add another teaspoon of oil. If it is too thin, let it sit for a minute to thicken up.
Step 5: Dip the Pumpkins
Line a baking sheet with parchment paper. Using a fork or dipping tool, carefully lower each Rice Krispie circle into the melted orange coating. Turn it to coat all sides, then lift it out and let the excess drip off. Gently slide the coated pumpkin onto the parchment paper. Work in batches of three or four so the coating does not harden in the bowl. If the coating starts to thicken, pop it back in the microwave for 10 seconds.
Step 6: Add the Stems
While the coating is still wet, press a mini pretzel stick into the top center of each pumpkin for the stem. If you want green leaves, add a small dab of green candy melt or sprinkle green sanding sugar next to the stem. Let the pumpkins set completely at room temperature. This takes about 15 to 20 minutes. If you are impatient (like me), stick them in the refrigerator for 10 minutes.
Sensory cue: When the coating is set, it should look glossy and feel firm to the touch. If you press gently, your finger should not leave a mark. The pretzel stem should be securely attached. If it wiggles, you did not coat it enough—dip the base of the pretzel in leftover coating and reattach.
Cooking Tips & Techniques
I have made these pumpkins enough times to have a graveyard of mistakes. Let me save you from repeating them.
Do not overheat the marshmallows. This is the number one mistake. If you microwave them too long, they turn into hard, chewy caramel that is impossible to stir. Stop at the 2-minute mark even if there are a few unmelted lumps. The residual heat will finish the job as you stir. Trust me on this—I once nuked a batch for 3 minutes and ended up with something that could have patched a tire.
Use wet hands for pressing. Dip your hands in warm water before pressing the mixture into the dish. The marshmallow will not stick to wet hands. Keep a bowl of water nearby and re-wet your hands between presses. This trick changed my Rice Krispie treat game entirely.
Work fast with the coating. Orange candy melts cool quickly. If you are making a large batch, melt the coating in two smaller batches rather than one big one. Keep the bowl on a warm mug of hot water to maintain temperature. Also, tap the fork gently against the bowl edge to remove excess coating—too much coating makes the pumpkins look lumpy.
Cut shapes while slightly warm. If your treats are too cold, the cookie cutter will crush them instead of cutting cleanly. Let them sit at room temperature for exactly 30 minutes, then cut immediately. If they have been in the fridge, let them sit out for 10 minutes before cutting.
Make extra for snacking. The scraps from cutting the circles are delicious. Do not throw them away. My kids fight over the “pumpkin scraps” more than the actual pumpkins. Roll the scraps into balls and dip them in leftover coating for bonus treats.
Variations & Adaptations
One of the best things about this recipe is how easily it adapts. Here are some variations I have tried and loved:
Chocolate Pumpkin Treats
Melt semi-sweet chocolate chips instead of orange candy melts for a chocolate pumpkin version. Add a drizzle of white chocolate on top for contrast. The chocolate version is richer and feels more decadent. I made these for a Halloween movie night, and they paired beautifully with hot cocoa.
Peanut Butter Pumpkin Treats
Stir 1/4 cup of creamy peanut butter into the marshmallow mixture along with the vanilla. The peanut butter adds protein and a savory note that balances the sweetness. Use chocolate candy melts for a peanut butter cup vibe. Just be aware of nut allergies if you are bringing these to a school event.
Vegan Pumpkin Treats
Use vegan marshmallows (Dandies brand is my go-to), vegan butter, and dairy-free crispy rice cereal. For the coating, use vegan white chocolate or simply roll the treats in orange sanding sugar. The texture is slightly different—vegan marshmallows are a bit denser—but the flavor is spot on.
Spider Web Design
Instead of coating the entire pumpkin, leave them plain and drizzle white candy melts in a spider web pattern on top. Add a small plastic spider for a creepy touch. This is easier than full dipping and looks impressive with minimal effort.
Mini Pumpkin Bites
Use a smaller cookie cutter (1.5 inches) to make bite-sized pumpkins. These are perfect for party platters or lunchbox surprises. The dipping process is faster since they are smaller, and kids love the mini size.
Serving & Storage Suggestions
These pumpkins are best served at room temperature. The coating stays firm, and the Rice Krispie base stays perfectly chewy. If you serve them straight from the refrigerator, the coating will be hard and the base will be stiff. Let them sit out for 10 minutes before serving.
Presentation idea: Arrange the pumpkins on a platter lined with green tissue paper or fake fall leaves. Stack them in a little pyramid for a centerpiece that doubles as dessert. Add a few candy corn scattered around for color. For a classroom party, place each pumpkin in a mini cupcake liner—it makes them easy to grab and reduces mess.
Storage: Store the pumpkins in an airtight container at room temperature for up to 5 days. Layer them with parchment paper between each layer to prevent sticking. Do not refrigerate them—the cold dries out the marshmallow and makes the treats hard. If you live in a humid climate, add a silica gel packet to the container to keep the coating from getting sticky.
Freezer instructions: These freeze beautifully for up to 2 months. Place the pumpkins in a single layer on a baking sheet and freeze until solid (about 1 hour). Transfer to a freezer-safe bag or container with parchment between layers. To thaw, let them sit at room temperature for about 30 minutes. The coating might develop a slight bloom (white streaks), but the flavor is unaffected.
Reheating tip: If your treats have been stored for a few days and seem a bit firm, microwave them for 5 to 8 seconds. This softens the marshmallow base without melting the coating. It is like magic.
Nutritional Information & Benefits
Let us be real—these are a treat, not a health food. But here is the estimated nutritional breakdown per pumpkin (based on 12 servings):
- Calories: 185
- Total Fat: 7g
- Saturated Fat: 4g
- Carbohydrates: 30g
- Sugar: 18g
- Protein: 2g
- Sodium: 115mg
The good news? Rice Krispies are fortified with iron and B vitamins, so there is a tiny nutritional silver lining. Marshmallows are mostly air and sugar, but they do provide quick energy for running around the neighborhood on Halloween night. The coconut oil in the coating contains medium-chain triglycerides, which some studies suggest may support metabolism. But honestly, I am not here to sell you on health benefits. These are about joy, tradition, and the simple pleasure of making something with your hands.
Dietary considerations: This recipe contains gluten (from the Rice Krispies) and dairy (from the butter and candy melts). For gluten-free, use certified gluten-free crispy rice cereal. For dairy-free, use vegan butter and dairy-free marshmallows. The candy coating is typically dairy-free, but always check the label. These are not suitable for nut-free environments unless you skip the peanut butter variation.
Conclusion
These Easy Halloween Rice Krispie Treat Pumpkins have become more than just a recipe in our house. They are the thing we look forward to every October. The sticky fingers, the lopsided shapes, the proud little faces holding up their creations—that is what Halloween is really about. Not perfection, but presence. Not fancy decorations, but the smell of marshmallow and butter filling the kitchen while spooky music plays in the background.
I hope you make these with your kids, your friends, or just for yourself on a quiet October evening. Customize them however you like—add sprinkles, skip the coating, use different shapes. The recipe is flexible, forgiving, and reliably delicious. That is the kind of recipe I love sharing.
If you try these pumpkins, I would love to hear about it. Drop a comment below and tell me how they turned out. Did your kids help? Did you invent a new variation? Did you eat three before they made it to the party platter? No judgment here. And if you snap a photo, tag me on social media—I love seeing your creations. Happy Halloween, friends. Go make something sticky and wonderful.
Frequently Asked Questions
Can I use homemade marshmallows for this recipe?
You can, but I do not recommend it. Homemade marshmallows have a different moisture content and will make the treats too soft. Stick with store-bought for the best texture. Trust me, I tried the homemade route once, and the results were a sticky disaster.
Why did my candy coating crack after setting?
This usually happens if the coating was too thick or if the treats were too cold when you dipped them. Make sure the Rice Krispie treats are at room temperature before dipping. Also, add a little extra coconut oil to thin the coating—it makes the coating more flexible and less prone to cracking.
Can I make these ahead of time for a party?
Absolutely. You can make the Rice Krispie treat base up to 2 days ahead and store it in an airtight container. Cut and dip the pumpkins the day before your event. They stay fresh at room temperature for up to 5 days, so you have plenty of time to prepare.
How do I get the orange color without candy melts?
If you do not have orange candy melts, melt white chocolate chips with a few drops of orange gel food coloring. Add a teaspoon of coconut oil to keep the mixture smooth. Start with one drop of color and add more until you reach your desired shade. Gel food coloring works better than liquid because it does not thin the chocolate.
My pretzel stems keep falling off. What am I doing wrong?
Make sure you press the pretzel into the coating while it is still wet. If the coating has started to set, the pretzel will not stick. Also, dip the tip of the pretzel in the coating before placing it on the pumpkin—this creates a stronger bond. If all else fails, use a tiny dab of melted candy coating as glue.
Pin This Recipe!
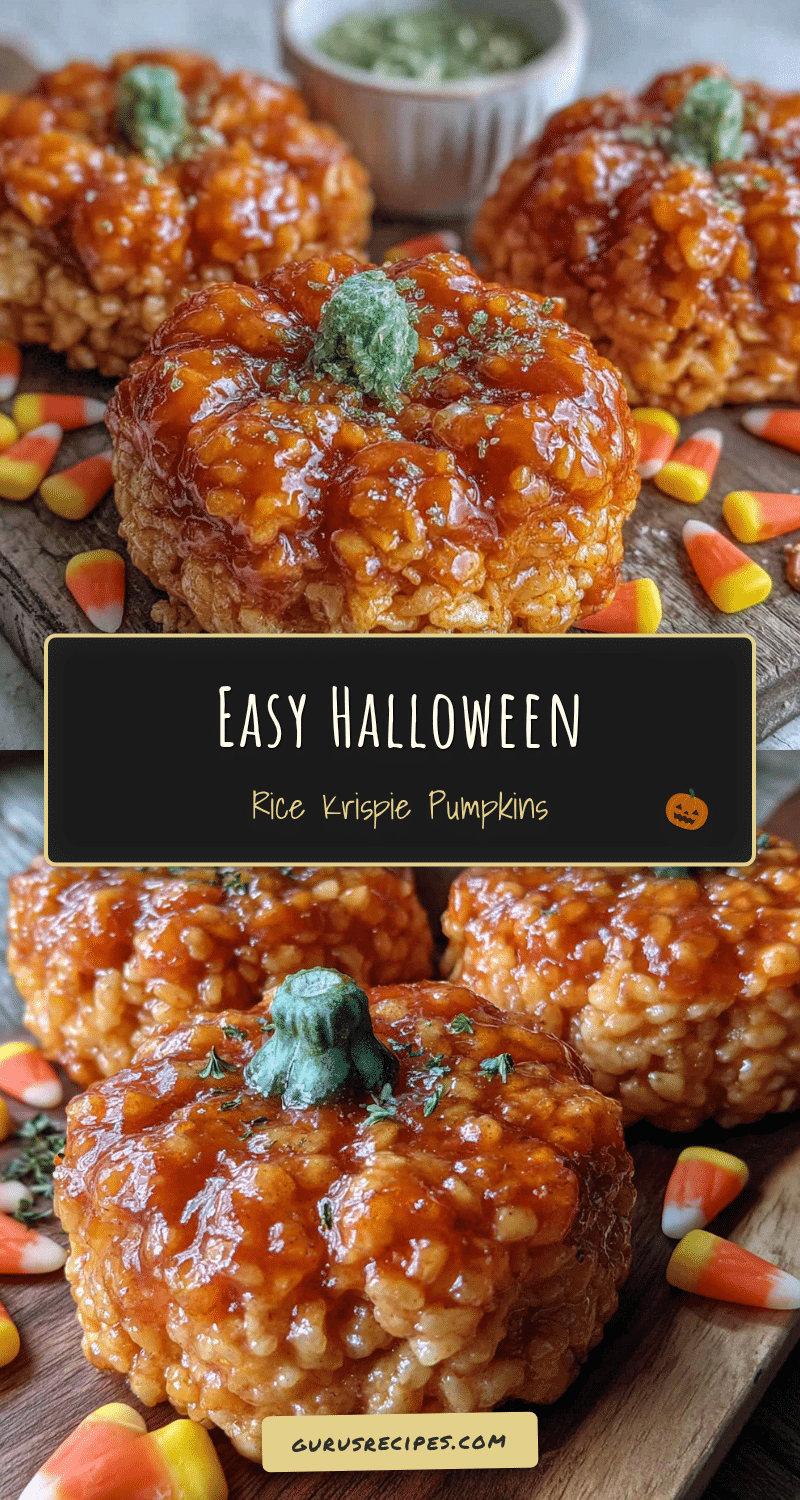

Easy Halloween Rice Krispie Treat Pumpkins: Best 15-Minute Recipe
These Easy Halloween Rice Krispie Treat Pumpkins are a quick, 15-minute recipe that delivers maximum joy with minimum stress. Perfect for Halloween parties, classroom celebrations, or a cozy night in, these soft and chewy treats are coated in orange candy melts with a salty pretzel stem.
- Total Time: 45 minutes
- Yield: 12 servings 1x
Ingredients
- 3 tablespoons unsalted butter
- 1 package (10 oz) marshmallows
- 6 cups Rice Krispies cereal
- 1/4 teaspoon vanilla extract
- Pinch of salt
- 1 cup orange candy melts
- 1 tablespoon coconut oil or shortening
- Mini pretzel sticks
- Green sprinkles or green candy melts (optional)
Instructions
- Grease a 9×13 inch baking dish lightly with butter or nonstick spray. Line with parchment paper, leaving overhang on the sides.
- In a large microwave-safe bowl, melt the butter in the microwave for about 30 seconds. Add the marshmallows and stir to coat. Microwave in 30-second intervals, stirring between each, until completely melted and smooth (about 2 minutes total). Stir in vanilla extract and salt.
- Pour the Rice Krispies cereal into the bowl and fold together with a rubber spatula until every piece is coated. Do not overmix.
- Press the mixture firmly into the prepared dish using a second piece of parchment paper on top to keep your hands clean. Let cool at room temperature for 30 minutes (or refrigerate for 15 minutes if in a hurry).
- Lift the treats out of the dish using the parchment overhang. Place on a cutting board and use a round cookie cutter (2-3 inches) to press out circles. Press straight down without twisting. You should get about 12 to 15 circles.
- Place the orange candy melts and coconut oil in a small microwave-safe bowl. Microwave in 30-second intervals, stirring after each, until completely smooth.
- Line a baking sheet with parchment paper. Using a fork or dipping tool, dip each Rice Krispie circle into the melted coating, turning to coat all sides. Lift out, let excess drip off, and place on the parchment paper.
- While the coating is still wet, press a mini pretzel stick into the top center of each pumpkin for the stem. Add green sprinkles or a dab of green candy melt for leaves if desired.
- Let the pumpkins set completely at room temperature for 15-20 minutes (or refrigerate for 10 minutes). Store in an airtight container at room temperature for up to 5 days.
Notes
Do not overheat the marshmallows; stop at 2 minutes even if a few lumps remain. Use wet hands for pressing the mixture to prevent sticking. Work fast with the coating as it cools quickly. Cut shapes while slightly warm for clean edges. Scraps can be rolled into balls and dipped for bonus treats.
- Prep Time: 15 minutes
- Cook Time: 2 minutes
- Category: Dessert
- Cuisine: American
Nutrition
- Serving Size: 1 pumpkin
- Calories: 185
- Sugar: 18
- Sodium: 115
- Fat: 7
- Saturated Fat: 4
- Carbohydrates: 30
- Protein: 2
Keywords: Halloween treats, Rice Krispie treats, pumpkin treats, easy Halloween recipe, 15-minute recipe, no-bake dessert, kid-friendly Halloween


