

My seven-year-old, Lily, asked why I couldn’t just skip the flipping. I was mid-sentence, explaining the science of even browning and the importance of rendering fat, when she interrupted with a shrug. “Just leave them in there and shake the basket halfway. That’s what my friend’s mom does.” I started to explain why that wouldn’t work—then stopped. Honestly, I had never tried it. I had been so locked into the “flip every six minutes” method I learned from a cooking class that I forgot to question it. That night, with a little skepticism and a whole lot of curiosity, I let her be the boss. The result? The crispiest, juiciest, most kid-approved crispy air fryer chicken thighs I had ever made. No flipping. No fuss. Just perfect chicken that had my husband asking what I did differently. I had to admit it was Lily’s idea. Maybe you’ve been there—so sure of your method that you miss a simpler, better one. This recipe is that lesson for me, and I keep making it because it proves that sometimes the best teacher is the one you’re trying to teach.
Why You’ll Love This Recipe
Let me tell you, these crispy air fryer chicken thighs have become a weekly staple in our house, and for good reason. I’ve tested this method about a dozen times now, tweaking the temperature and timing until it was absolutely foolproof. What I love most is that it uses ingredients I always have on hand, and it turns out perfect every single time—no fancy equipment or chef skills required.
- Budget-Friendly: Chicken thighs are one of the most affordable cuts of meat, and this recipe stretches your dollar without sacrificing flavor. You can often find a family pack for under $10.
- Quick & Easy: From prep to plate in under 30 minutes. The air fryer does all the heavy lifting, which means less time in the kitchen and more time at the table.
- Simple Ingredients: You probably have everything in your pantry right now. No weird spices or hard-to-find items—just basic seasonings that pack a punch.
- Crowd-Pleaser: My kids gobble these up, and I’ve served them to picky adult guests who asked for the recipe. The crispy skin is universally loved.
- Unbelievably Delicious: The secret is in the technique—a light coating of baking powder helps the skin get that shatteringly crispy texture without deep frying. It’s comfort food made healthier and faster.
This isn’t just another chicken recipe. It’s the one that makes you close your eyes after the first bite because the skin is that perfect. It’s the kind of meal that turns a regular Tuesday into something special, without any stress or complicated steps.
What Ingredients You Will Need
This recipe uses simple, everyday ingredients to create something truly special. The magic is in how they work together—the salt draws out moisture, the baking powder helps create that crispy crust, and the spices add layers of flavor without overpowering the chicken.
For the Chicken
- 4 bone-in, skin-on chicken thighs (about 1.5 lbs total) — Look for thighs that are similar in size so they cook evenly. I prefer bone-in for extra juiciness and flavor.
- 1 teaspoon kosher salt — Use kosher salt for better adherence and flavor distribution. Table salt is too fine and can make the chicken salty.
- 1/2 teaspoon black pepper, freshly ground — Freshly ground pepper has more aroma and a brighter flavor.
- 1 teaspoon garlic powder — Not garlic salt! Garlic powder gives that savory depth without extra sodium.
- 1 teaspoon onion powder — Adds a subtle sweetness that kids love.
- 1/2 teaspoon smoked paprika — This is optional but adds a beautiful color and a hint of smokiness. Regular paprika works too.
- 1 teaspoon baking powder — This is the secret ingredient! It raises the skin’s pH, helping it brown and crisp faster. Make sure it’s aluminum-free to avoid a metallic taste.
- 1 tablespoon olive oil or avocado oil — Just enough to help the seasoning stick. Don’t use too much or the skin won’t get crispy.
Optional for Serving

- Fresh parsley or chives, chopped — A sprinkle of green makes it look restaurant-worthy.
- Lemon wedges — A squeeze of lemon brightens up the rich flavor.
- Your favorite dipping sauce — Honey mustard, ranch, or BBQ sauce are all great options.
I personally recommend McCormick spices for consistent quality, but any brand works. For the baking powder, Rumford is my go-to because it’s aluminum-free. If you’re watching your sodium, you can reduce the salt to 3/4 teaspoon, but don’t skip the baking powder—it’s what makes these crispy air fryer chicken thighs so special.
Equipment Needed
You don’t need a lot of fancy tools for this recipe, which is part of why I love it. Here’s what you’ll need:
- Air fryer — Any size works, but a 5.8-quart or larger basket-style air fryer is ideal for fitting 4 thighs without crowding. I use a Cosori Pro II and it works perfectly.
- Paper towels — For patting the chicken dry. This step is crucial for crispy skin.
- Mixing bowl — Medium-sized, for tossing the chicken with seasonings.
- Tongs — For handling the hot chicken safely.
- Instant-read thermometer — This is non-negotiable for perfectly cooked chicken. I’ve used a ThermoPro for years and it’s never let me down.
- Cutting board and knife — For optional garnishes.
If you don’t have an air fryer, you can use a convection oven set to 400°F, but the cooking time will be longer (about 25-30 minutes) and the skin won’t be quite as crispy. A regular oven works too, but you’ll need to flip the thighs halfway through. Honestly, the air fryer is worth the investment for recipes like this one.
Preparation Method
This method is simple, but each step matters. Here’s how to get perfect crispy air fryer chicken thighs every time.
- Pat the chicken dry. Start by removing the chicken thighs from the package and patting them very dry with paper towels. This is the most important step for crispy skin. Don’t skip it! Any moisture on the surface will steam instead of crisp. I usually use about 3-4 paper towels per batch.
- Season the chicken. In a medium bowl, combine the kosher salt, black pepper, garlic powder, onion powder, smoked paprika, and baking powder. Mix well with a fork. Drizzle the olive oil over the chicken thighs, then sprinkle the seasoning mixture over them. Use your hands (or tongs) to toss everything together until each thigh is evenly coated. Don’t be shy—get the seasoning under the skin too if you can.
- Preheat the air fryer. Set your air fryer to 380°F (193°C) and let it preheat for 3-5 minutes. Preheating ensures the chicken starts cooking immediately, which helps the skin crisp up faster.
- Arrange the thighs. Place the seasoned chicken thighs in the air fryer basket, skin side up. Make sure they are in a single layer with a little space between each piece. Crowding the basket will trap steam and prevent crisping. If your air fryer is small, cook them in two batches.
- Cook without flipping. Here’s where Lily’s advice comes in. Cook the chicken thighs at 380°F for 18-20 minutes. About halfway through (at the 10-minute mark), give the basket a good shake or use tongs to gently rearrange the thighs. This ensures even cooking without needing to flip each piece individually. The skin will turn a beautiful golden brown.
- Check the temperature. After 18 minutes, use an instant-read thermometer to check the internal temperature of the thickest part of a thigh (avoiding the bone). You’re looking for 165°F (74°C). If it’s not there yet, cook for another 2-3 minutes and check again. I usually find 20 minutes is perfect for my air fryer.
- Rest before serving. Once the chicken reaches 165°F, remove it from the air fryer and let it rest on a cutting board or plate for 5 minutes. This allows the juices to redistribute, making the meat extra tender and juicy. Don’t skip this step!
- Garnish and serve. Sprinkle with fresh parsley or chives if you like, and serve with lemon wedges and your favorite dipping sauce. The skin should be shatteringly crispy, and the meat should be moist and flavorful.
Pro tip: If you want extra crispy skin, after the chicken reaches 165°F, increase the air fryer temperature to 400°F and cook for another 2 minutes. Watch carefully so it doesn’t burn!
Cooking Tips & Techniques
After making these crispy air fryer chicken thighs more times than I can count, I’ve learned a few things the hard way. Here are my best tips to help you avoid my mistakes.
Don’t overcrowd the basket. I made this mistake the first time I tried air fryer chicken. I crammed six thighs into a small basket, and they came out steamed instead of crispy. The air fryer needs hot air to circulate around each piece of chicken. Leave at least half an inch of space between each thigh. If you have to cook in batches, that’s totally fine—the first batch will stay warm in a 200°F oven while you finish the rest.
Pat, pat, pat. I cannot stress this enough. Wet skin equals soggy skin. Use paper towels and really press them into the skin to absorb as much moisture as possible. I even let the chicken sit on a paper towel-lined plate for 10 minutes after patting to air-dry a little more. This extra step makes a noticeable difference.
Use aluminum-free baking powder. Regular baking powder can leave a metallic aftertaste on the chicken. Check the label and look for one that says “aluminum-free.” I use Rumford or Bob’s Red Mill. If you don’t have baking powder, you can skip it, but the skin won’t be as crispy.
Let the chicken come to room temperature. If you have time, take the chicken out of the fridge 15-20 minutes before cooking. Cold chicken takes longer to cook, and the skin might over-brown before the inside is done. Room temperature chicken cooks more evenly.
Don’t flip. Remember Lily’s advice? It works. Leaving the chicken skin-side up for the entire cook time allows the fat to render and the skin to get super crispy. Shaking the basket halfway through is enough to ensure even cooking.
Use a thermometer. I ruined a batch of chicken by guessing the doneness. The outside looked perfect, but the inside was undercooked. An instant-read thermometer takes the guesswork out. It’s a small investment that pays off in perfectly cooked chicken every time.
Variations & Adaptations
One of the best things about this recipe is how easy it is to adapt. Here are some of my favorite variations.
Spicy Honey Garlic: After the chicken is cooked, toss it in a mixture of 2 tablespoons honey, 1 tablespoon soy sauce, and 1 teaspoon sriracha. Return to the air fryer for 2 minutes at 380°F. The sweet and spicy glaze is incredible. My husband loves this version.
Lemon Herb: Add 1 teaspoon dried thyme and 1 teaspoon dried rosemary to the seasoning mix. Squeeze fresh lemon juice over the cooked chicken before serving. This is my go-to for a lighter, fresher flavor that feels like spring.
BBQ Chicken Thighs: Brush the cooked chicken with your favorite BBQ sauce during the last 3 minutes of cooking. The sauce caramelizes in the air fryer, creating a sticky, sweet crust. Perfect for game day or summer cookouts.
Dairy-Free and Gluten-Free: This recipe is naturally dairy-free and gluten-free as written. Just make sure your baking powder is certified gluten-free if you have celiac disease or a severe sensitivity. Some brands contain wheat starch.
Boneless Thighs: If you prefer boneless, skinless thighs, reduce the cooking time to 12-15 minutes at 380°F. The skin won’t be as crispy since there’s no skin, but they’ll still be juicy and flavorful. I sometimes make these for quick weeknight salads.
My personal favorite variation: I once added a teaspoon of curry powder to the seasoning mix on a whim, and it was amazing. The warm spices paired perfectly with the crispy chicken. My kids were skeptical at first, but they ended up loving it. It’s now our “secret recipe” version.
Serving & Storage Suggestions
These crispy air fryer chicken thighs are incredibly versatile. Here’s how to serve and store them for the best experience.
Serving Temperature: Serve the chicken hot, right after the 5-minute rest. The skin is at its crispiest straight from the air fryer. If you’re serving a crowd, keep the cooked chicken on a wire rack set over a baking sheet in a 200°F oven to maintain crispiness.
What to Serve With: These chicken thighs pair beautifully with simple sides. Try them with mashed potatoes and a green vegetable like steamed broccoli or green beans. For a lighter meal, serve over a bed of mixed greens with a tangy vinaigrette. Rice or quinoa also work well to soak up the juices. My kids love them with mac and cheese and a side of applesauce.
Beverage Pairings: For adults, a crisp white wine like Sauvignon Blanc or a light beer like a pilsner complements the savory flavors. For kids, apple juice or sparkling water with a lemon wedge is perfect.
Storing Leftovers: Store leftover chicken in an airtight container in the refrigerator for up to 4 days. The skin will soften, but the flavor will still be delicious. To reheat, place the chicken back in the air fryer at 350°F for 3-5 minutes until heated through. This helps restore some of the crispiness. You can also reheat in a 375°F oven for 10 minutes. Avoid the microwave—it will make the skin rubbery.
Freezing: Cooked chicken thighs freeze beautifully. Let them cool completely, then wrap each thigh individually in plastic wrap and place in a freezer-safe bag. They’ll keep for up to 3 months. To reheat from frozen, air fry at 350°F for 8-10 minutes, or until warmed through.
How Flavors Develop: The flavors actually deepen after a day in the fridge. I often make a double batch on purpose so we can have leftovers for lunch the next day. The chicken is fantastic cold, sliced over a salad, or shredded into tacos.
Nutritional Information & Benefits
Here’s the approximate nutritional breakdown for one serving (one chicken thigh, cooked with skin):
| Nutrient | Amount per Serving |
|---|---|
| Calories | 280 |
| Protein | 24g |
| Fat | 19g |
| Saturated Fat | 5g |
| Carbohydrates | 1g |
| Fiber | 0g |
| Sugar | 0g |
| Sodium | 550mg |
| Iron | 1mg |
| Calcium | 20mg |
Chicken thighs are a great source of protein, which is essential for muscle growth and repair. They also provide B vitamins, particularly niacin and B6, which support energy metabolism. The skin contains healthy fats that help your body absorb fat-soluble vitamins. This recipe is naturally low in carbs and sugar, making it suitable for low-carb and keto diets. If you’re watching your sodium, you can reduce the salt to 3/4 teaspoon. The baking powder adds a small amount of sodium, but it’s minimal compared to the flavor and texture benefits. I personally love that this recipe feels indulgent but is actually quite balanced—a satisfying meal that doesn’t leave you feeling heavy.
Frequently Asked Questions
Can I use frozen chicken thighs?
Yes, but you’ll need to adjust the cooking time. Thaw the chicken completely in the refrigerator first, then pat it very dry before seasoning. Cooking from frozen will result in unevenly cooked chicken and less crispy skin. If you’re in a hurry, you can thaw them in a bowl of cold water for about 30 minutes, changing the water halfway through.
Why is my chicken skin not crispy?
The most common reason is moisture. Make sure you pat the chicken very dry with paper towels before seasoning. Also, check that your air fryer is preheated and that the thighs aren’t overcrowded in the basket. If the skin still isn’t crispy, try increasing the temperature to 400°F for the last 2-3 minutes of cooking.
Can I use chicken breasts instead of thighs?
Absolutely! Boneless, skinless chicken breasts will work, but they’ll cook faster and won’t be as juicy. Reduce the cooking time to 12-15 minutes at 380°F, and check the internal temperature at 12 minutes. Chicken breasts are done at 165°F. For the best results, pound them to an even thickness first so they cook evenly.
How do I reheat leftovers without losing crispiness?
The air fryer is your best friend here. Reheat the chicken at 350°F for 3-5 minutes. This will restore much of the original crispiness. You can also use a 375°F oven for 10 minutes. Avoid the microwave at all costs—it will make the skin soggy and rubbery.
Can I make this recipe ahead of time?
Yes, but I recommend cooking the chicken fresh for the best texture. If you need to prep ahead, you can season the chicken up to 24 hours in advance and store it in the refrigerator. Let it come to room temperature for 15-20 minutes before air frying. The seasoning will penetrate the meat, making it even more flavorful.
Conclusion
These crispy air fryer chicken thighs have become a staple in my kitchen for good reason. They’re affordable, fast, and incredibly delicious—everything a busy home cook could ask for. The best part is that they’re so simple, yet the results are impressive enough for company. I love that I can customize the seasoning to match whatever I’m craving, and the air fryer does all the hard work. Whether you’re feeding a family on a budget or just want a reliable weeknight dinner, this recipe delivers every time. I hope you give it a try and make it your own. Maybe your kids will have a suggestion that changes everything, like Lily did for me. When you make these, I’d love to hear how they turned out—drop a comment below and let me know your favorite variation. Happy cooking!
Pin This Recipe!
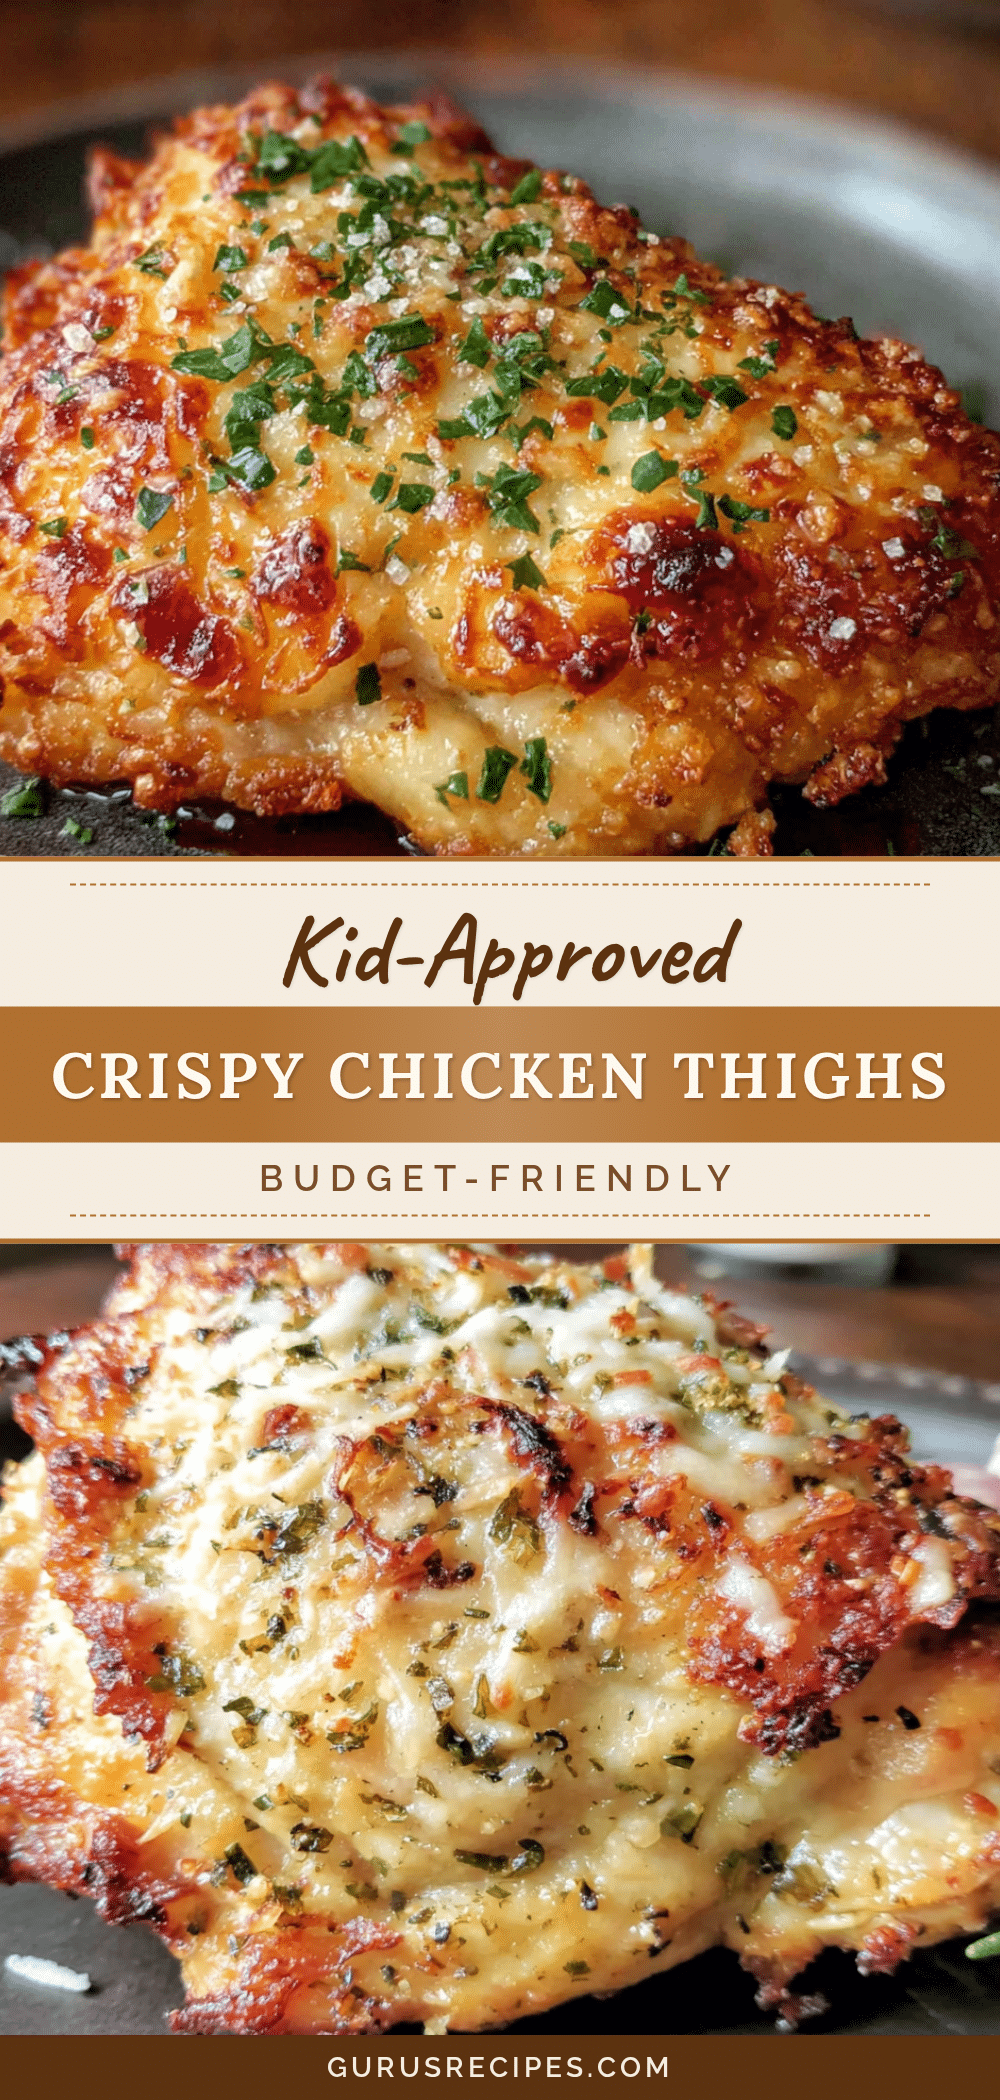

Easy Kid-Approved Crispy Air Fryer Chicken Thighs
These crispy air fryer chicken thighs are budget-friendly, quick, and incredibly delicious. With a simple seasoning blend and a no-flip method, they turn out perfectly crispy and juicy every time.
- Total Time: 30 minutes
- Yield: 4 servings 1x
Ingredients
- 4 bone-in, skin-on chicken thighs (about 1.5 lbs total)
- 1 teaspoon kosher salt
- 1/2 teaspoon black pepper, freshly ground
- 1 teaspoon garlic powder
- 1 teaspoon onion powder
- 1/2 teaspoon smoked paprika (optional)
- 1 teaspoon baking powder (aluminum-free)
- 1 tablespoon olive oil or avocado oil
- Fresh parsley or chives, chopped (optional for serving)
- Lemon wedges (optional for serving)
- Your favorite dipping sauce (optional for serving)
Instructions
- Pat the chicken dry with paper towels. This is crucial for crispy skin.
- In a medium bowl, combine kosher salt, black pepper, garlic powder, onion powder, smoked paprika, and baking powder. Mix well.
- Drizzle olive oil over the chicken thighs, then sprinkle the seasoning mixture over them. Toss until each thigh is evenly coated.
- Preheat the air fryer to 380°F (193°C) for 3-5 minutes.
- Place the seasoned chicken thighs in the air fryer basket, skin side up, in a single layer with space between each piece.
- Cook at 380°F for 18-20 minutes. Halfway through (at 10 minutes), shake the basket or rearrange the thighs gently.
- Check the internal temperature with an instant-read thermometer; it should reach 165°F (74°C) in the thickest part. Cook 2-3 more minutes if needed.
- Remove from the air fryer and let rest for 5 minutes before serving.
- Garnish with fresh parsley or chives, and serve with lemon wedges and dipping sauce if desired.
Notes
For extra crispy skin, after reaching 165°F, increase air fryer temperature to 400°F and cook for 2 more minutes. Use aluminum-free baking powder to avoid metallic taste. Let chicken come to room temperature for 15-20 minutes before cooking for even results.
- Prep Time: 10 minutes
- Cook Time: 20 minutes
- Category: Main Course
- Cuisine: American
Nutrition
- Serving Size: 1 chicken thigh
- Calories: 280
- Sodium: 550
- Fat: 19
- Saturated Fat: 5
- Carbohydrates: 1
- Protein: 24
Keywords: air fryer chicken thighs, crispy chicken thighs, kid-approved, easy chicken recipe, budget-friendly dinner


