
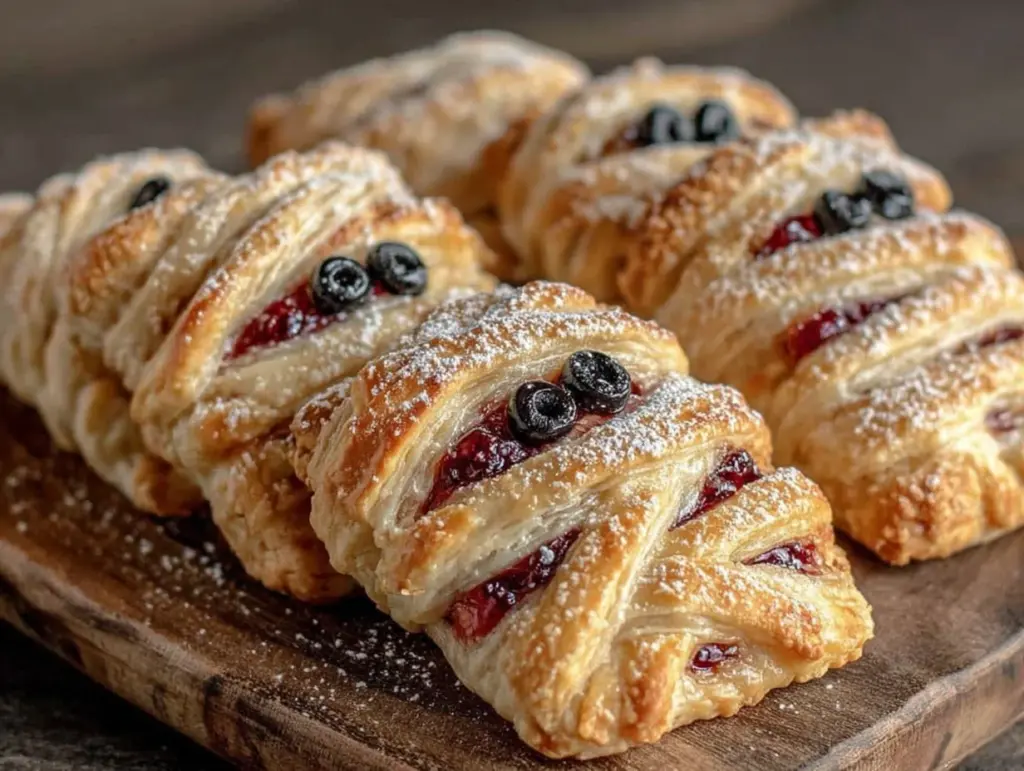
My neighbor’s annual Halloween party is a big deal. Every year, someone shows up with a dessert that looks like it took three days and a pastry degree to make. I, on the other hand, had been looking for a Halloween treat that actually looked impressive without requiring me to wrestle with complicated fondant or a piping bag for hours. I just wanted something that felt festive and fun, but that I could actually pull off on a Thursday night after work. For a while, I just accepted that my contribution would be a bag of store-bought candy, or maybe some cupcakes with a plastic spider stuck on top. It was fine, but it never felt special.
Then, last October, I was staring at a package of refrigerated pie crusts in my grocery cart, and it just clicked. What if I made little hand pies, but wrapped them up like mummies? The idea was so simple it felt like cheating. I grabbed some pre-made pie crust, a can of pumpkin puree (because it was fall, after all), and a bag of candy eyes. The whole thing cost maybe ten bucks. I went home, whipped up a batch, and they were gone in minutes. Honestly, they were the hit of the party. People kept asking if I had made them from scratch, and I just smiled. The best part? They took me about thirty minutes from start to finish. That night, I knew I had found my forever Halloween recipe. It was the perfect mix of spooky, cute, and ridiculously easy.
Why You’ll Love This Recipe
These Easy Mummy Hand Pies for Halloween are the kind of recipe that makes you look like a rockstar with almost zero effort. I have tested this with both homemade and store-bought dough, and let me tell you, the store-bought version is a total lifesaver. This recipe has been family-approved by my picky nephew and party-approved by my most discerning foodie friends. It is the perfect blend of my experience as a home cook who values her time and a baker who loves a good shortcut.
- Quick & Easy : From start to finish, these come together in under 40 minutes. Perfect for a last-minute Halloween party or a fun weeknight activity with the kids.
- Simple Ingredients : You probably have most of these in your kitchen already. No fancy extracts, no specialty flours. Just good, basic baking staples.
- Perfect for Halloween : These are the ultimate spooky snack. They are great for school parties, office potlucks, or just a fun treat to make with the kids before trick-or-treating.
- Crowd-Pleaser : Both kids and adults go crazy for them. The cute mummy design is a total conversation starter, and the flaky, sweet filling is irresistible.
- Unbelievably Delicious : The combination of buttery, flaky crust with a warm, spiced filling is next-level comfort food. It is like a miniature pie you can eat with your hands!
What makes this recipe different from the rest is the texture. By using a simple egg wash and a specific baking temperature, you get a crust that is perfectly golden and shatteringly flaky, not soggy or doughy. Plus, the “mummy” wrapping technique is foolproof. It doesn’t have to be perfect to look amazing. Trust me, the more haphazard the wrapping, the more authentic the mummy looks. This isnt just another hand pie recipe; it is your best version of a Halloween classic.
What Ingredients You Will Need
This recipe relies on simple, wholesome ingredients to create a big impact. The beauty of these Easy Mummy Hand Pies for Halloween is that they are incredibly adaptable. Here is what you will need to get started.
- For the Pie Crust:
- 1 box (14.1 ounces) refrigerated pie crusts (2 crusts). I prefer Pillsbury for consistency, but any brand works. You can also use my recipe for homemade pie dough if you are feeling ambitious, but the store-bought version makes this a true weeknight win.
- For the Filling:
- 1 cup pumpkin puree (not pumpkin pie filling). Make sure you get the 100% pure stuff.
- 1/4 cup brown sugar, packed (adds moisture and a deep, caramel-like sweetness).
- 1 large egg yolk (binds the filling and makes it extra rich).
- 1 teaspoon pumpkin pie spice (a warm blend of cinnamon, ginger, nutmeg, and cloves).
- 1/2 teaspoon vanilla extract.
- 1/4 teaspoon salt (this balances the sweetness and makes the spices pop).
- For the Egg Wash & Assembly:
- 1 large egg, beaten with 1 tablespoon of water (for that beautiful golden-brown crust).
- 24-30 candy eyes (the little white and black ones you find in the baking aisle).
- 1-2 tablespoons coarse sugar or sparkling sugar for sprinkling (optional, but adds a lovely crunch).
Ingredient Tips & Substitutions:
- For the filling, you can absolutely swap in apple butter, sweet potato puree, or even a thick jam like raspberry or strawberry. If you use jam, just be sure it is not too runny, or it will make the pies soggy.
- If you don’t have pumpkin pie spice, you can make your own by mixing 1/2 teaspoon cinnamon, 1/4 teaspoon ginger, 1/8 teaspoon nutmeg, and a pinch of cloves.
- For a dairy-free version, use a vegan pie crust and skip the egg wash (just brush with a little plant-based milk). The candy eyes are usually vegan, but double-check the package.
Equipment Needed
You don’t need any special gadgets for this recipe, which is part of its charm. Here is what you will need to make these Easy Mummy Hand Pies for Halloween:
- Baking Sheet: A standard half-sheet pan works perfectly. Line it with parchment paper for easy cleanup.
- Parchment Paper: Non-negotiable for preventing sticking and making cleanup a breeze.
- Rolling Pin: Even if you use pre-made crusts, a light roll will help them fit perfectly into your cutter.
- Round Cookie Cutter: I use a 3-inch round cutter. A biscuit cutter or even a clean, empty tin can works great. The size is important because it determines how big your mummies will be.
- Pastry Brush: For applying the egg wash. A silicone brush is my favorite because it doesn’t shed bristles.
- Small Knife or Pizza Cutter: For cutting the dough strips to wrap the mummies.
- Fork: For crimping the edges of the pies.
If you don’t have a round cookie cutter, you can use a paring knife to cut out rough circles. They don’t have to be perfect! In fact, irregular shapes make the mummies look even more charming. I have used a small bowl before in a pinch, and it worked just fine.
Preparation Method
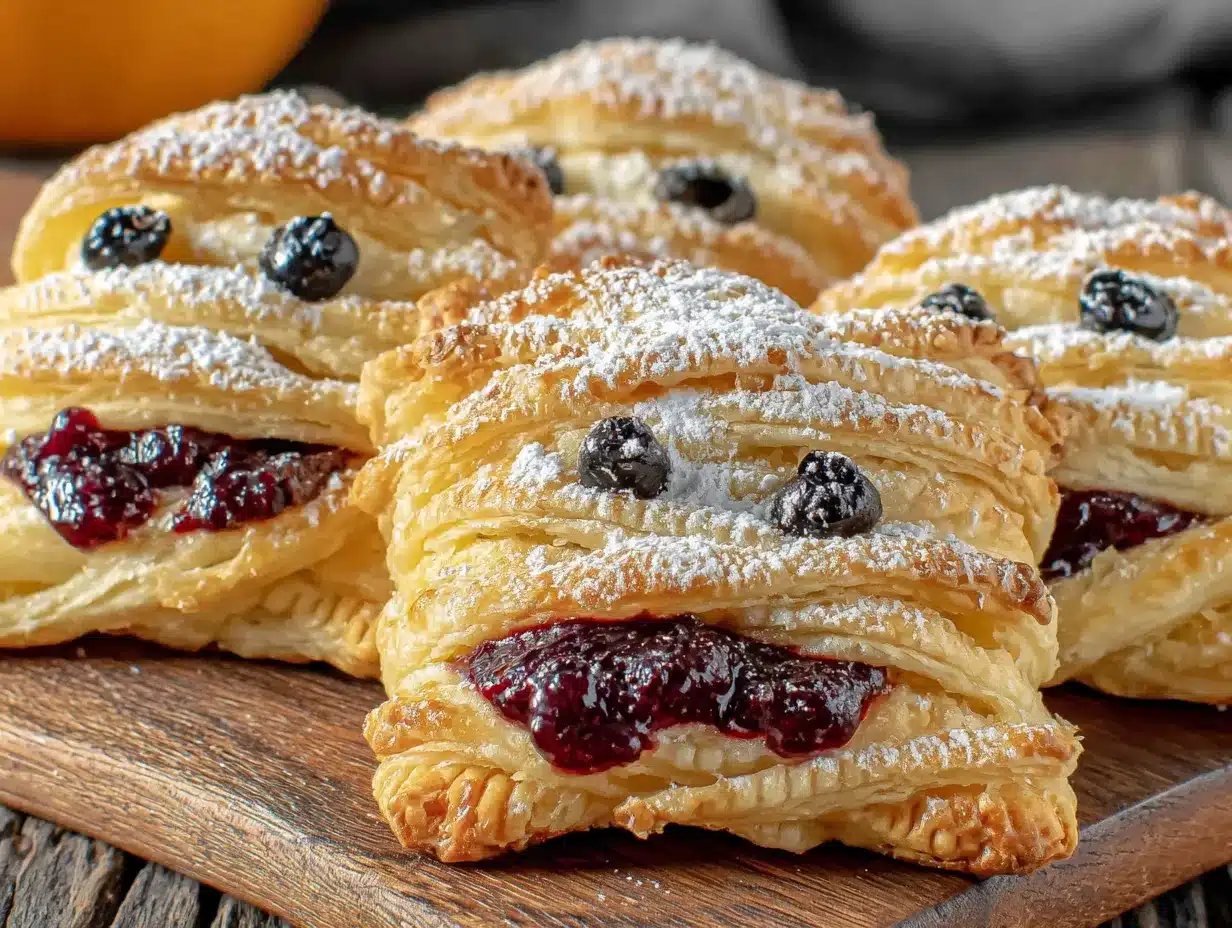
Let’s get our hands a little spooky! Follow these steps to create the cutest Easy Mummy Hand Pies for Halloween.
- Preheat & Prep: Preheat your oven to 400°F (200°C). Line a large baking sheet with parchment paper and set it aside.
- Make the Filling: In a medium bowl, combine the pumpkin puree, brown sugar, egg yolk, pumpkin pie spice, vanilla extract, and salt. Stir until everything is well combined and smooth. Give it a taste—it should be sweet and wonderfully spiced. Set the bowl aside.
- Prepare the Crusts: Unroll your pie crusts onto a lightly floured surface. If they crack a little at the edges, don’t worry. Just pinch the cracks back together. Using your rolling pin, gently roll each crust out to about 1/8-inch thickness. This helps the crusts hold their shape better.
- Cut the Circles: Using your 3-inch round cutter, cut out as many circles as you can from the first crust. You should get about 6 circles per crust, for a total of 12 circles. Gather the scraps, re-roll them, and cut out more circles if needed. You want an even number of circles for the tops and bottoms.
- Assemble the Pies: Place half of your dough circles onto the prepared baking sheet, spacing them about 2 inches apart. Drop a heaping teaspoon of the pumpkin filling into the center of each circle on the baking sheet. Be careful not to overfill, or the filling will leak out during baking.
- Top & Crimp: Place a second dough circle on top of each filled circle. Use your fingers to gently press the edges together, then use a fork to crimp the edges all the way around. This seals the pies and gives them that classic hand pie look. Poke a small vent hole in the top of each pie with the tip of a knife to let steam escape.
- Create the Mummy Wraps: Here is the fun part! Using a small knife or pizza cutter, cut the remaining dough scraps into thin strips, about 1/4-inch wide. You will need about 3-4 strips per mummy. Gently lay the strips across each pie, crisscrossing them to look like mummy bandages. Don’t worry about being neat—the messier, the better! Press the ends of the strips lightly onto the bottom crust to secure them.
- Egg Wash & Bake: In a small bowl, beat the egg with 1 tablespoon of water. Using your pastry brush, lightly brush the entire surface of each mummy pie (including the dough strips) with the egg wash. This is what gives them that gorgeous, glossy, golden-brown finish. Sprinkle with coarse sugar if you are using it.
- Bake: Place the baking sheet in the preheated oven and bake for 14-18 minutes, or until the crust is deeply golden brown and the filling is bubbling slightly. The time will vary depending on your oven, so start checking at the 14-minute mark.
- Add the Eyes: This is the most important step! As soon as the pies come out of the oven, while they are still hot, gently press two candy eyes onto each mummy. The heat from the crust will help them stick. Let the pies cool on the baking sheet for at least 10 minutes before serving. The filling will be extremely hot!
Cooking Tips & Techniques
I have made these Easy Mummy Hand Pies for Halloween about a dozen times, and I have learned a few things along the way. Here are my best tips to ensure your mummies come out perfectly every time.
Don’t Overfill: This is the number one mistake people make. It is tempting to add a big spoonful of filling, but too much will cause the pies to burst open in the oven. A heaping teaspoon is all you need. Trust me, I have had a few “zombie pies” that exploded in the oven, and while they still tasted good, they didn’t look as cute.
Keep the Dough Cold: If your dough starts to feel soft or sticky at any point, pop the baking sheet in the fridge for 10 minutes. Cold dough holds its shape better and creates flakier layers. This is especially important if your kitchen is warm. I learned this the hard way when I made a batch on a hot summer day and the crusts turned out tough.
Use a Sharp Cutter: A dull cutter will press the edges of the dough together, preventing them from rising. A sharp, clean cut ensures a nice, flaky edge. If you don’t have a sharp cutter, you can use a paring knife.
The Egg Wash is Key: Don’t skip the egg wash! It is what gives the crust that beautiful, deep golden color and a little bit of shine. If you are vegan, you can brush the pies with a little plant-based milk or melted vegan butter instead.
Multitasking Strategy: While the pies are baking, I like to clean up the kitchen and set out the candy eyes. This way, I am ready to add them the second the pies come out of the oven. It makes the whole process feel more organized and less frantic.
Variations & Adaptations
One of the best things about this recipe is how easy it is to change up. Here are a few of my favorite ways to make these Easy Mummy Hand Pies for Halloween my own.
- Spooky Sweet Potato: Swap the pumpkin puree for an equal amount of mashed, cooked sweet potato. It adds a slightly different sweetness and a beautiful orange color. I tried this last year and it was a huge hit with my sweet potato-loving friends.
- Apple Cinnamon Mummies: Replace the pumpkin filling with a simple apple pie filling. Just dice one small apple, toss it with 1 tablespoon of brown sugar and 1/2 teaspoon of cinnamon, and cook it in a small pan for 3-4 minutes until soft. Let it cool completely before using.
- Chocolate Peanut Butter Mummies: For a totally decadent twist, use a spoonful of chocolate-hazelnut spread or peanut butter as the filling. These are incredibly rich and feel like a real indulgence.
- Savory Mummies: Who says hand pies have to be sweet? Fill them with a mixture of cooked, crumbled sausage, shredded cheddar cheese, and a little cream cheese. These make an awesome savory appetizer for a grown-up Halloween party.
- Gluten-Free Option: Use a high-quality gluten-free pie crust. I have had good luck with the brands that come pre-rolled. Just be sure to handle the dough gently, as gluten-free dough can be more fragile.
Serving & Storage Suggestions
These Easy Mummy Hand Pies for Halloween are best served warm, but they are also delicious at room temperature. The flavors really come alive when they are slightly warm, and the crust is at its flakiest.
Serving: Arrange the mummies on a platter with a spooky name tag, like “Mummy’s Little Pies.” They are perfect on their own, but you could serve them with a side of vanilla ice cream, a dollop of whipped cream, or a drizzle of caramel sauce for an extra-special treat. They also pair wonderfully with a warm mug of apple cider or a creamy coffee tiramisu for a grown-up dessert spread.
Storage: Store any leftover pies in an airtight container at room temperature for up to 2 days. Do not refrigerate them, as the fridge will make the crust soggy. The candy eyes may soften slightly over time, so they are best enjoyed the day they are made.
Freezing: You can freeze these pies either before or after baking. To freeze unbaked pies, assemble them on a baking sheet and freeze until solid (about 2 hours). Then transfer them to a freezer-safe bag. Bake from frozen, adding 3-5 minutes to the baking time. To freeze baked pies, let them cool completely, then freeze them in a single layer on a baking sheet before transferring to a bag. Reheat in a 350°F oven for 5-7 minutes.
Reheating: The best way to reheat these pies is in the oven or an air fryer. A 350°F (175°C) oven for 5-7 minutes will crisp the crust right back up. The microwave will work in a pinch, but the crust will be soft, not flaky.
Nutritional Information & Benefits
While these are a treat, they aren’t totally devoid of redeeming qualities! Here is a rough estimate for one mummy hand pie (based on the pumpkin filling recipe).
- Calories: ~180
- Fat: 10g
- Carbohydrates: 22g
- Sugar: 9g
- Protein: 2g
- Vitamin A: 70% DV (from the pumpkin!)
Health Benefits: The pumpkin puree is a fantastic source of Vitamin A, which is great for your eyesight and immune system. It also provides a good amount of fiber. By using pre-made crust, you can control the portion size and avoid the extra sugar and preservatives often found in store-bought Halloween treats. These pies are a more wholesome way to enjoy a festive dessert. For a lighter option, you can serve them alongside a creamy no-churn strawberry ice cream for a fun, balanced dessert board.
Dietary Considerations: This recipe can be made vegetarian and, with a few swaps, dairy-free and vegan. The main allergens are wheat (gluten) and eggs.
Conclusion
These Easy Mummy Hand Pies for Halloween are exactly what a Halloween recipe should be: fun, festive, and incredibly forgiving. They are not about perfection; they are about having a good time in the kitchen and creating something that makes people smile. The best part is watching someone’s face light up when they realize the bandages are just pie crust and the eyes are staring right at them. It is pure Halloween magic.
I absolutely love this recipe because it proves you don’t need to be a professional baker to create something spectacular. It is a recipe that invites you to play, to experiment, and to make it your own. So go ahead, grab some candy eyes, and get wrapping. I promise you will have a blast. And when you make them, I would love to hear about it! Drop a comment below and tell me what filling you used, or share a photo of your mummy creations. Happy Halloween, and happy baking!
Frequently Asked Questions
Can I use homemade pie crust for these mummy hand pies?
Absolutely! Homemade pie crust will work beautifully. Just make sure it is well-chilled before you roll it out. If you are looking for a great, flaky recipe, I highly recommend trying my same-day sourdough bread for a different kind of dough project, but for this, a simple butter-based pie crust is perfect.
My filling leaked out during baking. What went wrong?
This usually happens for two reasons: you overfilled the pies, or the edges were not properly sealed. Make sure you only use a heaping teaspoon of filling and that you press the edges together firmly with a fork. A good crimp is your best defense against a filling explosion.
Can I make these ahead of time for a party?
Yes! You can assemble the pies completely (including the mummy strips) and store them in the refrigerator on the baking sheet, covered with plastic wrap, for up to 24 hours before baking. You can also freeze them unbaked for up to 3 months. Just bake them directly from frozen, adding a few extra minutes to the cooking time.
The candy eyes keep falling off after baking. How do I make them stick?
The key is to press the eyes onto the pies while they are still hot, right out of the oven. The residual heat from the crust will melt the sugar on the back of the candy eyes just enough to glue them in place. If you wait until they are cool, they will not stick as well.
Can I use a different filling besides pumpkin?
Absolutely! This is one of the most versatile recipes. You can use any thick fruit jam, apple butter, sweet potato puree, chocolate-hazelnut spread, or even a savory filling like cooked sausage and cheese. Just be sure any fruit filling is not too watery, or it will make the crust soggy.
Pin This Recipe!
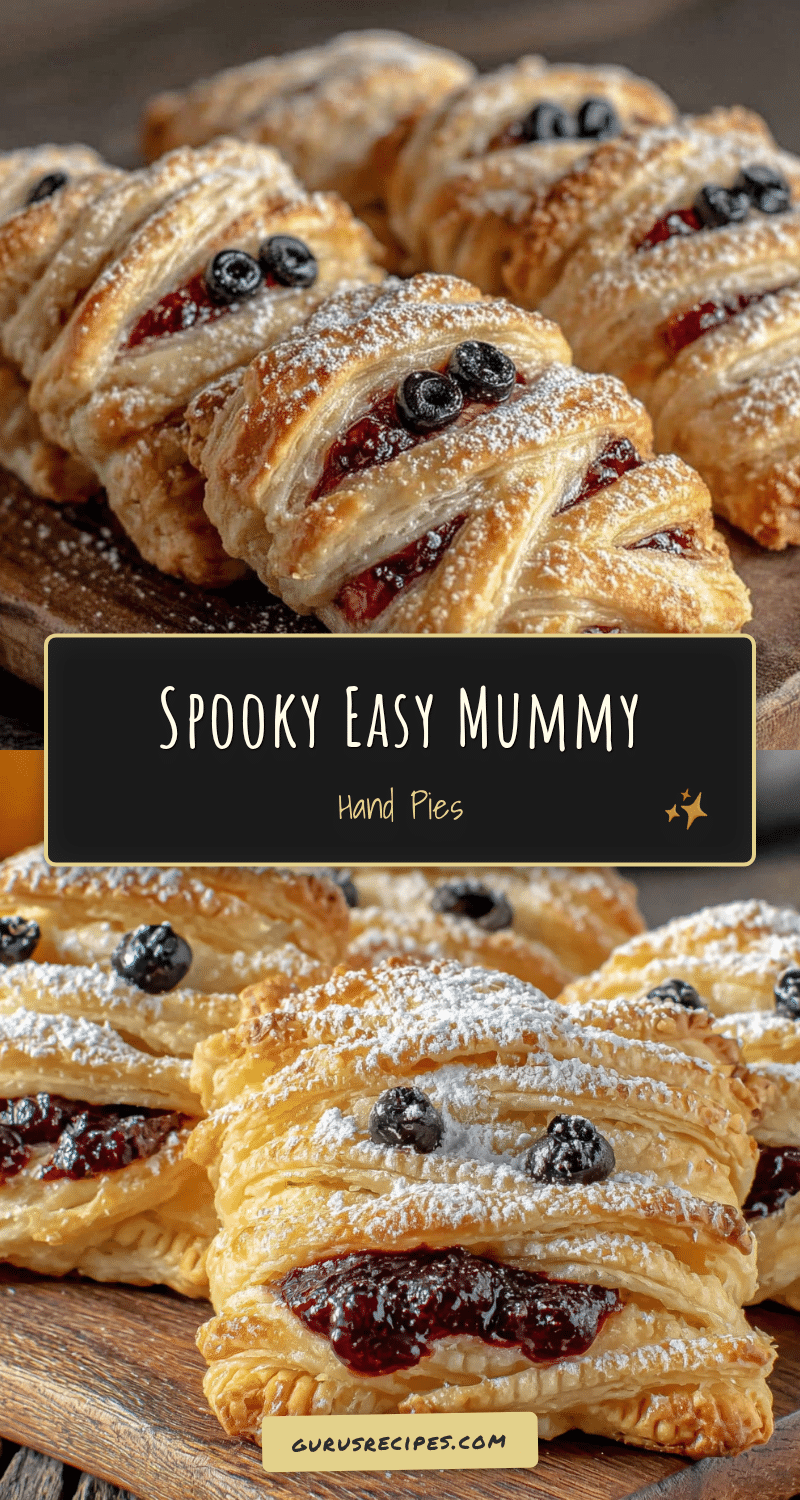

Easy Mummy Hand Pies: Best Halloween Recipe
These Easy Mummy Hand Pies for Halloween are the perfect spooky treat that looks impressive with almost zero effort. Made with pre-made pie crust and a simple pumpkin filling, they come together in under 40 minutes and are guaranteed to be the hit of any Halloween party.
- Total Time: 36 minutes
- Yield: 6 servings 1x
Ingredients
- 1 box (14.1 ounces) refrigerated pie crusts (2 crusts)
- 1 cup pumpkin puree (not pumpkin pie filling)
- 1/4 cup brown sugar, packed
- 1 large egg yolk
- 1 teaspoon pumpkin pie spice
- 1/2 teaspoon vanilla extract
- 1/4 teaspoon salt
- 1 large egg, beaten with 1 tablespoon water (for egg wash)
- 24–30 candy eyes
- 1–2 tablespoons coarse sugar or sparkling sugar (optional)
Instructions
- Preheat your oven to 400°F (200°C). Line a large baking sheet with parchment paper and set it aside.
- In a medium bowl, combine the pumpkin puree, brown sugar, egg yolk, pumpkin pie spice, vanilla extract, and salt. Stir until everything is well combined and smooth.
- Unroll your pie crusts onto a lightly floured surface. Using your rolling pin, gently roll each crust out to about 1/8-inch thickness.
- Using a 3-inch round cutter, cut out as many circles as you can from the first crust. You should get about 6 circles per crust, for a total of 12 circles. Gather the scraps, re-roll them, and cut out more circles if needed.
- Place half of your dough circles onto the prepared baking sheet, spacing them about 2 inches apart. Drop a heaping teaspoon of the pumpkin filling into the center of each circle on the baking sheet.
- Place a second dough circle on top of each filled circle. Use your fingers to gently press the edges together, then use a fork to crimp the edges all the way around. Poke a small vent hole in the top of each pie with the tip of a knife.
- Using a small knife or pizza cutter, cut the remaining dough scraps into thin strips, about 1/4-inch wide. Gently lay 3-4 strips across each pie, crisscrossing them to look like mummy bandages. Press the ends of the strips lightly onto the bottom crust to secure them.
- In a small bowl, beat the egg with 1 tablespoon of water. Using your pastry brush, lightly brush the entire surface of each mummy pie with the egg wash. Sprinkle with coarse sugar if using.
- Place the baking sheet in the preheated oven and bake for 14-18 minutes, or until the crust is deeply golden brown and the filling is bubbling slightly.
- As soon as the pies come out of the oven, while they are still hot, gently press two candy eyes onto each mummy. Let the pies cool on the baking sheet for at least 10 minutes before serving.
Notes
Don’t overfill the pies – a heaping teaspoon is enough. Keep dough cold for best results. Press candy eyes on while pies are still hot so they stick. Can be frozen unbaked for up to 3 months.
- Prep Time: 20 minutes
- Cook Time: 16 minutes
- Category: Dessert
- Cuisine: American
Nutrition
- Serving Size: 1 hand pie
- Calories: 180
- Sugar: 9
- Sodium: 210
- Fat: 10
- Saturated Fat: 4
- Carbohydrates: 22
- Fiber: 2
- Protein: 2
Keywords: Halloween, hand pies, mummy, pumpkin, easy, fall, party treat, spooky


