
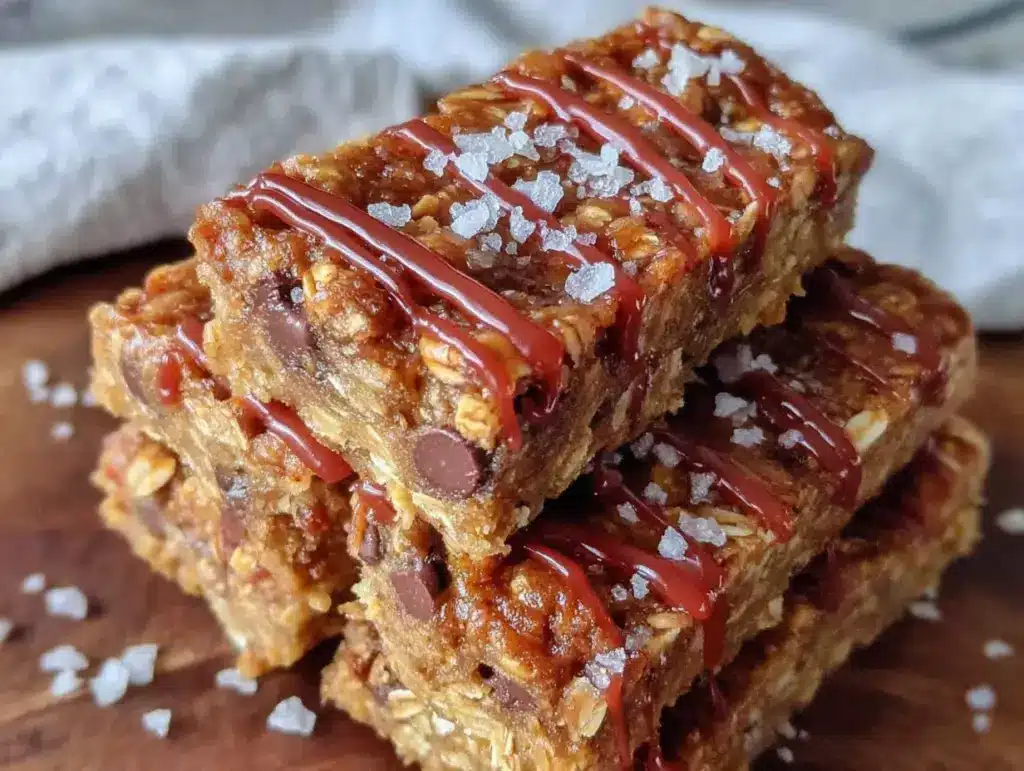
Dropping a spoonful of peanut butter onto the counter while trying to hold a screaming toddler with one hand and a half-eaten granola bar wrapper with the other. That’s where these no-bake peanut butter oat lunchbox bars were born. Not in a test kitchen. Not after hours of careful planning. Just a Tuesday morning where the pantry was bare, the lunchbox was empty, and I needed something—anything—that didn’t require turning on the oven.
I had a bag of oats staring at me from the shelf. A jar of peanut butter with maybe two tablespoons left at the bottom. Some honey that was crystallizing at the edges. And honestly? I almost gave up and just threw a cheese stick in there like I did the day before. But then I remembered a trick my mom used to do when we were kids—mixing peanut butter and oats together, pressing it into a pan, and calling it a snack. It wasn’t fancy, but it worked.
So I dumped the oats into a bowl. Added the peanut butter. Drizzled honey until it looked right. Stirred it with a wooden spoon that had seen better days. Pressed it into a square dish I found buried under some Tupperware lids. And you know what? It held together. It actually tasted good. My kid ate three of them after school that day, and I knew I stumbled onto something worth keeping.
These bars have become my emergency lunchbox solution, my after-school snack, my “I have nothing to bring to the playdate” save. They’re not fancy. They’re not complicated. But they’re real, and they work when nothing else does.
Why You’ll Love This Recipe
Let me tell you why these easy no-bake peanut butter oat lunchbox bars have earned a permanent spot in my weekly rotation. I’ve tested this recipe at least seven times—adjusting the honey, swapping different peanut butters, even trying it with almond butter once (it worked, but peanut butter is better). Here’s why I keep coming back:
- No oven required. Summer days, busy mornings, or when your oven is full of something else—these bars come together on the countertop with zero heat.
- Five ingredients. That’s it. Oats, peanut butter, honey, a pinch of salt, and some chocolate chips if you’re feeling fancy. You probably have all of them right now.
- Ready in 10 minutes. Mix, press, chill. That’s the whole process. No baking time, no waiting for the oven to preheat.
- Lunchbox approved. My kids actually eat these without complaining. They hold up in a lunchbox without getting soggy or falling apart. That’s a win in my book.
- Naturally sweetened. No refined sugar here—just honey doing the heavy lifting. You can even use maple syrup if that’s what you have.
What makes these bars different from every other no-bake recipe out there? The texture. Most no-bake bars turn into crumbly disasters or rock-hard bricks. These? They’re chewy but firm, with just enough stickiness to hold together without gluing your teeth shut. I figured out the exact oat-to-peanut-butter ratio after one particularly sad batch that fell apart in my hand. Now they hold together perfectly every time.
This is the kind of recipe that makes you feel like you’ve got your life together. Even when you don’t.
What Ingredients You Will Need
This recipe uses simple, pantry-friendly ingredients that come together to create something genuinely satisfying. No fancy health food store runs required—just the basics you probably already have in your kitchen.
For the bars:
- 2 cups rolled oats (not instant—they get too mushy. Old-fashioned oats give the best chewy texture. I use Quaker or Bob’s Red Mill.)
- 1 cup creamy peanut butter (natural peanut butter works but can be oilier. I prefer Skippy or Jif for consistent results. If using natural, stir it really well first and expect slightly softer bars.)
- 1/2 cup honey (local honey if you have it. Maple syrup works too, but the bars will be a bit softer. Agave is fine but makes them sweeter.)
- 1/4 teaspoon salt (skip this if your peanut butter is already salted. I use fine sea salt.)
- 1/2 cup mini chocolate chips (optional but highly recommended. Semi-sweet or dark chocolate balances the sweetness. I’ve used milk chocolate too—it’s good but sweeter.)
Ingredient tips from my kitchen to yours:
Rolled oats are non-negotiable here. I tried quick oats once because that’s all I had, and the bars turned into a paste-like situation that nobody wanted to eat. Stick with old-fashioned rolled oats for that perfect chewy bite.
Peanut butter choice matters more than you’d think. The natural stuff that separates? It works, but you need to stir it vigorously before measuring. And expect the bars to be slightly softer because natural peanut butter has more oil. If you want firmer bars that hold up well in a lunchbox, go with the processed kind. I know, I know—processed isn’t trendy. But it works better here.
Honey can be swapped, but each swap changes the texture slightly. Maple syrup makes bars that are softer and more delicate. Brown rice syrup makes them chewier. Honey is the Goldilocks option—just right.
Chocolate chips are optional but honestly? Don’t skip them. They add little pockets of melted chocolate that make these bars feel like a treat. Mini chips distribute better than regular-sized ones. If you only have regular chips, chop them roughly first.
Equipment Needed
You don’t need much for these easy no-bake peanut butter oat lunchbox bars. That’s part of the beauty.
- 8×8 inch square baking dish (glass or metal, either works. Line it with parchment paper for easy removal. I forgot parchment once and had to chisel the bars out—learn from my mistake.)
- Large mixing bowl (any bowl big enough to stir everything together without oats flying everywhere)
- Wooden spoon or rubber spatula (something sturdy. The mixture gets thick and sticky. A whisk won’t cut it.)
- Parchment paper (absolute lifesaver for lifting the bars out cleanly. If you don’t have parchment, grease the dish well with butter or cooking spray.)
- Measuring cups and spoons (standard set. I’m not precious about exact measurements here, but close counts.)
- Small saucepan or microwave-safe bowl (for warming the peanut butter and honey together if needed)
- Refrigerator space (they need at least an hour to set. Overnight is better.)
Budget-friendly tip: If you don’t have an 8×8 dish, a 9×9 works fine—your bars will just be slightly thinner. You can even use a loaf pan and get thicker, chunkier bars. I’ve done that when my 8×8 was in the dishwasher. Worked great.
Preparation Method
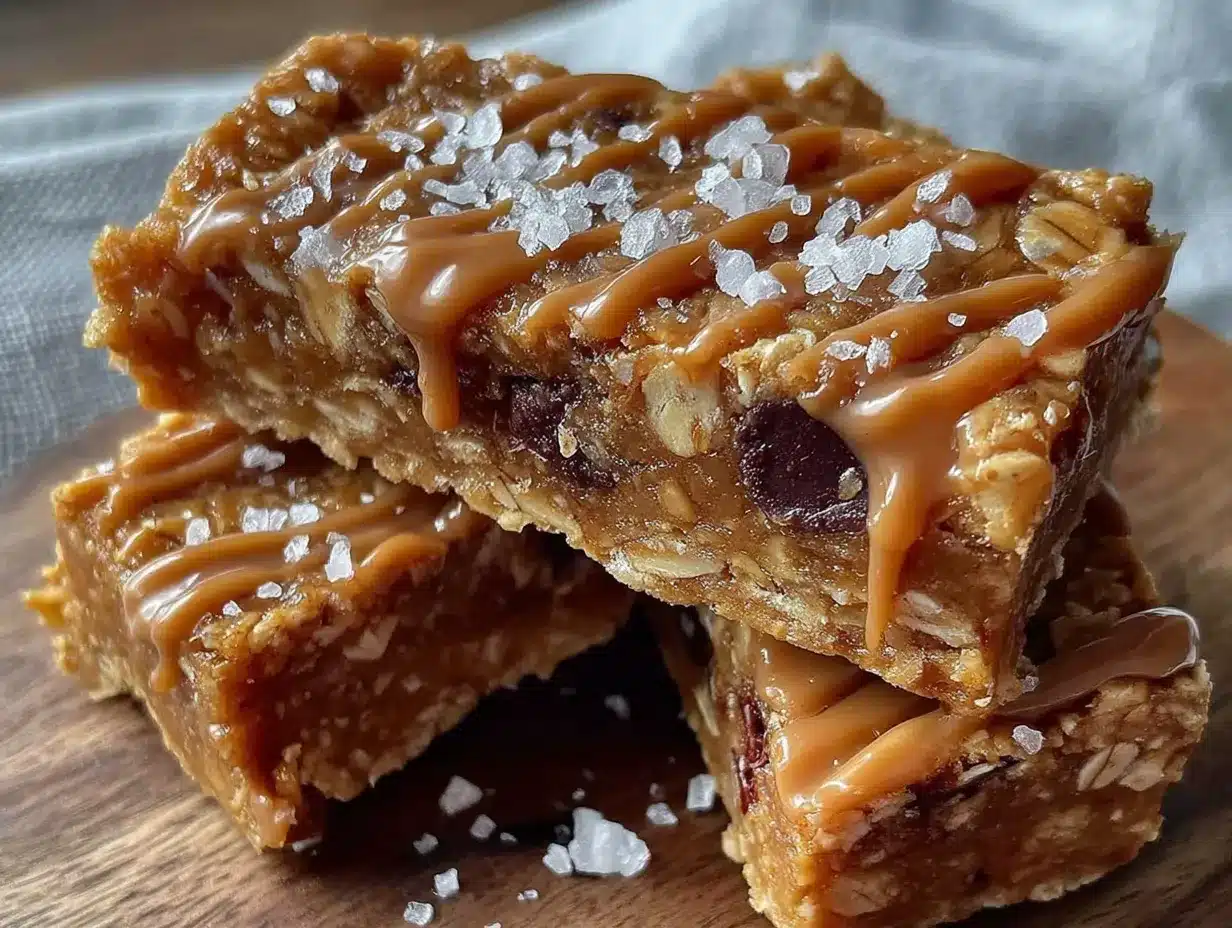
Here’s how to make these no-bake peanut butter oat lunchbox bars without any stress. I’ve made this recipe probably twenty times now, so I’ve worked out all the little quirks.
- Line your dish. Cut a piece of parchment paper to fit your 8×8 dish, leaving some overhang on two sides. This creates handles for lifting the bars out later. Press it into the corners. If it curls up, use a little butter to hold it in place.
- Warm the peanut butter and honey. Add the peanut butter and honey to a small saucepan over low heat. Stir constantly until they come together into a smooth, glossy mixture. This takes about 2-3 minutes. Don’t walk away—peanut butter burns fast. You can also microwave them in a bowl for 30-second intervals, stirring between each. I prefer the stovetop because I can control the heat better.
- Mix the dry ingredients. In your large bowl, combine the rolled oats and salt. Give them a quick stir so the salt distributes evenly. If you’re using chocolate chips, wait—don’t add them yet. They’ll melt if you add them now.
- Combine wet and dry. Pour the warm peanut butter-honey mixture over the oats. Stir with your wooden spoon or spatula until every oat is coated. This takes some elbow grease—the mixture is thick and sticky. Keep going until you don’t see any dry oats. The mixture should look uniformly golden brown and smell amazing.
- Add chocolate chips. Once the mixture has cooled for about 2 minutes (so the chips don’t melt), fold in the mini chocolate chips. Stir just until they’re distributed. Don’t overmix or the chips will start melting from the residual heat.
- Press into the dish. Transfer the mixture to your lined dish. Here’s the trick: don’t just dump it in and hope for the best. Use the back of a spoon or your clean hands to press it down firmly and evenly. Really pack it in there. The more you press, the better the bars hold together. I press for a full minute, making sure the corners are filled and the surface is flat.
- Chill. Place the dish in the refrigerator for at least 1 hour. Overnight is ideal. The bars need time to set and become firm. If you try to cut them too soon, they’ll crumble. Trust me—I’ve been impatient before and regretted it.
- Cut and serve. Once fully chilled, lift the parchment paper to remove the entire block from the dish. Place it on a cutting board. Use a sharp knife to cut into 12-16 squares. Wipe the knife clean between cuts for neat edges. Store in the fridge.
Sensory cues to look for: When you press the mixture, it should feel dense and slightly sticky but not wet. If it feels dry and crumbly, add a tablespoon more warm honey. If it feels too wet and greasy, add a tablespoon more oats. The mixture should hold together when you squeeze a handful of it.
Cooking Tips & Techniques
After making these bars more times than I can count, here’s what I’ve learned the hard way.
Press hard. This is the number one mistake people make. They gently pat the mixture into the dish and wonder why their bars fall apart. You need to press with authority. Use the bottom of a flat measuring cup or glass to really compact the mixture. Think of it like making a sandcastle—the more you pack it, the better it holds.
Don’t overheat the peanut butter. I once got distracted and let the peanut butter get too hot. It separated and turned grainy. The bars still tasted okay, but the texture was off. Low and slow is the way to go. If you see bubbles forming, you’ve gone too far.
Room temperature ingredients matter. Cold honey straight from the fridge is harder to mix. Let it sit out for 10 minutes, or warm it gently with the peanut butter. Same goes for peanut butter—cold peanut butter is a nightmare to stir.
Chill completely. The hardest part of this recipe is waiting. But if you cut these bars too early, they’ll fall apart. I’ve done it. I’ve cried about it. Just wait the full hour, or better yet, make them the night before.
Use wet hands for pressing. If the mixture sticks to your hands while pressing, lightly wet your fingers with cold water. Works like a charm. Or use a piece of parchment paper on top and press through that.
Double the batch. These bars disappear fast. I always double the recipe and press it into a 9×13 dish. They last longer, and I don’t have to make them again in two days.
Variations & Adaptations
These easy no-bake peanut butter oat lunchbox bars are incredibly forgiving. Here are some ways I’ve adapted them over the years:
Chocolate peanut butter version: Add 2 tablespoons of cocoa powder to the oat mixture before adding the wet ingredients. You get a chocolate-peanut butter combo that tastes like a Reese’s cup in bar form. My kids fight over these.
Seed butter swap: My friend’s kid has a peanut allergy, so I tested these with sunflower seed butter. It works! The bars turn slightly green from a reaction between sunflower seeds and baking soda (yes, even though there’s no baking soda here, it still happens). They taste fine, just look a little weird. Sunflower butter also makes the bars softer, so add an extra 1/4 cup of oats.
Crunchy texture: Use crunchy peanut butter instead of creamy. Or add 1/4 cup of chopped peanuts, sunflower seeds, or toasted coconut flakes. The extra crunch makes these even more satisfying.
Vegan option: Swap honey for maple syrup or agave nectar. The bars will be slightly softer, so chill them longer—at least 2 hours. Use dairy-free chocolate chips if you’re adding those.
Gluten-free: Use certified gluten-free rolled oats. That’s it. Everything else in this recipe is naturally gluten-free. I’ve made these for gluten-sensitive friends and they never knew the difference.
Add dried fruit: Fold in 1/4 cup of dried cranberries, raisins, or chopped dried apricots along with the chocolate chips. The tartness of cranberries pairs beautifully with the sweet peanut butter.
Protein boost: Add 2 tablespoons of vanilla or chocolate protein powder to the oats before mixing. You might need an extra tablespoon of honey to keep things from getting too dry. My husband takes these to the gym and swears by them.
Spiced version: Add 1/2 teaspoon of cinnamon and a pinch of nutmeg to the oat mixture. It gives the bars a warm, cozy flavor that’s perfect for fall. I made these for a Halloween party and they disappeared.
Serving & Storage Suggestions
These bars are best served cold, straight from the fridge. The texture is firm and chewy, and the chocolate chips stay solid. If you let them sit at room temperature for too long, they soften up. Still delicious, just less sturdy.
For lunchboxes: Wrap individual bars in parchment paper or plastic wrap. They hold up remarkably well for several hours at room temperature. I’ve sent them in lunchboxes on warm days and they didn’t fall apart. Just don’t leave them in a hot car—the chocolate will melt and the bars will get messy.
For serving at parties: Arrange them on a platter and let them sit out for up to 30 minutes. They soften slightly but still hold their shape. I’ve brought them to potlucks and they always get compliments.
Storage: Keep the bars in an airtight container in the refrigerator. They stay fresh for up to 2 weeks. In fact, they get better after a day or two—the flavors meld together and the texture becomes perfectly chewy. I’ve never had them last longer than a week because they get eaten too fast.
Freezer instructions: These bars freeze beautifully. Wrap individual bars tightly in plastic wrap, then place them in a freezer bag. They keep for up to 3 months. To thaw, just leave one in the fridge overnight or let it sit at room temperature for 15 minutes. I make a double batch and keep a stash in the freezer for emergency lunchbox moments.
Reheating: Honestly, don’t. These are meant to be eaten cold or at room temperature. Microwaving them makes the chocolate melt and the bars get soft and messy. If you want a warm treat, try a different recipe.
Nutritional Information & Benefits
Here’s the nutritional breakdown for one bar (assuming 12 bars per batch):
- Calories: 245
- Protein: 8g
- Carbohydrates: 28g
- Fiber: 3g
- Sugar: 14g
- Fat: 12g
- Saturated Fat: 3g
- Sodium: 115mg
Health benefits to note: Rolled oats are packed with fiber, which helps keep kids full and focused at school. Peanut butter provides protein and healthy fats that support brain development. Honey offers natural sweetness with antioxidants. These bars are a far better choice than anything you’d buy in a package.
Dietary considerations: These bars are vegetarian and can easily be made vegan, gluten-free, or dairy-free. They contain peanuts and may contain traces of other allergens depending on your ingredients. Always check labels if you’re serving someone with allergies.
My personal take: I don’t pretend these are health food. But compared to the granola bars at the grocery store that are basically candy bars in disguise? These are a win. Real ingredients, no preservatives, and you control the sugar. That’s good enough for me.
Conclusion
These easy no-bake peanut butter oat lunchbox bars have saved my sanity more times than I can count. They’re the recipe I turn to when I’m out of ideas, out of energy, and out of time. And they always deliver.
What I love most about this recipe is how forgiving it is. You can swap ingredients, adjust the sweetness, add whatever mix-ins you have on hand, and it still works. It’s not a fussy recipe that demands perfection. It’s a recipe that meets you where you are—whether that’s a tired parent at 7 AM or someone who just wants a quick snack without turning on the oven.
I’d love to hear how these turn out for you. Did you add anything fun? Swap something out? Make a mess in the kitchen like I always do? Drop a comment below and let me know. And if you’re looking for another quick treat, you might enjoy this creamy no-churn strawberry ice cream—it’s just as easy and just as satisfying. Or if you’re in the mood for something savory, this crispy Reuben sandwich is a total crowd-pleaser.
Go make these bars. Your lunchbox—and your sanity—will thank you.
Frequently Asked Questions
Can I use quick oats instead of rolled oats?
You can, but the texture will be different. Quick oats absorb moisture faster and create a softer, almost paste-like bar. Rolled oats give you that chewy, satisfying texture. If quick oats are all you have, reduce the honey by a tablespoon and expect softer bars.
How long do these bars need to chill?
At least 1 hour in the refrigerator. Overnight is ideal. If you’re in a hurry, you can pop them in the freezer for 20-30 minutes, but watch them closely—they can freeze solid if left too long.
Can I make these without chocolate chips?
Absolutely. The bars are delicious without them. You can replace the chocolate chips with dried fruit, seeds, chopped nuts, or just leave them plain. The recipe works perfectly either way.
Why did my bars fall apart?
Usually two reasons: you didn’t press the mixture firmly enough into the dish, or you didn’t chill them long enough. Next time, really pack the mixture down and give them a full hour in the fridge. If they’re still crumbly, add an extra tablespoon of honey to the next batch.
Can I double this recipe?
Yes! Double everything and press it into a 9×13 inch dish. Increase the chilling time to at least 2 hours. I do this all the time—they disappear fast in my house, and having extra in the fridge is a lifesaver.
Pin This Recipe!
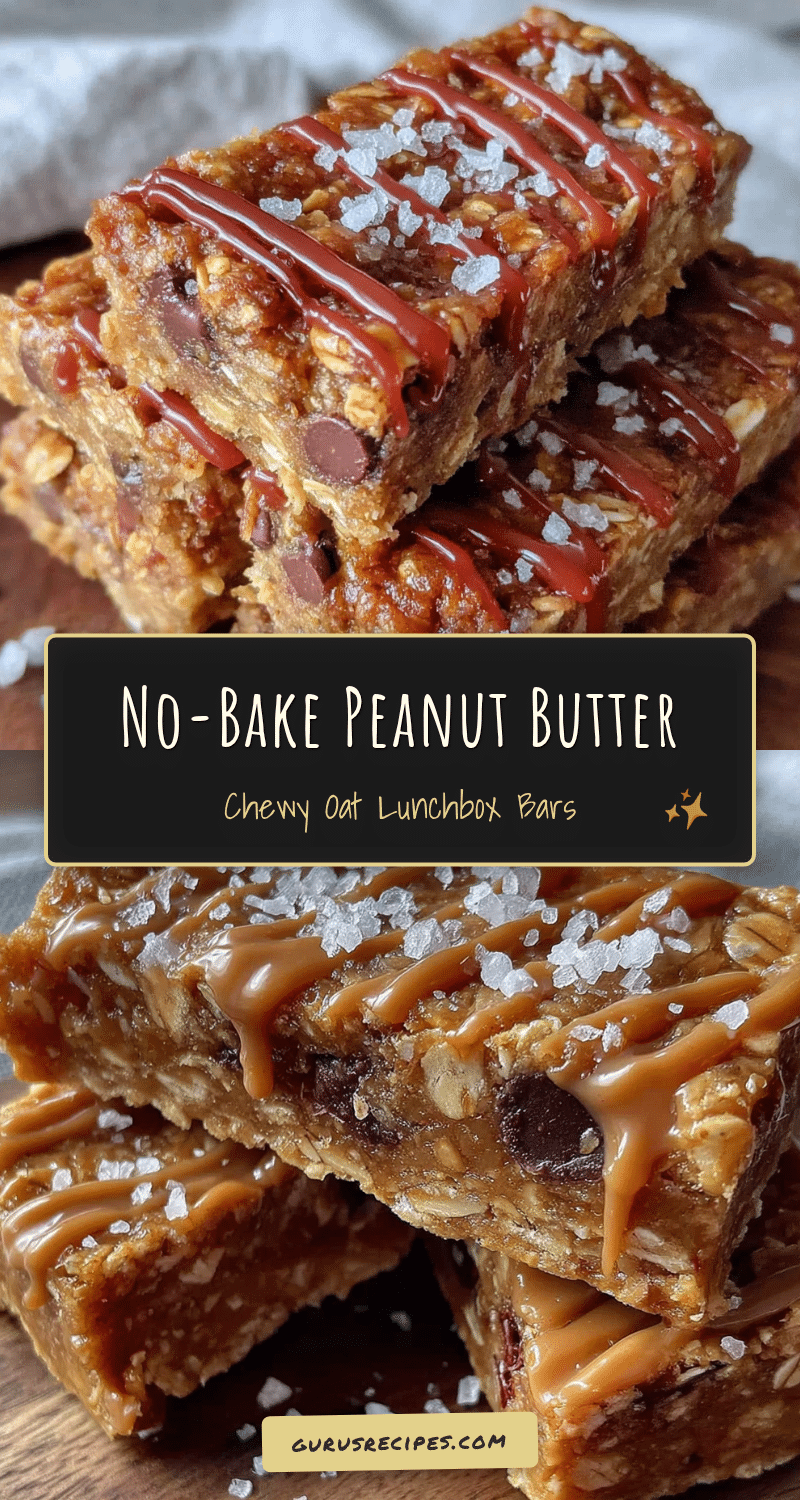

Easy No-Bake Peanut Butter Oat Lunchbox Bars
These no-bake peanut butter oat lunchbox bars are a quick, 5-ingredient snack that comes together in 10 minutes. Perfect for busy mornings, lunchboxes, or an after-school treat, they’re chewy, naturally sweetened, and require no oven.
- Total Time: 1 hour 10 minutes (includes chilling time)
- Yield: 12-16 bars 1x
Ingredients
- 2 cups rolled oats (old-fashioned, not instant)
- 1 cup creamy peanut butter (Skippy or Jif recommended; natural works but yields softer bars)
- 1/2 cup honey (local honey preferred; maple syrup or agave can be substituted)
- 1/4 teaspoon salt (fine sea salt; skip if peanut butter is salted)
- 1/2 cup mini chocolate chips (optional but recommended; semi-sweet or dark)
Instructions
- Line an 8×8 inch square baking dish with parchment paper, leaving overhang on two sides for easy removal.
- In a small saucepan over low heat, warm the peanut butter and honey together, stirring constantly until smooth and glossy (about 2-3 minutes). Alternatively, microwave in 30-second intervals, stirring between each.
- In a large mixing bowl, combine the rolled oats and salt. Stir to distribute the salt evenly.
- Pour the warm peanut butter-honey mixture over the oats. Stir with a wooden spoon or rubber spatula until every oat is coated and the mixture is uniformly golden brown.
- Let the mixture cool for about 2 minutes, then fold in the mini chocolate chips until just distributed. Avoid overmixing to prevent melting.
- Transfer the mixture to the lined dish. Press it down firmly and evenly using the back of a spoon or clean hands. Pack it tightly for at least a minute, ensuring corners are filled and the surface is flat.
- Refrigerate for at least 1 hour, or overnight for best results, until the bars are firm.
- Once fully chilled, lift the parchment paper to remove the block from the dish. Place on a cutting board and cut into 12-16 squares with a sharp knife, wiping the blade clean between cuts.
Notes
Press the mixture firmly to prevent crumbling. Chill completely before cutting. For firmer bars, use processed peanut butter. For vegan option, substitute honey with maple syrup or agave and use dairy-free chocolate chips. For gluten-free, use certified gluten-free rolled oats. Bars can be stored in an airtight container in the refrigerator for up to 2 weeks or frozen for up to 3 months.
- Prep Time: 10 minutes
- Cook Time: 0 minutes
- Category: Snack
- Cuisine: American
Nutrition
- Serving Size: 1 bar
- Calories: 245
- Sugar: 14
- Sodium: 115
- Fat: 12
- Saturated Fat: 3
- Carbohydrates: 28
- Fiber: 3
- Protein: 8
Keywords: no-bake, peanut butter, oat bars, lunchbox snacks, easy, kid-friendly, healthy snack, 5-ingredient


