
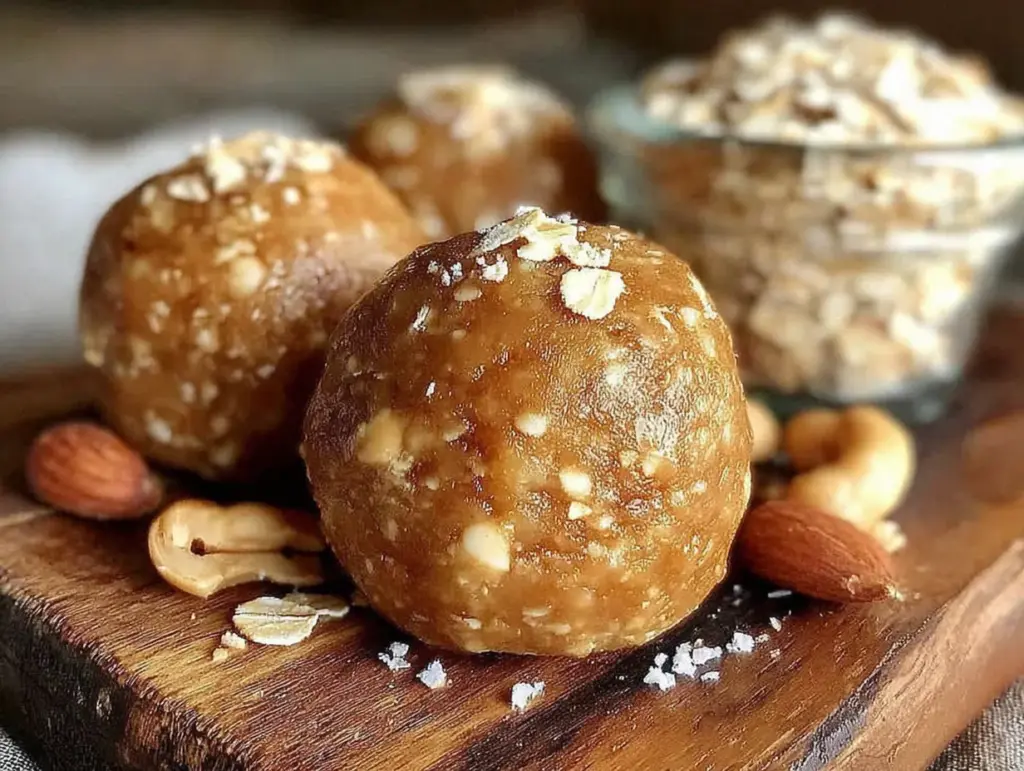
My friend Jenna showed up at my door one Tuesday afternoon looking like she’d just run a marathon. She had her toddler on one hip, a diaper bag slung over her shoulder, and that specific kind of exhaustion that makes you forget your own name. She collapsed onto my couch and asked, “Do you have anything I can eat that doesn’t require chewing for ten minutes?” I laughed, but she wasn’t joking. She needed something fast, something filling, and something she could grab with one hand while the other held a sippy cup. That’s when I remembered the batch of these no-bake peanut butter protein energy bites sitting in my fridge. I handed her the container, and she ate four of them before saying a single word. Then she looked at me and said, “You need to give me this recipe or I’m moving in.”
Honestly, I wasn’t sure about these energy bites at first. I’d tried those store-bought protein balls before, you know the ones that taste like cardboard dust mixed with regret. They always felt like a compromise, like eating something because you should, not because you want to. But these no-bake peanut butter protein energy bites are different. They actually taste like a treat, not a punishment. The peanut butter gives them that rich, creamy texture, and the oats and honey make them satisfying in a way that doesn’t leave you reaching for a second snack ten minutes later. I tweaked the recipe over several batches, adding a pinch of salt here and a bit more vanilla there, until I got it just right.
What I love most about these is how they’ve become my go-to for those weird times of day when you’re hungry but not hungry enough for a full meal. You know the feeling, right around 3 PM when lunch is a distant memory but dinner feels like it’s hours away. These energy bites hit that spot perfectly. They’re small enough to feel like a snack but packed with enough protein and fiber to actually keep you going. Jenna still texts me pictures whenever she makes a new batch, and honestly, that’s the best kind of compliment a recipe can get.
Why You’ll Love This Recipe
I’ve tested this recipe more times than I care to admit, and each batch taught me something new. The first time I made them, I used crunchy peanut butter because that’s what I had, and the texture was actually pretty great. The second time, I used creamy, and honestly, that’s my favorite. The point is, this recipe works with what you’ve got, and that’s the kind of flexibility I appreciate in a busy kitchen.
- Quick & Easy: These come together in literally five minutes. No baking, no waiting, no complicated techniques. Just mix, roll, and eat. Perfect for those days when you need something fast.
- Simple Ingredients: You probably have most of these in your pantry right now. Oats, peanut butter, honey, chocolate chips. No weird health food store finds that cost a fortune and sit in your cupboard for years.
- Perfect for Busy Days: These are great for pre-workout fuel, post-workout recovery, afternoon slumps, or even a quick breakfast when you’re running late. I’ve eaten them for all of the above.
- Crowd-Pleaser: My kids love these, my husband loves these, and even my mom who’s skeptical of anything labeled “protein” asked for the recipe. They’re kid-friendly without being boring.
- Unbelievably Delicious: The combination of creamy peanut butter, sweet honey, and dark chocolate chips is honestly addictive. You won’t feel like you’re eating a health food.
What makes this recipe different from all the other energy ball recipes out there? It’s the ratio. I spent way too long figuring out the perfect balance of wet to dry ingredients so these hold together without being sticky or crumbly. They’re firm enough to pack in a lunchbox but soft enough to enjoy right out of the fridge. Plus, I use a touch of flaky sea salt on top, which sounds fancy but is actually just a game-changer. The salty-sweet combo makes these taste like a salted caramel peanut butter cookie, not a protein snack.
These no-bake peanut butter protein energy bites are the kind of recipe that makes you feel like you’ve got your life together, even on the chaotic days. They’re proof that eating well doesn’t have to be complicated or time-consuming.
What Ingredients You Will Need
This recipe uses simple, wholesome ingredients that work together to create a satisfying snack with great texture and flavor. Nothing here is complicated, and most items are probably already in your kitchen.
- Rolled oats (old-fashioned oats) – 1 cup (100g). These provide the base and the chewy texture. Quick oats work in a pinch, but rolled oats give a better, more substantial bite. I prefer Bob’s Red Mill or Quaker old-fashioned oats for consistent results.
- Creamy peanut butter – ½ cup (130g). Natural peanut butter works best here, the kind that’s just peanuts and salt. Avoid the super oily natural brands that separate a lot, they can make the mixture too loose. If you only have the stir kind, just make sure you mix it well first. Crunchy peanut butter is fine too if you want extra texture.
- Honey – ⅓ cup (110g). This binds everything together and adds sweetness. Maple syrup works as a substitute, but honey gives a better consistency. Local honey is nice if you have it, adds a subtle floral note.
- Dark chocolate chips – ¼ cup (45g). Mini chocolate chips distribute better, but regular ones work too. I like using dark chocolate with at least 60% cacao for a richer flavor that balances the sweetness. Milk chocolate makes them sweeter, which is fine if that’s your preference.
- Ground flaxseed – 2 tablespoons (14g). This adds fiber and helps bind everything together. You can skip it or substitute with chia seeds, but the texture will be slightly different. I’ve found flax gives the best consistency without changing the flavor.
- Vanilla extract – 1 teaspoon (5ml). Pure vanilla extract makes a noticeable difference. Imitation vanilla works, but the flavor won’t be as warm and rich. This is one ingredient I’d splurge on.
- Pinch of salt – ¼ teaspoon. If your peanut butter is salted, you can reduce this or skip it. I always add a small pinch because it enhances the peanut butter flavor and balances the sweetness.
- Flaky sea salt for topping (optional) – Just a sprinkle. This is totally optional but highly recommended. It gives that fancy salted caramel vibe and makes these feel like a treat.
Substitution Notes: For a nut-free version, use sunflower seed butter or tahini instead of peanut butter. The flavor will be different, but the texture works the same. For a gluten-free option, make sure your oats are certified gluten-free. For a vegan version, use maple syrup instead of honey. I’ve tried all of these substitutions, and they all work, though the flavor profile changes slightly with each swap.
Equipment Needed
You don’t need much for this recipe, which is part of the beauty. Here’s what you’ll need:
- Large mixing bowl – Any medium-to-large bowl works. I use my favorite ceramic one because it’s wide enough to mix without spilling.
- Measuring cups and spoons – Standard set. Nothing fancy needed.
- Rubber spatula or wooden spoon – For mixing everything together. I prefer a silicone spatula because it scrapes the sides well.
- Small cookie scoop or tablespoon – For portioning the balls evenly. A 1-inch scoop makes perfectly sized bites. If you don’t have one, just use a regular spoon and your hands.
- Parchment paper or wax paper – To line the baking sheet or plate where the balls will chill. Makes cleanup so much easier.
- Baking sheet or large plate – To hold the bites while they chill in the fridge. A dinner plate works fine.
- Airtight container – For storage. A glass container with a lid works best to keep them fresh.
That’s it. No food processor, no mixer, no special equipment. I’ve made these in my tiny apartment kitchen with just a bowl and a spoon, and they turned out perfect every time.
Preparation Method
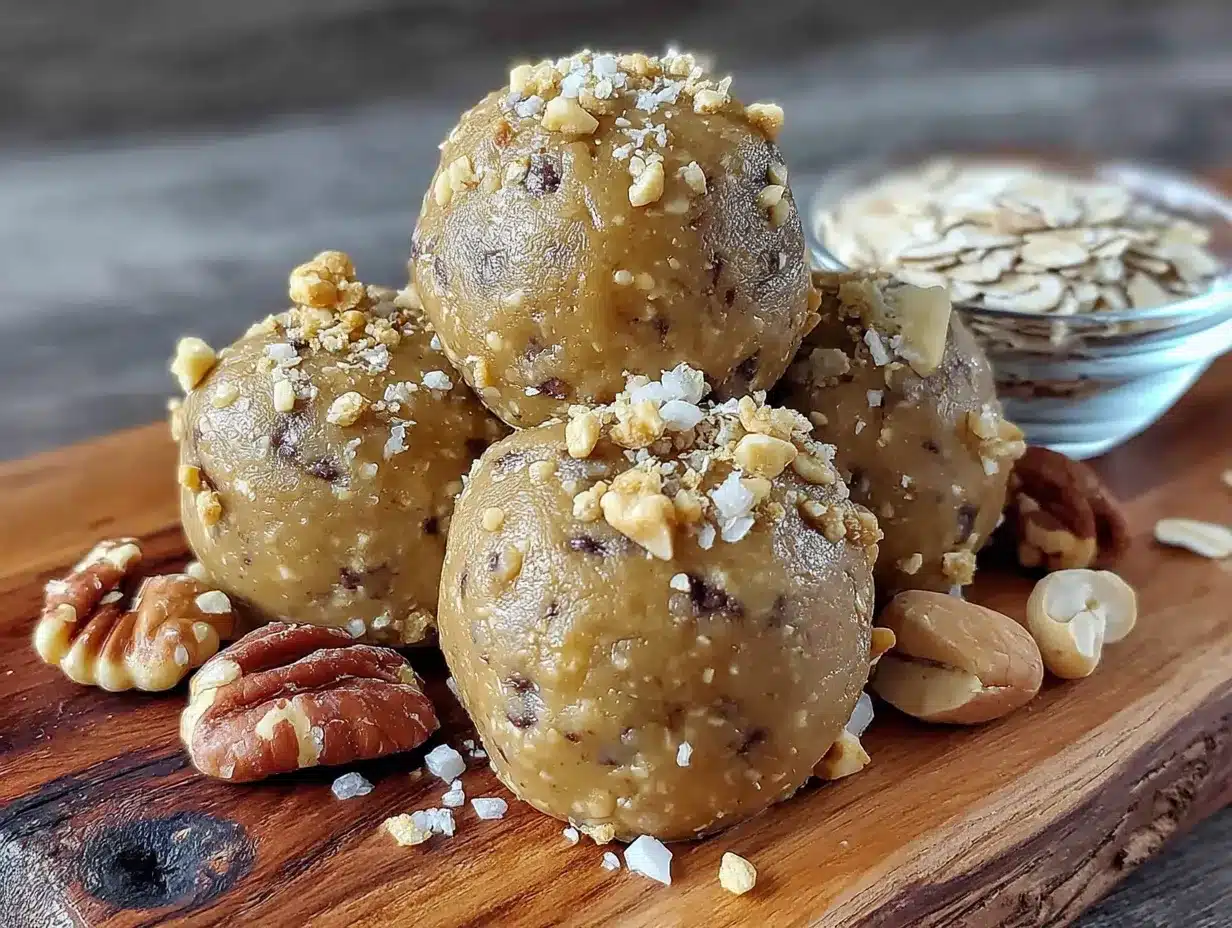
This is the easiest part. Seriously, if you can stir things together, you can make these energy bites. Here’s how it goes:
- Combine the dry ingredients. In your large mixing bowl, add 1 cup (100g) rolled oats, 2 tablespoons (14g) ground flaxseed, and ¼ cup (45g) dark chocolate chips. Give them a quick stir with your spatula to distribute everything evenly. This step takes about 30 seconds.
- Add the wet ingredients. Add ½ cup (130g) creamy peanut butter, ⅓ cup (110g) honey, 1 teaspoon (5ml) vanilla extract, and ¼ teaspoon salt directly to the bowl with the dry ingredients. Don’t worry about making a well or anything fancy, just dump it all in there.
- Mix thoroughly. Start stirring everything together with your rubber spatula or wooden spoon. At first, it might look like the peanut butter isn’t incorporating, but keep going. The mixture will come together as you stir. I usually switch to using my hands at the end to make sure everything is fully combined. You want a uniform mixture where all the oats are coated and the chocolate chips are distributed evenly. This takes about 2 minutes of solid stirring.
- Check the consistency. The mixture should hold together when you squeeze a small amount in your hand. If it’s too dry and crumbly, add a teaspoon more honey or peanut butter. If it’s too sticky and wet, add a tablespoon more oats. I’ve had to adjust based on different peanut butter brands, so don’t worry if you need to tweak it slightly.
- Chill the mixture (optional but helpful). If the mixture feels too soft to roll, pop the bowl in the fridge for 15-20 minutes. This makes rolling much easier, especially if your kitchen is warm. I usually skip this step because I’m impatient, but it does help if you’re having trouble.
- Roll into balls. Using your cookie scoop or a tablespoon, scoop out portions of the mixture and roll them between your palms into smooth balls. Aim for about 1-inch in diameter, which makes roughly 16-18 bites. If the mixture sticks to your hands, lightly wet your palms with water. This trick works like magic.
- Add the finishing touch. Place the rolled bites on your parchment-lined baking sheet or plate. If you’re using flaky sea salt, sprinkle a tiny pinch on top of each ball while they’re still slightly warm from your hands. The salt sticks better this way.
- Chill to set. Refrigerate the energy bites for at least 30 minutes before eating. This helps them firm up and hold their shape. I know it’s tempting to eat one right away, and you can, but they’re much better after they’ve had time to set.
Pro tip: Your hands will get a bit messy during rolling, but that’s part of the experience. I keep a small bowl of water nearby to dip my fingers in if things get too sticky. And don’t worry if your balls aren’t perfectly round, they’ll taste the same no matter what shape they are.
Cooking Tips & Techniques
I’ve made these energy bites more times than I can count, and I’ve learned a few things along the way. Let me share what I’ve figured out so you don’t have to make the same mistakes I did.
Don’t overmix. I know, I just told you to mix thoroughly, but there’s a difference between thoroughly mixed and overmixed. Once everything comes together, stop. Overmixing can make the oats break down too much and give you a gummy texture. You want to see some oat texture still visible.
Temperature matters. If your peanut butter is straight from the fridge, it’ll be harder to mix. Let it sit at room temperature for about 10 minutes before starting. Same goes for honey, cold honey is thick and stubborn. Room temperature ingredients mix together much more smoothly.
Toast your oats for extra flavor. This is optional, but if you have an extra 5 minutes, spread your oats on a baking sheet and toast them at 350°F (175°C) for 5-7 minutes until they’re lightly golden and smell nutty. Let them cool completely before using. This adds a deeper, toastier flavor that makes these taste even better. I did this once by accident and now I do it every time.
My biggest failure: The first time I made these, I used old peanut butter that had been sitting in my pantry for months. It was dry and crumbly, and the energy bites turned out the same way. They wouldn’t hold together and just fell apart in my hands. Fresh peanut butter makes a huge difference. If your peanut butter looks dry or separated, give it a good stir before using, or better yet, open a fresh jar.
Multitasking strategy: While the mixture chills, I clean up my dishes and prep my storage container. This way, by the time the mixture is ready to roll, my workspace is clean and organized. It makes the whole process feel smoother and less chaotic.
Consistency tip: If you’re making a double batch, mix everything in two separate bowls rather than one giant bowl. It’s easier to mix thoroughly and you’ll get a better texture. I learned this the hard way when I tried to make a triple batch in one bowl and ended up with unevenly mixed bites.
Variations & Adaptations
One of the best things about this recipe is how flexible it is. You can change it up based on what you have on hand or what you’re craving. Here are some variations I’ve tried and loved:
- Chocolate Peanut Butter Dream: Add 1 tablespoon of cocoa powder to the dry ingredients. This makes them taste like no-bake chocolate peanut butter cookies. I add a few extra chocolate chips on top for looks, but that’s just for fun.
- Coconut Almond Crunch: Swap the peanut butter for almond butter, add ¼ cup shredded coconut, and use slivered almonds instead of chocolate chips. The texture is amazing, and it tastes like an almond joy in bite form.
- Spiced Apple Cinnamon: Add ½ teaspoon cinnamon, ¼ teaspoon nutmeg, and ¼ cup dried apple pieces (chopped small). Use maple syrup instead of honey for a fall-inspired version. These are perfect for autumn afternoons.
- Vegan Version: Use maple syrup or agave nectar instead of honey. Everything else stays the same. I’ve made these for my vegan friends and they couldn’t tell the difference.
- Extra Protein Boost: Add 1 scoop (about 30g) of vanilla or chocolate protein powder. You’ll need to increase the wet ingredients slightly, add an extra tablespoon of honey and peanut butter. I do this when I’m using these as pre-workout fuel.
- Nut-Free School-Friendly: Use sunflower seed butter or WowButter instead of peanut butter. The color will be a bit greener (thanks to the chlorophyll in sunflower seeds), but the taste is still great. My kids’ school is nut-free, so this is our go-to version for lunchboxes.
My personal favorite variation is the chocolate peanut butter dream version. I made it on a whim one night when I was craving something chocolatey, and now it’s my default. My husband actually prefers the original, so I usually make a batch of each. It’s not much extra work, and everyone gets what they want.
Serving & Storage Suggestions
These energy bites are best served cold, straight from the fridge. The texture is firm but chewy, and the chocolate chips are nicely set. I’ve eaten them at room temperature too, and they’re fine, but they’re definitely better chilled.
Serving ideas:
- Pack 2-3 in a lunchbox for a midday snack
- Grab one before a workout for quick energy
- Serve them on a platter with fresh fruit for a casual gathering
- Pair them with a glass of cold milk or a warm cup of coffee
- Crumble one over Greek yogurt for a crunchy topping
Storage instructions:
- Refrigerator: Store in an airtight container for up to 2 weeks. I use a glass container with a tight-fitting lid. Layer them between sheets of parchment paper if you’re stacking them to prevent sticking.
- Freezer: These freeze beautifully. Place them in a single layer on a baking sheet and freeze for 1 hour, then transfer to a freezer-safe bag or container. They’ll keep for up to 3 months. I always keep a stash in my freezer for busy weeks.
- Countertop: You can keep them at room temperature for 2-3 days, but they’ll be softer and more prone to falling apart. I don’t recommend this unless you’re eating them immediately.
Reheating: There’s no need to reheat these. If frozen, just let them sit at room temperature for 5-10 minutes, or eat them straight from the freezer. I actually love them frozen, they’re like little peanut butter ice cream bites.
Flavor development: These actually get better after a day in the fridge. The flavors meld together and the texture becomes more uniform. I always try to make them a day ahead if I’m serving them for a gathering. The difference is subtle but noticeable.
Nutritional Information & Benefits
Here’s the approximate nutritional breakdown for one energy bite (based on 16 servings):
| Nutrient | Amount per bite |
|---|---|
| Calories | 145 |
| Total Fat | 7g |
| Saturated Fat | 2g |
| Carbohydrates | 17g |
| Fiber | 3g |
| Sugar | 9g |
| Protein | 5g |
These numbers are estimates and will vary based on your specific ingredients. The peanut butter and oats provide sustained energy, while the flaxseed adds omega-3 fatty acids and extra fiber. The dark chocolate chips offer antioxidants, and the honey gives a quick natural energy boost.
Dietary considerations: This recipe is naturally vegetarian and can be made vegan, gluten-free, and nut-free with simple substitutions. It contains peanuts and may contain traces of other allergens depending on your ingredients. If you’re making these for someone with allergies, always check your labels carefully.
I personally love that these energy bites give me a clean energy boost without the crash that comes from sugary snacks. They’re perfect for those 3 PM slumps when I need something to get me through the rest of the afternoon. Plus, they’re portion-controlled, which helps me avoid mindless snacking straight from the container.
If you enjoy making healthy snacks at home, you might also love this fresh dandelion green pesto for a savory option, or these crispy fried dandelion blossoms for another quick snack idea.
Conclusion
These no-bake peanut butter protein energy bites have honestly become a staple in my kitchen, and I think they’ll become one in yours too. They’re quick, they’re easy, and they actually taste good. No more choking down dry, chalky protein bars that cost five dollars each. This recipe gives you something you’ll genuinely look forward to eating.
I love that I can customize them based on what I’m craving or what I have in my pantry. Some weeks I make them with dark chocolate chips, other weeks I add coconut and dried fruit. The base recipe is forgiving enough that you can experiment without worrying about ruining a batch. And honestly, even the “failures” are still pretty delicious.
I’d love to hear how these turn out for you. Did you try any fun variations? Did your kids love them? Did you eat half the batch before they made it to the fridge? (No judgment, I’ve been there.) Drop a comment below and let me know. And if you have a favorite flavor combination I haven’t tried, please share it. I’m always looking for new ideas to keep things interesting.
For another quick and satisfying snack, try this homemade dandelion honey for a natural sweet treat. And if you’re in the mood for something savory, this hearty lentil stew is perfect for cozy evenings.
Now go make some energy bites. Your future self, the one who’s hungry and busy and needs a quick snack, will thank you.
Frequently Asked Questions
Can I use quick oats instead of rolled oats?
Yes, you can. Quick oats will give a softer, more uniform texture. The energy bites won’t be as chewy, but they’ll still taste great. I’ve made them both ways and prefer rolled oats for the texture, but quick oats work perfectly fine in a pinch.
Why are my energy bites falling apart?
This usually happens when the mixture is too dry. Add a little more peanut butter or honey, one teaspoon at a time, until the mixture holds together when squeezed. Also, make sure you’re chilling them for at least 30 minutes before eating, this helps them firm up significantly.
How long do these energy bites last?
In the refrigerator, they’ll stay fresh for up to 2 weeks in an airtight container. In the freezer, they’ll keep for up to 3 months. I’ve never had a batch last that long because we eat them too quickly, but theoretically they’ll be fine.
Can I make these without chocolate chips?
Absolutely. You can leave them out entirely, or substitute with dried fruit like raisins, cranberries, or chopped dates. Chopped nuts, seeds, or even a tablespoon of cocoa powder work great too. The recipe is very adaptable.
Are these energy bites healthy for kids?
Yes, they’re a great snack for kids. They have protein, fiber, and healthy fats from the peanut butter and oats. Just be mindful of the honey content if you’re watching sugar intake. For younger kids, make sure the peanut butter is smooth and the bites are cut into smaller pieces to prevent choking.
Pin This Recipe!

Easy No-Bake Peanut Butter Protein Energy Bites: Best 5-Minute Snack
These no-bake peanut butter protein energy bites are a quick, delicious, and healthy snack made with simple ingredients like oats, peanut butter, honey, and dark chocolate chips. Ready in just 5 minutes, they’re perfect for busy days, pre-workout fuel, or a satisfying afternoon treat.
- Total Time: 35 minutes (includes 30 minutes chilling)
- Yield: 16-18 bites 1x
Ingredients
- 1 cup (100g) rolled oats (old-fashioned oats)
- ½ cup (130g) creamy peanut butter
- ⅓ cup (110g) honey
- ¼ cup (45g) dark chocolate chips
- 2 tablespoons (14g) ground flaxseed
- 1 teaspoon (5ml) vanilla extract
- ¼ teaspoon salt
- Flaky sea salt for topping (optional)
Instructions
- Combine the dry ingredients: In a large mixing bowl, add rolled oats, ground flaxseed, and dark chocolate chips. Stir to distribute evenly.
- Add the wet ingredients: Add creamy peanut butter, honey, vanilla extract, and salt directly to the bowl with the dry ingredients.
- Mix thoroughly: Stir with a rubber spatula or wooden spoon until the mixture comes together. Switch to using your hands at the end to ensure everything is fully combined. This takes about 2 minutes.
- Check the consistency: The mixture should hold together when squeezed. If too dry, add a teaspoon more honey or peanut butter. If too sticky, add a tablespoon more oats.
- Chill the mixture (optional but helpful): If the mixture feels too soft to roll, refrigerate for 15-20 minutes.
- Roll into balls: Using a cookie scoop or tablespoon, scoop portions and roll between your palms into 1-inch balls. Aim for 16-18 bites. Lightly wet your palms if the mixture sticks.
- Add the finishing touch: Place rolled bites on a parchment-lined baking sheet or plate. Sprinkle flaky sea salt on top if desired.
- Chill to set: Refrigerate for at least 30 minutes before eating to firm up.
Notes
For best results, use room temperature peanut butter and honey. Toast oats at 350°F (175°C) for 5-7 minutes for extra flavor. These energy bites get better after a day in the fridge as flavors meld. Store in an airtight container in the refrigerator for up to 2 weeks or freeze for up to 3 months.
- Prep Time: 5 minutes
- Cook Time: 0 minutes
- Category: Snack
- Cuisine: American
Nutrition
- Serving Size: 1 energy bite
- Calories: 145
- Sugar: 9
- Sodium: 85
- Fat: 7
- Saturated Fat: 2
- Carbohydrates: 17
- Fiber: 3
- Protein: 5
Keywords: no-bake energy bites, peanut butter protein balls, healthy snack, 5-minute recipe, gluten-free option, vegan option, kid-friendly snack


