
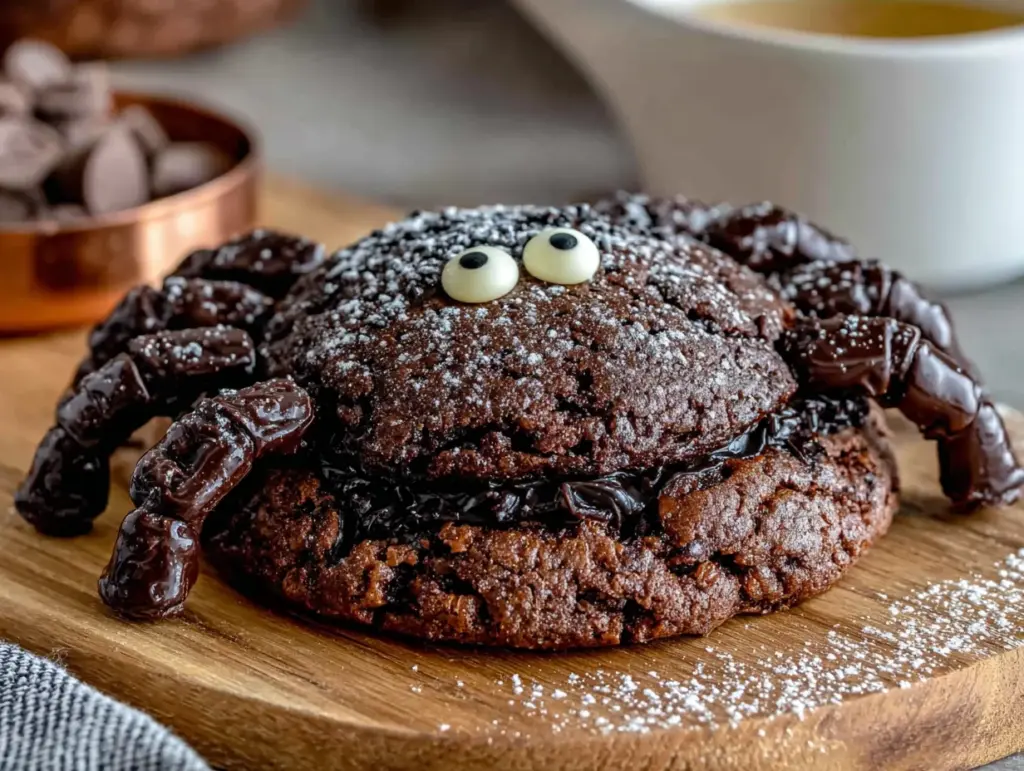
It was 10:47 PM on a random Tuesday, and I was hit with the most ridiculous craving. I wanted a Halloween cookie — not just any cookie, but one that looked like a spider. The problem? It was February. No seasonal candy in sight. No candy eyes. No pretzel sticks. But I had a bag of chocolate chips and a roll of sugar cookie dough that was about to expire. So I did what any tired, slightly unhinged person would do at nearly midnight — I started snapping chocolate chips in half to make spider legs.
Honestly, I felt a little silly at first. There I was, standing in my kitchen in pajamas, carefully pressing eight chocolate chip halves into each little cookie ball. But when they came out of the oven — these adorable little arachnids with dark chocolate legs sticking out at all angles — I actually laughed out loud. They were weird. They were wonderful. And they tasted way better than the fancy decorated version I’d been overthinking for years.
These easy spider cookies with chocolate cookie legs have become my go-to for Halloween parties, classroom treats, and honestly, any random Tuesday when I need a smile. They’re the kind of recipe that proves you don’t need specialty ingredients or hours of patience to make something that looks impressive. Just a little creativity, some basic pantry staples, and maybe a late-night impulse you can’t quite explain. Maybe you’ve been there — standing in your kitchen, staring at ingredients, wondering what would happen if you just tried something weird?
Why You’ll Love This Recipe
Let me tell you why these cookies have earned a permanent spot in my recipe rotation. I’ve tested this method more times than I care to admit, and every batch has gotten the same reaction — people can’t believe how simple they are.
- Quick & Easy : From start to finish, these come together in about 25 minutes. No chilling. No complicated piping. Perfect for busy weeknights or last-minute party contributions.
- Simple Ingredients : You likely already have everything in your kitchen. No special candy eyes, no pretzel sticks, no trip to a specialty baking store. Just chocolate chips and cookie dough.
- Perfect for Halloween (or Any Spooky Occasion) : Great for classroom parties, office potlucks, or making with kids on a rainy afternoon. They’re also surprisingly fun for a “just because” baking session.
- Crowd-Pleaser : Kids adore them. Adults get a kick out of them. I’ve watched grown-ups giggle while eating these cookies, and that alone makes them worth making.
- Unbelievably Delicious : The combination of soft, chewy cookie and crunchy chocolate legs is next-level comfort food. The chocolate chips melt just slightly into the cookie base, creating little pockets of gooey goodness.
What makes these different from every other spider cookie recipe out there? It’s the technique. By using halved chocolate chips as legs instead of pretzels or licorice, you get a cookie that’s entirely edible — no picking off weird candy parts. Plus, the chocolate legs actually taste amazing with the cookie base. It’s comfort food reimagined — faster, simpler, but with the same soul-soothing satisfaction.
What Ingredients You Will Need
This recipe uses simple, pantry-friendly ingredients to deliver bold flavor and satisfying texture without the fuss. Here’s what you’ll need to gather:
For the Cookie Base
- 1 cup unsalted butter, softened (I prefer Kerrygold for its rich flavor)
- 3/4 cup granulated sugar
- 3/4 cup packed light brown sugar (adds moisture and chewiness)
- 2 large eggs, room temperature
- 1 teaspoon vanilla extract (use pure, not imitation, for best flavor)
- 2 1/4 cups all-purpose flour (spoon and level for accuracy)
- 1 teaspoon baking soda
- 1/2 teaspoon salt
For the Spider Legs & Decoration
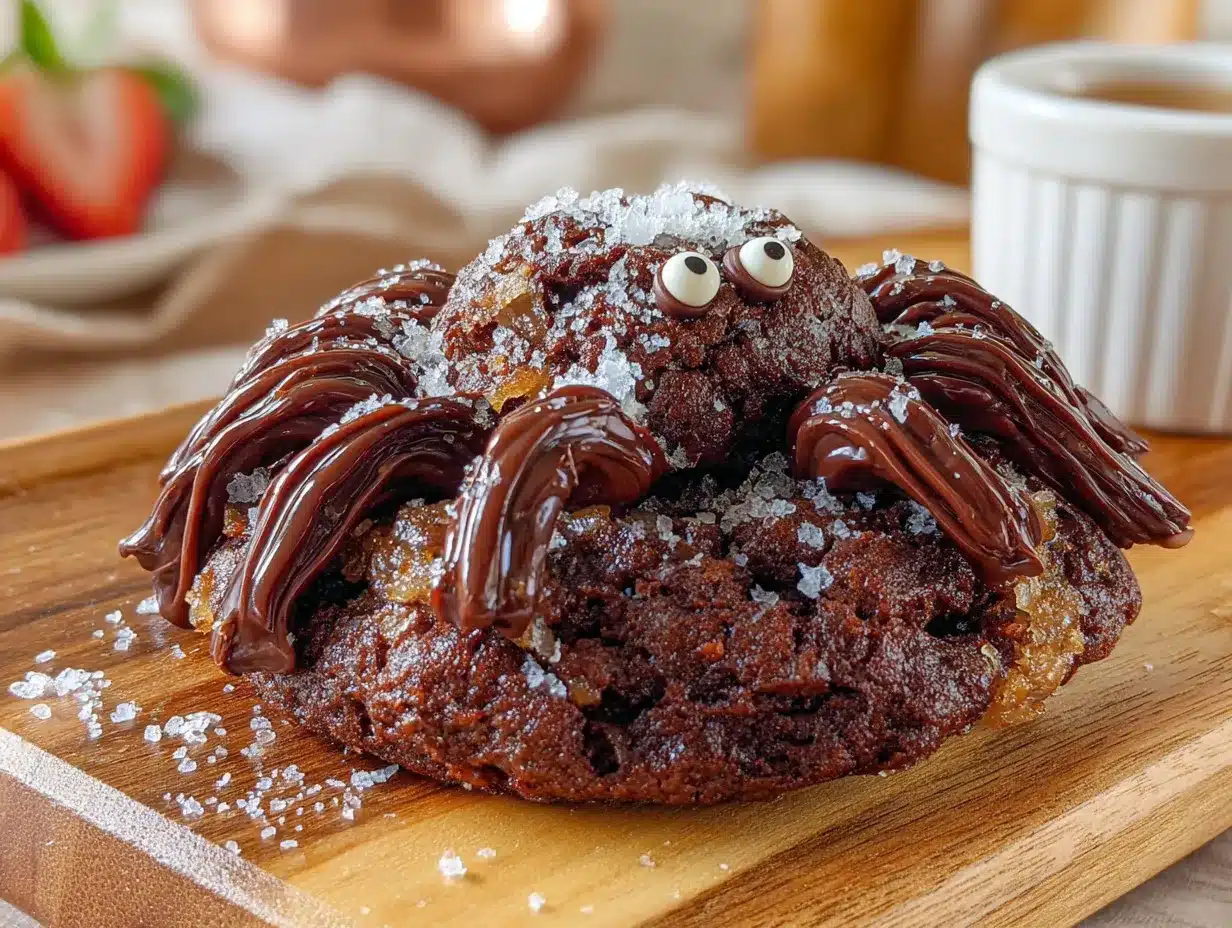
- 1 cup semi-sweet chocolate chips (I like Ghirardelli — they snap cleanly in half)
- Additional chocolate chips for the spider bodies (optional, but gives a nice dark look)
Ingredient Tips & Substitutions
- For the butter: Salted butter works too — just reduce the added salt to 1/4 teaspoon.
- For the flour: You can substitute up to half the all-purpose flour with whole wheat pastry flour for a slightly nuttier flavor.
- For the chocolate chips: Dark chocolate, milk chocolate, or even white chocolate chips all work. Just make sure they’re sturdy enough to snap in half without crumbling.
- For a gluten-free version: Use a 1:1 gluten-free baking flour blend. I’ve tested this with Bob’s Red Mill and it works beautifully.
- For a dairy-free option: Substitute vegan butter and use dairy-free chocolate chips.
Equipment Needed
You don’t need fancy tools for this recipe, which is part of its charm. Here’s what you’ll actually need:
- Large mixing bowl and electric mixer (hand or stand — I’ve used both and prefer my KitchenAid for creaming butter and sugar, but a hand mixer works just fine)
- Baking sheets (I recommend light-colored aluminum sheets for even browning — dark sheets can over-brown the bottoms)
- Parchment paper or silicone baking mat (parchment is easier for cleanup, but silicone mats give slightly more even baking)
- Cookie scoop (a 1.5-tablespoon scoop makes uniform cookies — I learned this after years of uneven batches)
- Sharp knife or bench scraper for halving chocolate chips (a chef’s knife works surprisingly well)
- Cooling rack (wire rack is best, but a clean cutting board works in a pinch)
Budget-friendly tip: If you don’t have a cookie scoop, use two spoons to portion dough. And if you’re halving chocolate chips by hand (which I actually prefer), a sharp paring knife and a steady hand are all you need.
Preparation Method
Let’s get these spiders crawling onto your baking sheet! Follow these steps carefully, and you’ll have adorable, delicious cookies in no time.
- Preheat your oven to 350°F (175°C). Line two baking sheets with parchment paper or silicone baking mats. This is non-negotiable — the chocolate legs will stick to an unlined pan.
- Halve your chocolate chips. This is the most tedious step, but it’s worth it. Take about 1 cup of chocolate chips and carefully cut each one in half using a sharp knife. You’ll get cleaner breaks if the chips are cold — pop them in the freezer for 5 minutes first. Don’t stress about perfection; uneven legs add character. You should end up with about 80-100 halves, which is enough for 10-12 spiders (8 legs each).
- Cream the butter and sugars. In your large mixing bowl, beat the softened butter, granulated sugar, and brown sugar together on medium speed until light and fluffy — about 3 minutes. Scrape down the sides of the bowl halfway through. The mixture should look pale and slightly increased in volume.
- Add eggs and vanilla. Beat in the eggs one at a time, mixing well after each addition. Add the vanilla extract and mix until combined. The mixture might look slightly curdled — that’s okay, it will come together once you add the flour.
- Mix the dry ingredients. In a separate bowl, whisk together the flour, baking soda, and salt. Gradually add this to the wet mixture, mixing on low speed just until combined. Overmixing will make tough cookies, so stop as soon as you don’t see any more flour streaks. The dough should be soft but not sticky.
- Portion the dough. Using your cookie scoop or two spoons, portion out rounded tablespoons of dough (about 1.5 tablespoons each). Roll each portion into a smooth ball and place on the prepared baking sheets, spacing them about 3 inches apart. You should get 10-12 cookies per batch.
- Insert the spider legs. Here’s where the magic happens. Take your halved chocolate chips and gently press 8 halves into each dough ball — 4 on each side — to create the spider legs. Insert them at slight angles so they look like legs crawling outward. Don’t push them too deep; about halfway in is perfect. The legs should stick out at different angles for a more natural (and creepy-cute) look.
- Bake the cookies. Place the baking sheets in the preheated oven and bake for 8-10 minutes, or until the edges are lightly golden and the centers still look slightly underdone. The cookies will continue to set as they cool. Rotate the pans halfway through for even baking.
- Cool completely. Let the cookies cool on the baking sheets for 5 minutes — this allows the chocolate legs to firm up. Then transfer them to a wire rack to cool completely. The legs will look a little wobbly at first, but they’ll harden as they cool. Don’t try to move them too early or the legs might fall out.
Pro tip: If any chocolate legs fall out during baking (it happens!), just press them back in while the cookies are still warm. Nobody will ever know.
Cooking Tips & Techniques
After making these cookies more times than I can count (including a memorable batch where I forgot to halve the chocolate chips and ended up with spider legs the size of tree trunks), I’ve gathered some hard-won wisdom.
The biggest mistake I see: People push the chocolate legs in too deep. If you insert them all the way to the dough surface, they’ll sink into the cookie as it spreads and you’ll lose the leg effect entirely. Insert them about halfway — the exposed part will stay visible while the buried end anchors them in place.
Timing is everything. These cookies are best when slightly underbaked. Pull them when the edges are set but the centers still look soft and puffy. They’ll continue baking on the hot pan. Overbaked cookies = hard, crunchy spiders, and nobody wants that.
Multitasking strategy: While the first batch bakes, prepare the second batch of dough balls with legs. This keeps your workflow smooth. Just don’t leave the second batch sitting too long — the chocolate legs can soften at room temperature.
For consistent results: Use a kitchen scale to weigh your dough portions. Each cookie should be about 30-35 grams. This ensures even baking and uniform spider sizes. I learned this after a batch where one spider came out the size of a dinner plate and another was bite-sized.
Temperature matters: If your kitchen is warm, the chocolate legs might start melting before they go into the oven. Pop the cookie sheets in the fridge for 10 minutes before baking to firm everything up. This also helps prevent excessive spreading.
Variations & Adaptations
One of the best things about this recipe is how easily it adapts. Here are some variations I’ve tried and loved:
Peanut Butter Spider Cookies
Replace 1/2 cup of the butter with creamy peanut butter. Reduce the granulated sugar to 1/2 cup. The peanut butter adds a savory note that pairs beautifully with the chocolate legs. My neighbor Sarah requests these every Halloween.
Gluten-Free Spider Cookies
Use a 1:1 gluten-free flour blend. I’ve tested this with King Arthur Measure for Measure and the texture is nearly identical to the original. Just be careful not to overmix — gluten-free dough can get gummy.
White Chocolate & Cranberry Spiders
Use white chocolate chips for the legs and add 1/2 cup dried cranberries to the dough. The tart cranberries balance the sweetness, and the white chocolate legs look like ghostly spider legs — perfect for a spooky-but-pretty effect.
Double Chocolate Spiders
Replace 1/4 cup of the flour with unsweetened cocoa powder. Use dark chocolate chips for the legs. These are intensely chocolatey and look especially dramatic against the dark cookie base.
Vegan Spider Cookies
Substitute the butter with vegan butter (I like Earth Balance), use a flax egg (1 tablespoon ground flaxseed + 3 tablespoons water), and choose dairy-free chocolate chips. The texture is slightly different — a bit more cakey — but still delicious.
Serving & Storage Suggestions
These cookies are best served at room temperature, ideally within a few hours of baking when the chocolate legs are still snappy and the cookie centers are soft and chewy. They make a fantastic addition to any Halloween dessert table, classroom party, or spooky movie night.
Presentation tip: Arrange them on a black or dark-colored platter to make the spider legs pop. I like to scatter a few extra chocolate chips around the plate as if the spiders have been snacking. For extra fun, serve them alongside a bowl of “spider eggs” (white chocolate truffles or mozzarella balls).
Storage: Store leftover cookies in an airtight container at room temperature for up to 5 days. Place a sheet of parchment paper between layers to prevent the chocolate legs from sticking to each other. Do not refrigerate — the chocolate can bloom (develop white streaks) and the cookies will dry out.
Freezing: You can freeze the unbaked dough balls (with legs inserted) on a baking sheet until solid, then transfer to a freezer bag. Bake directly from frozen, adding 2-3 minutes to the baking time. Baked cookies also freeze well for up to 3 months — just thaw at room temperature.
Reheating: If you want that fresh-from-the-oven experience, pop a cookie in the microwave for 10-15 seconds. The chocolate legs will soften slightly, but the cookie will taste wonderfully warm and gooey.
One thing I love about these cookies is how the flavors develop over time. Day-old cookies actually taste more cohesive — the chocolate flavor melds with the cookie base in a way that’s hard to describe but wonderful to experience.
Nutritional Information & Benefits
While these are definitely a treat (and meant to be enjoyed as such!), here’s a rough nutritional breakdown per cookie (based on 12 cookies):
- Calories: 320
- Total Fat: 18g
- Saturated Fat: 11g
- Carbohydrates: 38g
- Sugar: 22g
- Protein: 4g
- Fiber: 1g
- Sodium: 180mg
Dietary considerations: This recipe contains gluten, dairy, and eggs. For allergen-friendly alternatives, see the variations section above. The good news? Dark chocolate contains antioxidants and flavonoids, so you’re getting a tiny health boost with each bite. The butter provides vitamin A, and the eggs offer protein. Is it health food? No. But it’s a treat made with real ingredients, and that counts for something.
From a wellness perspective, I believe in enjoying treats without guilt. These cookies are meant to bring joy — to a Halloween party, a classroom, or your own kitchen on a random Tuesday night. Life’s too short for boring cookies.
Conclusion
These easy spider cookies with chocolate cookie legs are proof that the best recipes often come from late-night experiments and happy accidents. They’re simple enough for a weeknight baking session, impressive enough for a Halloween party, and delicious enough to make you wonder why you ever bothered with complicated decorated cookies.
I love that this recipe invites creativity. Maybe you’ll use milk chocolate legs instead of semi-sweet. Maybe you’ll add a pinch of cinnamon to the dough. Maybe you’ll make them with your kids on a rainy Saturday and watch their faces light up when the spiders come out of the oven. That’s the beauty of a simple, forgiving recipe — it leaves room for your own touch.
So go ahead — preheat that oven, halve those chocolate chips, and make some spiders. And when you do, I’d love to hear about it. Leave a comment below with your variations, tag me in your photos, or just tell me what time of night you found yourself baking these. Trust me, I won’t judge. Happy baking, and may your cookies always have the perfect number of legs!
Frequently Asked Questions
Can I use store-bought cookie dough?
Absolutely! This recipe works great with refrigerated sugar cookie or chocolate chip cookie dough. Just roll it into balls and add the chocolate legs as directed. It saves even more time on busy nights.
How do I keep the chocolate legs from falling out?
Insert them about halfway into the dough ball, and make sure the dough isn’t too soft. If your dough is warm, chill the cookie sheets for 10 minutes before baking. Also, don’t move the cookies too soon after baking — let them set on the pan for 5 minutes.
Can I make these ahead of time?
Yes! You can prepare the dough balls with legs inserted and freeze them on a baking sheet. Once frozen, transfer to a freezer bag. Bake directly from frozen, adding 2-3 minutes to the baking time. Baked cookies also freeze well for up to 3 months.
What if I don’t have time to halve the chocolate chips?
You can use mini chocolate chips instead — they’re already the perfect size for spider legs. Just press 8 mini chips into each dough ball. They won’t look as dramatic, but they’ll still be cute and delicious.
Why did my cookies spread too much?
This usually happens if the dough is too warm or if you used too much butter. Make sure your butter is softened but not melted, and chill the dough balls for 10-15 minutes before baking if your kitchen is warm. Also, check that your baking soda is fresh — old baking soda can cause excessive spreading.
Pin This Recipe!


Easy Spider Cookies with Chocolate Cookie Legs
These easy spider cookies with chocolate cookie legs are a fun and delicious Halloween treat made with simple pantry ingredients. They come together in about 25 minutes and are perfect for parties, classroom treats, or a spontaneous baking session.
- Total Time: 25 minutes
- Yield: 12 servings 1x
Ingredients
- 1 cup unsalted butter, softened
- 3/4 cup granulated sugar
- 3/4 cup packed light brown sugar
- 2 large eggs, room temperature
- 1 teaspoon vanilla extract
- 2 1/4 cups all-purpose flour
- 1 teaspoon baking soda
- 1/2 teaspoon salt
- 1 cup semi-sweet chocolate chips (for legs)
- Additional chocolate chips for spider bodies (optional)
Instructions
- Preheat your oven to 350°F (175°C). Line two baking sheets with parchment paper or silicone baking mats.
- Halve your chocolate chips: Take about 1 cup of chocolate chips and carefully cut each one in half using a sharp knife. For cleaner breaks, chill the chips in the freezer for 5 minutes first. You should end up with about 80-100 halves.
- Cream the butter and sugars: In a large mixing bowl, beat the softened butter, granulated sugar, and brown sugar together on medium speed until light and fluffy, about 3 minutes. Scrape down the sides of the bowl halfway through.
- Add eggs and vanilla: Beat in the eggs one at a time, mixing well after each addition. Add the vanilla extract and mix until combined.
- Mix the dry ingredients: In a separate bowl, whisk together the flour, baking soda, and salt. Gradually add this to the wet mixture, mixing on low speed just until combined. Do not overmix.
- Portion the dough: Using a cookie scoop or two spoons, portion out rounded tablespoons of dough (about 1.5 tablespoons each). Roll each portion into a smooth ball and place on the prepared baking sheets, spacing them about 3 inches apart. You should get 10-12 cookies.
- Insert the spider legs: Gently press 8 halved chocolate chips into each dough ball — 4 on each side — to create the spider legs. Insert them at slight angles, about halfway in.
- Bake the cookies: Place the baking sheets in the preheated oven and bake for 8-10 minutes, or until the edges are lightly golden and the centers still look slightly underdone. Rotate the pans halfway through for even baking.
- Cool completely: Let the cookies cool on the baking sheets for 5 minutes, then transfer them to a wire rack to cool completely. If any legs fall out, press them back in while the cookies are still warm.
Notes
For best results, insert chocolate legs about halfway into the dough to prevent them from sinking during baking. If your kitchen is warm, chill the cookie sheets for 10 minutes before baking to prevent excessive spreading. Store in an airtight container at room temperature for up to 5 days. Freeze unbaked dough balls with legs inserted for up to 3 months.
- Prep Time: 15 minutes
- Cook Time: 10 minutes
- Category: Dessert
- Cuisine: American
Nutrition
- Serving Size: 1 cookie
- Calories: 320
- Sugar: 22
- Sodium: 180
- Fat: 18
- Saturated Fat: 11
- Carbohydrates: 38
- Fiber: 1
- Protein: 4
Keywords: spider cookies, Halloween cookies, chocolate chip cookies, easy cookies, no chill cookies, spider legs, chocolate legs


