

There used to be a tiny coffee shop tucked into an alley in downtown Portland called The Frosty Mug that made a hot cocoa that I still dream about. When they closed their doors in 2019—literally overnight, with a handwritten sign taped to the window—I honestly felt a little lost. That cocoa was my winter ritual. The way they layered the chocolate, the steam rising off the mug, and that ridiculous mountain of peppermint whipped cream that somehow never melted too fast. After twelve tries—twelve mugs of overly sweet, grainy, or just plain disappointing cocoa—I finally got it.
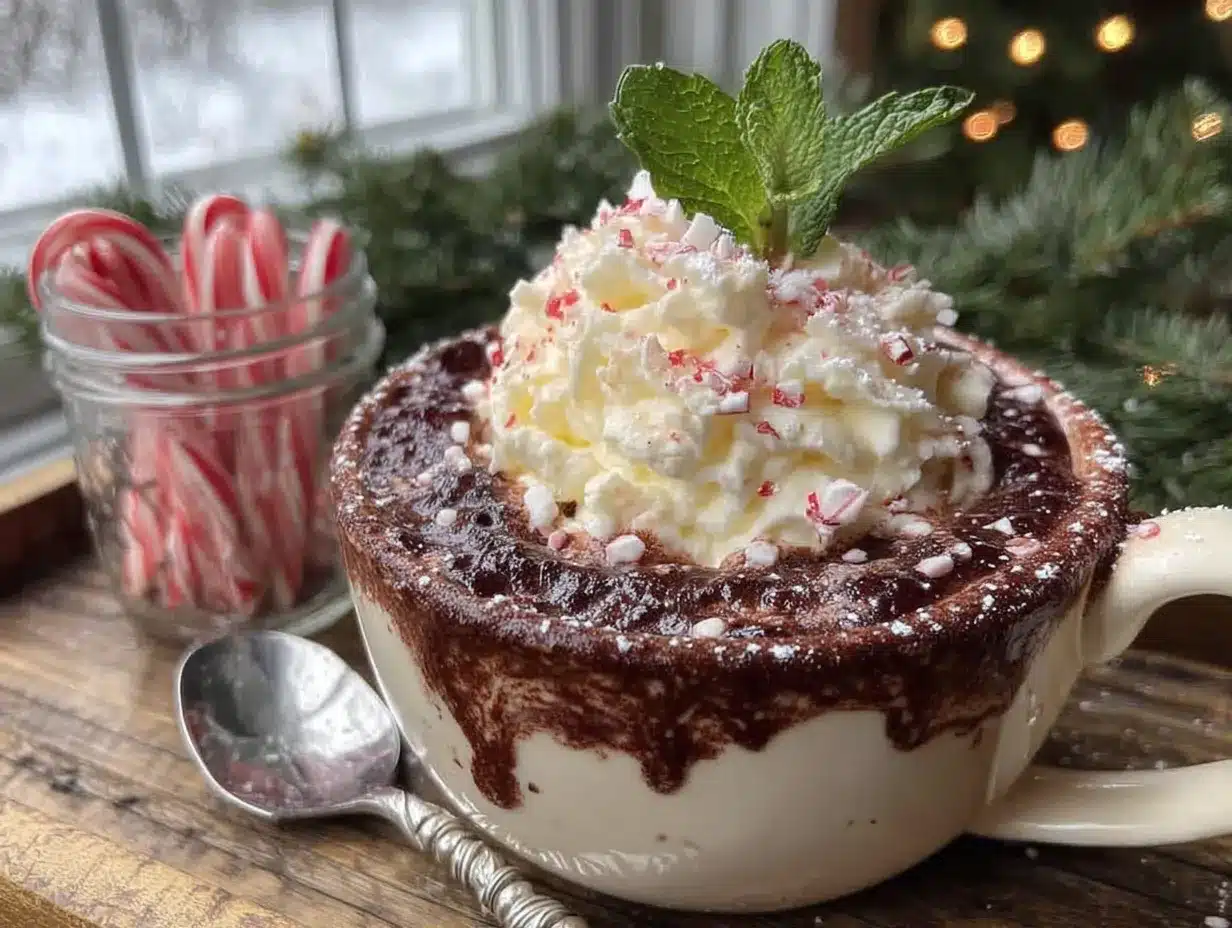
This homemade hot cocoa bar with peppermint whipped cream is that exact memory, recreated in my own kitchen. And let me tell you, it was worth every failed batch. The secret isn’t fancy chocolate or expensive equipment—it’s about building layers of flavor and texture that make each cup feel like a special occasion. I mean, who doesn’t want to curl up with a mug of something this good when the temperature drops?
Maybe you’ve been there—chasing a taste from a place that no longer exists, or just craving something that feels like a hug in a mug. This recipe is for those moments. It’s the kind of hot cocoa bar that turns a regular Tuesday night into something worth remembering. And the peppermint whipped cream? Honestly, it’s the star of the show.
Why You’ll Love This Recipe
Let me share why this hot cocoa bar has become my go-to winter tradition, tested and tweaked over countless cozy evenings.
- Quick & Easy: Comes together in under 15 minutes, perfect for unexpected guests or a spontaneous self-care night.
- Simple Ingredients: No fancy grocery trips needed—you likely have most of these items in your pantry already.
- Perfect for Winter Gatherings: Great for holiday parties, movie nights, or just surviving a snowy afternoon.
- Crowd-Pleaser: Kids and adults alike go crazy for the build-your-own aspect and that peppermint whipped cream.
- Unbelievably Delicious: The combination of rich, velvety cocoa with cool, minty cream is next-level comfort.
What makes this recipe different from all the other hot cocoa bars out there? It’s the technique. Most recipes use water or just milk, but I’ve found that blending whole milk with a splash of heavy cream creates that luxurious, almost pudding-like texture without being too heavy. And the peppermint whipped cream? It’s stabilized with a tiny bit of cream cheese—a trick I learned from a pastry chef friend—so it holds its shape for hours without deflating.
This isn’t just another hot cocoa bar. It’s the kind that makes you close your eyes after the first sip. It’s comfort food reimagined—richer, faster, and with the same soul-soothing satisfaction you crave on a cold night. Perfect for impressing guests without stress, or turning a simple evening into something memorable.
What Ingredients You Will Need
This recipe uses simple, wholesome ingredients to deliver that deep, satisfying chocolate flavor and airy peppermint topping. Most of these are pantry staples, but I’ve included a few notes to help you pick the best options.
For the Hot Cocoa Base
- 2 cups whole milk (adds richness; oat milk works well for dairy-free)
- 1 cup heavy cream (creates that velvety texture)
- 1/4 cup unsweetened cocoa powder (I prefer Ghirardelli for its deep flavor)
- 1/4 cup granulated sugar (adjust to taste; coconut sugar works too)
- 1/2 cup semi-sweet chocolate chips (adds extra richness and shine)
- 1 teaspoon vanilla extract (pure, not imitation)
- Pinch of sea salt (balances the sweetness and enhances chocolate flavor)
For the Peppermint Whipped Cream
- 1 cup heavy whipping cream (cold, for best volume)
- 2 tablespoons powdered sugar (dissolves easily; avoid granulated)
- 1/2 teaspoon peppermint extract (start with less; it’s potent)
- 1 tablespoon cream cheese, softened (secret stabilizer—trust me on this)
- Crushed candy canes or peppermint candies (for garnish)
For the Toppings Bar (Optional but Highly Recommended)
- Mini marshmallows
- Chocolate shavings or curls
- Caramel sauce
- Crushed pretzels (for that sweet-salty combo)
- Cinnamon sticks (for stirring)
- Whipped cream dispenser (if you want to get fancy)
Ingredient Selection Tips: Look for high-quality cocoa powder—Dutch-processed gives a smoother, less acidic flavor. For the chocolate chips, I recommend Guittard or Ghirardelli. If you’re using peppermint extract, go with a brand like Nielsen-Massey; it’s pure and won’t taste like toothpaste.
Substitution Guidance: For a dairy-free version, use full-fat oat milk and coconut cream (chilled) for the whipped cream. The cream cheese stabilizer can be replaced with a pinch of xanthan gum, but honestly, the cream cheese version is better.
Equipment Needed
You don’t need a professional kitchen to pull this off, but a few tools make the process smoother.
- Medium saucepan (for the cocoa base; non-stick works best)
- Whisk (a silicone whisk is gentle on non-stick surfaces)
- Mixing bowl (for the whipped cream; metal or glass is ideal)
- Hand mixer or stand mixer (you can whisk by hand, but your arm will thank you)
- Measuring cups and spoons
- Mugs or heatproof glasses (clear glass shows off the layers beautifully)
- Small bowls or ramekins (for the topping bar)
- Ziploc bag and rolling pin (for crushing candy canes without making a mess)
Budget-Friendly Alternatives: No hand mixer? A whisk and some elbow grease work fine—just make sure the cream is very cold. For the candy cane crushing, a mortar and pestle works great, or you can buy pre-crushed peppermint pieces.
Preparation Method
Let’s get to the good part. Follow these steps, and you’ll have a hot cocoa bar that rivals any café.
-
Make the Peppermint Whipped Cream First: In a mixing bowl, combine the cold heavy cream, powdered sugar, peppermint extract, and softened cream cheese. Beat on medium-high speed until stiff peaks form—about 3-4 minutes. Be careful not to overbeat, or you’ll end up with butter. The cream cheese might leave tiny white specks at first; keep mixing, and they’ll disappear. Set the bowl in the fridge while you make the cocoa.
-
Start the Cocoa Base: In a medium saucepan over medium heat, whisk together the milk and heavy cream. Heat until small bubbles form around the edges—don’t let it boil. This takes about 4-5 minutes. You want it steaming hot but not scalded.
-
Add the Dry Ingredients: Whisk in the cocoa powder and sugar until completely dissolved. No lumps allowed here. If you see clumps, keep whisking—they’ll break down as the mixture heats. This takes about 2 minutes of steady whisking.
-
Incorporate the Chocolate Chips: Reduce the heat to low and add the chocolate chips, vanilla extract, and sea salt. Stir constantly until the chips are fully melted and the mixture is smooth and glossy—about 3 minutes. The cocoa should look like liquid velvet at this point.
-
Taste and Adjust: Take a small spoonful and taste it. Is it chocolatey enough? Add more cocoa powder if needed. Too sweet? A pinch more salt balances it out. This is your moment to customize.
-
Set Up the Topping Bar: While the cocoa stays warm on the stove over low heat, arrange your toppings in small bowls. Crush the candy canes by placing them in a Ziploc bag and smashing with a rolling pin. Aim for a mix of fine powder and small chunks.
-
Assemble and Serve: Ladle the hot cocoa into mugs, leaving room for toppings. Top with a generous dollop of peppermint whipped cream, then sprinkle with crushed candy canes. Add any other toppings your heart desires. Serve immediately.
Sensory Cues: The cocoa should smell deeply chocolatey with a hint of vanilla. When you whisk, the mixture should feel heavy and smooth on the spoon. The whipped cream should hold a peak when you lift the beater—if it droops, beat it a little longer.
Preparation Note: If you’re making this for a party, keep the cocoa warm in a slow cooker on the “warm” setting. Stir occasionally to prevent a skin from forming.
Cooking Tips & Techniques
I’ve made this hot cocoa bar more times than I can count, and I’ve learned a few things the hard way. Here’s what I wish someone had told me.
Don’t Skip the Cream Cheese in the Whipped Cream: I know it sounds weird, but it’s a game-changer. The first time I tried it, I was skeptical. But it stabilizes the cream without adding any noticeable flavor. Without it, your whipped cream will start weeping within an hour. With it, it stays perfect for hours.
Temperature Matters: Your heavy cream needs to be very cold—like, straight-from-the-fridge cold. If it’s even slightly warm, it won’t whip properly. I once left mine on the counter for 10 minutes and ended up with soupy cream. Lesson learned.
Watch the Heat on the Cocoa: High heat is the enemy here. If you boil the milk mixture, it can scorch and develop a burnt taste. Keep it at a gentle simmer. I ruined my first batch by walking away for two minutes—never again.
Crush Candy Canes Strategically: Don’t crush them too fine, or they’ll dissolve into the whipped cream and lose that satisfying crunch. Aim for pieces about the size of small peas. And use a Ziploc bag—trust me, the mess is real otherwise.
Make-Ahead Strategy: You can make the cocoa base up to 2 days ahead and store it in the fridge. Reheat gently on the stove, whisking to recombine. The whipped cream is best fresh, but you can make it up to 4 hours ahead and keep it refrigerated.
Variations & Adaptations
One of the best things about a hot cocoa bar is how customizable it is. Here are some variations I’ve tried and loved.
Dark Chocolate Lover’s Version: Swap the semi-sweet chocolate chips for dark chocolate (70% cocoa or higher) and use dark cocoa powder. The result is less sweet, more intense, and absolutely divine. Add a pinch of chili powder for a Mexican hot chocolate twist.
Vegan-Friendly Adaptation: Use full-fat oat milk and coconut cream (chilled overnight) for the base. For the whipped cream, chill a can of full-fat coconut milk and scoop out the solid part—it whips up beautifully. Skip the cream cheese stabilizer or use a pinch of xanthan gum.
Peppermint-Free Option: Not a mint fan? No problem. Omit the peppermint extract from the whipped cream and use vanilla bean paste instead. Top with cinnamon sugar or cocoa powder. It’s still incredibly cozy.
Spiked Adult Version: Add a shot of peppermint schnapps or bourbon to each mug before pouring the cocoa. The peppermint schnapps pairs beautifully with the whipped cream, while bourbon adds a warm, oaky note. Just label it clearly if you’re serving a mixed crowd.
White Hot Cocoa: Use white chocolate chips instead of semi-sweet, and skip the cocoa powder. Add a splash of coconut milk for extra richness. Top with the same peppermint whipped cream—the contrast is stunning.
Serving & Storage Suggestions
This hot cocoa bar is meant to be an experience, so let’s talk about how to serve it right.
Serving Temperature: Serve the cocoa piping hot—around 160°F (71°C) is ideal. The whipped cream should be cold, so the contrast in temperatures is part of the magic. If the cocoa cools down, it loses some of its velvety texture.
Presentation Ideas: Set up a self-serve bar with everything in small bowls or jars. Use a chalkboard sign to label each topping. For a party, provide clear mugs so guests can see the layers. Add a few cinnamon sticks as stirrers—they look beautiful and add a subtle warmth.
Storage Instructions: Leftover cocoa can be stored in an airtight container in the fridge for up to 3 days. Reheat gently on the stove or in the microwave, stirring every 30 seconds. The whipped cream should be used within 24 hours—after that, it starts to deflate.
Freezer-Friendly: The cocoa base freezes well for up to 2 months. Thaw overnight in the fridge and reheat. Unfortunately, the whipped cream doesn’t freeze well—it becomes grainy when thawed.
Flavor Development: The cocoa actually tastes better the next day as the flavors meld together. The chocolate becomes deeper and more rounded. So don’t be afraid to make it ahead!
Nutritional Information & Benefits
Let’s be real—this is a treat, not a health food. But here’s what you’re getting per serving (based on one mug with whipped cream and a sprinkle of candy cane).
| Nutrient | Amount Per Serving |
|---|---|
| Calories | 380 |
| Total Fat | 24g |
| Saturated Fat | 15g |
| Carbohydrates | 36g |
| Sugar | 28g |
| Protein | 6g |
| Calcium | 15% DV |
| Iron | 10% DV |
Health Benefits: Dark chocolate (if you use it) is rich in antioxidants and can improve heart health. Milk provides calcium and vitamin D. Peppermint can aid digestion and soothe headaches. But honestly, the biggest benefit here is the joy it brings—and that counts for something.
Dietary Considerations: This recipe contains dairy and gluten (from the candy canes). For a gluten-free version, use certified gluten-free candy canes. For dairy-free, follow the vegan adaptation above.
Conclusion
This homemade hot cocoa bar with peppermint whipped cream is more than just a recipe—it’s a memory waiting to happen. Whether you’re recreating a lost favorite from a closed café or starting a new tradition with loved ones, this cocoa delivers every time.
I’ve made this for holiday parties, snowy afternoons, and quiet nights when I needed a little extra warmth. It never fails to make people smile. And honestly, that’s why I keep making it. The way the rich chocolate coats your tongue, the cool burst of peppermint, the crunch of candy cane—it’s pure winter magic in a mug.
I’d love to hear how your hot cocoa bar turns out. Leave a comment below and tell me your favorite topping combination! And if you share it on social media, tag me—I want to see your cozy creations. Now go make yourself a cup. You deserve it.
Frequently Asked Questions
Can I make this hot cocoa bar ahead of time for a party?
Yes! Make the cocoa base up to 2 days ahead and reheat gently. The whipped cream can be made 4 hours ahead and kept refrigerated. Set up the topping bar just before guests arrive.
Why did my whipped cream turn out runny?
Most likely your cream wasn’t cold enough, or you didn’t beat it long enough. Make sure the cream is very cold, and beat until stiff peaks form. The cream cheese stabilizer also helps prevent this.
Can I use milk chocolate instead of semi-sweet?
Absolutely. The cocoa will be sweeter and milder. Just reduce the sugar slightly to balance the sweetness. I’ve done this for kids’ parties, and it’s always a hit.
How do I crush candy canes without making a mess?
Place them in a sturdy Ziploc bag, seal it tight, and use a rolling pin or heavy pan to crush them. You can also pulse them in a food processor for a more even texture.
Is there a way to make this lower in sugar?
Use unsweetened cocoa powder, reduce the sugar to 2 tablespoons, and use sugar-free chocolate chips. For the whipped cream, use a sugar substitute like monk fruit sweetener. The flavor will be less sweet but still satisfying.
Pin This Recipe!


Homemade Hot Cocoa Bar with Peppermint Whipped Cream
A rich, velvety hot cocoa bar topped with stabilized peppermint whipped cream and crushed candy canes, perfect for winter gatherings or cozy nights in.
- Total Time: 20 minutes
- Yield: 4 servings 1x
Ingredients
- 2 cups whole milk
- 1 cup heavy cream
- 1/4 cup unsweetened cocoa powder
- 1/4 cup granulated sugar
- 1/2 cup semi-sweet chocolate chips
- 1 teaspoon vanilla extract
- Pinch of sea salt
- 1 cup heavy whipping cream (for whipped cream)
- 2 tablespoons powdered sugar
- 1/2 teaspoon peppermint extract
- 1 tablespoon cream cheese, softened
- Crushed candy canes or peppermint candies (for garnish)
- Mini marshmallows (optional)
- Chocolate shavings or curls (optional)
- Caramel sauce (optional)
- Crushed pretzels (optional)
- Cinnamon sticks (optional)
Instructions
- Make the Peppermint Whipped Cream First: In a mixing bowl, combine the cold heavy cream, powdered sugar, peppermint extract, and softened cream cheese. Beat on medium-high speed until stiff peaks form—about 3-4 minutes. Set the bowl in the fridge while you make the cocoa.
- Start the Cocoa Base: In a medium saucepan over medium heat, whisk together the milk and heavy cream. Heat until small bubbles form around the edges—don’t let it boil. This takes about 4-5 minutes.
- Add the Dry Ingredients: Whisk in the cocoa powder and sugar until completely dissolved. No lumps allowed. This takes about 2 minutes of steady whisking.
- Incorporate the Chocolate Chips: Reduce the heat to low and add the chocolate chips, vanilla extract, and sea salt. Stir constantly until the chips are fully melted and the mixture is smooth and glossy—about 3 minutes.
- Taste and Adjust: Take a small spoonful and taste it. Add more cocoa powder if needed, or a pinch more salt to balance sweetness.
- Set Up the Topping Bar: While the cocoa stays warm on the stove over low heat, arrange your toppings in small bowls. Crush the candy canes by placing them in a Ziploc bag and smashing with a rolling pin.
- Assemble and Serve: Ladle the hot cocoa into mugs, leaving room for toppings. Top with a generous dollop of peppermint whipped cream, then sprinkle with crushed candy canes. Add any other toppings your heart desires. Serve immediately.
Notes
The cream cheese stabilizer in the whipped cream helps it hold its shape for hours. For a dairy-free version, use full-fat oat milk and coconut cream. The cocoa base can be made up to 2 days ahead and reheated gently.
- Prep Time: 10 minutes
- Cook Time: 10 minutes
- Category: Beverage
- Cuisine: American
Nutrition
- Serving Size: 1 mug with whipped c
- Calories: 380
- Sugar: 28
- Sodium: 150
- Fat: 24
- Saturated Fat: 15
- Carbohydrates: 36
- Fiber: 2
- Protein: 6
Keywords: hot cocoa, peppermint whipped cream, hot chocolate bar, winter drink, holiday recipe, homemade hot cocoa


