
It was 10:47 PM on a random Thursday in October, and I had a ridiculous craving for something that didn’t technically exist yet. I wanted pumpkin cheesecake, but I also wanted it to be fun enough that my kids would actually eat it without making that face they make when they see something “too fancy.” You know the face—the one that says “Mom, what is this and why does it look like a restaurant made it?”
I didn’t have a springform pan for a full cheesecake, but I had a 9×13 baking dish and a can of pumpkin puree that was staring at me from the pantry. Then it hit me—what if I made bars instead of a whole cake? And what if I turned the top into something silly and festive, like a spiderweb? Honestly, I was tired. It had been a long day of school pickups, homework battles, and the usual chaos that comes with feeding a family on a budget. But something about the late hour made me brave. I grabbed the cream cheese, crushed some graham crackers, and just went for it.
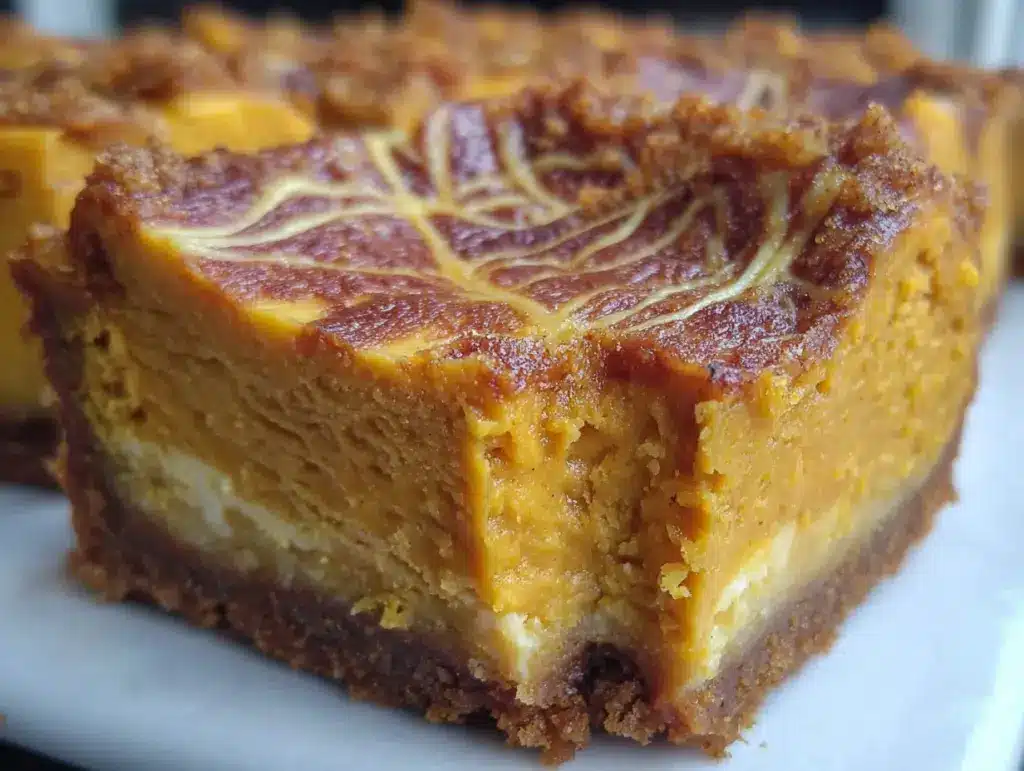
I’ll be honest—I forgot to soften the cream cheese properly and ended up with lumpy batter that I had to whisk like my life depended on it. There was flour on my sweatshirt and a smudge of pumpkin on the counter that I didn’t clean up until the next morning. But when those bars came out of the oven and I drew the spiderweb pattern on top with a toothpick, I knew I had stumbled onto something special. My kids devoured them the next day, and my husband asked if I could make them every week until Thanksgiving. That’s when I knew this recipe was a keeper—not because it was fancy, but because it made everyone at the table happy without costing a fortune or taking all day.
Why You’ll Love This Recipe
Let me tell you why these spiderweb pumpkin cheesecake bars have become the most requested fall dessert in my house. First off, they’re ridiculously easy to make. We’re talking about a graham cracker crust that comes together in five minutes, a creamy pumpkin cheesecake filling that you mix in one bowl, and a fun little spiderweb design that looks way harder than it actually is.
- Budget-Friendly Ingredients: You probably already have most of what you need in your pantry right now. Canned pumpkin, cream cheese, sugar, eggs, and graham crackers—these are all affordable staples that won’t blow your grocery budget.
- Kid-Approved Fun: The spiderweb design is a total game-changer. Kids think it’s magic when you drag a toothpick through the chocolate and cream cheese layers. My youngest calls them “spooky bars” and asks for them year-round, not just at Halloween.
- Perfect for Busy Families: These bars come together in about 20 minutes of active prep time. The oven does the rest of the work. You can make them a day ahead, and they actually taste better the next day after the flavors have had time to meld together.
- Crowd-Pleaser Every Time: I’ve brought these to school potlucks, church fall festivals, and family dinners. They disappear fast. Adults love the creamy pumpkin cheesecake flavor, and kids love the spooky web on top. It’s a win-win.
- No Special Equipment Needed: You don’t need a springform pan or a stand mixer. Just a regular 9×13 baking dish, a mixing bowl, and a toothpick. That’s it.
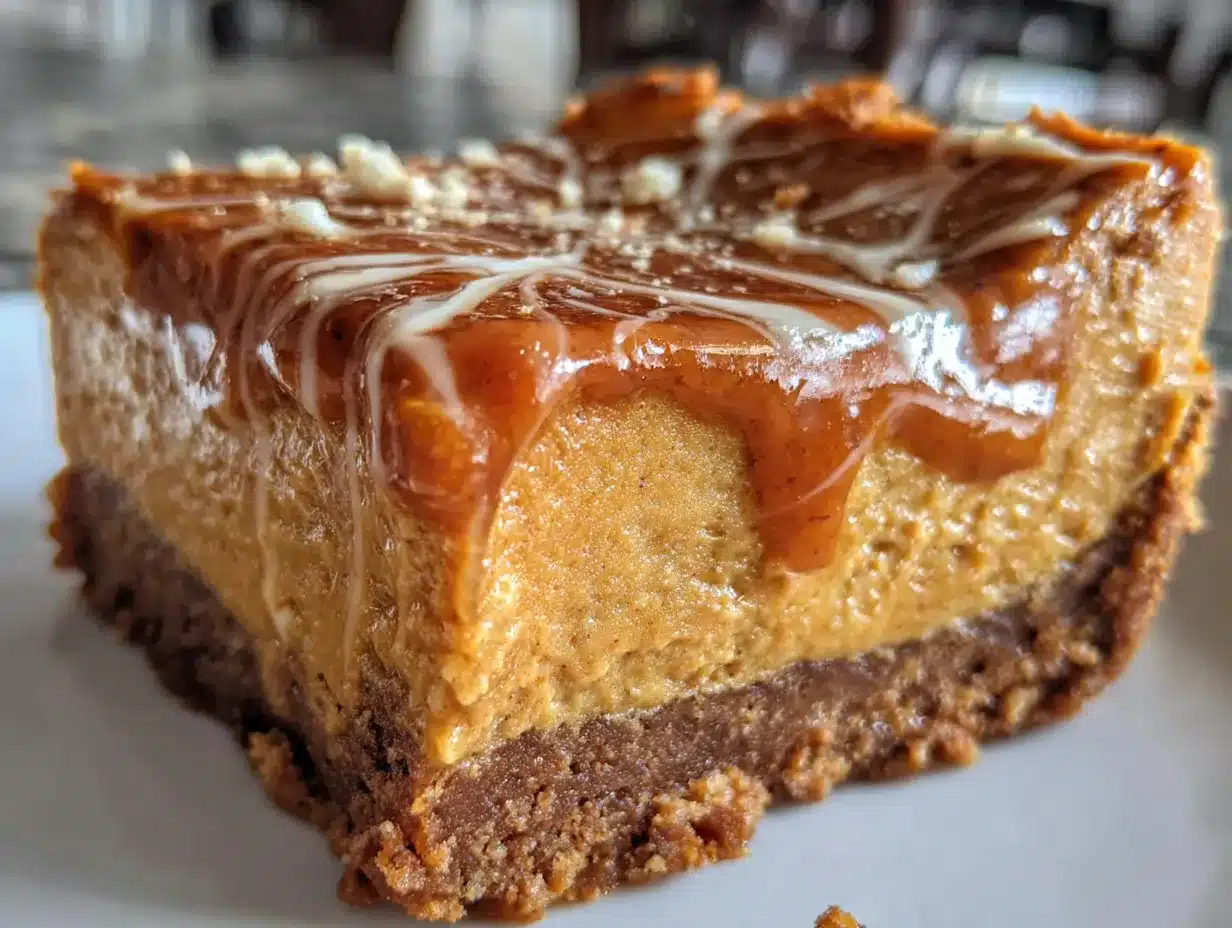
What makes these bars different from every other pumpkin dessert out there? It’s the texture. The cheesecake layer stays perfectly creamy, the pumpkin layer is spiced just right, and the crust holds everything together without getting soggy. Plus, that spiderweb design isn’t just for show—the chocolate and cream cheese swirl adds a little extra richness that takes these bars from good to unforgettable.
Honestly, this is the kind of recipe that makes you feel like a kitchen wizard without actually having to do anything complicated. It’s comfort food with a little Halloween flair, and it’s perfect for those nights when you want to make something special without spending hours in the kitchen.
What Ingredients You Will Need
This recipe uses simple, wholesome ingredients that come together to create something truly magical. Most of these are pantry staples, so you probably won’t need to make a special trip to the store.
For the Crust
- 2 cups graham cracker crumbs (about 16 full sheets, crushed fine) — I prefer using Honey Maid graham crackers for the best texture and sweetness.
- 1/2 cup unsalted butter, melted — Salted butter works too, just reduce the added salt in the filling slightly.
- 1/4 cup granulated sugar — This helps the crust hold together and adds a touch of sweetness.
- 1/4 teaspoon salt — Balances the sweetness and enhances the buttery flavor.
For the Cheesecake Layer
- 16 ounces cream cheese, softened (two 8-ounce blocks) — Make sure it’s at room temperature for a smooth, lump-free filling. I recommend Philadelphia brand for the creamiest results.
- 3/4 cup granulated sugar — Just enough to sweeten without overpowering the pumpkin.
- 2 large eggs, room temperature — Cold eggs can cause the filling to seize up. Leave them on the counter for 30 minutes before starting.
- 1 teaspoon vanilla extract — Pure vanilla extract makes a difference here, but imitation works in a pinch.
For the Pumpkin Layer
- 1 cup canned pumpkin puree — Not pumpkin pie filling! Make sure you grab the 100% pure pumpkin. Libby’s is my go-to brand.
- 1/2 cup granulated sugar — Adds sweetness and helps the pumpkin layer set properly.
- 2 large eggs, room temperature — Same as the cheesecake layer, room temperature is key.
- 1 teaspoon pumpkin pie spice — You can use store-bought or make your own with cinnamon, nutmeg, ginger, and cloves.
- 1/2 teaspoon cinnamon — For that extra warm, cozy flavor.
- 1/4 teaspoon salt — Brings out all the pumpkin and spice flavors.
For the Spiderweb Design
- 1/4 cup semi-sweet chocolate chips, melted — You can also use dark chocolate or white chocolate for a different look.
- 2 tablespoons cream cheese, softened — This gets mixed with a little powdered sugar to create the white web lines.
- 1 tablespoon powdered sugar — Helps thicken the cream cheese for piping.
Substitution Notes
If you’re gluten-free, use gluten-free graham crackers or crushed gluten-free cookies for the crust. For a dairy-free version, use dairy-free cream cheese and a plant-based butter substitute. I’ve tried both, and they work surprisingly well, though the texture is slightly less creamy. If you don’t have pumpkin pie spice, mix 1/2 teaspoon cinnamon, 1/4 teaspoon nutmeg, 1/4 teaspoon ginger, and a pinch of cloves—it’s basically the same thing.
Equipment Needed
You don’t need a fancy kitchen to make these bars. Here’s what you’ll need:
- 9×13-inch baking dish — This is the perfect size for getting thick, satisfying bars. If you only have an 8×8 dish, you can use it, but you’ll need to adjust the baking time and the bars will be much thicker.
- Mixing bowls — One large bowl for the cheesecake filling, one medium bowl for the pumpkin layer, and a small bowl for the crust.
- Electric hand mixer or stand mixer — A hand mixer works great and is easier to clean. You can mix by hand if you’re patient, but a mixer gives you that silky smooth texture.
- Toothpick or skewer — This is your magic wand for creating the spiderweb pattern. A wooden skewer works even better because it’s longer.
- Piping bag or small zip-top bag — For the cream cheese web lines. A zip-top bag with a tiny corner snipped off works perfectly.
- Measuring cups and spoons — Accuracy matters in baking, so use proper measuring tools.
- Spatula — For spreading the crust evenly and scraping every last bit of filling into the dish.
I’ve made these bars using a cheap hand mixer I bought at a discount store, and they turned out just as good as when I used my fancy stand mixer. Don’t let equipment hold you back—if you have a whisk and some elbow grease, you can make this work.
Preparation Method
Let’s get baking! Here’s how to make these spiderweb pumpkin cheesecake bars step by step.
- Preheat your oven to 350°F (175°C). Line your 9×13 baking dish with parchment paper, leaving some overhang on the sides. This makes it super easy to lift the bars out later. If you don’t have parchment, lightly grease the dish with butter or cooking spray.
- Make the crust. In a medium bowl, combine the graham cracker crumbs, melted butter, sugar, and salt. Stir until the mixture looks like wet sand and holds together when you squeeze it. Press the mixture firmly into the bottom of your prepared baking dish. I use the bottom of a measuring cup to get it nice and even. Bake for 8 minutes, then set aside to cool slightly while you make the fillings.
- Make the cheesecake layer. In a large bowl, beat the softened cream cheese with an electric mixer on medium speed until smooth and creamy, about 2 minutes. Add the sugar and beat until combined. Add the eggs one at a time, beating well after each addition. Stir in the vanilla extract. The mixture should be smooth and silky—if you see lumps, keep beating until they disappear. Pour this mixture over the crust and spread it evenly with a spatula.
- Make the pumpkin layer. In a separate medium bowl, whisk together the pumpkin puree, sugar, eggs, pumpkin pie spice, cinnamon, and salt. Whisk until everything is well combined and smooth. Carefully spoon this mixture over the cheesecake layer, spreading it gently to cover the surface. Don’t worry if they mix a little at the edges—it’ll still taste amazing.
- Create the spiderweb design. This is the fun part! Melt the chocolate chips in a microwave-safe bowl in 20-second intervals, stirring between each, until smooth. Drop small spoonfuls of melted chocolate over the pumpkin layer in a rough circle pattern. Then, drop small spoonfuls of the cream cheese mixture (the 2 tablespoons of cream cheese mixed with 1 tablespoon powdered sugar) in between the chocolate dots. Using a toothpick or skewer, drag through the dots from the center outward to create web lines. Wipe the toothpick clean between each line for the best effect. You’ll see the pattern emerge like magic!
- Bake the bars. Place the dish in the preheated oven and bake for 35-40 minutes. The edges should look set, and the center should still have a slight jiggle when you gently shake the pan. Don’t overbake, or the cheesecake can become dry. Turn off the oven, crack the door open, and let the bars cool in the oven for 30 minutes. This gradual cooling helps prevent cracking.
- Chill thoroughly. Remove the bars from the oven and let them cool completely at room temperature, about 1 hour. Then cover the dish with plastic wrap and refrigerate for at least 4 hours, but overnight is best. The bars need this time to set properly—cutting them too early will result in a messy slice.
- Slice and serve. Once fully chilled, lift the bars out using the parchment overhang. Place them on a cutting board and use a sharp knife to cut into squares. Wipe the knife clean between cuts for the neatest edges. Serve cold or at room temperature.
Sensory cues to watch for: When you press the crust into the pan, it should feel like damp sand. The cheesecake batter should look like thick, glossy yogurt. The pumpkin layer should be a rich orange color and smell like fall. When you drag the toothpick through the chocolate, you’ll see the web pattern appear immediately—it’s so satisfying!
Cooking Tips & Techniques
I’ve made these bars at least a dozen times, and I’ve learned a few things the hard way. Here are my best tips for getting perfect results every time.
Room temperature ingredients are non-negotiable. I know it’s tempting to use cold cream cheese straight from the fridge, but trust me on this one. Cold cream cheese creates lumps that won’t go away, no matter how long you beat them. Take the cream cheese and eggs out of the fridge at least 30 minutes before you start. If you’re in a rush, cut the cream cheese into small cubes and microwave it for 10 seconds—just be careful not to melt it.
Don’t overmix the fillings. Once you add the eggs, mix just until they’re incorporated. Overmixing adds too much air to the batter, which can cause the cheesecake to puff up and crack as it bakes. You want a dense, creamy texture, not a fluffy one.
The water bath hack. Traditional cheesecakes use a water bath to prevent cracking, but that’s tricky with bars. Instead, place a shallow pan of hot water on the bottom rack of your oven while the bars bake. The steam helps keep the cheesecake moist and prevents those ugly cracks from forming. I learned this trick after my first batch came out looking like a dried-up riverbed.
Let them cool slowly. That step where you let the bars cool in the oven with the door cracked? Don’t skip it. Rapid temperature changes are the number one cause of cheesecake cracks. Give them time to adjust gradually, and you’ll be rewarded with a smooth, beautiful surface.
Patience with chilling. I know you’ll want to cut into these bars as soon as they’re cool, but resist the urge. Four hours is the minimum, and overnight is ideal. The bars need time to set up properly so they slice cleanly. My first batch was a gooey mess because I got impatient—learn from my mistakes!
Variations & Adaptations
One of the best things about this recipe is how easy it is to customize. Here are some variations I’ve tried and loved.
Chocolate Lover’s Version: Swap the graham cracker crust for crushed chocolate cookies or Oreo crumbs (cream filling included). The chocolate-pumpkin combination is absolutely divine. I made this for a friend’s Halloween party, and it was gone in 15 minutes.
Gluten-Free Adaptation: Use gluten-free graham crackers or gluten-free vanilla cookies for the crust. I’ve tested this with Schar brand gluten-free graham crackers, and they work perfectly. The filling is naturally gluten-free, so this is an easy swap.
Dairy-Free Option: Use dairy-free cream cheese (Kite Hill or Violife are my favorites) and a plant-based butter substitute. The texture will be slightly less creamy, but the flavor is still fantastic. I made this for a friend with dairy allergies, and she couldn’t tell the difference.
Pumpkin Spice Extra: Add a teaspoon of vanilla extract and an extra half teaspoon of pumpkin pie spice to the cheesecake layer for a more intense fall flavor. This is my personal favorite—I love when the pumpkin and spice flavors are in every single bite.
Mini Spiderweb Bites: Make these in a mini muffin tin for bite-sized treats. Press the crust into greased mini muffin cups, fill with the cheesecake and pumpkin mixtures, and bake for 12-15 minutes. They’re perfect for school parties or Halloween gatherings. Just reduce the chilling time to 2 hours since they’re smaller.
Serving & Storage Suggestions
These bars are incredibly versatile when it comes to serving. Here’s how I like to enjoy them.
Serving Temperature: I prefer these bars cold, straight from the fridge. The texture is firmer, and the flavors are more pronounced. But they’re also delicious at room temperature, especially if you let them sit out for about 15 minutes before serving. If you’re serving them at a party, arrange them on a platter and let guests grab what they want.
Presentation Ideas: For a Halloween party, arrange the bars on a black platter with some fake spider rings scattered around. For Thanksgiving, dust them with a light sprinkle of cinnamon or add a dollop of whipped cream on top. My kids love it when I add candy eyes to the spiderweb pattern—it makes them look even spookier.
What to Serve With Them: A cup of hot apple cider or a warm pumpkin spice latte is the perfect accompaniment. If you’re serving these as a dessert after a meal, they pair beautifully with vanilla ice cream or a drizzle of caramel sauce.
Storage Instructions: Store the bars in an airtight container in the refrigerator for up to 5 days. Place a sheet of wax paper between layers to prevent them from sticking together. These bars actually taste better on day two or three, as the flavors have more time to meld together.
Freezing Tips: These bars freeze beautifully! Wrap individual bars tightly in plastic wrap, then place them in a freezer-safe bag or container. They’ll keep for up to 3 months. To thaw, transfer them to the refrigerator overnight. I always keep a stash in the freezer for unexpected guests or late-night cravings.
Nutritional Information & Benefits
Let’s be real—these are a treat, not a health food. But they do have some redeeming qualities! Pumpkin is packed with vitamin A, fiber, and antioxidants. Cream cheese provides calcium and protein. And the portion-controlled bar format makes it easier to enjoy without overindulging.
Here are the approximate nutritional values per bar (based on 16 servings):
- Calories: 285
- Fat: 17g
- Carbohydrates: 30g
- Protein: 5g
- Sugar: 22g
- Fiber: 1g
- Vitamin A: 80% of the daily value
If you’re watching your sugar intake, you can reduce the sugar in the cheesecake layer to 1/2 cup without affecting the texture too much. I’ve done this before, and they still taste plenty sweet, especially with the chocolate web on top. For a lower-fat version, use reduced-fat cream cheese—just know the texture will be slightly less rich and creamy.
Frequently Asked Questions
Can I use fresh pumpkin instead of canned?
Yes, you can! Just make sure to roast and puree the pumpkin until it’s very smooth, then drain off any excess liquid. Canned pumpkin is more consistent, but fresh works beautifully if you have it on hand.
Why did my cheesecake layer crack?
Cracking usually happens from overbaking or rapid temperature changes. Make sure you don’t overbake—the center should still jiggle slightly when you shake the pan. Also, let the bars cool gradually in the oven with the door cracked open.
Can I make these bars ahead of time?
Absolutely! In fact, they’re better when made a day ahead. Prepare the bars completely, including the spiderweb design, and refrigerate them overnight. The flavors meld together beautifully, and the texture sets perfectly.
My spiderweb pattern didn’t turn out well. What went wrong?
Don’t worry—mine didn’t look perfect the first time either! The key is to use a thin toothpick or skewer and drag it gently through the chocolate dots. Wipe the toothpick clean between each line. If the pattern is messy, just swirl everything together—it’ll still taste amazing.
Can I use a different crust?
Yes! Shortbread cookies, vanilla wafers, or even crushed pretzels work great as a crust. If you use pretzels, reduce the salt in the crust since pretzels are already salty. The sweet-salty combination is incredible with the creamy pumpkin filling.
Conclusion
These kid-approved spiderweb pumpkin cheesecake bars have become a fall tradition in my house, and I have a feeling they’ll become one in yours too. They’re easy enough for a weeknight dessert but special enough for a holiday gathering. The best part? They won’t break the bank, they use ingredients you probably already have, and they make everyone at the table happy—from the pickiest kid to the most discerning adult.
I love this recipe because it reminds me that you don’t need fancy techniques or expensive equipment to create something memorable. Sometimes the best recipes come from late-night cravings, a few pantry staples, and a little bit of creativity. That spiderweb pattern on top? It’s not just decoration—it’s a conversation starter, a moment of magic, and proof that cooking can be fun.
So go ahead and give these bars a try. Make them with your kids, bring them to a party, or just keep them all to yourself (no judgment here). And when you do, I’d love to hear how they turned out. Drop a comment below, share a photo, or tell me about your own spiderweb variations. Happy baking, friends!
Pin This Recipe!

Kid-Approved Spiderweb Pumpkin Cheesecake Bars: Easy Fall Recipe
These spiderweb pumpkin cheesecake bars are a fun and easy fall dessert that kids love. With a creamy pumpkin cheesecake filling, a buttery graham cracker crust, and a spooky spiderweb design, they’re perfect for Halloween or any autumn gathering.
- Total Time: 5 hours 55 minutes (including cooling and chilling)
- Yield: 16 servings 1x
Ingredients
- 2 cups graham cracker crumbs (about 16 full sheets, crushed fine)
- 1/2 cup unsalted butter, melted
- 1/4 cup granulated sugar
- 1/4 teaspoon salt
- 16 ounces cream cheese, softened (two 8-ounce blocks)
- 3/4 cup granulated sugar
- 2 large eggs, room temperature
- 1 teaspoon vanilla extract
- 1 cup canned pumpkin puree
- 1/2 cup granulated sugar
- 2 large eggs, room temperature
- 1 teaspoon pumpkin pie spice
- 1/2 teaspoon cinnamon
- 1/4 teaspoon salt
- 1/4 cup semi-sweet chocolate chips, melted
- 2 tablespoons cream cheese, softened
- 1 tablespoon powdered sugar
Instructions
- Preheat your oven to 350°F (175°C). Line your 9×13 baking dish with parchment paper, leaving some overhang on the sides.
- Make the crust: In a medium bowl, combine the graham cracker crumbs, melted butter, sugar, and salt. Stir until the mixture looks like wet sand and holds together when squeezed. Press the mixture firmly into the bottom of your prepared baking dish. Bake for 8 minutes, then set aside to cool slightly.
- Make the cheesecake layer: In a large bowl, beat the softened cream cheese with an electric mixer on medium speed until smooth and creamy, about 2 minutes. Add the sugar and beat until combined. Add the eggs one at a time, beating well after each addition. Stir in the vanilla extract. Pour this mixture over the crust and spread it evenly.
- Make the pumpkin layer: In a separate medium bowl, whisk together the pumpkin puree, sugar, eggs, pumpkin pie spice, cinnamon, and salt until well combined and smooth. Carefully spoon this mixture over the cheesecake layer, spreading it gently to cover the surface.
- Create the spiderweb design: Melt the chocolate chips in a microwave-safe bowl in 20-second intervals, stirring between each, until smooth. Drop small spoonfuls of melted chocolate over the pumpkin layer in a rough circle pattern. Then, drop small spoonfuls of the cream cheese mixture (the 2 tablespoons of cream cheese mixed with 1 tablespoon powdered sugar) in between the chocolate dots. Using a toothpick or skewer, drag through the dots from the center outward to create web lines. Wipe the too…
- Bake the bars: Place the dish in the preheated oven and bake for 35-40 minutes. The edges should look set, and the center should still have a slight jiggle when you gently shake the pan. Turn off the oven, crack the door open, and let the bars cool in the oven for 30 minutes.
- Chill thoroughly: Remove the bars from the oven and let them cool completely at room temperature, about 1 hour. Then cover the dish with plastic wrap and refrigerate for at least 4 hours, but overnight is best.
- Slice and serve: Once fully chilled, lift the bars out using the parchment overhang. Place them on a cutting board and use a sharp knife to cut into squares. Wipe the knife clean between cuts for the neatest edges. Serve cold or at room temperature.
Notes
Room temperature ingredients are crucial for a smooth filling. Don’t overmix the fillings to avoid cracks. Place a shallow pan of hot water on the bottom rack of the oven to create steam and prevent cracking. Let the bars cool slowly in the oven with the door cracked. Chill for at least 4 hours, preferably overnight, for clean slices.
- Prep Time: 20 minutes
- Cook Time: 35-40 minutes
- Category: Dessert
- Cuisine: American
Nutrition
- Serving Size: 1 bar
- Calories: 285
- Sugar: 22
- Sodium: 220
- Fat: 17
- Saturated Fat: 10
- Carbohydrates: 30
- Fiber: 1
- Protein: 5
Keywords: pumpkin cheesecake bars, spiderweb dessert, Halloween dessert, fall recipe, kid-friendly, easy cheesecake bars


