
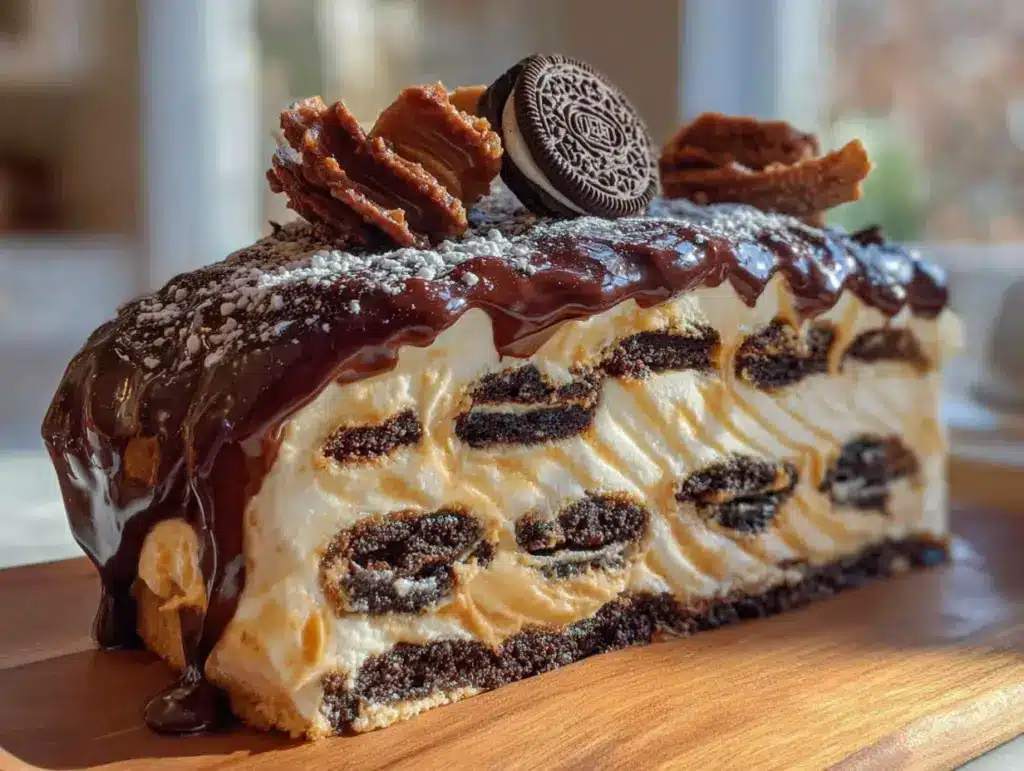
I’m not supposed to play favorites with desserts, but this one has me completely hooked. It tastes like a splurge—all creamy peanut butter, rich chocolate, and that signature Oreo crunch—but it actually fits into a week where you’re trying to eat a little smarter. That’s the magic of this lighter no-bake peanut butter Oreo icebox cake.
It’s the kind of dessert that solves a problem we all face: wanting something truly indulgent without the heavy, sugar-crash aftermath. By swapping out a few heavy hitters for lighter, smarter ingredients, you get a dessert that feels like a cheat day but treats your body with a little more respect. Honestly, it’s a game-changer for anyone who loves dessert but doesn’t love the way it can make them feel.
- Quick & Easy : No oven required. No complicated steps. Just a few layers of creamy goodness that come together in about 20 minutes of active time.
- Simple Ingredients : You probably already have most of these in your pantry. No weird, hard-to-find health food store items here.
- Perfect for Warm Weather : This is your go-to for summer barbecues, pool parties, or any day it’s too hot to even think about turning on the oven.
- Crowd-Pleaser : I’ve served this to die-hard dessert fans and health-conscious friends alike. It disappears every single time, with people asking for the recipe before they even finish their first slice.
- Unbelievably Delicious : The texture is what gets me. It’s creamy, crunchy, and perfectly chilled—a next-level comfort food experience that feels way more decadent than it actually is.
This isn’t just another lighter dessert that tastes like a compromise. It’s the real deal. The kind that makes you close your eyes after the first bite because it’s just that good. It’s comfort food reimagined—healthier, faster, but with the same soul-soothing satisfaction. Perfect for impressing guests without stress, or turning a simple Tuesday night into something memorable.
What Ingredients You Will Need
This recipe uses simple, wholesome ingredients to deliver that big, bold dessert flavor without the fuss. Most of these are pantry staples, which makes this a perfect last-minute dessert to have up your sleeve. Here’s what you’ll need to gather.
- For the Creamy Peanut Butter Layer:
- 1 ½ cups heavy cream (or full-fat coconut cream for a dairy-free option) — this is the base that makes it all light and luscious
- 8 oz (226g) reduced-fat cream cheese, softened — this gives it that rich, tangy cheesecake-like body without all the fat of the full-fat version
- 1 cup (240g) powdered peanut butter (like PB2) — the secret to big peanut butter flavor with way less fat and calories; I prefer the brand PBfit for its smooth texture
- ½ cup (120ml) maple syrup or honey — for natural sweetness that doesn’t spike your blood sugar as much as refined sugar
- 1 teaspoon vanilla extract — it amplifies the sweetness and rounds out the flavors
- Pinch of sea salt — to balance the sweetness and make the peanut butter pop
- For the Chocolate Cookie Layer:
- 36 Oreo Thins (or regular Oreos, but Thins make for a lighter, more delicate cake) — the classic cookie that makes this an icebox cake; I actually prefer the Thins here because they soften perfectly
- Optional: 2 tablespoons unsweetened cocoa powder (if you want a deeper chocolate flavor)
- For the Topping (Optional but Highly Recommended):
- ½ cup (120ml) dark chocolate chips (I use 70% cacao for a richer, less sugary flavor)
- 2 tablespoons coconut oil — this helps the chocolate set into a nice, snappy shell
- Flaky sea salt (like Maldon) — that little crunch of salt on top is everything
Ingredient Selection Tips: When choosing your cream cheese, look for a block, not the spreadable kind in a tub. The block has a firmer texture that holds up better in the creamy layer. For the powdered peanut butter, I’ve tested a few brands, and PBfit gives the smoothest, most natural-tasting result. If you can only find regular peanut butter, you can use ½ cup of it, but the cake will be heavier and more caloric. The texture won’t be quite as light and airy, but it will still taste amazing.
Substitution Guidance: Need this to be dairy-free? Use full-fat coconut cream instead of heavy cream and a dairy-free cream cheese alternative (like Kite Hill or Tofutti). The texture will be slightly different—a little more dense—but it’s still incredibly delicious. For a gluten-free version, use gluten-free chocolate sandwich cookies (like Glutino’s). They work perfectly, though they soften a bit differently, so you might need an extra 30 minutes of chilling time.
Equipment Needed
You don’t need a fancy kitchen to pull this off. Honestly, you probably already have everything you need. Here’s the list:
- 8×8-inch square baking dish (or 9×9-inch): This is the perfect size for a nice, tall cake. A 9×9 will give you a slightly thinner cake, which is fine, but I prefer the 8×8 for that impressive height.
- Electric hand mixer or stand mixer: You’ll be whipping cream and beating cream cheese, so a mixer makes this so much easier. A whisk and some serious arm strength will work, but I wouldn’t recommend it unless you’re looking for a workout.
- Large mixing bowl: For the creamy peanut butter mixture.
- Medium microwave-safe bowl: For melting the chocolate topping.
- Rubber spatula: For folding and scraping every last bit of that creamy goodness.
- Plastic wrap or parchment paper: To cover the dish while it chills.
Budget-Friendly Options: If you don’t have an electric mixer, a good old-fashioned whisk will do the trick. Just make sure your cream is very cold, and be prepared for a little arm workout. For the baking dish, any similar-sized dish will work—even a loaf pan will work if you want a taller, narrower cake. Just adjust the layers accordingly.
Preparation Method
Let’s get to the fun part! This is where it all comes together. Follow these steps, and you’ll have a dessert that looks like you spent hours on it.
- Make the Creamy Peanut Butter Layer: In a large mixing bowl, add the softened cream cheese, powdered peanut butter, maple syrup (or honey), vanilla extract, and a pinch of sea salt. Using your hand mixer, beat everything together on medium speed until it’s completely smooth and well combined. This should take about 2 minutes. Scrape down the sides of the bowl with your spatula. In a separate bowl (or the same one if you’re feeling brave—just wash it first), pour in the heavy cream. Whip it on high speed until stiff peaks form. This means when you lift the beaters, the cream stands up in firm peaks that don’t flop over. Be careful not to over-whip, or you’ll end up with butter. Gently fold the whipped cream into the peanut butter mixture using your spatula. Fold until just combined—you don’t want to deflate all that air you just whipped in. The mixture should be light, fluffy, and irresistible.
- Prepare the Baking Dish: Line your 8×8-inch baking dish with a sheet of plastic wrap or parchment paper, leaving some overhang on the sides. This will make it so much easier to lift the cake out later for slicing. Trust me on this one.
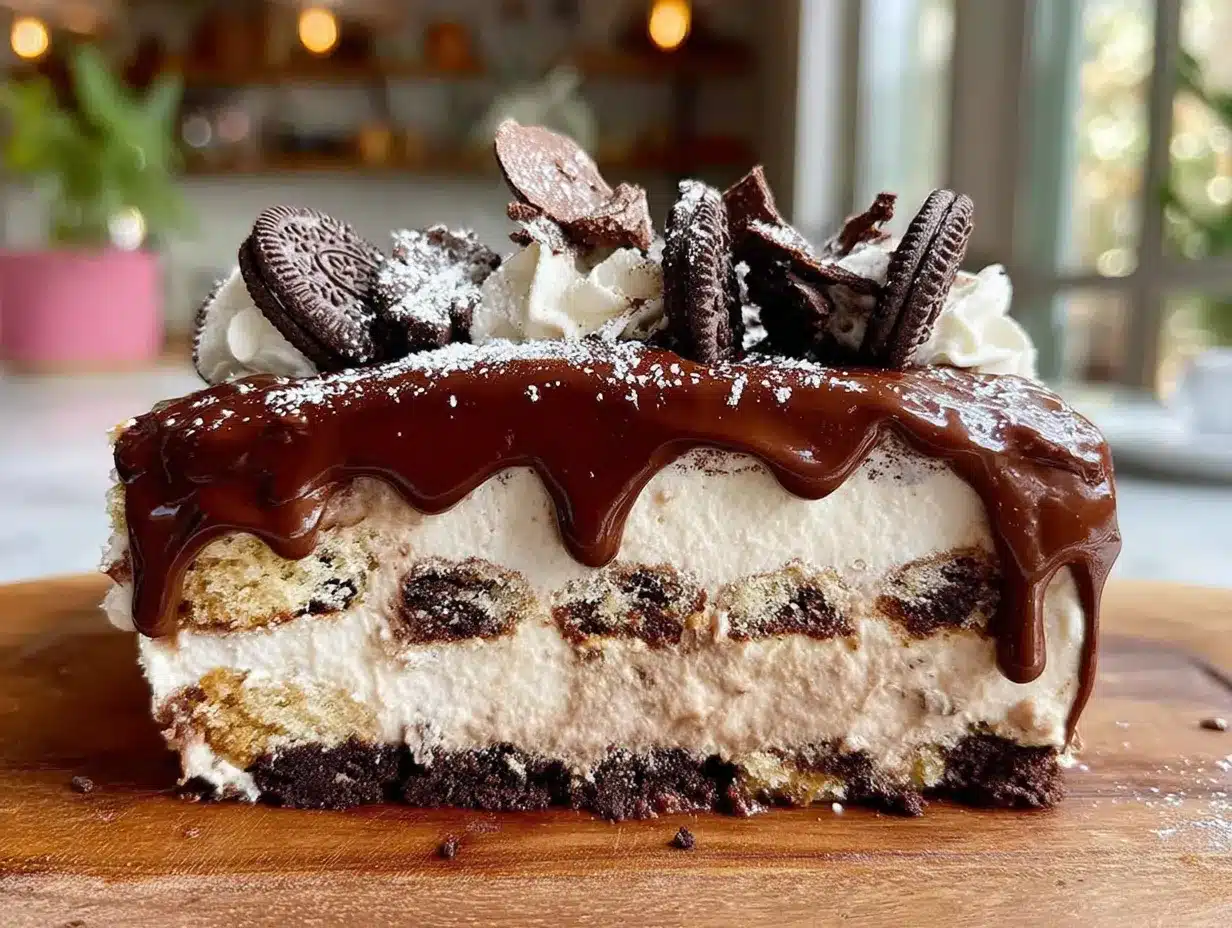
- Layer the Cake: Start with a thin, even layer of the creamy peanut butter mixture on the bottom of the dish. Spread it out with your spatula. Then, place a layer of Oreo Thins on top, covering the cream as much as possible. You might need to break a few cookies to fill in the gaps. Don’t stress about perfection—it’s all going to get deliciously messy. Repeat the layers: creamy mixture, then cookies, creamy mixture, then cookies. You should get about 3 layers of cookies and 4 layers of cream, ending with a final layer of the creamy mixture on top. Make sure the top is smooth and even.
- Chill the Cake: Cover the dish tightly with plastic wrap and place it in the refrigerator. This is the hardest part—you have to wait. Chill for at least 6 hours, but overnight is truly best. The cookies need time to soften and absorb the creamy mixture, creating that iconic icebox cake texture. If you’re in a rush, 4 hours will work, but the texture won’t be as perfectly soft and sliceable.
- Make the Chocolate Topping: About 30 minutes before you’re ready to serve, make the topping. In a small microwave-safe bowl, combine the dark chocolate chips and coconut oil. Microwave in 30-second bursts, stirring in between, until the chocolate is completely melted and smooth. Let it cool for about 5 minutes so it thickens slightly but is still pourable.
- Assemble and Serve: Remove the cake from the refrigerator. Using the overhanging plastic wrap, lift the cake out of the dish and place it on a cutting board or serving plate. Pour the melted chocolate mixture over the top, spreading it gently with your spatula to cover the entire surface. Sprinkle with a pinch of flaky sea salt. Let the chocolate set for about 10 minutes at room temperature, or pop it in the fridge for 5 minutes if you’re impatient. Slice into squares and serve cold. The first bite will be pure magic.
Troubleshooting Tip: If your creamy mixture seems too runny after folding in the whipped cream, your cream might not have been whipped enough. Next time, make sure you whip it to stiff peaks. For now, just pop the mixture in the fridge for 15 minutes to firm up a bit before layering. It’ll be fine.
Cooking Tips & Techniques
I’ve made this cake more times than I can count, and I’ve learned a few things along the way. Here are my best tips to make sure yours turns out perfectly every time.
Whip Your Cream Properly: This is the most important step. If your cream is under-whipped, your cake will be a soupy mess. If it’s over-whipped, it’ll be grainy and potentially turn into butter. The sweet spot is stiff peaks—when you lift the beaters, the cream stands up tall and doesn’t flop over. Keep a close eye on it, especially if you’re using a hand mixer. It can go from perfect to over-whipped in about 10 seconds.
Soften Your Cream Cheese: Don’t skip this step! Cold cream cheese will leave you with lumpy, unappealing bites. Take it out of the fridge at least 30 minutes before you start. If you forget, you can microwave it in 10-second bursts until it’s just soft but not melted. Trust me, it’s worth the extra minute.
Don’t Over-Fold: When you’re folding the whipped cream into the peanut butter mixture, be gentle. Use a light hand and a rubber spatula. You want to incorporate the two without deflating all that air you just whipped in. Over-folding will give you a dense, heavy cake instead of a light, airy one.
Be Patient with Chilling: I know it’s hard, but this cake really needs its beauty sleep. The cookies need time to soften and meld with the creamy layer. If you cut into it too early, you’ll get crunchy cookies and a runny center. Overnight is ideal, but 6 hours is the absolute minimum. I once made the mistake of cutting into it after 4 hours, and it was a delicious but messy disaster.
My Biggest Failure: The first time I made this, I used regular peanut butter instead of the powdered stuff. The cake was delicious, but it was so heavy and dense that it felt like eating a brick. I learned that powdered peanut butter is the secret to that light, mousse-like texture. If you want to use regular peanut butter, you can, but the texture will be significantly different—more like a dense cheesecake.
Variations & Adaptations
One of the best things about this recipe is how easy it is to make it your own. Here are a few of my favorite variations.
Chocolate Lover’s Dream: For an even richer chocolate experience, use chocolate Oreo Thins (the ones with the extra chocolate creme) and add 2 tablespoons of unsweetened cocoa powder to the creamy peanut butter mixture. You’ll get a double-chocolate-peanut butter situation that’s absolutely divine. I tried this for a friend’s birthday, and it was gone in 10 minutes.
Vegan & Dairy-Free: This is surprisingly easy to adapt. Use full-fat coconut cream instead of heavy cream (chill the can overnight and scoop out the solid cream), a dairy-free cream cheese alternative, and maple syrup instead of honey. The texture will be slightly denser, but the flavor is still incredible. My vegan friend couldn’t believe it wasn’t the “real” thing.
Gluten-Free Option: Simply swap the Oreo Thins for your favorite gluten-free chocolate sandwich cookies. I’ve used Glutino’s, and they work perfectly. Just note that they might soften a little differently, so you might need an extra 30 minutes of chilling time. It’s a small price to pay for a gluten-free dessert that actually tastes like the original.
Flavor Twists: Feeling adventurous? Add a teaspoon of instant espresso powder to the creamy mixture for a mocha twist. Or fold in ½ cup of crushed pretzels for a salty-sweet crunch. I once added a layer of sliced bananas in the middle, and it was like a deconstructed peanut butter banana sandwich. So good.
Individual Servings: For a fun, party-friendly presentation, make these in small mason jars or ramekins. Just layer the creamy mixture and crushed cookies in the jars, chill, and top with the chocolate. They’re perfect for picnics or potlucks where you want something portable and adorable.
Serving & Storage Suggestions
This cake is best served cold, straight from the fridge. The texture is at its peak—creamy, soft, and perfectly chilled. Here’s how to make the most of it.
Serving Temperature: Take the cake out of the fridge about 10 minutes before slicing. This takes the chill off just enough to make the flavors really sing. If you serve it straight from the fridge, it will be a little too firm. If you let it sit too long, it will get too soft and messy. 10 minutes is the sweet spot.
Presentation: For a beautiful presentation, run your knife under hot water and wipe it dry before each slice. This gives you clean, sharp edges. Top each slice with a little extra flaky sea salt and maybe a drizzle of warm chocolate sauce. It’s a showstopper.
Complementary Dishes: This cake is rich and satisfying on its own, but it pairs beautifully with a cup of hot coffee or a cold glass of milk. For a more complete dessert spread, serve it alongside fresh berries or a light fruit salad. The acidity of the berries cuts through the richness of the cake beautifully.
Storage Instructions: Leftovers (if you have any!) can be stored in the refrigerator, tightly covered, for up to 5 days. The texture will change slightly over time—the cookies will continue to soften, and the cake will become more uniform and almost mousse-like. It’s still delicious, just different. I actually prefer it on day two or three when all the flavors have really melded together.
Freezing Instructions: This cake freezes beautifully! Wrap the entire cake (or individual slices) tightly in plastic wrap, then in a layer of aluminum foil. Freeze for up to 3 months. To serve, thaw in the refrigerator overnight. The texture will be slightly different—a little more icy—but it’s still a fantastic treat to have on hand for unexpected guests or late-night cravings.
Nutritional Information & Benefits
I’m not a nutritionist, but I do pay attention to what goes into my body. This lighter version of the classic icebox cake is a much smarter choice than the original, without sacrificing an ounce of flavor.
Estimated Nutritional Values (per serving, based on 9 servings):
- Calories: ~320
- Fat: 18g
- Saturated Fat: 10g
- Carbohydrates: 35g
- Sugar: 22g
- Protein: 8g
- Fiber: 3g
Health Benefits of Key Ingredients: The powdered peanut butter is the real hero here. It gives you all the protein and flavor of regular peanut butter with about 70% less fat and calories. The dark chocolate in the topping is rich in antioxidants, and the maple syrup provides a more natural source of sweetness with a lower glycemic index than refined sugar. The cream cheese, even the reduced-fat version, adds a good dose of calcium and protein.
Dietary Considerations: This recipe is naturally vegetarian. It can easily be made gluten-free, dairy-free, or vegan with the substitutions I mentioned earlier. It’s also lower in sugar and fat than the traditional version, making it a great option for those watching their waistline without feeling deprived.
My Personal Wellness Perspective: I believe in balance. Desserts like this one are a way to enjoy the foods we love while still making choices that support our health. It’s not about restriction—it’s about finding smarter ways to enjoy the things that make us happy. And this cake? It makes me very, very happy.
Conclusion
This lighter no-bake peanut butter Oreo icebox cake is more than just a recipe—it’s a solution. It’s for those nights when you crave something indulgent but don’t want to undo a week of healthy eating. It’s for the summer gatherings where the oven is off limits. It’s for the moments when you want to impress without the stress.
I love this recipe because it proves that healthy and delicious aren’t opposites. They can coexist beautifully, and this cake is living proof. The creamy peanut butter layer, the soft chocolate cookies, the rich dark chocolate topping—it’s a combination that feels like a cheat day but treats your body with respect.
Now it’s your turn. Make this cake, share it with the people you love, and don’t forget to tell me how it turned out. Did you try a variation? Did it disappear in record time? Leave a comment below—I’d love to hear your stories. And if you’re looking for more lighter, indulgent desserts, check out my lighter chocolate mousse or these healthy peanut butter cookies. Happy cooking, friends!
Frequently Asked Questions
Can I use regular Oreos instead of Oreo Thins?
Absolutely! You can use regular Oreos if that’s what you have on hand. The cake will be a bit thicker and denser, and the cookies will take a little longer to soften. I’d recommend chilling for a full 8 hours or overnight for the best texture.
Can I make this without whipped cream?
You can, but the texture will be very different. The whipped cream is what makes this cake light and mousse-like. Without it, you’d essentially have a dense peanut butter cheesecake. If you want a dairy-free option, use full-fat coconut cream whipped to stiff peaks instead.
How long does this cake last in the fridge?
Stored tightly covered, this cake will last for up to 5 days in the refrigerator. The texture will continue to soften over time, becoming more uniform and mousse-like. It’s still delicious, but I find it’s best within the first 3 days.
Can I freeze this cake?
Yes! It freezes beautifully. Wrap the entire cake or individual slices tightly in plastic wrap, then in aluminum foil. Freeze for up to 3 months. Thaw in the refrigerator overnight before serving. The texture will be slightly different—a bit more icy—but it’s still a fantastic treat.
Can I use natural peanut butter instead of powdered peanut butter?
You can, but the texture will be significantly heavier and denser. Natural peanut butter has a lot more fat and oil, which will weigh down the creamy layer. If you want to use it, I’d recommend using ½ cup of natural peanut butter and omitting the powdered version. The cake will still taste amazing, but it won’t be as light and airy.
Pin This Recipe!
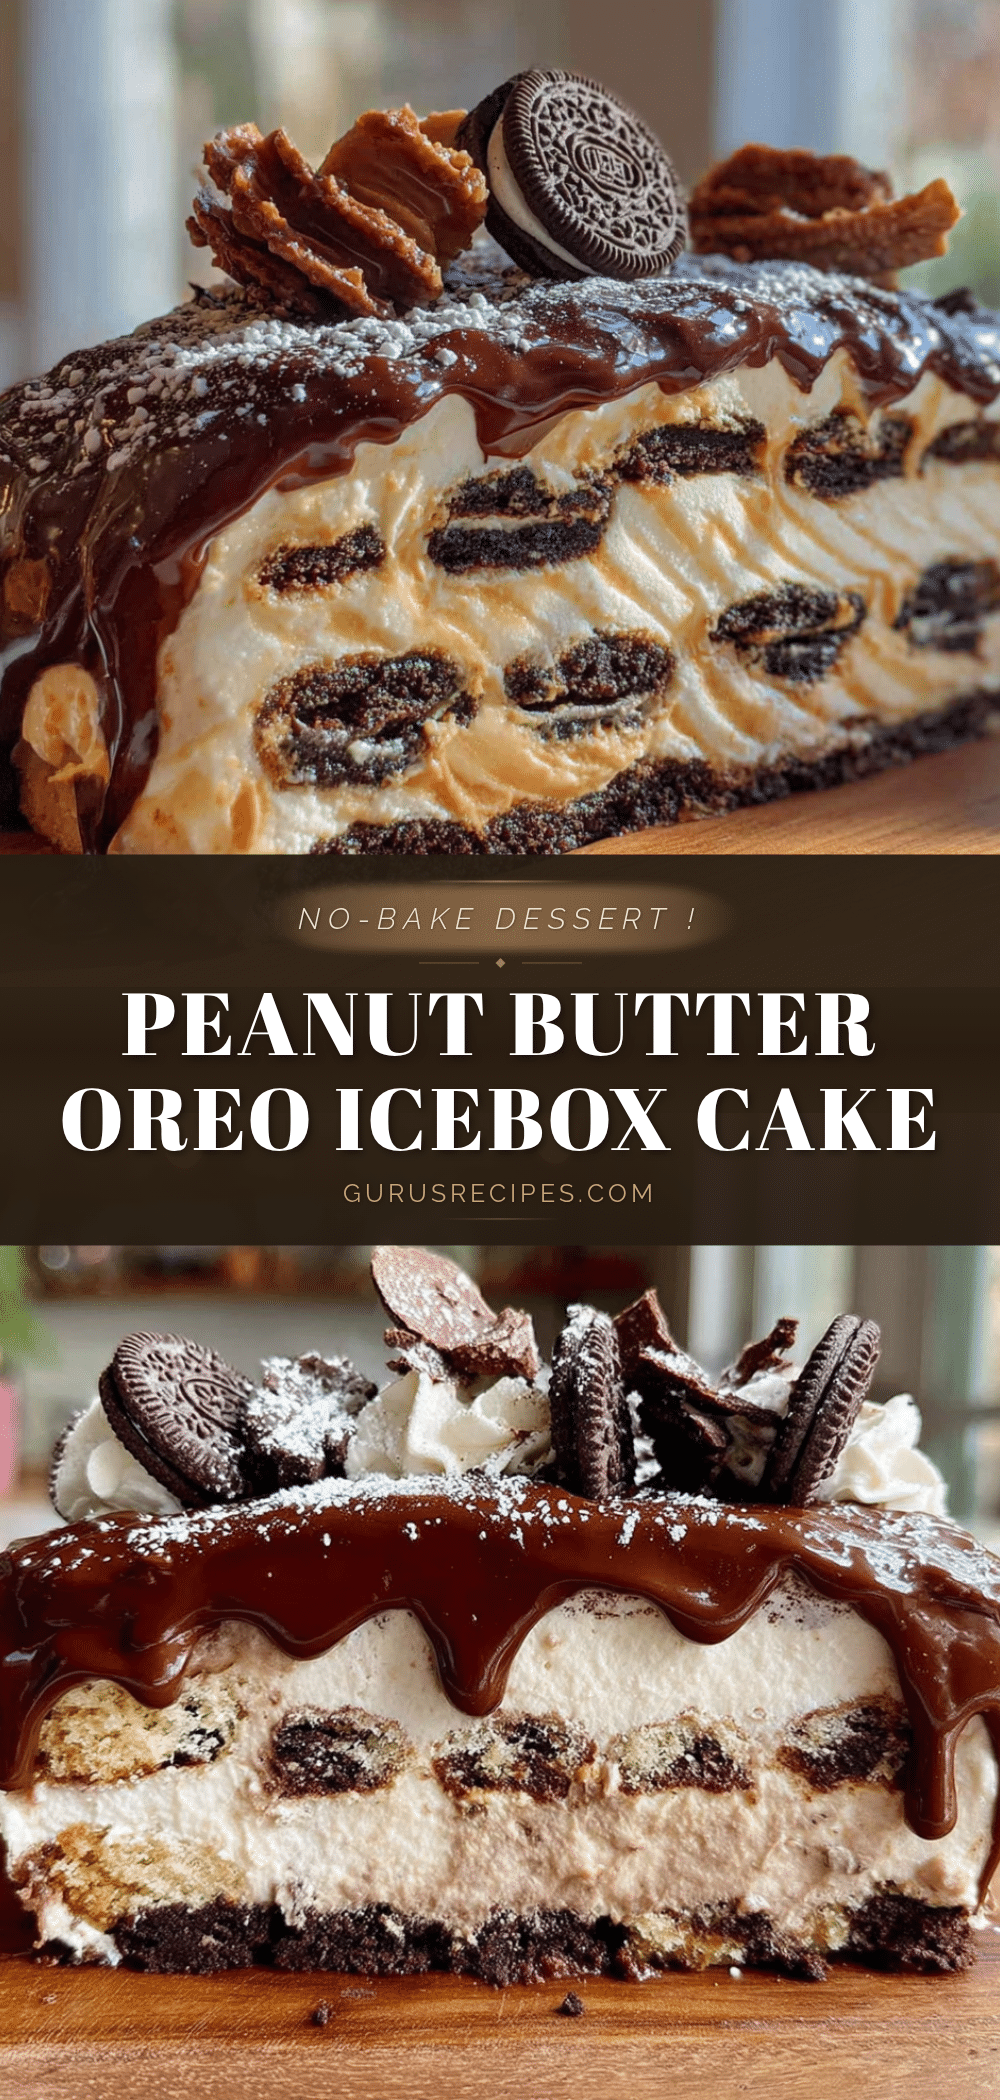

Lighter No-Bake Peanut Butter Oreo Icebox Cake
A creamy, indulgent no-bake dessert that tastes like a splurge but fits into a healthier lifestyle. Made with powdered peanut butter and reduced-fat cream cheese, this icebox cake delivers rich peanut butter and chocolate flavor without the heavy sugar crash.
- Total Time: 6 hours 20 minutes (includes chilling)
- Yield: 9 servings 1x
Ingredients
- 1 ½ cups heavy cream (or full-fat coconut cream for dairy-free)
- 8 oz (226g) reduced-fat cream cheese, softened
- 1 cup (240g) powdered peanut butter (like PB2 or PBfit)
- ½ cup (120ml) maple syrup or honey
- 1 teaspoon vanilla extract
- Pinch of sea salt
- 36 Oreo Thins (or regular Oreos)
- Optional: 2 tablespoons unsweetened cocoa powder
- ½ cup (120ml) dark chocolate chips (70% cacao)
- 2 tablespoons coconut oil
- Flaky sea salt (like Maldon) for topping
Instructions
- Make the Creamy Peanut Butter Layer: In a large mixing bowl, beat softened cream cheese, powdered peanut butter, maple syrup (or honey), vanilla extract, and a pinch of sea salt on medium speed until smooth (about 2 minutes). Scrape down sides. In a separate bowl, whip heavy cream on high speed until stiff peaks form. Gently fold whipped cream into peanut butter mixture until just combined.
- Prepare the Baking Dish: Line an 8×8-inch baking dish with plastic wrap or parchment paper, leaving overhang on sides for easy removal.
- Layer the Cake: Spread a thin, even layer of the creamy mixture on the bottom. Place a layer of Oreo Thins on top, breaking cookies to fill gaps. Repeat layers: creamy mixture, cookies, creamy mixture, cookies, ending with a final layer of creamy mixture on top. Smooth the top.
- Chill the Cake: Cover tightly with plastic wrap and refrigerate for at least 6 hours, preferably overnight, until cookies soften and cake sets.
- Make the Chocolate Topping: About 30 minutes before serving, combine dark chocolate chips and coconut oil in a microwave-safe bowl. Microwave in 30-second bursts, stirring between, until melted and smooth. Let cool for 5 minutes.
- Assemble and Serve: Remove cake from fridge. Use overhanging wrap to lift cake out of dish onto a cutting board. Pour melted chocolate over top, spreading evenly. Sprinkle with flaky sea salt. Let chocolate set for 10 minutes at room temperature or 5 minutes in fridge. Slice into squares and serve cold.
Notes
For best texture, chill overnight. If creamy mixture seems too runny, refrigerate for 15 minutes before layering. Use block cream cheese, not spreadable. For dairy-free, use full-fat coconut cream and dairy-free cream cheese. For gluten-free, use gluten-free chocolate sandwich cookies. The cake can be frozen for up to 3 months.
- Prep Time: 20 minutes
- Cook Time: 0 minutes
- Category: Dessert
- Cuisine: American
Nutrition
- Serving Size: 1 square (1/9 of cak
- Calories: 320
- Sugar: 22
- Fat: 18
- Saturated Fat: 10
- Carbohydrates: 35
- Fiber: 3
- Protein: 8
Keywords: no-bake dessert, icebox cake, peanut butter, Oreo, lighter dessert, summer dessert, easy dessert, no oven


