
The first time I pulled a tray of matcha cheesecake brownies out of the oven, my kitchen smelled like a cozy café—rich cocoa, a hint of green tea earthiness, and that unmistakable warm cheesecake aroma. You know that feeling when you peek through the oven door and watch those layers set, just knowing something magical is happening? That’s the kind of anticipation these triple-layered brownies deliver. They’re not just brownies, honestly—they’re a conversation starter, a showstopper, and a little slice of happiness all at once.
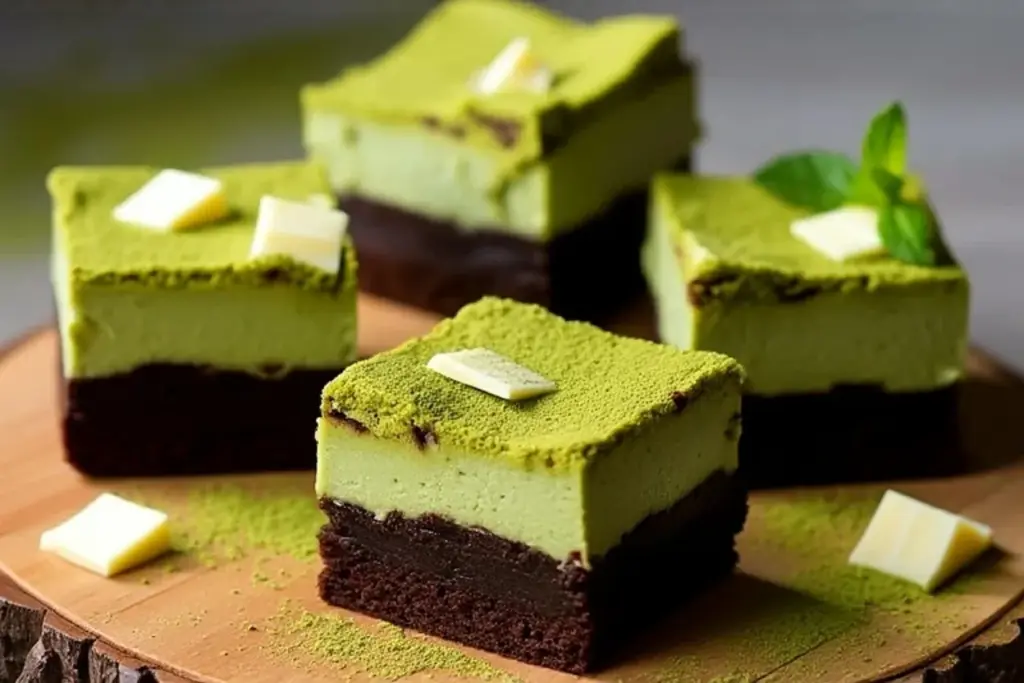
I stumbled across the idea for matcha cheesecake brownies during a late-night baking spree when I couldn’t decide between my favorite fudgy brownies and a creamy matcha cheesecake. If you’ve ever been torn between two desserts, you’ll get it. Why pick one when you can have both? The result: a three-layered treat with a dense brownie base, a creamy, slightly tangy matcha cheesecake middle, and a gorgeous marbled swirl on top. It’s equal parts comfort food and elegant dessert, and it always impresses at potlucks or family gatherings (even the skeptical folks who aren’t sure about matcha end up asking for seconds).
There’s something about the balance of flavors that makes these matcha cheesecake brownies so special. The matcha brings a delicate, grassy sweetness that pairs beautifully with the deep chocolate below. Plus, if you’re a texture lover like me, the creamy cheesecake layer nestled between fudgy brownie and a lightly crackled top is just dreamy. Whether you’re baking for friends, looking to satisfy a sweet tooth, or just want to try something new, this matcha cheesecake brownies recipe is a must-have. And trust me—I’ve tested, tweaked, and devoured more batches than I can count to get it just right!
Why You’ll Love This Matcha Cheesecake Brownies Recipe
- Simple But Impressive: This triple-layer dessert looks bakery-worthy but comes together with everyday ingredients and basic techniques.
- Three Decadent Layers: Fudgy brownie, creamy matcha cheesecake, and a stunning marbled swirl—each bite gives you the best of both worlds.
- Distinct Flavors: The earthy, slightly sweet matcha is perfectly balanced by rich chocolate and tangy cream cheese. It’s not too sweet, not too bitter—just right.
- Perfect for Special Occasions: These brownies always steal the show at birthdays, baby showers, brunches, and holidays. (They look like you spent hours making them!)
- Crowd-Pleaser: Even folks who aren’t matcha fans have been converted by these. Kids love the swirly green and white pattern, and adults appreciate the sophisticated flavor.
- Versatile & Customizable: You can adjust the sweetness, swap in gluten-free flour, or experiment with white chocolate chips for a fun twist.
- Make-Ahead Friendly: The texture and flavor actually improve as these brownies chill overnight in the fridge—ideal for planning ahead.
I’ve made dozens of versions of these matcha cheesecake brownies, and every single time, someone says, “Oh wow, these are special.” The marbled top looks fancy but is truly foolproof. The matcha isn’t buried by sugar—its gentle flavor shines through. And if you’re a sucker for contrast, that bright green swirl against deep chocolate is just gorgeous. It’s the kind of dessert that feels like a treat for both your taste buds and your eyes.
Honestly, it’s the balance that sets this matcha cheesecake brownies recipe apart. The creamy cheesecake cuts the richness of the brownie, and the matcha keeps things light and interesting. It’s comfort food with a twist—familiar but with a little spark of something new. And best of all, you’ll never have to choose between brownies and cheesecake again.
What Ingredients You Will Need
This matcha cheesecake brownies recipe uses a handful of pantry staples alongside a few special touches. The ingredients are easy to find, and I’ll share some of my favorite tricks for the best flavor and texture. Here’s what you’ll need:
- For the Brownie Layer:
- 1/2 cup (115g) unsalted butter, melted (adds richness and keeps brownies fudgy)
- 3/4 cup (150g) granulated sugar (for classic sweetness)
- 1/4 cup (50g) packed light brown sugar (adds moisture and depth)
- 2 large eggs, room temperature
- 1 teaspoon vanilla extract (pure is best for flavor)
- 1/3 cup (30g) unsweetened cocoa powder (Dutch-processed or natural both work)
- 1/2 cup (65g) all-purpose flour (use gluten-free 1:1 blend if needed)
- 1/4 teaspoon salt (balances sweetness)
- 1/2 cup (90g) semi-sweet or dark chocolate chips (optional, but I rarely skip them!)
- For the Matcha Cheesecake Layer:
- 8 oz (225g) cream cheese, softened (full-fat for best texture, but light also works)
- 1/3 cup (65g) granulated sugar
- 1 large egg, room temperature
- 1 tablespoon (10g) all-purpose flour (helps set the cheesecake)
- 1 tablespoon (7g) culinary-grade matcha powder (I like the bright flavor of [brand], but any good quality matcha works)
- 1/4 cup (60g) sour cream or plain Greek yogurt (for creaminess and a slight tang)
- 1/2 teaspoon vanilla extract
- For the Swirl:
- 2 tablespoons reserved brownie batter (set aside before spreading)
Ingredient Notes & Substitutions:
- Butter: For a dairy-free version, use melted coconut oil (refined for a neutral flavor).
- Flour: A 1:1 gluten-free all-purpose blend works perfectly if you’re baking for someone with celiac or gluten sensitivity.
- Matcha: Culinary-grade is ideal—avoid ceremonial as it’s pricier and better for drinking. Store in an airtight tin in the fridge to keep it fresh.
- Sour Cream/Greek Yogurt: Both add a subtle tang. Greek yogurt gives a bit more protein and a thicker texture.
- Chocolate Chips: I sometimes toss in a handful of white chocolate chips for a sweeter touch. Omit if you want a more classic brownie texture.
Most of these items are probably already in your pantry, except maybe matcha powder—which, once you have it, you’ll want to use in lattes, smoothies, or even pancakes. Trust me, it’s worth grabbing a tin!
Equipment Needed
- 8-inch (20cm) square baking pan: Glass or metal both work. Metal gives slightly crisper edges; glass keeps things a bit moister.
- Parchment paper: For easy lifting and clean-up. (Yes, it makes a difference!)
- Two mixing bowls: One for brownie batter, one for cheesecake mixture.
- Hand mixer or stand mixer: For a creamy cheesecake layer. You can mix by hand, but it takes a little muscle (and the cream cheese must be super soft).
- Whisk and spatula: A whisk for mixing the brownie base and a spatula for scraping every last bit of batter and swirling the top.
- Measuring cups and spoons: Accuracy is key for layered desserts.
- Toothpick or skewer: For that signature marbled effect.
If you don’t have a hand mixer, a stiff whisk and some elbow grease will do—just make sure your cream cheese is very soft. I’ve baked these brownies in both glass and metal pans, and while both are great, I find a light-colored metal pan bakes more evenly (no burnt edges). If you’re on a budget, dollar-store pans and basic whisks work fine—just grease or line the pan well so nothing sticks!
Pro tip: Keep your mixer beaters and spatulas in good shape by washing right after using sticky batters. Sticky brownie batter can be a pain when it dries!
How to Make Matcha Cheesecake Brownies – Step By Step
- Prep and Preheat:
- Preheat your oven to 350°F (175°C).
- Line your 8-inch (20cm) square baking pan with parchment paper, leaving some overhang for easy lifting.
- Make the Brownie Batter:
- In a large bowl, whisk together 1/2 cup (115g) melted butter, 3/4 cup (150g) sugar, and 1/4 cup (50g) brown sugar until smooth and glossy (about 1 minute).
- Whisk in 2 eggs, one at a time, then add 1 teaspoon vanilla extract.
- Sift in 1/3 cup (30g) cocoa powder, 1/2 cup (65g) all-purpose flour, and 1/4 teaspoon salt. Stir until just combined—don’t overmix or the brownies might get tough.
- Fold in 1/2 cup (90g) chocolate chips, if using.
- Scoop out 2 tablespoons of the brownie batter and set aside for the marble swirl.
- Spread the remaining brownie batter evenly in the prepared pan. It’ll be thick—use a spatula to nudge it into the corners.
- Make the Matcha Cheesecake Layer:
- In a clean bowl, beat 8 oz (225g) softened cream cheese with 1/3 cup (65g) sugar until creamy (about 2 minutes).
- Beat in 1 egg, then add 1 tablespoon (10g) flour, 1 tablespoon (7g) matcha powder, 1/4 cup (60g) sour cream or Greek yogurt, and 1/2 teaspoon vanilla. Mix until smooth and the color is even—scrape down the sides to catch any unmixed bits.
- If your matcha is lumpy, sift it first. (Trust me, no one wants green speckles!)
- Pour the cheesecake batter over the brownie layer and spread it gently to the edges.
- Marble the Top:
- Dollop the reserved brownie batter in small spoonfuls over the cheesecake layer.
- Use a toothpick or skewer to swirl the two batters together, creating a marbled pattern. Don’t overdo it—just a few swirls for that pretty effect.
- Bake:
- Bake in the center of the oven for 32-38 minutes, or until the edges are set and the center wobbles just slightly (it’ll finish setting as it cools).
- If the top starts to brown too quickly, loosely tent with foil.
- Cool and Chill:
- Let the brownies cool completely in the pan, then transfer to the fridge for at least 2 hours (overnight is even better).
- Use the parchment overhang to lift out the brownies. Slice with a hot, damp knife for clean layers.
Troubleshooting: If your cheesecake layer cracks, don’t stress—it’ll taste just as good and the swirl covers imperfections. If the brownies seem underbaked, chill them longer; they firm up as they cool. For extra glossy tops, use room temperature eggs and don’t overbake.
My favorite tip? Prep the brownie layer first, then assemble the cheesecake while it bakes for a few minutes on its own (if you want a firmer base). But honestly, it’s just as good when baked all together!
Cooking Tips & Techniques
- Room Temperature Ingredients: Cream cheese and eggs blend much more smoothly when not cold. If you forget to set them out, a quick 20 seconds in the microwave (no more!) helps.
- Don’t Overmix: Stir batter until just combined—overmixing can make brownies tough and cheesecake rubbery.
- Use Good-Quality Matcha: Fresh, vibrant green matcha gives the best color and flavor. Dull or yellowish matcha can taste dusty (I learned that the hard way!).
- Marbling Is an Art, Not a Science: Swirl gently, and don’t try to make it perfect. Some of my prettiest brownies happened when I let go and just wiggled the toothpick.
- Bake Until Just Set: The middle should be a little wobbly when you pull them out—overbaking dries out the cheesecake.
- Chill Before Slicing: For sharp, clean layers, let the brownies chill at least two hours. If you cut while warm, things get messy (not the worst outcome, but not as photo-worthy!).
- Knife Wiping Trick: Dip your knife in hot water, wipe it clean between cuts for bakery-style slices. It sounds fussy, but it makes a difference!
- Common Mistake: Using too much matcha can make the cheesecake bitter. Stick to the measured amount—less is more here.
Once, I rushed the chilling step and tried to slice while the brownies were warm. Total disaster—gooey layers everywhere! Now I always plan ahead, and honestly, the flavor is better after a night in the fridge. I’ve also learned to sift my matcha—clumps are sneaky and don’t dissolve well in creamy batters. If you follow these little tips, you’ll get perfect, bakery-worthy matcha cheesecake brownies every time.
Variations & Adaptations
- Gluten-Free Option: Swap all-purpose flour for a gluten-free 1:1 blend in both the brownie and cheesecake layers. I’ve done this for friends with celiac and no one could tell the difference.
- Vegan Version: Use vegan cream cheese, coconut yogurt, dairy-free butter, and flax eggs (1 tbsp ground flax + 3 tbsp water per egg). Substitute chocolate chips with dairy-free versions. The layers may be a bit softer but still delicious!
- Flavor Twists: Add 1/2 teaspoon almond extract to the brownie layer for a nutty undertone, or swirl in a spoonful of raspberry or strawberry jam on top for a fruity pop.
- White Chocolate Chips: Fold in 1/2 cup (90g) white chocolate chips to the brownie or cheesecake layer for extra sweetness and color contrast.
- Low Sugar: Reduce both sugars by 2-3 tablespoons if you prefer a less sweet treat. (I’ve tried this and the matcha shines even more.)
- Different Pan Sizes: Bake in a 9-inch (23cm) square pan for thinner brownies (reduce baking time by 5-8 minutes) or double the recipe for a 9×13-inch (23x33cm) pan—just adjust baking times accordingly.
I love adding a swirl of berry compote for spring gatherings, or a sprinkle of toasted coconut for a tropical twist. If you try a new combo, let me know! The base recipe is super adaptable to whatever you’re craving.
Serving & Storage Suggestions
These matcha cheesecake brownies are best served chilled or at cool room temperature. I love slicing them into neat squares and stacking them on a pretty platter for brunches or dessert buffets—the marbled tops always get attention! For an extra treat, dust with a pinch of matcha powder or a drizzle of melted chocolate just before serving.
- Pairings: Enjoy with a hot matcha latte, jasmine tea, or even a cold glass of milk. For a dessert plate, serve alongside fresh berries or a scoop of vanilla ice cream.
- Storing: Store brownies in an airtight container in the fridge for up to 5 days. The flavors meld and the texture gets even fudgier with time.
- Freezer-Friendly: Wrap individual squares tightly and freeze for up to 2 months. Thaw overnight in the fridge and enjoy as a chilled treat (or zap for 10 seconds in the microwave for a softer bite).
- Reheating: If you like your brownies a little warm, microwave for 10-15 seconds. The cheesecake layer will soften—yum!
- Flavor Note: As the brownies rest, the matcha flavor deepens and the layers meld together—you might find they’re even better on day two or three.
Honestly, I hide a few slices in the back of the fridge just for myself. Late-night snack, anyone?
Nutritional Information & Benefits
Each square of matcha cheesecake brownies (based on a 16-piece yield) is approximately 185 calories, with 12g fat, 19g carbs, 3g protein, and 1g fiber. The matcha brings a little antioxidant boost, while the cream cheese and eggs add some protein and calcium.
Key Benefits: Matcha is packed with catechins and L-theanine, which may support calm focus and energy. The recipe is naturally nut-free and can be adapted for gluten-free and dairy-free diets. If you’re watching sugars, you can scale back a bit without sacrificing flavor.
Allergens: Contains eggs, dairy, and gluten (unless using substitutions). Always check your ingredient labels if you’re baking for someone with allergies.
From a personal perspective, I love that you get a little treat that feels decadent but is also less sweet than most brownies. Plus: matcha gives a gentle energy lift without the jitters!
Conclusion
So, why should you make these matcha cheesecake brownies? Because they’re a triple-layered treat that’s as gorgeous as it is delicious—fudgy, creamy, and totally comforting. They’re perfect for impressing guests, spoiling your family, or just giving yourself a little moment of joy.
Don’t be afraid to play around with the recipe—adjust the sweetness, try a different swirl, or make it gluten-free. My favorite part of baking is making each batch a little different, depending on my mood and what’s in the pantry.
These matcha cheesecake brownies have become a staple in my kitchen, and I hope they’ll become one in yours too. Let me know how yours turn out—drop a comment, share a photo, or tell me your favorite variation! Happy baking, and don’t forget to save a square for yourself—you deserve it.
FAQs About Matcha Cheesecake Brownies
What kind of matcha is best for these brownies?
Use a good-quality culinary-grade matcha. It gives the best flavor and color without being too bitter or grassy. Ceremonial matcha is a bit pricey and usually reserved for drinking.
Can I make these brownies gluten-free?
Absolutely! Just swap the all-purpose flour for your favorite gluten-free 1:1 baking blend in both the brownie and cheesecake layers. The results are just as fudgy and delicious.
Can I use a different size pan?
Yes. A 9-inch square pan will yield thinner brownies—reduce the baking time by about 5-8 minutes. For a larger group, double the recipe and bake in a 9×13-inch pan, adjusting baking time as needed.
How do I get sharp, clean layers when cutting?
Chill the brownies thoroughly first, then use a hot, damp knife and wipe it clean between cuts. This keeps the layers neat and the marbled top looking beautiful.
What’s the best way to store leftover brownies?
Keep them in an airtight container in the fridge for up to 5 days, or freeze individually wrapped squares for up to 2 months. The flavor and texture actually improve after a day or two in the fridge!
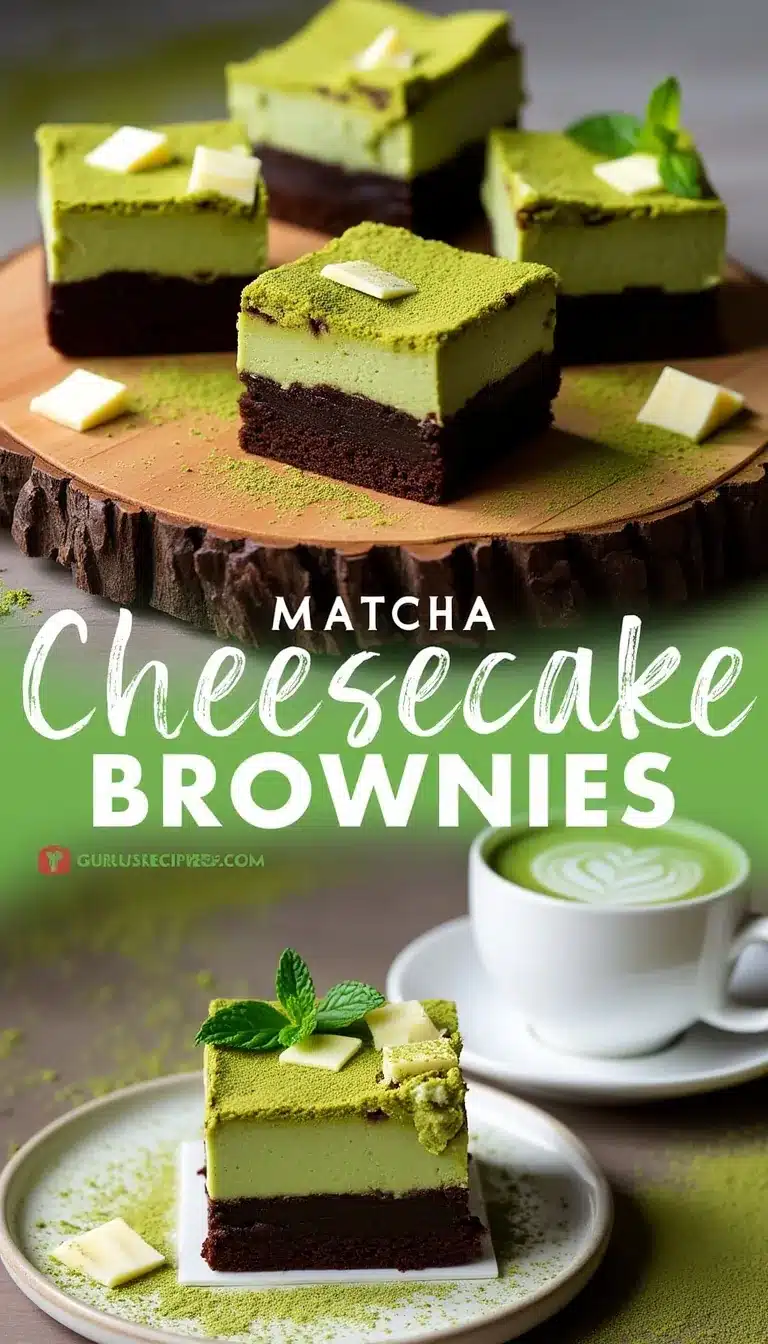

Matcha Cheesecake Brownies
These triple-layered matcha cheesecake brownies combine a fudgy brownie base, a creamy matcha cheesecake middle, and a beautiful marbled swirl on top. The result is a showstopping dessert that’s both comforting and elegant, perfect for special occasions or a unique treat at home.
- Total Time: 2 hours 55 minutes (includes chilling)
- Yield: 16 brownies 1x
Ingredients
- 1/2 cup (115g) unsalted butter, melted
- 3/4 cup (150g) granulated sugar
- 1/4 cup (50g) packed light brown sugar
- 2 large eggs, room temperature
- 1 teaspoon vanilla extract
- 1/3 cup (30g) unsweetened cocoa powder
- 1/2 cup (65g) all-purpose flour (or gluten-free 1:1 blend)
- 1/4 teaspoon salt
- 1/2 cup (90g) semi-sweet or dark chocolate chips (optional)
- 8 oz (225g) cream cheese, softened
- 1/3 cup (65g) granulated sugar
- 1 large egg, room temperature
- 1 tablespoon (10g) all-purpose flour
- 1 tablespoon (7g) culinary-grade matcha powder
- 1/4 cup (60g) sour cream or plain Greek yogurt
- 1/2 teaspoon vanilla extract
- 2 tablespoons reserved brownie batter (for swirl)
Instructions
- Preheat your oven to 350°F (175°C). Line an 8-inch (20cm) square baking pan with parchment paper, leaving some overhang for easy lifting.
- In a large bowl, whisk together melted butter, granulated sugar, and brown sugar until smooth and glossy (about 1 minute).
- Whisk in eggs, one at a time, then add vanilla extract.
- Sift in cocoa powder, flour, and salt. Stir until just combined—do not overmix.
- Fold in chocolate chips, if using.
- Scoop out 2 tablespoons of the brownie batter and set aside for the marble swirl.
- Spread the remaining brownie batter evenly in the prepared pan.
- In a clean bowl, beat softened cream cheese with granulated sugar until creamy (about 2 minutes).
- Beat in egg, then add flour, matcha powder, sour cream or Greek yogurt, and vanilla extract. Mix until smooth and evenly colored.
- Pour the cheesecake batter over the brownie layer and spread gently to the edges.
- Dollop the reserved brownie batter in small spoonfuls over the cheesecake layer.
- Use a toothpick or skewer to swirl the two batters together, creating a marbled pattern.
- Bake in the center of the oven for 32-38 minutes, or until the edges are set and the center wobbles just slightly.
- Let the brownies cool completely in the pan, then transfer to the fridge for at least 2 hours (overnight is even better).
- Use the parchment overhang to lift out the brownies. Slice with a hot, damp knife for clean layers.
Notes
For best results, use room temperature ingredients and sift your matcha to avoid clumps. Chill brownies thoroughly before slicing for clean layers. You can substitute gluten-free flour or dairy-free alternatives as needed. Marbling is best done with a light hand—don’t over-swirl. Store in the fridge for up to 5 days or freeze for up to 2 months.
- Prep Time: 20 minutes
- Cook Time: 35 minutes
- Category: Dessert
- Cuisine: Fusion, Japanese-American
Nutrition
- Serving Size: 1 brownie (1/16 of pan)
- Calories: 185
- Sugar: 14
- Sodium: 90
- Fat: 12
- Saturated Fat: 7
- Carbohydrates: 19
- Fiber: 1
- Protein: 3
Keywords: matcha brownies, matcha cheesecake brownies, triple layer brownies, green tea brownies, marbled brownies, easy dessert, potluck dessert, fusion dessert, Japanese dessert, cheesecake brownies


