
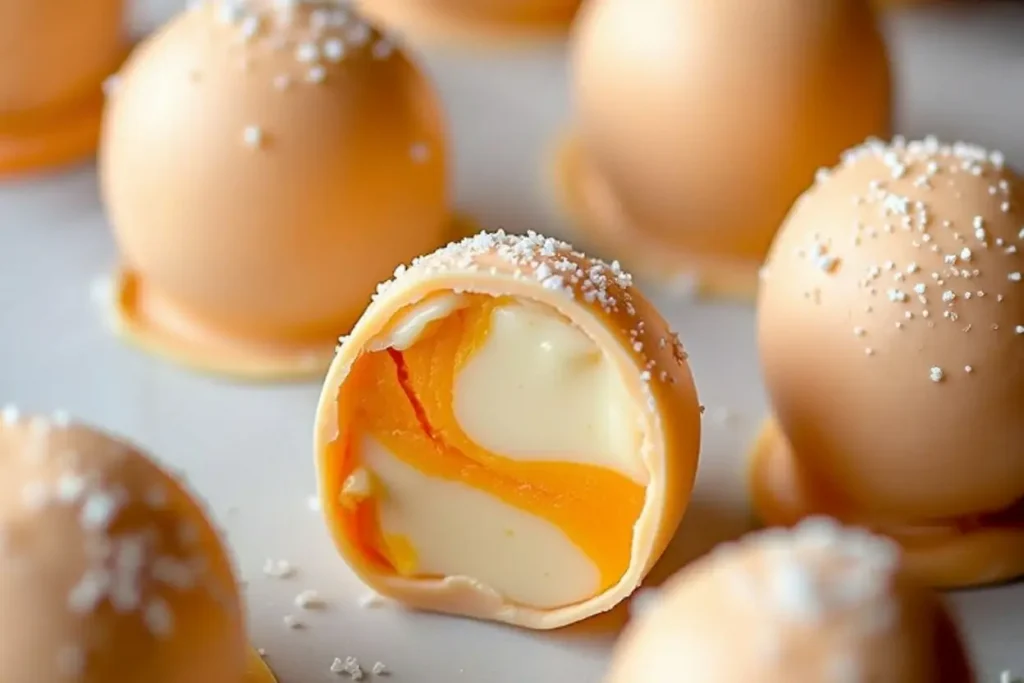
Imagine biting into a soft, creamy truffle that tastes just like your favorite childhood summer treat—orange creamsicles. These No Bake Orange Creamsicle Truffles are not only irresistibly delicious but also incredibly easy to make. With just a handful of ingredients and no oven required, they’re the ultimate indulgence for any occasion.
Whether you’re prepping for a party, looking for a quick dessert fix, or whipping up DIY edible gifts, this recipe is a game-changer. Trust me, once you make these, you’ll find yourself craving them all year round!
The Story Behind These No Bake Orange Creamsicle Truffles
Let’s take a quick stroll down memory lane. Do you remember chasing the ice cream truck on a warm summer day, just to grab that dreamy orange creamsicle? For me, it was always a highlight of summer afternoons. The tangy orange coating combined with a creamy vanilla center was pure happiness on a stick.
Fast forward to today, and I wanted to recreate that nostalgic flavor but in a new, fun way. These truffles are the result of that inspiration—bringing the classic orange creamsicle vibe to life, but with a no-bake twist and bite-sized perfection. They’re ideal for any season, but especially delightful in summer when you don’t want to turn on the oven!
Over the years, I’ve experimented with various versions of this recipe, tweaking ingredients and ratios to get that perfect balance of orange zestiness and creamy sweetness. And here’s the best part—they’re super versatile. Whether you make them for a casual snack or a fancy dessert platter, they’re guaranteed to impress.
Ingredients for No Bake Orange Creamsicle Truffles
Each ingredient in this recipe plays a key role in creating that signature orange creamsicle flavor and texture. Let’s break it down:
- Orange Extract: The secret to capturing that unmistakable orange creamsicle flavor. If you can’t find orange extract, use fresh orange zest for a natural alternative, though the flavor will be milder.
- Cream Cheese: This is what gives the truffles their creamy, melt-in-your-mouth texture. Use full-fat cream cheese for the best results.
- Powdered Sugar: Also known as confectioners’ sugar, it sweetens the mixture while keeping the texture smooth.
- White Chocolate Chips: These add sweetness and help bind everything together. You can use high-quality white chocolate bars if you prefer.
- Orange Food Coloring: Optional, but it gives the truffles that signature orange creamsicle look. A little goes a long way!
- Crushed Vanilla Wafers: Adds a subtle crunch and a hint of vanilla to complement the orange flavor. Graham cracker crumbs work as a substitute.
- Sprinkles: Optional, but they make these truffles festive and fun!
All these ingredients are easy to find at your local grocery store, and most are pantry staples. If you’re not using them right away, store the cream cheese in the fridge and keep the rest in a cool, dry place.
Equipment You’ll Need
Here’s what you’ll need to make these truffles:
- Mixing Bowls: At least two bowls—one for the truffle mixture and one for melting the white chocolate.
- Electric Mixer: A hand or stand mixer works great for combining the cream cheese and powdered sugar.
- Microwave-Safe Bowl: For melting the white chocolate.
- Cookie Scoop: Ensures evenly-sized truffles. A tablespoon works in a pinch.
- Baking Sheet: Line it with parchment paper to prevent sticking.
- Spatula: For scraping down the bowl and mixing.
If you don’t have a microwave, you can use a double boiler to melt the white chocolate. And if you’re short on tools, a sturdy spoon and some elbow grease can replace the mixer—just be prepared for a bit of a workout!
How to Make No Bake Orange Creamsicle Truffles
- Prepare the Base: In a mixing bowl, beat 8 oz (225g) of softened cream cheese with 1 cup (120g) of powdered sugar until smooth and creamy. Add 1 teaspoon of orange extract and, if desired, a few drops of orange food coloring. Mix until fully combined.
- Add the Vanilla Wafers: Stir in 1 ½ cups (150g) of crushed vanilla wafers until the mixture forms a dough-like consistency. If it feels too sticky, chill it in the refrigerator for 15-20 minutes.
- Shape the Truffles: Using a cookie scoop or tablespoon, portion out the mixture and roll into small balls. Place them on a parchment-lined baking sheet.
- Melt the White Chocolate: In a microwave-safe bowl, melt 1 cup (175g) of white chocolate chips in 20-second intervals, stirring between each, until smooth.
- Coat the Truffles: Dip each truffle into the melted white chocolate, letting the excess drip off. Return them to the baking sheet and add sprinkles or crushed wafers on top if desired.
- Chill: Refrigerate the truffles for at least 30 minutes or until the coating is set.
And there you have it—perfectly creamy, dreamy orange creamsicle truffles!
Cooking Tips and Techniques
- Chilling the Dough: If your dough feels too sticky to handle, a quick chill in the fridge makes it easier to roll.
- Melting White Chocolate: Be careful not to overheat the chocolate, as it can seize. Stir frequently and melt in short bursts.
- Customizing Coatings: Crushed nuts, shredded coconut, or even a drizzle of dark chocolate can be fun alternatives to sprinkles.
- Working Quickly: The melted chocolate sets fast, so it’s helpful to have your decorations ready to go before you start dipping.
Variations and Adaptations
Here are some ways to tweak the recipe to suit your preferences:
- Dietary Substitutions: Use dairy-free cream cheese and vegan white chocolate to make these vegan-friendly.
- Seasonal Twists: Swap the orange extract for lemon or lime for a citrusy variation.
- Flavor Boost: Add ¼ teaspoon of vanilla extract for extra depth of flavor.
- No Food Coloring: Skip the food coloring if you prefer a more natural look.
One of my favorite variations is to roll the truffles in crushed graham crackers instead of dipping them in white chocolate—it gives them a rustic, crumbly texture.
Serving and Storage Suggestions
These truffles are best served chilled, straight from the fridge. They make a delightful dessert after dinner or a sweet snack with a cup of coffee or tea. If you’re hosting, arrange them on a platter with some fresh orange slices for a bright, cheerful presentation.
To store, place the truffles in an airtight container and refrigerate for up to a week. For longer storage, freeze them in a single layer, then transfer to a freezer bag—they’ll keep for up to three months. To enjoy, thaw them in the fridge overnight.
Nutritional Information and Benefits
While these truffles are definitely an indulgence, they do have some redeeming qualities:
- Calories: Approximately 100-120 per truffle, depending on size.
- Key Ingredients: Cream cheese provides a dose of calcium, while orange extract and zest add a touch of vitamin C.
- Allergen Notes: Contains dairy, so not suitable for those with lactose intolerance unless substitutions are made.
As with any sweet treat, enjoy these in moderation as part of a balanced diet.
Conclusion
If you’re searching for a quick, easy, and downright delicious dessert, these No Bake Orange Creamsicle Truffles are a must-try. They bring the nostalgic flavors of an orange creamsicle to life in the most delightful way. Plus, they’re fun to make and even more fun to eat!
I’d love to hear how your truffles turn out! Feel free to share your variations or post a picture on social media and tag me. Don’t forget to save this recipe for later—it’s one you’ll want to make again and again. Happy no-baking!
FAQs
Can I make these truffles ahead of time?
Yes! These truffles can be made up to a week in advance and stored in the fridge.
What if I don’t have orange extract?
Fresh orange zest is a great substitute, though the flavor may be slightly less intense.
Can I freeze the truffles?
Absolutely. Freeze them in a single layer first, then store in an airtight container for up to three months.
Do I have to use food coloring?
No, the food coloring is optional. The truffles will still taste amazing without it!
What can I use instead of vanilla wafers?
Graham cracker crumbs or even crushed digestive biscuits work well as substitutes.


