
“Hey, do you think we can pull off chocolate-covered strawberries shaped like little graduation caps and diplomas?” my sister texted me one afternoon, just days before my niece’s graduation party. Honestly, I was skeptical—chocolate strawberries are great, but crafting them into tiny hats and scrolls? Seemed a bit over the top for me. But, you know how it goes, last-minute ideas sometimes turn into the best memories.
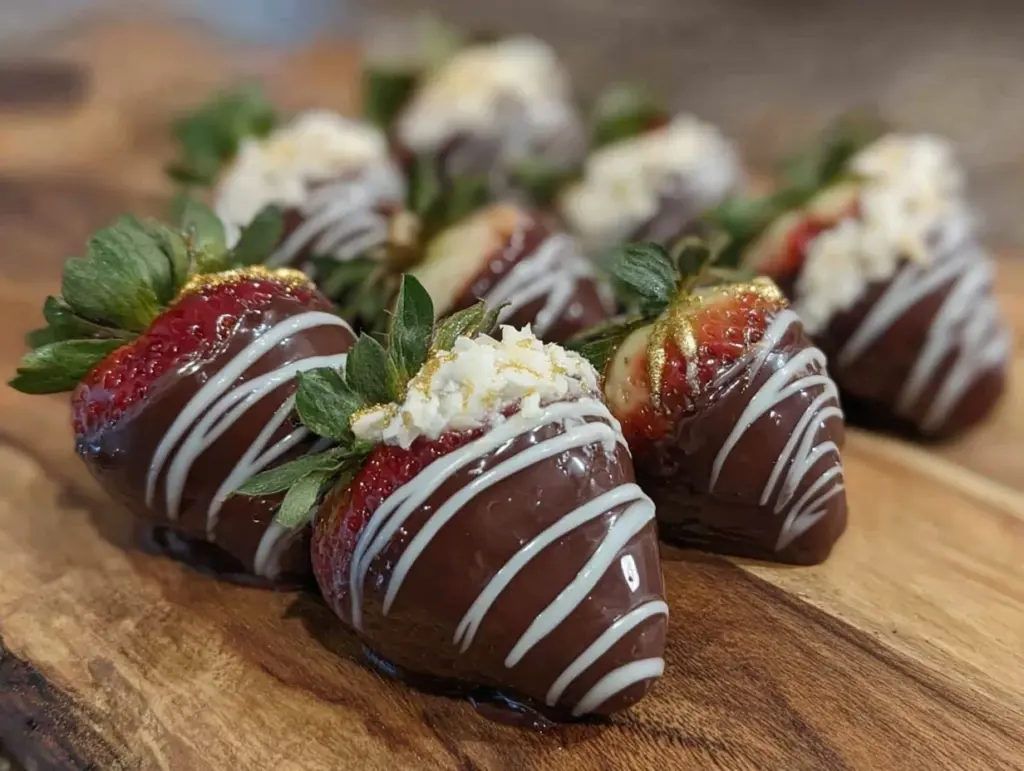
That afternoon, I found myself elbow-deep in melted chocolate, trying to get the “cap” just right with a little square of dark chocolate and a candy tassel. It wasn’t perfect the first few tries (some strawberries just refused to cooperate), but slowly, the magic happened. The smooth chocolate coating, the crisp little diploma rolls tied with a colorful icing ribbon—each piece felt like a tiny celebration all on its own.
What surprised me most was how quickly these treats disappeared at the party. Folks kept asking for the recipe, and I realized this wasn’t just a sweet snack; it was a way to mark a milestone with a playful, homemade touch. The combination of fresh strawberries and silky chocolate, with a little whimsical graduation twist, made this a recipe I’m happy to keep coming back to every spring. It’s simple enough to whip up even if you’re not a “crafty baker,” but special enough to feel like you put real thought into the celebration.
So, if you’re looking for a sweet, festive way to celebrate graduation that’s both charming and delicious, these Perfect Cap and Diploma Chocolate Covered Strawberries might just be your new go-to. They stuck with me because they’re a little bit fun, a little bit fancy, and totally satisfying. Let’s get to it—these treats are worth every messy, chocolatey moment.
Why You’ll Love This Recipe
After several attempts and tweaks, I can say this recipe for Perfect Cap and Diploma Chocolate Covered Strawberries really hits the mark. Here’s why you’ll be reaching for it come graduation season:
- Quick & Easy: You can have these ready in under 45 minutes, perfect when you’re juggling party prep and last-minute errands.
- Simple Ingredients: Fresh strawberries, good-quality chocolate, and a few candy decorations—nothing fancy or hard to find.
- Perfect for Graduation Celebrations: These treats add a festive vibe to any graduation party, whether it’s a backyard gathering or a classroom celebration.
- Crowd-Pleaser: Kids and adults alike love them, and they’re a lovely alternative to heavy desserts.
- Unbelievably Delicious: The combination of juicy strawberries with rich chocolate and a little crunch from the candy accents is just right.
What makes this recipe stand out is the little creative twist of shaping the chocolate and candies into graduation caps and diplomas. It’s not just any chocolate-covered strawberry—it’s a personalized tribute to a big moment. Plus, I’ve learned a trick or two about tempering the chocolate just right so it’s glossy and snaps when you bite in, rather than getting all soft and messy.
This recipe isn’t just about taste; it’s about turning a simple fruit into a keepsake of celebration. Whether you’re impressing guests or just want to make your graduate feel special, these strawberries do the job without stress or fuss.
What Ingredients You Will Need
This recipe uses simple, wholesome ingredients to deliver bold flavor and a festive look without the fuss. Most of these are pantry staples or easy to find at your local store.
- Fresh Strawberries: About 20 large, ripe strawberries with stems (choose firm, bright red berries for best results)
- Dark Chocolate: 8 ounces (225 grams) good-quality dark chocolate chips or baking bars (I like Ghirardelli for smooth melting)
- White Chocolate: 3 ounces (85 grams) white chocolate for detail work (optional but recommended for diplomas and tassels)
- Black Candy Melts: 2 ounces (55 grams) or use additional dark chocolate for the graduation caps
- Red, Blue, or Gold Icing Gel: For tying “diplomas” and making tassels (you can use store-bought decorating gels or homemade royal icing)
- Miniature Pretzel Sticks or Thin Candy Sticks: About 20 small pieces to serve as diploma scroll rods or tassel stems
- Edible Gold or Silver Glitter (optional): For a touch of sparkle on the caps or diplomas
- Wax Paper or Parchment Paper: To set the strawberries on while the chocolate hardens
Substitution tips: If you prefer, swap dark chocolate for milk chocolate for a creamier flavor, or use dairy-free chocolate for a vegan-friendly treat. Almond or coconut flour dusted lightly on the strawberries before dipping can help the chocolate stick better if your berries are extra juicy.
Equipment Needed
- Double Boiler or Microwave-Safe Bowl: For melting chocolate gently without burning. I use a glass bowl over simmering water or a microwave in 30-second bursts.
- Skewers or Toothpicks: To dip strawberries and handle them without getting chocolate on your fingers.
- Baking Sheet: Lined with wax or parchment paper for setting the dipped strawberries.
- Small Piping Bags or Zip-Top Bags: To pipe details like tassels and diploma ribbons (cut a tiny corner off for precision).
- Small Offset Spatula or Butter Knife: Helpful for smoothing chocolate or adjusting shapes gently.
- Cooling Rack (optional): To let excess chocolate drip off, making coating smoother.
If you don’t have a double boiler, a microwave works fine but be careful to stir frequently to avoid scorching. For piping, a plastic sandwich bag with a snipped corner works just as well as a fancy pastry bag. I’ve found a sturdy toothpick is great for placing small decorations or adjusting chocolate “caps” before they set.
Preparation Method
- Wash and Dry Strawberries (10 minutes): Gently rinse the strawberries under cold water. Pat them completely dry with paper towels or a clean kitchen cloth. Moisture is the enemy here—any water left on the berries will cause the chocolate to seize or slide off.
- Melt the Dark Chocolate (5-7 minutes): Using a double boiler or microwave, melt the dark chocolate slowly. Stir often until smooth and glossy. If using a microwave, heat in 30-second intervals, stirring in between.
- Dip Strawberries into Dark Chocolate (10-15 minutes): Hold each strawberry by the stem and dip it about two-thirds into the melted chocolate. Lift and gently twist to let excess drip off. Place the dipped strawberry on the lined baking sheet. Leave space between each berry to avoid sticking.
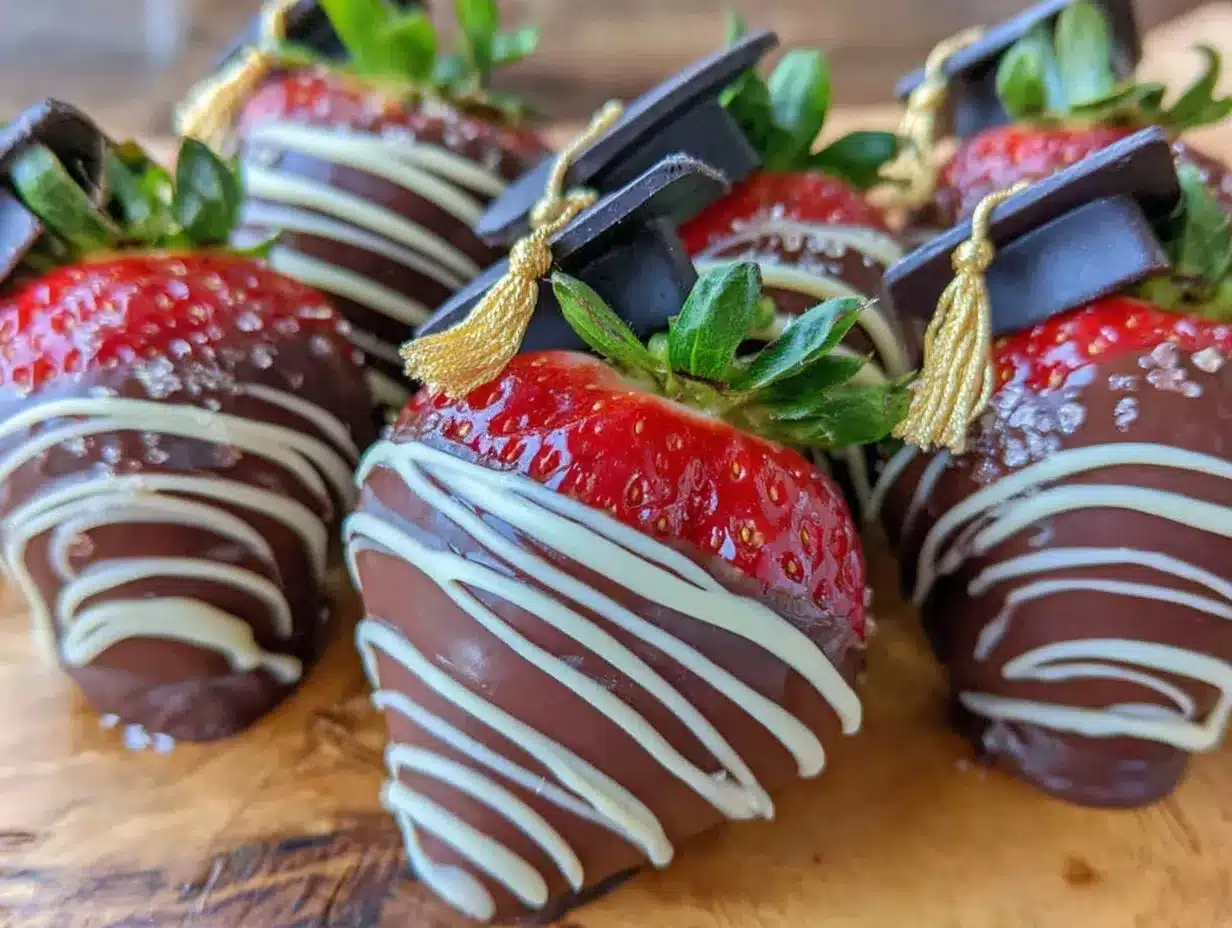
- Prepare the Graduation Caps (15 minutes): While the chocolate is still wet, place a flat square of black candy melt or dark chocolate on top of each strawberry to mimic the mortarboard. Use a small dab of melted chocolate as “glue” if needed.
- Create Tassels and Diploma Ribbons (10 minutes): Melt white chocolate and spoon into a piping bag or zip-top bag. Pipe thin lines on wax paper for diploma ribbons and let set. Use icing gel to tie around miniature pretzel sticks for diplomas and to create tiny tassels on the caps. Attach tassels with a small dot of melted chocolate.
- Assemble Diplomas (5 minutes): Roll thin strips of parchment or edible wafer paper into tiny scrolls and tie with icing gel ribbons. Attach a pretzel stick as the base. Set these on the baking sheet alongside the strawberries.
- Chill to Set (30 minutes): Place the baking sheet in the refrigerator for at least half an hour to let the chocolate harden completely. Avoid the freezer as rapid cooling can cause cracking.
- Final Touches (Optional): Add a sprinkle of edible glitter or a light drizzle of white chocolate over the caps for a festive look right before serving.
Pro tip: If your chocolate starts to thicken while dipping, warm it gently again. Also, test one strawberry first to make sure the chocolate sets smoothly. If it’s too runny or too thick, adjust your melting time accordingly.
Cooking Tips & Techniques
Making chocolate-covered strawberries with a graduation theme sounds fancy, but a few key techniques make it manageable and fun.
- Chocolate Tempering: You don’t have to do formal tempering, but melted chocolate should be smooth and glossy. Overheating chocolate makes it dull and grainy. Melt gently and stir often.
- Dry Berries Are a Must: Even a tiny bit of water on the strawberry ruins the coating. Pat dry multiple times if needed and avoid washing strawberries too far ahead to keep them fresh.
- Use Room Temperature Strawberries: Cold berries cause chocolate to seize. Let strawberries come to room temperature before dipping.
- Work Quickly: Chocolate hardens fast once off heat, so dip and decorate swiftly. If chocolate thickens, gently rewarm.
- Practice Your Piping: For tassels and ribbons, practice on parchment before working on the actual strawberries. It saves frustration and mess.
- Multitask Wisely: While chocolate sets on some strawberries, start prepping tassels or diplomas. Saves time and keeps momentum.
- Storage: Keep strawberries cool but not too cold to avoid condensation, which can make chocolate soggy.
Honestly, my first few attempts were clunky, and some strawberries looked more like abstract art than caps or diplomas. But with a little patience, the look becomes charmingly imperfect—just like most homemade treats!
Variations & Adaptations
Want to switch things up or accommodate different tastes? Here are some fun variations I’ve tried and recommend:
- White Chocolate Base: Use white chocolate instead of dark for a lighter, sweeter flavor. Add food coloring to tint caps or tassels for school colors.
- Nutty Crunch: After dipping in chocolate, sprinkle crushed nuts (like pistachios or almonds) on the bottom half for texture.
- Vegan/Dairy-Free: Use dairy-free chocolate and coconut-based icing gels. Fresh strawberries shine just as well with these swaps.
- Mini Strawberries: Use smaller berries for bite-sized treats, perfect for buffet tables or dessert trays.
- Flavored Chocolate: Add a pinch of cinnamon or orange zest to melted chocolate for a subtle twist.
Personally, one year I swapped the traditional black caps for colorful candy melts in my niece’s school colors—it was a hit and added a festive pop! You can also easily adapt this idea for other celebrations by changing the theme of the decorations.
Serving & Storage Suggestions
These chocolate-covered strawberries look best served chilled but not icy cold. I like to take them out of the fridge about 10 minutes before serving to let their flavor bloom. Arrange them on a pretty platter, maybe with a few fresh mint leaves or edible flowers for an extra touch.
Pair them with light beverages like sparkling water with lemon or a fruity punch to balance the sweetness. They make a lovely addition to a dessert table that might also feature lighter options like the creamy no-churn strawberry ice cream or the fresh strawberry galette with vanilla glaze for more strawberry-themed treats.
Store any leftovers in an airtight container in the refrigerator for up to 2 days. Avoid stacking them to prevent damage to the delicate caps and tassels. When reheating, just let them sit at room temperature briefly; avoid microwaving as the chocolate can melt unevenly.
Flavors mature as the strawberries infuse the chocolate slightly over time, but I find they’re best fresh for that crisp berry bite.
Nutritional Information & Benefits
Each chocolate-covered strawberry treat roughly contains:
| Calories | Approx. 70-90 kcal per piece |
|---|---|
| Fat | 4-6 grams (mostly from chocolate) |
| Carbohydrates | 8-10 grams (natural sugars from fruit and added sugars from chocolate) |
| Protein | 1 gram |
Strawberries are a fantastic source of vitamin C, antioxidants, and fiber, making this treat a better choice than many heavy desserts. Dark chocolate, in moderation, can provide beneficial flavonoids and a mood boost.
For those with dietary concerns, this recipe is naturally gluten-free and can be adapted for vegan diets with the right chocolate. Just watch out for potential nut contamination if you add toppings.
From a wellness perspective, I appreciate how this recipe brings a moment of joy and celebration without feeling like overindulgence—perfect for honoring milestones with a little sweetness and a lot of heart.
Conclusion
Perfect Cap and Diploma Chocolate Covered Strawberries turn a simple fruit into a memorable symbol of achievement. I love how this recipe blends ease with creativity, making it accessible for cooks of all skill levels. Whether you’re throwing a big party or a quiet family celebration, these treats offer a sweet way to honor hard work and new beginnings.
Make them your own by tweaking colors, flavors, or decorations to match your graduate’s personality. And if you find yourself craving more strawberry inspiration, you might enjoy the balsamic roasted strawberry shortcake or the strawberry cheesecake stuffed French toast for a breakfast twist.
Feel free to share your own takes or questions in the comments—I’d love to hear how you make these graduation treats your own. Here’s to sweet celebrations and delicious memories!
FAQs
How do I keep the chocolate from melting on strawberries?
Make sure strawberries are completely dry and at room temperature before dipping. Once coated, chill them in the fridge to set the chocolate firmly.
Can I prepare these chocolate-covered strawberries ahead of time?
Yes, you can make them a day ahead and keep them refrigerated in an airtight container. However, for best freshness and appearance, serve within 24-48 hours.
What if I don’t have candy melts for the caps?
No problem! You can use extra melted dark chocolate or even square-shaped cookies or chocolate pieces to mimic the graduation caps.
Are these strawberries suitable for freezing?
Freezing chocolate-covered strawberries is not recommended as the texture and appearance can suffer. They’re best enjoyed fresh or shortly after making.
How can I make the diploma scrolls look more realistic?
Use thin strips of parchment or edible wafer paper rolled tightly and tied with colorful icing gel. Adding a small pretzel stick inside gives it structure and a scroll-like feel.
Pin This Recipe!
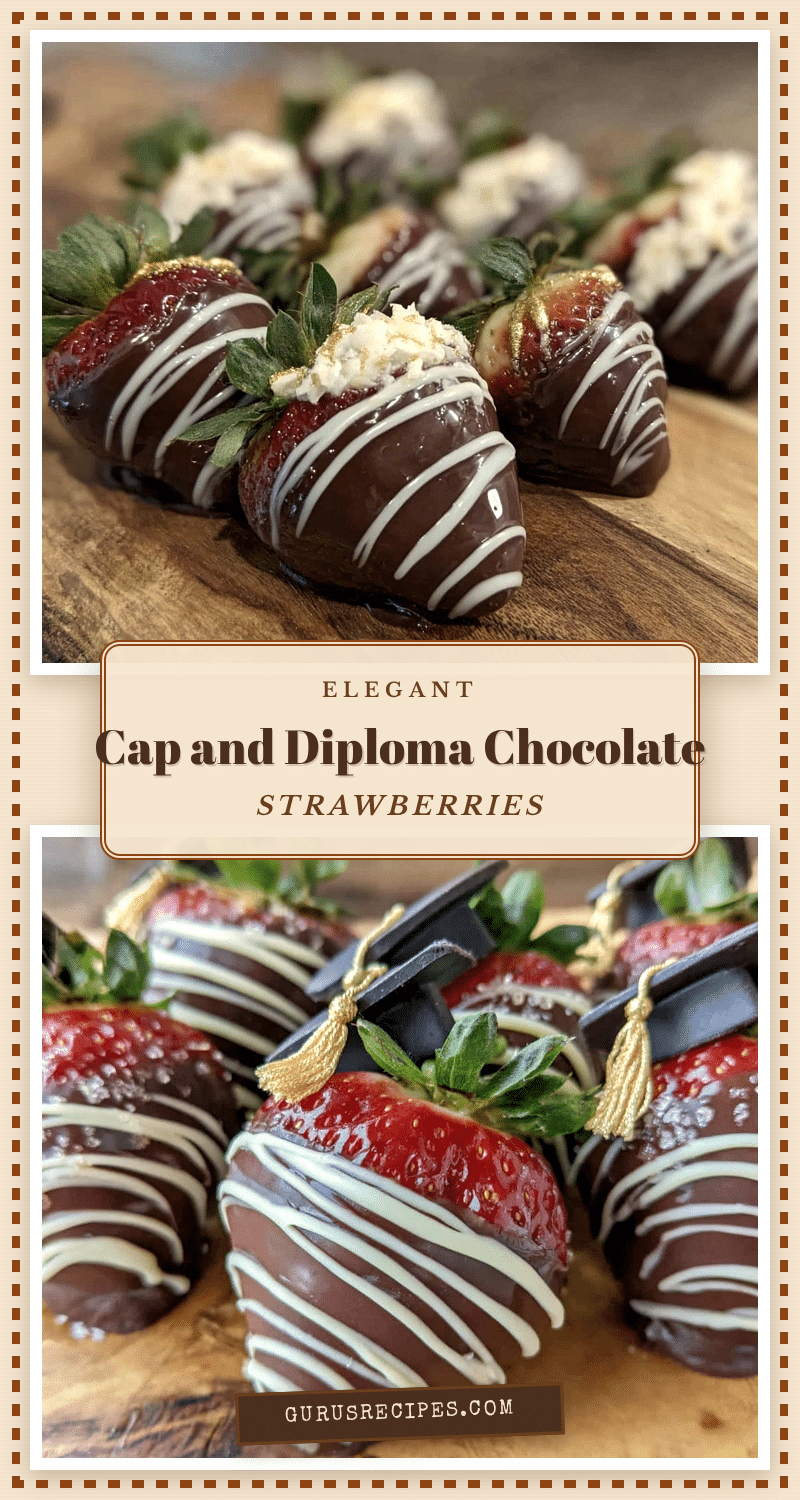

Perfect Chocolate Covered Strawberries for Graduation Easy Homemade Cap and Diploma Treats
Celebrate graduation with these charming chocolate-covered strawberries shaped like little caps and diplomas. A quick, easy, and festive treat combining fresh strawberries and rich chocolate with playful decorations.
- Total Time: 45 minutes
- Yield: 20 servings 1x
Ingredients
- About 20 large, ripe strawberries with stems
- 8 ounces good-quality dark chocolate chips or baking bars
- 3 ounces white chocolate (optional, for detail work)
- 2 ounces black candy melts or additional dark chocolate for caps
- Red, blue, or gold icing gel for tying diplomas and making tassels
- About 20 miniature pretzel sticks or thin candy sticks
- Edible gold or silver glitter (optional)
- Wax paper or parchment paper for setting strawberries
Instructions
- Wash and dry strawberries thoroughly, ensuring no moisture remains.
- Melt the dark chocolate using a double boiler or microwave in 30-second intervals, stirring until smooth and glossy.
- Dip each strawberry about two-thirds into the melted dark chocolate, twist to remove excess, and place on a lined baking sheet.
- While chocolate is still wet, place a flat square of black candy melt or dark chocolate on top of each strawberry to mimic graduation caps, using melted chocolate as glue if needed.
- Melt white chocolate and pipe thin lines on wax paper for diploma ribbons; let set. Use icing gel to tie around miniature pretzel sticks for diplomas and create tassels on caps, attaching with melted chocolate.
- Roll thin strips of parchment or edible wafer paper into tiny scrolls, tie with icing gel ribbons, and attach a pretzel stick as the base. Place alongside strawberries on the baking sheet.
- Chill the baking sheet in the refrigerator for at least 30 minutes to let chocolate harden completely.
- Optionally, add edible glitter or drizzle white chocolate over caps before serving.
Notes
Ensure strawberries are completely dry and at room temperature before dipping to prevent chocolate from seizing. Work quickly as chocolate hardens fast. Rewarm chocolate gently if it thickens. Store leftovers in an airtight container in the refrigerator for up to 2 days. Avoid freezing.
- Prep Time: 20 minutes
- Cook Time: 25 minutes
- Category: Dessert
- Cuisine: American
Nutrition
- Serving Size: 1 chocolate-covered
- Calories: 80
- Sugar: 7
- Sodium: 10
- Fat: 5
- Saturated Fat: 3
- Carbohydrates: 9
- Fiber: 1
- Protein: 1
Keywords: chocolate covered strawberries, graduation treats, homemade desserts, party snacks, chocolate caps, diploma treats, easy chocolate recipes


