

“The power went out halfway through my Easter baking last year,” I remember saying to myself, scrambling in the dim light of my kitchen. The idea was to make the Perfect Robin Egg Speckled Chocolate Nest Spring Cookies, something cheerful and bright for the holiday table. Honestly, I wasn’t sure if I could pull it off without my trusty mixer or oven timer. But as the candles flickered, I found a rhythm in mixing by hand and watching the dough come alive. The speckled blue candies reminded me of the robin eggs we used to find in the backyard—tiny, fragile treasures nestled in twigs and leaves.
Maybe you’ve been there—rushing to create something special, only to have the unexpected throw you off. Yet sometimes those moments bring out the best in us. These chocolate nest cookies turned out to be not only delicious but also a hit with everyone who saw them. The sweet chocolate base cradled those little speckled candies like a bird’s nest holds new life, and I couldn’t help but smile every time someone reached for one.
Let me tell you, this recipe stuck with me because it’s simple, charming, and perfect for spring celebrations. It’s not just a cookie; it’s a little celebration of the season, a nod to nature’s beauty, and a treat that brings a bit of whimsy to your kitchen table. I’m excited to share it with you, hoping it finds a place in your spring traditions too.
Why You’ll Love This Recipe
I’ve tested a handful of chocolate nest cookie recipes over the years, and this one stands out for a few solid reasons. It’s easy enough to whip up on a busy afternoon but special enough to impress guests or delight kids during spring gatherings. Here’s what makes it a keeper:
- Quick & Easy: Comes together in about 30 minutes, including baking time—ideal for last-minute celebrations or an afternoon treat.
- Simple Ingredients: Uses pantry basics like cocoa powder, butter, and flour, plus those iconic robin egg candies that give it a playful pop.
- Perfect for Spring: The delicate blue speckles and nest shape make it a charming addition to Easter baskets, spring brunches, or garden parties.
- Crowd-Pleaser: Kids adore them for the fun candy surprise, and adults appreciate the rich chocolate flavor balanced with a subtle crunch.
- Unbelievably Delicious: The cookie dough is rich and tender, with just the right hint of cocoa, and the candies add a delightful texture contrast.
What really sets this recipe apart is the technique of shaping the nests by hand, which means no fancy molds or tools are needed. Plus, the speckled robin egg candies are not just for show—they add a nostalgic, joyful element that reminds me why I keep baking these every spring. Honestly, this isn’t just another cookie recipe; it’s a little seasonal ritual that makes me pause and smile.
What Ingredients You Will Need
This recipe uses simple, wholesome ingredients to create a chocolatey cookie base that’s both tender and sturdy enough to hold the nest shape. The robin egg speckled candies bring that signature springtime look and a sweet crunch. Here’s what you’ll need:
- For the Cookie Dough:
- 1 cup (226g) unsalted butter, softened (I like Land O Lakes for its creamy texture)
- 1 cup (200g) granulated sugar
- 1 large egg, room temperature
- 2 teaspoons vanilla extract
- 1 ½ cups (190g) all-purpose flour
- ½ cup (50g) unsweetened cocoa powder (preferably Dutch-processed for a smoother taste)
- ½ teaspoon baking powder
- ¼ teaspoon salt
- For the Nest Decoration:
- 1 ½ cups robin egg speckled candy-coated chocolate eggs (mini size works best for nest scale)
If you can’t find the speckled candies, mini pastel chocolate eggs or even jellybeans work as a substitute. For a gluten-free version, swap the all-purpose flour with a 1:1 gluten-free baking flour blend. The cocoa powder’s quality really shines here, so don’t skimp if you want a deep chocolate flavor that isn’t bitter.
Equipment Needed
- Mixing bowls – I prefer glass or stainless steel for easy cleanup and no flavor carryover.
- Electric hand mixer or stand mixer (optional but speeds up creaming the butter and sugar)
- Measuring cups and spoons – precise measurements make a big difference in cookies.
- Baking sheets lined with parchment paper or silicone mats (prevents sticking and helps even baking).
- Cooling rack – for cookies to cool evenly and keep their shape crisp.
- Spoon or small ice cream scoop – for portioning dough consistently.
If you don’t have a mixer, no worries—this dough can be mixed by hand with a sturdy wooden spoon. For budget-conscious bakers, parchment paper can be swapped with well-greased baking sheets, but I find parchment really saves time and cleanup. Also, a small offset spatula helps when transferring delicate cookies to racks without breaking the nests.
Preparation Method

- Preheat your oven to 350°F (175°C). Line two baking sheets with parchment paper or silicone mats to keep the cookies from sticking and help with even baking. This step saves you from a sticky mess later.
- Cream the butter and sugar. In a large bowl, use an electric mixer or hand whisk to beat 1 cup softened unsalted butter with 1 cup granulated sugar until the mixture is light and fluffy—about 3-4 minutes. It’s key for creating that tender cookie texture.
- Add the egg and vanilla. Beat in 1 large room-temperature egg and 2 teaspoons vanilla extract until fully combined. The dough will look glossy and smooth now, which is a good sign.
- Combine dry ingredients. In a separate bowl, sift together 1 ½ cups all-purpose flour, ½ cup unsweetened cocoa powder, ½ teaspoon baking powder, and ¼ teaspoon salt. Sifting helps avoid lumps, especially with cocoa powder.
- Mix dry ingredients into wet. Gradually add the dry mix to the butter mixture, stirring gently until just combined. Don’t overmix or the cookies may get tough. The dough will be soft but hold together well.
- Shape the nests. Using a spoon or small ice cream scoop, drop rounded tablespoons of dough onto your prepared baking sheets, spacing about 2 inches apart. Then, with your fingers or the back of a spoon, gently create indentations in the center of each cookie to form a nest shape—don’t press too hard or the cookies will spread too thin.
- Add the robin egg candies. Carefully press 3-4 speckled candy eggs into the center of each nest. This step is fun and gives the cookies their signature look. The candies will soften slightly during baking but keep their color and crunch.
- Bake for 12-14 minutes. The cookies should look set but still soft in the middle. The edges will firm up nicely without burning. Keep an eye on them—ovens vary, and you don’t want them drying out.
- Cool completely on racks. Let the cookies rest for 5 minutes on the baking sheets, then transfer to wire racks to cool fully. This helps them keep their shape and the nests stay intact.
If your dough feels too soft to shape, pop it in the fridge for 15 minutes before scooping. Also, if the candies start melting too much during baking, try adding them halfway through the baking time next round—just a personal hack I’ve learned.
Cooking Tips & Techniques
When making the Perfect Robin Egg Speckled Chocolate Nest Cookies, a few tricks really make the process smooth and the results consistent. First off, don’t skip softening your butter properly. I’ve burned through batches using cold butter, and the dough just won’t come together right.
Another thing—I learned the hard way—that creating the nest indentation too deep causes the cookies to flatten out and lose shape. Keep it gentle and shallow; the dough will rise just enough to cradle the candies beautifully. Also, using a silicone baking mat helps prevent the nests from sticking and breaking apart.
Timing is key. I recommend setting a timer for 12 minutes and checking early—every oven is different, and you want the cookies soft but not doughy. If you let them cool fully on the pan, they can continue cooking a bit from residual heat, so transferring to a rack after a few minutes is ideal.
Multitasking tip: While the cookies bake, start cleaning up or prepping a drink to enjoy with the warm treats. This makes the whole baking session feel more relaxed and enjoyable, trust me.
Variations & Adaptations
One of the best parts about this recipe is how easy it is to customize. Here are a few variations I’ve tried or recommend:
- Nutty Nest: Add ½ cup chopped toasted pecans or walnuts into the dough for a delightful crunch that pairs well with chocolate.
- Gluten-Free Option: Replace all-purpose flour with a gluten-free blend like Bob’s Red Mill 1-to-1 baking flour. The texture remains tender, and the nests hold up well.
- White Chocolate Twist: Swap the cocoa powder for an equal amount of flour and mix in ½ cup white chocolate chips for a sweeter, creamier flavor profile. Use pastel candies to match!
- Seasonal Candy Swaps: Outside of spring, try jelly beans or candy-coated almonds to adapt the nests for different holidays or celebrations.
- Vegan Version: Use dairy-free butter and a flax egg (1 tablespoon ground flaxseed + 3 tablespoons water, chilled) instead of a chicken egg. The nests turn out just as tasty!
Personally, I once made a batch with crushed peppermint candies mixed into the dough for a refreshing holiday spin. It was a hit, and the nest shape made it festive and fun.
Serving & Storage Suggestions
These cookies are best served at room temperature, letting the chocolate flavor really shine without being too hard or melty. Arrange them on a pretty platter, maybe lined with fresh spring greens or flowers, to highlight their nest-like charm.
Pair them with a cup of hot tea, coffee, or even a glass of cold milk for a comforting treat. I’ve also served them alongside light spring fruit salads or a creamy lemon tart for a lovely seasonal dessert spread.
For storage, keep the cookies in an airtight container at room temperature for up to 4 days. If you want to keep them longer, freeze the baked cookies in a single layer on a baking sheet, then transfer to a freezer-safe container. Thaw at room temperature before serving.
Reheating isn’t necessary but if you like them warm, pop them in a 300°F (150°C) oven for 5 minutes—just enough to soften without melting the candy eggs too much. Over time, the candies might lose some of their crunch, so fresh is always best!
Nutritional Information & Benefits
Each Perfect Robin Egg Speckled Chocolate Nest Cookie contains roughly:
| Calories | 160 |
|---|---|
| Fat | 9g |
| Carbohydrates | 20g |
| Protein | 2g |
| Sugar | 14g |
While these cookies are a sweet treat, the cocoa powder provides antioxidants and a bit of iron, making them a slightly better choice than regular sugar cookies. Using real butter adds richness and a satisfying mouthfeel, but if you need a dairy-free option, plant-based alternatives work well.
For those watching gluten, the recipe adapts easily with gluten-free flour blends, making it accessible to more diets. Just note the candy eggs may contain allergens like milk or soy depending on brand, so check labels if allergies are a concern.
From my wellness perspective, treats like this are about balance and joy—enjoying a little sweetness while savoring the moments with family and friends.
Conclusion
The Perfect Robin Egg Speckled Chocolate Nest Spring Cookies are more than just a festive dessert—they’re a little celebration of the season’s charm and a reminder that even simple ingredients can create something magical. I love how easy they are to make, how fun the shaping process is, and how the speckled candies bring a smile to everyone’s face.
Feel free to tweak this recipe to match your taste, whether that means adding nuts, swapping candies, or making it vegan. I’d love to hear how you customize your nests or any special memories you create with them. Please leave your comments and share your photos—nothing delights me more than seeing these cookies find new homes!
Happy baking, and here’s to sweet spring moments filled with chocolate, laughter, and a little bit of magic.
Frequently Asked Questions (FAQs)
Can I make these cookies ahead of time?
Absolutely! You can prepare the dough a day in advance and keep it refrigerated. Just shape and bake the cookies when you’re ready.
What if I can’t find robin egg speckled candies?
Mini pastel chocolate eggs, jelly beans, or candy-coated almonds all work well as substitutes and keep the springtime feel.
How do I prevent the nests from spreading too much during baking?
Make sure to chill the dough for about 15 minutes if it feels too soft and create shallow indentations for the nests. Also, avoid pressing the candies too deep.
Can I freeze the cookie dough or baked cookies?
Yes, cookie dough freezes well for up to 3 months. Baked cookies freeze best when cooled completely and stored in airtight containers.
Is there a vegan version of this recipe?
Yes, substitute dairy butter with plant-based butter and use a flax egg instead of a chicken egg. The nests turn out delicious with these swaps.
Pin This Recipe!
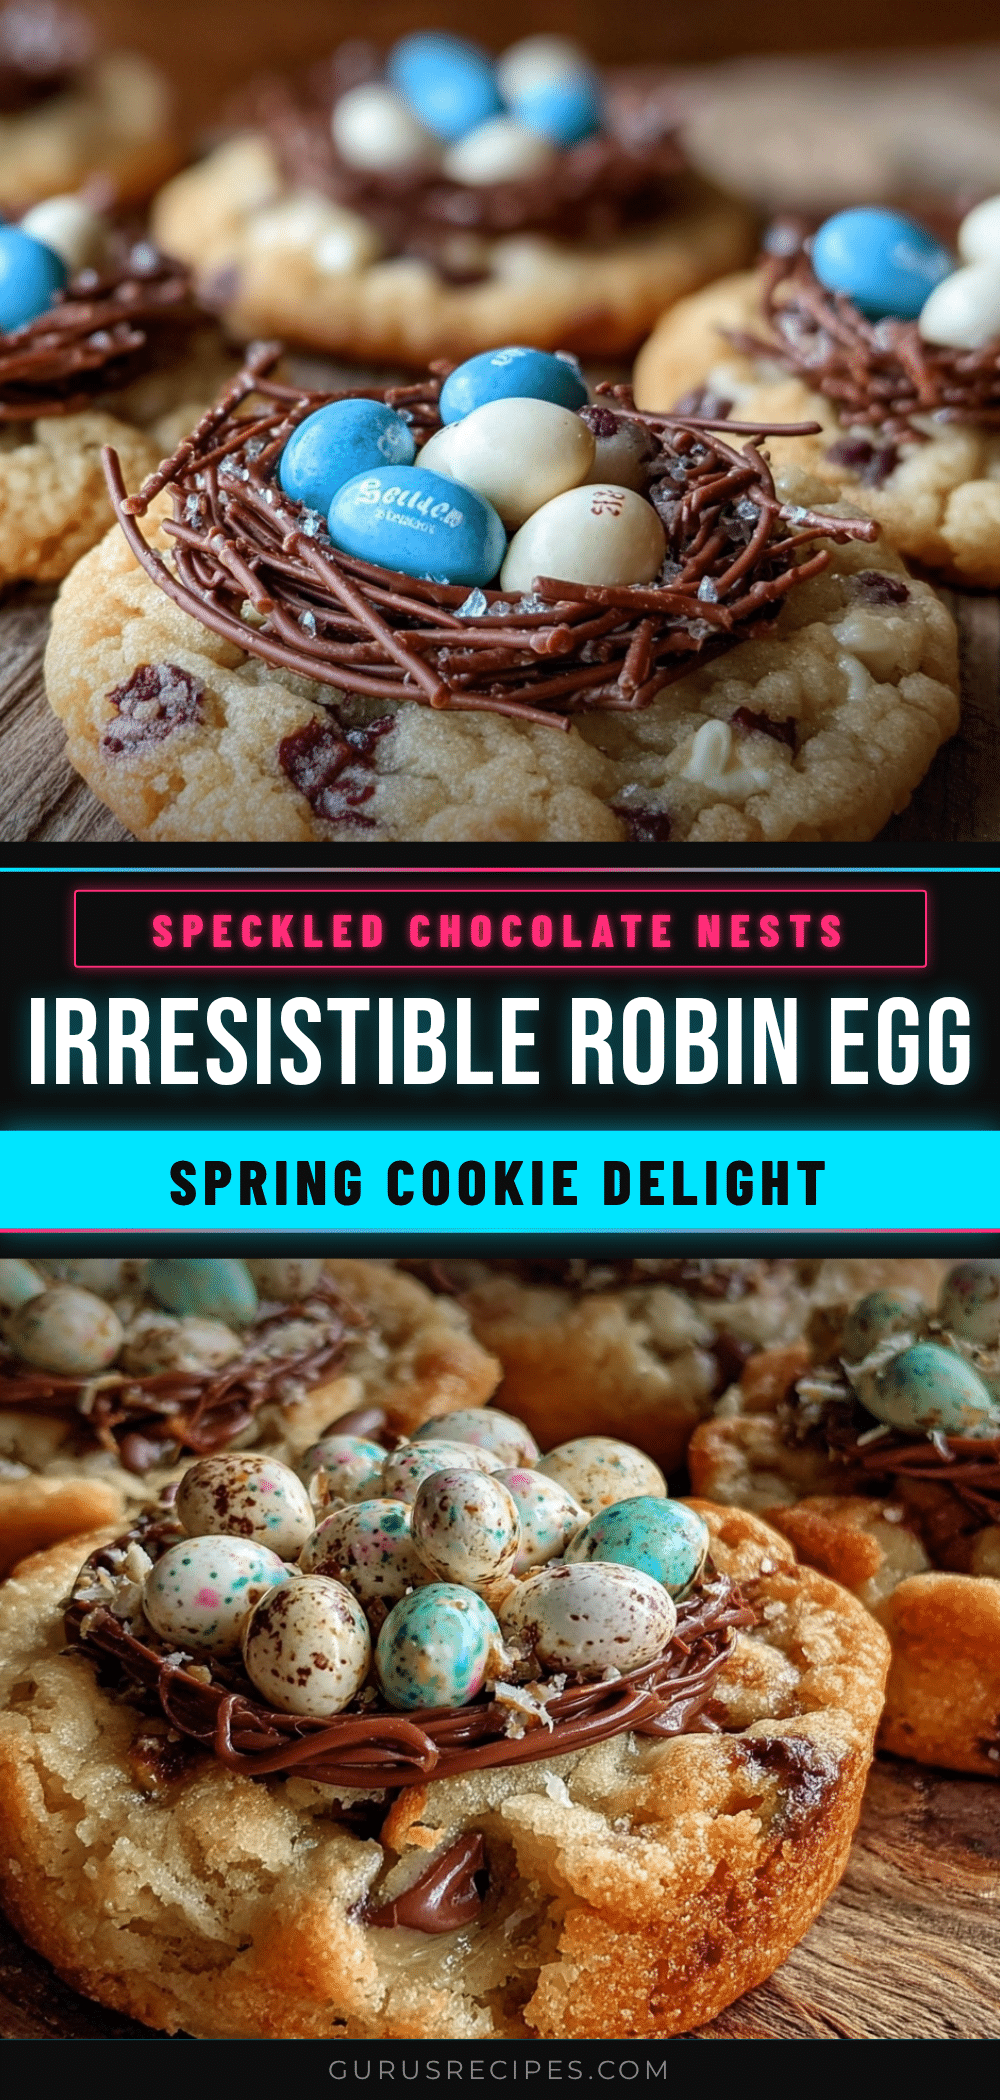

Perfect Robin Egg Speckled Chocolate Nest Cookies
These charming chocolate nest cookies feature a rich cocoa base and are decorated with speckled robin egg candies, perfect for spring celebrations and Easter gatherings.
- Total Time: 29 minutes
- Yield: 24 cookies 1x
Ingredients
- 1 cup (226g) unsalted butter, softened
- 1 cup (200g) granulated sugar
- 1 large egg, room temperature
- 2 teaspoons vanilla extract
- 1 ½ cups (190g) all-purpose flour
- ½ cup (50g) unsweetened cocoa powder (preferably Dutch-processed)
- ½ teaspoon baking powder
- ¼ teaspoon salt
- 1 ½ cups robin egg speckled candy-coated chocolate eggs (mini size preferred)
Instructions
- Preheat your oven to 350°F (175°C). Line two baking sheets with parchment paper or silicone mats.
- Cream the butter and sugar together in a large bowl using an electric mixer or hand whisk until light and fluffy, about 3-4 minutes.
- Beat in the egg and vanilla extract until fully combined and glossy.
- In a separate bowl, sift together the flour, cocoa powder, baking powder, and salt.
- Gradually add the dry ingredients to the wet mixture, stirring gently until just combined. Do not overmix.
- Using a spoon or small ice cream scoop, drop rounded tablespoons of dough onto the prepared baking sheets, spacing about 2 inches apart.
- Gently create shallow indentations in the center of each cookie to form a nest shape.
- Press 3-4 robin egg candies into the center of each nest.
- Bake for 12-14 minutes until cookies look set but still soft in the middle.
- Let cookies rest on the baking sheets for 5 minutes, then transfer to wire racks to cool completely.
Notes
If dough is too soft to shape, chill for 15 minutes before scooping. Press candies gently to avoid flattening nests. For vegan version, use dairy-free butter and flax egg. Use gluten-free flour blend for gluten-free option. Adding nuts or swapping candies can customize the recipe.
- Prep Time: 15 minutes
- Cook Time: 14 minutes
- Category: Dessert
- Cuisine: American
Nutrition
- Serving Size: 1 cookie
- Calories: 160
- Sugar: 14
- Fat: 9
- Carbohydrates: 20
- Protein: 2
Keywords: chocolate nest cookies, robin egg cookies, spring cookies, Easter cookies, speckled candy cookies, easy chocolate cookies


