
Imagine this: the crackle of a golden graham crust, a ribbon of melty chocolate fudge, and a soft blanket of toasted marshmallows – all in one bite. That’s exactly what you get with these s’mores fudge cookie bars. Honestly, the first time I pulled a pan of these out of the oven, the smell alone had the whole family circling the kitchen. There’s something magical about the way the chocolate and marshmallow swirl together, reminding you of sticky fingers and campfire nights, even if you’re just in your slippers at home.
I first made these s’mores fudge cookie bars on a rainy Saturday when the kids were begging for s’mores, but we weren’t lighting a fire in the living room (for obvious reasons!). I wanted them to have that campfire nostalgia, but without the mess or the weather dependency. After a few tweaks – and a couple of panfuls that disappeared too quickly – this version became our family favorite. It’s now my go-to for parties, bake sales, and “just because” evenings when we all need a little extra comfort.
What makes these s’mores fudge cookie bars so special? It’s the perfect marriage of gooey, fudgy, and golden. The layers are thick and generous, and each bite gives you the crunch, the chew, and the melt – all at once. Plus, you only need pantry staples and a bit of patience while they cool (that’s the hardest part). Whether you’re baking for a crowd or a quiet movie night, these bars are guaranteed to win hearts. Trust me, after baking this recipe more times than I can count, I can say with confidence: this is the only s’mores cookie bar recipe you’ll ever need.
Why You’ll Love This S’mores Fudge Cookie Bars Recipe
- Quick & Easy: These s’mores fudge cookie bars come together in under an hour, which is a lifesaver for last-minute gatherings or weeknight desserts. You won’t be tied to the kitchen for long!
- Simple Ingredients: No need for specialty items – everything you need is likely already hanging out in your pantry. That means you can whip these up whenever the craving hits, no extra grocery run required.
- Perfect for Any Occasion: From birthday parties and potlucks to holiday bake swaps or just a cozy night in, these bars are always a hit. I even pack them up for picnics and road trips – they travel well and taste even better the next day.
- Crowd-Pleaser: Kids, adults, even picky eaters – I’ve never seen anyone turn down a s’mores fudge cookie bar. They disappear fast, so I always recommend making a double batch if you’re serving a crowd.
- Unbelievably Delicious: The gooey fudge layer sandwiched between buttery graham cookie and toasted marshmallows is pure joy. It’s comfort food, nostalgia, and a touch of decadence all in one bite.
What really sets this recipe apart? I blend the graham crackers right into the cookie dough for maximum flavor, and I don’t skimp on the fudge layer (trust me, you want it thick and dreamy). The marshmallows are broiled to a perfect toasty finish, giving you that real campfire vibe. It’s not just another cookie bar – it’s my best version after plenty of taste tests and tweaks. There’s something about the way these bars hit all the right notes: sweet, slightly salty, chewy, and chocolatey. You know that moment when you take a bite and just have to close your eyes for a second? Yeah, that’s the magic right here.
Whether you’re hoping to impress your guests or just treat yourself to something special, these s’mores fudge cookie bars make it effortless. They’re comfort food for the soul, but with a totally irresistible twist – and you don’t even need a campfire.
What Ingredients You Will Need
This recipe uses simple, everyday ingredients to deliver all the classic s’mores flavors in a portable, gooey bar. You probably have most of these on hand already! Here’s what you’ll need:
- For the Graham Cookie Layer:
- 1 cup (2 sticks/226g) unsalted butter, softened (adds richness and chewiness)
- 1 cup (200g) light brown sugar, packed (for sweetness and moisture)
- 1/2 cup (100g) granulated sugar
- 2 large eggs, room temperature (for structure and binding)
- 2 teaspoons pure vanilla extract (adds warmth)
- 2 cups (240g) all-purpose flour (can sub gluten-free blend for allergies)
- 1 1/2 cups (150g) graham cracker crumbs (about 12 sheets, pulsed in a food processor)
- 1 teaspoon baking powder
- 1/2 teaspoon fine sea salt
- For the Fudge Layer:
- 2 cups (340g) semisweet chocolate chips (I like Ghirardelli or Guittard for a glossy, deep chocolate flavor)
- 1 (14-oz/396g) can sweetened condensed milk (don’t use evaporated milk!)
- 2 tablespoons (28g) unsalted butter
- 1 teaspoon pure vanilla extract
- Pinch of sea salt (balances the sweetness)
- For the Marshmallow Topping:
- 3 cups (about 150g) mini marshmallows (mini size melts and toasts perfectly; regular marshmallows can be cut up if needed)
Ingredient Tips:
- If you’re out of graham crackers, digestive biscuits or vanilla wafer crumbs work well.
- Swap semisweet chocolate for milk or dark chocolate depending on your taste.
- For a gluten-free version, use gluten-free graham crackers and a 1:1 gluten-free flour blend.
- Need dairy-free? Use plant-based butter and coconut condensed milk – it still tastes amazing!
- If you want extra crunch, toss in a handful of chopped pecans or walnuts to the cookie dough.
I always recommend using good-quality chocolate chips – it really makes a difference in that fudge layer. And don’t worry if you only have regular marshmallows. I’ve torn them up by hand plenty of times – they toast up just as gooey and golden.
Equipment Needed
- 9×13-inch (23x33cm) baking pan: Metal works best for even baking. Glass is fine but may require a couple extra minutes in the oven.
- Parchment paper or foil: For easy lifting and cleanup. I always line the pan so nothing sticks.
- Mixing bowls: At least two – one for the cookie dough, one for the fudge filling.
- Hand mixer or stand mixer: Optional, but makes creaming the butter and sugar a breeze. A sturdy spoon works too (and gives you a mini arm workout!).
- Spatula and wooden spoon: For folding and spreading layers. A silicone spatula gets every last bit out – trust me, you’ll want it!
- Measuring cups and spoons: For accuracy – baking is a science, after all.
- Small saucepan: For melting the fudge layer, unless you use the microwave (microwave-safe bowl works too).
- Food processor or blender: To crush graham crackers. If you don’t have one, a zip-top bag and rolling pin does the trick (and is oddly satisfying!).
If you don’t have a 9×13 pan, you can use two 8×8 pans and adjust baking time down a bit. I’ve even made these as “cookie cups” in muffin tins – just watch them closely so they don’t overbake. For easy cleaning, soak pans right after use, especially if marshmallow gets caramelized on the edges. Budget tip: Dollar store pans work fine for sharing or gifting!
How to Make S’mores Fudge Cookie Bars
- Prep your pan and oven: Preheat oven to 350°F (175°C). Line a 9×13-inch (23x33cm) pan with parchment paper, leaving some overhang for easy lifting later. Lightly grease the paper. This helps the bars pop right out.
- Make the graham cookie dough: In a large bowl, cream together 1 cup (226g) unsalted butter, 1 cup (200g) brown sugar, and 1/2 cup (100g) granulated sugar until light and fluffy (about 2-3 minutes). Beat in 2 eggs and 2 teaspoons vanilla until fully combined. In a separate bowl, whisk together 2 cups (240g) flour, 1.5 cups (150g) graham cracker crumbs, 1 teaspoon baking powder, and 1/2 teaspoon salt. Gradually add dry ingredients to wet, mixing until just combined. Dough will be thick and a little sticky.
- Press the dough into pan: Using clean hands or a spatula, press about two-thirds of the dough evenly into the bottom of the prepared pan. Save the remaining dough for the top. Pro tip: Slightly dampen your fingers to keep dough from sticking.
- Prepare the fudge layer: In a small saucepan (or microwave-safe bowl), combine 2 cups (340g) chocolate chips, 1 can (396g) sweetened condensed milk, and 2 tablespoons (28g) butter. Heat over low, stirring often, until melted and glossy (about 3-5 minutes). Remove from heat, stir in 1 teaspoon vanilla and a pinch of salt. The mixture should be thick, shiny, and pourable.
- Add the fudge layer: Pour the warm fudge evenly over your cookie base. Use a spatula to smooth to the edges – don’t worry if it’s not perfect, it’ll melt and level out in the oven.
- Add marshmallows and top layer: Sprinkle 3 cups mini marshmallows evenly over the fudge. Then, drop spoonfuls of the remaining cookie dough on top. It won’t cover the marshmallows completely – that’s totally fine! Gaps let the marshmallows toast and peek through for that signature look.
- Bake: Bake in preheated oven for 25-30 minutes, until cookie dough is golden brown and marshmallows are puffed and toasty. If you love extra-browned marshmallows, broil for 1-2 minutes at the end – but watch closely, they can burn fast!
- Cool completely: This is the hardest part. Let bars cool in the pan at least 2 hours – the fudge needs time to set. If you’re impatient (like me), pop the pan in the fridge for an hour to speed things up.
- Slice and serve: Use the parchment overhang to lift bars from the pan. Slice into squares with a sharp knife. Wipe the blade between cuts for clean edges (especially if the fudge is still a touch gooey).
Troubleshooting:
- If your dough is too sticky to spread, chill it for 10-15 minutes.
- Fudge looks dry? You probably overcooked it – next time, melt just until smooth.
- Marshmallows burned? Watch closely under the broiler and rotate the pan if needed.
You want to look for a golden cookie top, melty fudge peeking out, and marshmallows that are just shy of campfire charred (unless, like me, you love them extra toasty!). The scent is your best clue – when your kitchen smells like a summer bonfire, they’re ready to go.
Cooking Tips & Techniques
- Layering is key: Pressing the cookie dough down firmly for the base helps the bars hold their shape when sliced. Don’t skimp on the overhang of parchment – it’s a lifesaver for neat removal.
- Don’t overbake: The bars might look a bit underdone when you pull them out. That’s okay! They’ll set as they cool, and the fudge stays gooey. Overbaking leads to dry cookie and tough marshmallows.
- Toasting technique: If your broiler runs hot (like mine), keep the oven door cracked and don’t walk away. A little extra brown is yummy, but they can go from golden to black in seconds – learned that the hard way!
- Mix-ins: If you want to add nuts, chocolate chunks, or even a swirl of peanut butter, fold into the dough or fudge before assembly. Don’t overload – too many extras can make the bars crumble.
- Slicing cleanly: Cool bars completely. For perfect edges, refrigerate first, then use a sharp knife wiped clean between cuts. Trust me, patience pays off for Instagram-worthy bars!
- Batch-baking tip: Making these for a party? Double the recipe and use a rimmed half-sheet pan. They freeze beautifully, too – always a plus for busy bakers.
- Troubles I’ve faced: Once, I used stale marshmallows and they just didn’t melt right – always check freshness! Also, using cheap chocolate can make the fudge grainy. Go for a trusted brand if you can.
If you’re multitasking, prep the dough and fudge layer ahead of time and assemble right before baking. And if the kids want to help, let them sprinkle the marshmallows – it’s their favorite part (and the mess is half the fun!).
Variations & Adaptations
- Peanut Butter S’mores Fudge Cookie Bars: Swirl 1/2 cup (120g) creamy peanut butter into the fudge layer before topping with marshmallows. The salty-sweet combo is epic! If you love Reese’s cups, this is your jam.
- Gluten-Free S’mores Bars: Simply swap the all-purpose flour and graham crackers for certified gluten-free versions. I’ve made these with Bob’s Red Mill 1:1 blend and Schär graham crackers – no one could tell the difference.
- Seasonal S’mores Bars: In the fall, add a teaspoon of pumpkin pie spice to the cookie dough and scatter cinnamon chips over the fudge. For a winter twist, use peppermint extract in the fudge and top with crushed candy canes.
Want to make them dairy-free? Use vegan butter, coconut condensed milk, and Enjoy Life chocolate chips. For nut allergies, skip the add-ins or use sunflower seed butter for a nutty flavor without the risk. If you’re feeling adventurous, try using dark chocolate and a sprinkle of flaky sea salt on top for a grown-up twist. I once added a layer of caramel sauce between the fudge and marshmallows – it was over the top, but oh so worth it for a special occasion!
Serving & Storage Suggestions
These s’mores fudge cookie bars are best served at room temperature – the fudge is soft, the marshmallows are chewy, and the cookie base is just the right kind of crumbly. For parties, I love stacking them on a rustic wooden board or arranging them in cupcake liners for grab-and-go ease. Pair with a mug of hot cocoa or a glass of cold milk for the full “campfire at home” experience.
Storage: Store leftovers in an airtight container at room temperature for up to 3 days. If your kitchen runs hot, stash them in the fridge – just let them soften a bit before serving. These bars freeze like a dream: wrap tightly and freeze up to 2 months. Thaw at room temp or zap for 10 seconds in the microwave if you’re feeling impatient.
The flavors actually deepen after a day or two, so they’re a fantastic make-ahead treat. If you love gooey marshmallows, reheat individual bars in the microwave for 8-10 seconds – they’ll taste oven-fresh. Pro tip: Don’t stack the bars directly on top of each other unless you use parchment between layers, or you’ll end up with a marshmallow mess (learned that one the sticky way!).
Nutritional Information & Benefits
Each s’mores fudge cookie bar (based on 24 bars per pan) is approximately 240 calories, with 12g fat, 32g carbs, and 3g protein. There’s a good dose of calcium from the milk and some antioxidants from the chocolate, but let’s be honest – this is dessert! For those needing a gluten-free or dairy-free option, just follow the substitutions listed above.
Possible allergens include wheat, dairy, and eggs. As a mom and a nutrition coach, I love that you can tweak these for almost any dietary need. They’re definitely a treat, but sometimes a little indulgence is good for the soul – especially when it comes with childhood memories and smiles all around!
Conclusion
If you’re looking for a dessert that’s a guaranteed hit, these s’mores fudge cookie bars are it. They’re gooey, chocolatey, and packed with everything you love about campfire s’mores, minus the smoke and sticky fingers (well, maybe a little stickiness!). I love how easy they are to customize, and there’s just something about the way they bring people together. Whether you follow the recipe to the letter or make it your own with creative swaps, you’re in for a real treat.
I hope you love these s’mores fudge cookie bars as much as we do. Don’t forget to share your version in the comments or tag me on social – I can’t wait to see your gooey creations! If you’ve got a favorite twist (or a funny marshmallow mishap), let me know. Happy baking, and here’s to more sweet, simple moments at home.
Frequently Asked Questions About S’mores Fudge Cookie Bars
How do I keep the bars from sticking to the pan?
Always line your pan with parchment paper, leaving an overhang on the sides. Greasing the paper lightly also helps. When the bars are cool, just lift and slice – easy and mess-free!
Can I make s’mores fudge cookie bars ahead of time?
Absolutely! They’re actually even better the next day. Just store them in an airtight container at room temperature or in the fridge, and slice when ready to serve.
What’s the best way to get a clean slice?
Let the bars cool completely (or chill in the fridge), then use a sharp knife. Wipe the blade between cuts for tidy, bakery-style squares. If they’re extra gooey, refrigerate for 30 minutes before slicing.
Can I use large marshmallows instead of mini?
Yes! Just cut them into smaller pieces so they melt and toast evenly. The mini marshmallows do give a more even coverage, but both work great in a pinch.
How can I make this recipe gluten-free or dairy-free?
Swap in gluten-free flour and graham crackers for a wheat-free treat. For dairy-free bars, use plant-based butter, coconut condensed milk, and dairy-free chocolate chips. They’ll still be super gooey and delicious!
Print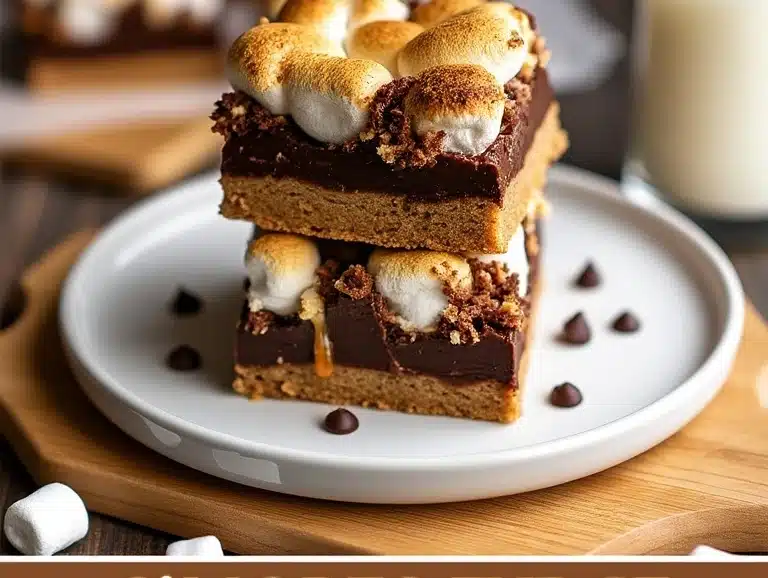
S’mores Fudge Cookie Bars
These s’mores fudge cookie bars combine a golden graham cookie base, a thick layer of chocolate fudge, and toasted marshmallows for a gooey, crowd-pleasing dessert. Perfect for parties, bake sales, or cozy nights in, they deliver all the nostalgic flavors of campfire s’mores—no fire required.
- Total Time: 2 hours 50 minutes
- Yield: 24 bars 1x
Ingredients
- 1 cup (2 sticks/226g) unsalted butter, softened
- 1 cup (200g) light brown sugar, packed
- 1/2 cup (100g) granulated sugar
- 2 large eggs, room temperature
- 2 teaspoons pure vanilla extract
- 2 cups (240g) all-purpose flour
- 1 1/2 cups (150g) graham cracker crumbs (about 12 sheets, pulsed in a food processor)
- 1 teaspoon baking powder
- 1/2 teaspoon fine sea salt
- 2 cups (340g) semisweet chocolate chips
- 1 (14-oz/396g) can sweetened condensed milk
- 2 tablespoons (28g) unsalted butter
- 1 teaspoon pure vanilla extract
- Pinch of sea salt
- 3 cups (about 150g) mini marshmallows
Instructions
- Preheat oven to 350°F (175°C). Line a 9×13-inch pan with parchment paper, leaving overhang for easy lifting. Lightly grease the paper.
- In a large bowl, cream together 1 cup butter, 1 cup brown sugar, and 1/2 cup granulated sugar until light and fluffy (2-3 minutes).
- Beat in 2 eggs and 2 teaspoons vanilla until fully combined.
- In a separate bowl, whisk together 2 cups flour, 1.5 cups graham cracker crumbs, 1 teaspoon baking powder, and 1/2 teaspoon salt.
- Gradually add dry ingredients to wet, mixing until just combined. Dough will be thick and a little sticky.
- Press about two-thirds of the dough evenly into the bottom of the prepared pan. Save the remaining dough for the top.
- In a small saucepan (or microwave-safe bowl), combine 2 cups chocolate chips, 1 can sweetened condensed milk, and 2 tablespoons butter. Heat over low, stirring often, until melted and glossy (about 3-5 minutes). Remove from heat, stir in 1 teaspoon vanilla and a pinch of salt.
- Pour the warm fudge evenly over the cookie base. Use a spatula to smooth to the edges.
- Sprinkle 3 cups mini marshmallows evenly over the fudge. Drop spoonfuls of the remaining cookie dough on top. It won’t cover the marshmallows completely.
- Bake in preheated oven for 25-30 minutes, until cookie dough is golden brown and marshmallows are puffed and toasty. For extra-browned marshmallows, broil for 1-2 minutes at the end, watching closely.
- Let bars cool in the pan at least 2 hours (or refrigerate for 1 hour) to set the fudge.
- Use the parchment overhang to lift bars from the pan. Slice into squares with a sharp knife, wiping the blade between cuts for clean edges.
Notes
For gluten-free bars, use gluten-free flour and graham crackers. For dairy-free, use plant-based butter, coconut condensed milk, and dairy-free chocolate chips. Cool bars completely before slicing for clean edges. Bars freeze well for up to 2 months. For extra flavor, add nuts or swirl in peanut butter. Watch marshmallows closely under the broiler to avoid burning.
- Prep Time: 20 minutes
- Cook Time: 30 minutes
- Category: Dessert
- Cuisine: American
Nutrition
- Serving Size: 1 bar (1/24 of pan)
- Calories: 240
- Sugar: 22
- Sodium: 110
- Fat: 12
- Saturated Fat: 7
- Carbohydrates: 32
- Fiber: 1
- Protein: 3
Keywords: s'mores, fudge, cookie bars, dessert, party, marshmallow, chocolate, graham cracker, easy, bake sale, gooey, campfire, American dessert


