
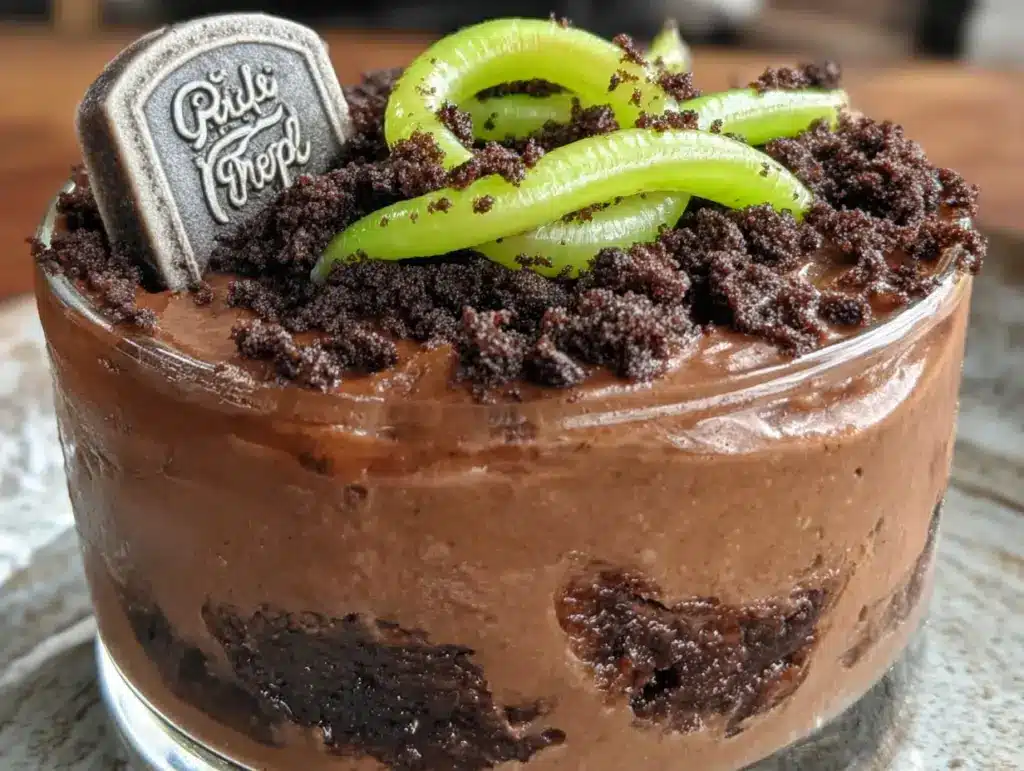
There used to be a tiny bakery tucked between a vintage shop and a laundromat in my old neighborhood that made the most incredible dirt cups you’ve ever seen. They called them “Graveyard Delights,” and every October, the line stretched out the door. When they closed three years ago — the owner retired, which I guess is a happy ending — I was genuinely devastated. I mean, I’d been buying those little cups of chocolatey, crumbly goodness for five Halloweens straight. After ten tries — and a few batches that looked more like mud puddles than graveyards — I finally cracked the code. Let me tell you, when I pulled the first perfect spoonful out of the fridge, I actually teared up a little. It was that exact memory, that perfect Halloween feeling, packed into a little plastic cup.
These spooky easy graveyard dirt cups for Halloween are the kind of dessert that makes everyone stop and smile. They’re not complicated — honestly, if you can crush cookies and stir pudding, you’ve got this — but they look like you spent hours fussing. The best part? Kids can help with almost every step, which makes them perfect for a spooky afternoon in the kitchen. I’ve made these for Halloween parties, classroom celebrations, and even just for a fun Friday night movie marathon. They disappear every single time.
You know that feeling when you want something festive but you’re already juggling costumes, decorations, and a million other things? These graveyard dirt cups are your answer. They come together in about twenty minutes of active work, then the fridge does the rest. And honestly, they taste even better the next day, which is a serious win when you’re trying to get ahead of the Halloween chaos. So grab your ingredients, put on your favorite spooky playlist, and let’s make some magic — no tricks, just treats.
Why You’ll Love This Recipe
These spooky easy graveyard dirt cups for Halloween are more than just a cute dessert. They’re a crowd-pleasing, stress-free, make-ahead miracle that solves your Halloween treat dilemma once and for all.
- Quick & Easy: This recipe comes together in under 20 minutes of active prep time. No baking, no complicated techniques, no stress. Just mix, layer, and chill.
- Simple Ingredients: You probably already have most of these in your pantry. Chocolate pudding mix, Oreos, cream cheese, and a few other basics. No expensive specialty items needed.
- Perfect for Halloween Parties: These are the star of any spooky gathering. Kids adore them, adults sneak them, and they fit right in with any Halloween theme.
- Crowd-Pleaser: I’ve brought these to potlucks, school events, and family dinners. Every single time, someone asks for the recipe. They’re that good.
- Unbelievably Delicious: The texture is what gets you — that creamy, dreamy pudding layer against the crunchy cookie “dirt,” with a hidden cream cheese surprise that makes it extra rich. It’s next-level comfort food in a cup.
What makes these different from every other dirt cup recipe out there? It’s the cream cheese layer. Most recipes just do pudding and crushed cookies, which is fine, but this version has a hidden surprise — a creamy, slightly tangy middle layer that takes the whole thing from “cute” to “I need another one right now.” I tested this about six different ways before landing on this combination, and trust me, this is the one.
These graveyard dirt cups are the kind of dessert that makes you close your eyes after the first bite. It’s comfort food reimagined — festive, fun, but with the same soul-soothing satisfaction as your favorite childhood treat. Perfect for impressing guests without any stress, or turning a simple Halloween night into something truly memorable.
What Ingredients You Will Need
This recipe uses simple, everyday ingredients that come together to create something truly special. Most of these are pantry staples, which makes these spooky easy graveyard dirt cups for Halloween a last-minute lifesaver when you need something festive fast.
For the Cream Cheese Layer:
- 8 ounces cream cheese, softened (I prefer Philadelphia for its smooth texture)
- 1/2 cup powdered sugar (also called confectioners’ sugar — sift it if it’s lumpy)
- 1 teaspoon vanilla extract (use pure vanilla if you have it, imitation works fine too)
- 1 cup heavy whipping cream (you can substitute with Cool Whip if you’re in a hurry, but the real stuff tastes better)
For the Pudding Layer:
- 2 (3.9-ounce) boxes instant chocolate pudding mix (I use Jell-O brand, but any brand works)
- 3 cups cold whole milk (2% works too, but whole milk makes it creamier)
For the Dirt and Decorations:
- 1 (14.3-ounce) package Oreo cookies (about 36 cookies — you’ll use the whole package)
- 1 (10-ounce) bag gummy worms (I like the sour ones for extra contrast)
- 8-10 small plastic skeletons or Halloween-themed picks (optional, but so fun)
- Green or purple food coloring (optional, for a spooky pudding tint)
Let’s talk about the cream cheese for a second. Make sure it’s really softened to room temperature — like, leave it on the counter for at least an hour. Cold cream cheese will leave you with lumpy filling, and nobody wants that. If you forget, you can microwave it in 10-second bursts, but be careful not to melt it.
For the Oreos, I’ve tried this with the double-stuf version, and honestly, it’s too much cream filling for the “dirt” texture. Regular Oreos crush up into that perfect soil-like consistency. If you’re feeling fancy, you can remove the cream centers before crushing, but I never bother — the extra sweetness just adds to the flavor.
As for substitutions, you can easily make this gluten-free by using gluten-free chocolate sandwich cookies and gluten-free pudding mix. For a dairy-free version, use dairy-free cream cheese, coconut cream instead of heavy cream, and almond milk with dairy-free pudding mix. I’ve tested both versions, and while the texture is slightly different, they’re still absolutely delicious.
Equipment Needed
You don’t need fancy equipment for these spooky easy graveyard dirt cups for Halloween. Here’s what you’ll need:
- Electric hand mixer or stand mixer — for whipping the cream and beating the cream cheese. You can do it by hand with a whisk, but your arm will get a workout. I’ve done both, and the mixer is worth the cleanup.
- Large mixing bowls — at least two. One for the cream cheese mixture, one for the pudding. Glass or metal works best.
- Measuring cups and spoons — for accurate measurements. Trust me, eyeballing the milk can throw off the pudding texture.
- Ziploc bag or food processor — for crushing Oreos. A rolling pin works too, but it’s messier. The food processor gives you the most consistent crumbs.
- 8-10 small cups or glasses — clear plastic cups (like the 9-ounce size) work perfectly and let you see the layers. I’ve also used small mason jars and even espresso cups for a mini version.
- Spatula — for scraping every last bit of that delicious cream cheese mixture. Rubber or silicone is best.
- Small spoon or piping bag — for layering. A piping bag makes it neater, but a spoon works just fine.
If you don’t have a food processor, just put the Oreos in a Ziploc bag and go to town with a rolling pin. It’s actually kind of therapeutic after a long day. My kids love this part — they call it “stress crushing” and it keeps them busy for a solid ten minutes.
Preparation Method
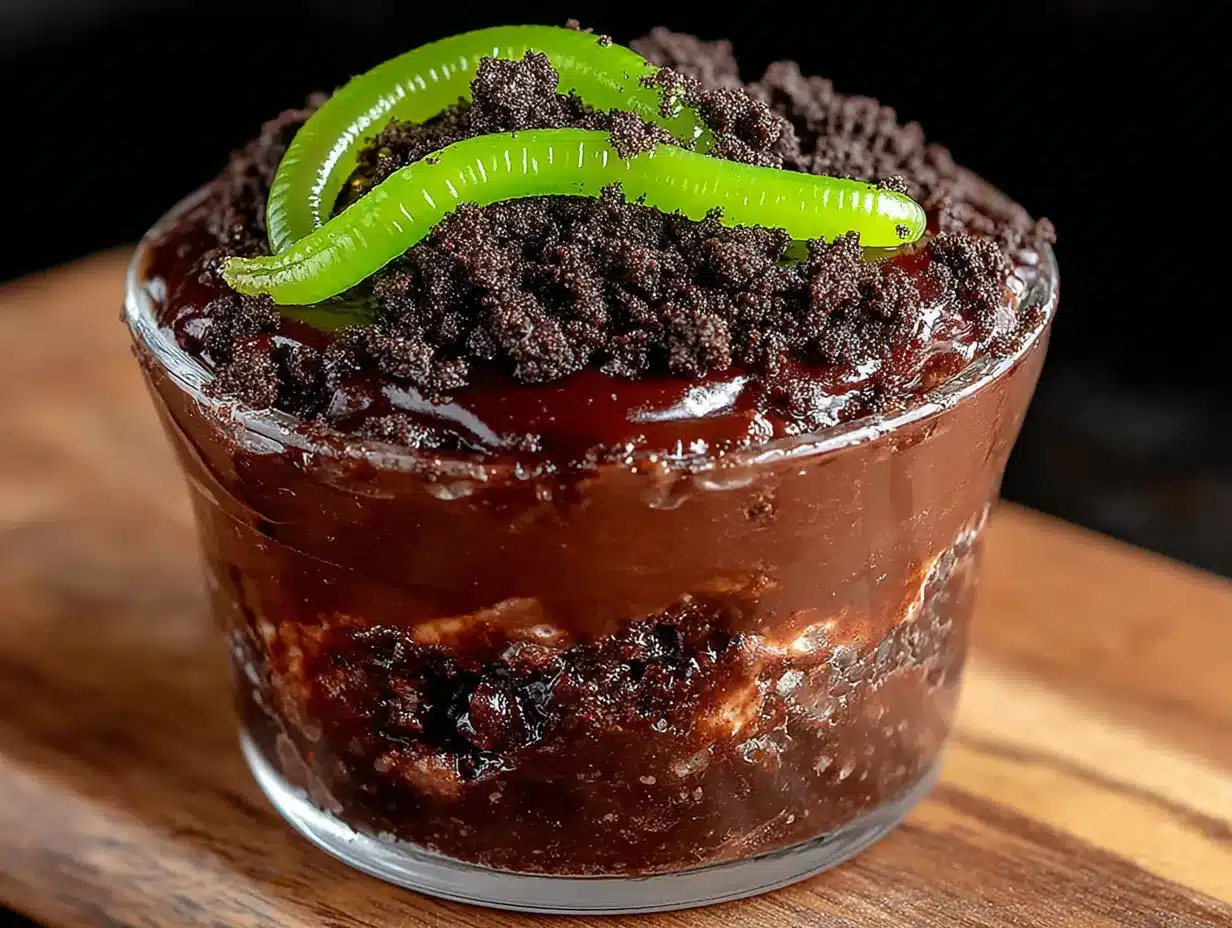
Let me walk you through making these spooky easy graveyard dirt cups for Halloween. Take your time with each step, and don’t rush the chilling — that’s where the magic happens.
- Crush the Oreos (5 minutes): Place all the Oreos in a large Ziploc bag or food processor. If using a bag, seal it tight and crush with a rolling pin until you have fine crumbs with some small chunks. If using a food processor, pulse 8-10 times until you get that dirt-like texture. You want some variation in the crumb size — it looks more realistic that way. Set aside about 1/4 cup of the crumbs for topping later.
- Make the cream cheese layer (10 minutes): In a large mixing bowl, beat the softened cream cheese with an electric mixer on medium speed until it’s smooth and fluffy — about 2 minutes. Add the powdered sugar and vanilla extract, then beat for another minute until everything is combined and creamy. Scrape down the sides of the bowl with a spatula.
- Whip the cream (5 minutes): In a separate bowl, pour the cold heavy whipping cream. Using clean beaters, whip the cream on high speed until stiff peaks form — about 3-4 minutes. You’ll know it’s ready when you lift the beaters and the cream stands up in peaks. Be careful not to over-whip, or you’ll end up with butter. I’ve done that before, and it’s not pretty.
- Fold it together (3 minutes): Gently fold the whipped cream into the cream cheese mixture using a spatula. Use a gentle, sweeping motion — fold from the bottom up, rotating the bowl as you go. Don’t stir vigorously, or you’ll deflate all that lovely air. You want the mixture to be light and fluffy, with no white streaks remaining.
- Make the pudding (5 minutes): In another bowl, whisk together the instant chocolate pudding mix and cold milk. Whisk for about 2 minutes until the pudding starts to thicken. It will still be a bit loose — that’s normal. Let it sit for 2-3 minutes to fully thicken. If you want a spooky green or purple pudding, add a few drops of food coloring now and stir well.
- Layer the cups (10 minutes): Now comes the fun part. Take your cups or glasses and start layering. First, add about 2 tablespoons of crushed Oreos to the bottom of each cup. This creates the “underground” layer. Next, spoon or pipe the cream cheese mixture on top — about 1/4 cup per cup. Then add a generous layer of chocolate pudding — about 1/3 cup per cup. Finally, top with more crushed Oreos to create the “dirt” surface. You want a thick enough layer that you can’t see the pudding underneath.
- Decorate (5 minutes): Gently poke gummy worms into the dirt so they look like they’re crawling out. Add a small plastic skeleton or Halloween pick if you’re using them. Sprinkle the reserved Oreo crumbs around the decorations to cover any exposed pudding.
- Chill (at least 2 hours): Cover each cup with plastic wrap or a lid and refrigerate for at least 2 hours. This is crucial — the layers need time to set and meld together. Overnight is even better. The pudding will firm up, the Oreo crumbs will soften slightly, and the flavors will marry into something truly special.
A few notes from my many trials: If your pudding seems too runny after mixing, give it another minute or two — it will thicken. If it’s still thin after 5 minutes, your milk might be too warm. Start with really cold milk next time. Also, don’t skip the chilling step. I once served these after only 30 minutes in the fridge, and they were a soupy mess. The wait is worth it.
Cooking Tips & Techniques
After making these spooky easy graveyard dirt cups for Halloween more times than I care to count, I’ve picked up a few tricks that make the process smoother and the results better.
Room temperature ingredients matter. I learned this the hard way when I tried to beat cold cream cheese and ended up with lumpy, frustrating filling. Let your cream cheese sit out for at least an hour before starting. Same goes for the milk — cold is good for whipping, but room temperature cream cheese is non-negotiable.
Don’t over-mix the pudding. Stir just until it starts to thicken. Over-mixing can make the pudding grainy or, worse, cause it to separate. You want it smooth and silky. If you see lumps forming, stop immediately and let it rest.
Crush Oreos in batches. If you’re using a food processor, don’t overload it. Pulse in two or three batches for the most consistent texture. Overcrowding leads to uneven crushing, with some pieces turning to dust while others stay in big chunks.
Use a piping bag for neat layers. This is my favorite pro tip. Spoon the cream cheese mixture and pudding into separate piping bags (or Ziploc bags with a corner snipped off). This makes layering so much neater and faster. Plus, the kids can help without making a gigantic mess.
Chill your bowls and beaters. For the best whipped cream, pop your mixing bowl and beaters in the freezer for 10 minutes before whipping. Cold equipment helps the cream whip up faster and hold its shape longer. I keep a metal bowl in the freezer just for this purpose.
Make extra “dirt.” I always crush an extra half-package of Oreos. You’ll use more than you think, and having extra ensures you can really pile it on. Plus, leftover Oreo crumbs are amazing on ice cream or yogurt.
One of my biggest failures? I once tried to make these with homemade pudding from scratch. It was a disaster — too runny, never set properly, and the layers all blended together into a sad, brown soup. Stick with instant pudding for this recipe. It’s reliable, consistent, and honestly tastes just as good.
Variations & Adaptations
These spooky easy graveyard dirt cups for Halloween are incredibly versatile. Here are some of my favorite ways to change them up:
Peanut Butter Dirt Cups: Add 1/2 cup creamy peanut butter to the cream cheese mixture before folding in the whipped cream. It adds a rich, nutty flavor that pairs beautifully with the chocolate. My husband begs for this version every year.
Pumpkin Spice Dirt Cups: Swap the chocolate pudding for vanilla or butterscotch, and add 1/2 cup pumpkin puree and 1 teaspoon pumpkin pie spice to the cream cheese mixture. Top with crushed ginger snaps instead of Oreos for a fall twist that’s absolutely divine.
Gluten-Free Version: Use gluten-free chocolate sandwich cookies (Kinnikinnick makes great ones) and gluten-free instant pudding. Everything else in the recipe is naturally gluten-free. I’ve made this for my gluten-sensitive friends, and they couldn’t tell the difference.
Dairy-Free Version: Substitute dairy-free cream cheese (Tofutti or Kite Hill work well), coconut cream instead of heavy whipping cream, and almond or oat milk with dairy-free pudding mix. The texture is slightly less creamy, but still delicious. I’ve tested this with my lactose-intolerant sister, and she gave it two thumbs up.
Mini Dirt Cups for Parties: Use shot glasses or small espresso cups for a bite-sized version. Perfect for Halloween parties where guests want to sample multiple treats. Layer them the same way, just with smaller amounts. You’ll get about 20-24 mini cups from one batch.
Brownie Bottom Dirt Cups: Add a layer of crumbled brownie at the bottom before the Oreo crumbs. It adds an extra chocolate punch and makes the cups even more decadent. I did this for a potluck once, and people lost their minds.
My personal favorite variation? I add a layer of raspberry jam between the cream cheese and pudding layers. The tartness cuts through the sweetness perfectly, and the red color peeking through the “dirt” looks like something creepy is lurking underneath. It’s a little extra work, but so worth it.
Serving & Storage Suggestions
These spooky easy graveyard dirt cups for Halloween are best served cold, straight from the fridge. The contrast between the cool, creamy filling and the slightly softened Oreo “dirt” is what makes them so addictive.
Serving Temperature: Serve these chilled, but not ice-cold. Let them sit at room temperature for about 5 minutes before serving. This takes the edge off the cold and lets the flavors bloom. I usually pull them out while I’m setting up the dessert table.
Presentation Ideas: Arrange the cups on a black or orange platter for maximum Halloween effect. Add some fake spider webs, plastic spiders, or battery-operated tea lights around the base for a spooky tablescape. For a party, I like to write guests’ names on the cups with a white paint pen — it doubles as a place card and a party favor.
Complementary Dishes: These dirt cups pair beautifully with warm apple cider, pumpkin spice lattes, or even a glass of cold milk. For a full Halloween spread, serve them alongside crispy Halloween pumpkin seeds or spider web dip with pretzels for dipping. The contrast of sweet and savory is perfect.
Storage Instructions: Cover each cup tightly with plastic wrap or a lid and store in the refrigerator for up to 5 days. The layers will continue to meld together over time, which honestly makes them taste even better. I actually prefer them on day two or three.
Freezer Tips: You can freeze these for up to 1 month, but the texture will change slightly. The cream cheese layer can become a bit icy, and the Oreos will soften more. If you do freeze them, thaw in the refrigerator overnight before serving. I don’t recommend freezing if you’re serving them at a party — they’re best fresh.
Reheating: These are meant to be served cold, so no reheating needed. If they’ve been in the fridge for a few days and seem a bit firm, let them sit at room temperature for 10-15 minutes before serving.
One thing I’ve noticed: the flavors really develop after about 24 hours. The Oreo crumbs absorb some moisture from the pudding and become almost cake-like, while the cream cheese layer firms up into a cheesecake-like texture. It’s a beautiful transformation that makes these even more delicious the next day.
Nutritional Information & Benefits
Let’s be honest — these spooky easy graveyard dirt cups for Halloween are a treat, not a health food. But that doesn’t mean they can’t have some redeeming qualities. Here’s the breakdown per serving (based on 10 servings):
| Nutrient | Amount Per Serving |
|---|---|
| Calories | 385 |
| Total Fat | 22g |
| Saturated Fat | 12g |
| Cholesterol | 55mg |
| Sodium | 420mg |
| Total Carbohydrates | 44g |
| Dietary Fiber | 2g |
| Sugars | 30g |
| Protein | 6g |
Now, the good stuff. Cream cheese provides a decent amount of calcium and protein. The cocoa in the pudding and Oreos contains antioxidants called flavonoids, which can support heart health. And hey, the gummy worms have zero nutritional value, but they make people smile, which has to count for something, right?
If you’re watching your sugar intake, you can use sugar-free pudding mix and reduced-fat cream cheese to cut the calories and sugar by about 30%. I’ve tried this, and while the texture is slightly less creamy, it still satisfies that Halloween dessert craving.
These contain dairy, wheat, and soy (from the Oreos), so they’re not suitable for anyone with allergies to those ingredients. Always check labels if you’re serving guests with dietary restrictions.
My personal take? Halloween comes once a year, and these dirt cups are worth every single calorie. Life is about balance — eat your vegetables, but also enjoy your spooky treats. These make people happy, and that’s a health benefit in my book.
Conclusion
These spooky easy graveyard dirt cups for Halloween are everything I want in a holiday dessert — fun, festive, ridiculously delicious, and so simple that anyone can make them. They’ve become a non-negotiable tradition in my house, and I hope they become one in yours too.
The best part? You can customize them however you want. Swap the pudding flavor, change up the decorations, add your favorite candy — make them your own. That’s the beauty of a recipe this forgiving. It’s a canvas for your Halloween creativity.
I’d love to hear how yours turn out. Did you add a secret ingredient? Did your kids go crazy decorating them? Did you try one of the variations? Drop a comment below and let me know. And if you snap a photo, tag me — I want to see your spooky creations. Halloween is better when we share the treats, don’t you think?
So go ahead, grab those Oreos, put on some spooky music, and make some memories. These graveyard dirt cups are more than just dessert — they’re a little moment of joy in a cup. Happy Halloween, friend. Enjoy every last bite.
Frequently Asked Questions
Can I make these graveyard dirt cups the night before Halloween?
Absolutely! In fact, they taste even better the next day. The flavors meld together and the Oreo crumbs soften into a cake-like texture. Make them up to 24 hours in advance and keep them covered in the fridge.
Can I use sugar-free pudding mix?
Yes, you can. Sugar-free instant chocolate pudding works perfectly in this recipe. The texture is slightly less creamy, but the taste is still great. Just follow the package directions for the amount of milk needed.
How do I keep the gummy worms from bleeding their color into the dirt?
This is a common issue! To prevent color bleeding, add the gummy worms just before serving, not during the chilling time. If you want to add them earlier, blot the worms dry with a paper towel first to remove excess food coloring.
Can I use Cool Whip instead of heavy cream?
Yes, you can substitute 1 1/2 cups of Cool Whip for the heavy cream. The texture will be lighter and slightly less rich, but it saves time and works well. Just fold it into the cream cheese mixture gently.
What kind of cups work best for these dirt cups?
Clear plastic cups (9-ounce size) are perfect because they let you see the spooky layers. Small mason jars, juice glasses, or even espresso cups work great too. Just make sure they’re at least 6 ounces to hold all the layers comfortably.
Pin This Recipe!
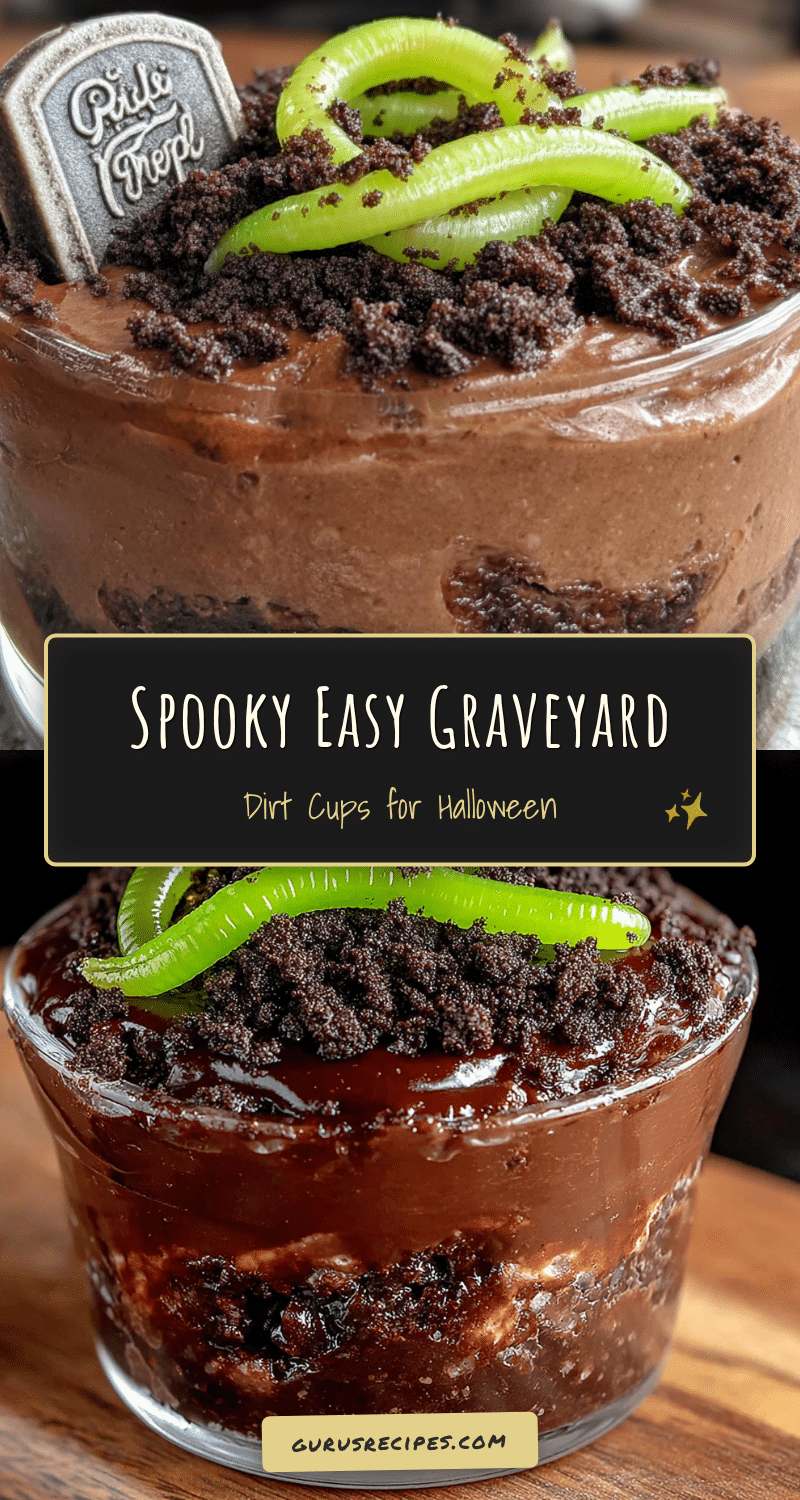

Spooky Easy Graveyard Dirt Cups: The Best Halloween Dessert
These spooky easy graveyard dirt cups for Halloween are a crowd-pleasing, stress-free, make-ahead dessert that combines creamy pudding, a hidden cream cheese layer, and crunchy Oreo ‘dirt’ for a festive treat that kids and adults love.
- Total Time: 2 hours 20 minutes
- Yield: 10 servings 1x
Ingredients
- 8 ounces cream cheese, softened
- 1/2 cup powdered sugar
- 1 teaspoon vanilla extract
- 1 cup heavy whipping cream
- 2 (3.9-ounce) boxes instant chocolate pudding mix
- 3 cups cold whole milk
- 1 (14.3-ounce) package Oreo cookies (about 36 cookies)
- 1 (10-ounce) bag gummy worms
- 8–10 small plastic skeletons or Halloween-themed picks (optional)
- Green or purple food coloring (optional)
Instructions
- Crush the Oreos: Place all the Oreos in a large Ziploc bag or food processor. If using a bag, crush with a rolling pin until you have fine crumbs with some small chunks. If using a food processor, pulse 8-10 times. Set aside about 1/4 cup of the crumbs for topping.
- Make the cream cheese layer: In a large mixing bowl, beat the softened cream cheese with an electric mixer on medium speed until smooth and fluffy (about 2 minutes). Add the powdered sugar and vanilla extract, then beat for another minute until combined and creamy. Scrape down the sides of the bowl.
- Whip the cream: In a separate bowl, pour the cold heavy whipping cream. Using clean beaters, whip the cream on high speed until stiff peaks form (about 3-4 minutes).
- Fold it together: Gently fold the whipped cream into the cream cheese mixture using a spatula, using a gentle sweeping motion until no white streaks remain.
- Make the pudding: In another bowl, whisk together the instant chocolate pudding mix and cold milk for about 2 minutes until the pudding starts to thicken. Let it sit for 2-3 minutes to fully thicken. If desired, add a few drops of food coloring and stir well.
- Layer the cups: Add about 2 tablespoons of crushed Oreos to the bottom of each cup. Next, spoon or pipe the cream cheese mixture on top (about 1/4 cup per cup). Then add a generous layer of chocolate pudding (about 1/3 cup per cup). Finally, top with more crushed Oreos to create the ‘dirt’ surface.
- Decorate: Gently poke gummy worms into the dirt so they look like they’re crawling out. Add a small plastic skeleton or Halloween pick if using. Sprinkle the reserved Oreo crumbs around the decorations.
- Chill: Cover each cup with plastic wrap or a lid and refrigerate for at least 2 hours (overnight is even better) before serving.
Notes
Make sure cream cheese is softened to room temperature for a smooth filling. For best results, chill the cups overnight to allow flavors to meld. If using gummy worms, add them just before serving to prevent color bleeding. You can substitute 1 1/2 cups Cool Whip for the heavy cream if desired.
- Prep Time: 20 minutes
- Cook Time: 0 minutes
- Category: Dessert
- Cuisine: American
Nutrition
- Serving Size: 1 cup
- Calories: 385
- Sugar: 30
- Sodium: 420
- Fat: 22
- Saturated Fat: 12
- Carbohydrates: 44
- Fiber: 2
- Protein: 6
Keywords: Halloween dessert, dirt cups, graveyard dirt cups, no-bake dessert, chocolate pudding, Oreo, cream cheese, gummy worms, spooky treat, easy dessert


