
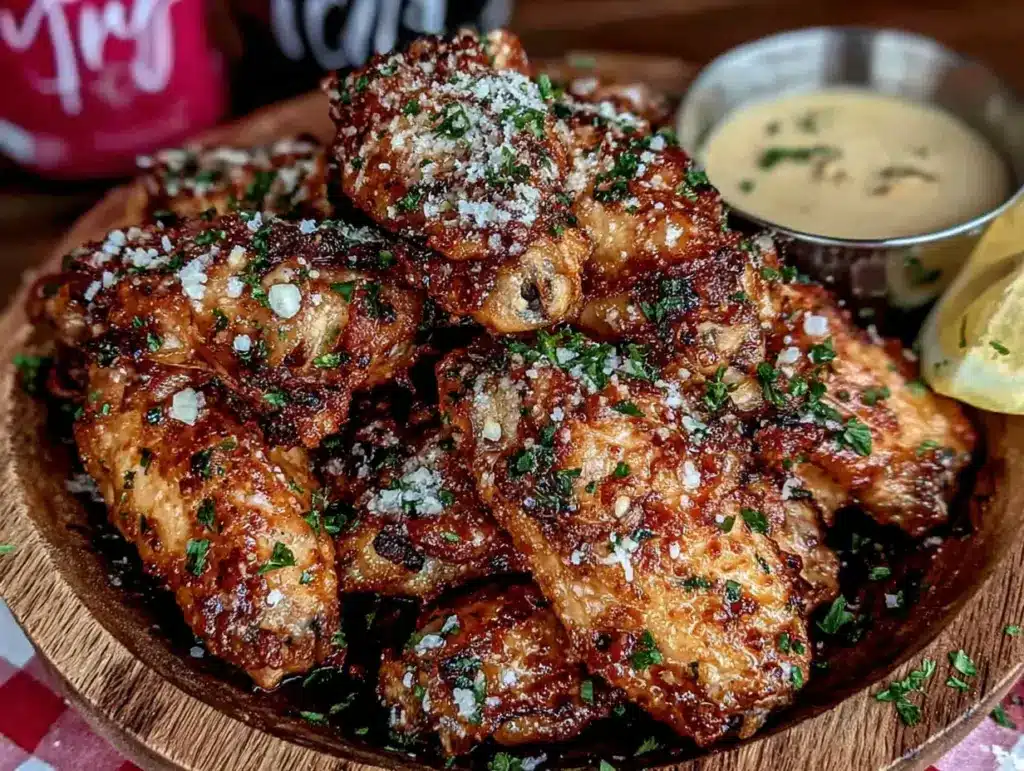
My husband looked at me across the coffee table and said, “You’re not allowed to make these for any other game.” It was the third Sunday in a row he’d said it, and honestly, I couldn’t blame him. The first batch I made was purely experimental—a desperate attempt to get something crispy without dragging out the deep fryer and dealing with that lingering oil smell for two days. I had a bag of chicken wings in the fridge, a block of Parmesan that needed using up, and about twenty minutes before kickoff. What came out of the oven changed our game day routine permanently.
These crispy baked Parmesan chicken wings have this thing about them—the cheese melts into the skin and creates this almost lacy, shatteringly crisp coating that you just don’t get from regular baked wings. And the best part? They’re not sitting in a pool of grease. You get that satisfying crunch without the heavy feeling afterward. I’ve tried dozens of wing recipes over the years, from smoked to fried to air-fried, but these keep getting requested. There’s something about the combination of the salty, nutty Parmesan with the tender, juicy meat underneath that just works.
The first time I made them, I honestly didn’t think they’d turn out. I was convinced you needed a deep fryer to get wings that actually crunch. But the oven does something different—it lets the fat render slowly while the cheese crisps up into this golden armor. My husband ate twelve of them before the halftime show even started. That’s when I knew I had stumbled onto something worth keeping.
Why You’ll Love This Recipe
Let me tell you why these wings have become my go-to for every game day, party, and casual gathering. I’ve tested this recipe more times than I can count, tweaking temperatures and timing until every batch comes out consistently perfect.
- Oven-Baked, Not Fried: You get all the crunch without the mess of deep frying. No splattering oil, no lingering grease smell in your kitchen for days. Just pure, crispy wing perfection straight from the oven.
- Simple Pantry Ingredients: Chicken wings, Parmesan cheese, butter, garlic, and a few basic seasonings. You probably have most of these in your kitchen right now. No special trips to the store required.
- Perfect for Game Day: These wings hold up beautifully on a buffet table. They stay crispy longer than traditional fried wings, which means you can make them ahead and not worry about them getting soggy during the big game.
- Crowd-Pleasing Flavor: The combination of savory Parmesan, garlic, and a hint of heat appeals to just about everyone. I’ve served these at parties where people who usually don’t eat chicken wings went back for seconds and thirds.
- Healthier Alternative: Baking instead of frying cuts down on oil significantly. You still get that satisfying crunch, but with less fat and fewer calories. It’s a win-win situation.
What sets this recipe apart is the technique. Instead of just tossing wings in Parmesan and hoping for the best, I’ve developed a method that creates a crust that actually sticks and crisps up beautifully. The secret is in how you prep the wings and the specific way you apply the coating. This isn’t just another baked wing recipe—it’s the one that will make you stop looking for others.
What Ingredients You Will Need
This recipe uses simple, everyday ingredients that come together to create something truly special. Each component plays a specific role in building flavor and texture.
- Chicken Wings (3 pounds / 1.4 kg): Look for party wings or whole wings that you’ll cut yourself. I prefer buying whole wings and cutting them at home—it’s cheaper and you get the wing tips for making stock. Pat them very dry with paper towels before starting. Moisture is the enemy of crispy skin.
- Freshly Grated Parmesan Cheese (1 cup / 100 g): Please, for the love of good food, do not use the pre-shredded stuff in a can. It contains anti-caking agents that prevent proper melting and crisping. Grate a block of real Parmigiano-Reggiano yourself. The difference is night and day. I recommend buying a block from the deli section—it’s worth the extra few dollars.
- Unsalted Butter (4 tablespoons / 57 g), melted: Butter adds richness and helps the Parmesan mixture adhere to the wings. I use unsalted so I can control the sodium level. If you only have salted butter, reduce the added salt in the recipe slightly.
- Garlic Powder (1 tablespoon): Garlic powder distributes more evenly than fresh garlic and won’t burn during the long baking time. It gives you that savory depth without the risk of bitter, burnt bits.
- Onion Powder (1 teaspoon): Adds a subtle sweetness that balances the savory Parmesan and garlic. Don’t skip this—it rounds out the flavor profile beautifully.
- Paprika (1 teaspoon): Use sweet paprika for color and mild sweetness. Smoked paprika works too if you want a deeper, smokier flavor. I’ve used both and they’re both delicious in different ways.
- Salt (1 teaspoon): Essential for bringing out the natural flavor of the chicken. I use fine sea salt for even distribution.
- Black Pepper (1/2 teaspoon): Freshly ground is best. It adds a gentle heat that complements the other seasonings.
- Cayenne Pepper (1/4 teaspoon, optional): For those who like a little kick. This is completely optional and adjustable. I usually add it because I like the subtle warmth it brings.
- Fresh Parsley (2 tablespoons, chopped): For garnish. It adds a pop of color and freshness that cuts through the richness of the cheese and butter.
For the dipping sauce, I recommend a simple mixture of sour cream, mayonnaise, lemon juice, and a pinch of garlic powder. But honestly, these wings are so flavorful on their own that you might not even need sauce.
Equipment Needed
You don’t need fancy equipment for these wings, which is part of what makes this recipe so accessible. Here’s what you’ll need:
- Baking Sheet (half-sheet pan, 18×13 inches): A rimmed baking sheet is essential to catch any rendered fat. I prefer heavy-duty aluminum pans that won’t warp in the oven.
- Wire Rack: This is the secret to crispy wings. Placing a wire rack on top of your baking sheet allows air to circulate all around the wings, ensuring even crisping on all sides. If you don’t have one, you can flip the wings halfway through, but the rack makes a noticeable difference.
- Box Grater or Microplane: For grating the Parmesan cheese. A microplane gives you a finer grate that melts more evenly, while a box grater produces slightly larger pieces that create more texture.
- Large Mixing Bowl: For tossing the wings with butter and the Parmesan mixture. Glass or stainless steel works best.
- Paper Towels: For drying the wings thoroughly. This step is non-negotiable for crispy skin.
- Tongs: For handling the hot wings during the tossing and serving process.
- Sharp Knife and Cutting Board: If you’re cutting whole wings yourself, a sharp chef’s knife makes the job quick and clean.
I’ve made these wings with and without the wire rack, and honestly, the rack is worth investing in if you make wings regularly. They’re inexpensive and make a huge difference in texture. I found mine at a kitchen supply store for under ten dollars.
Preparation Method
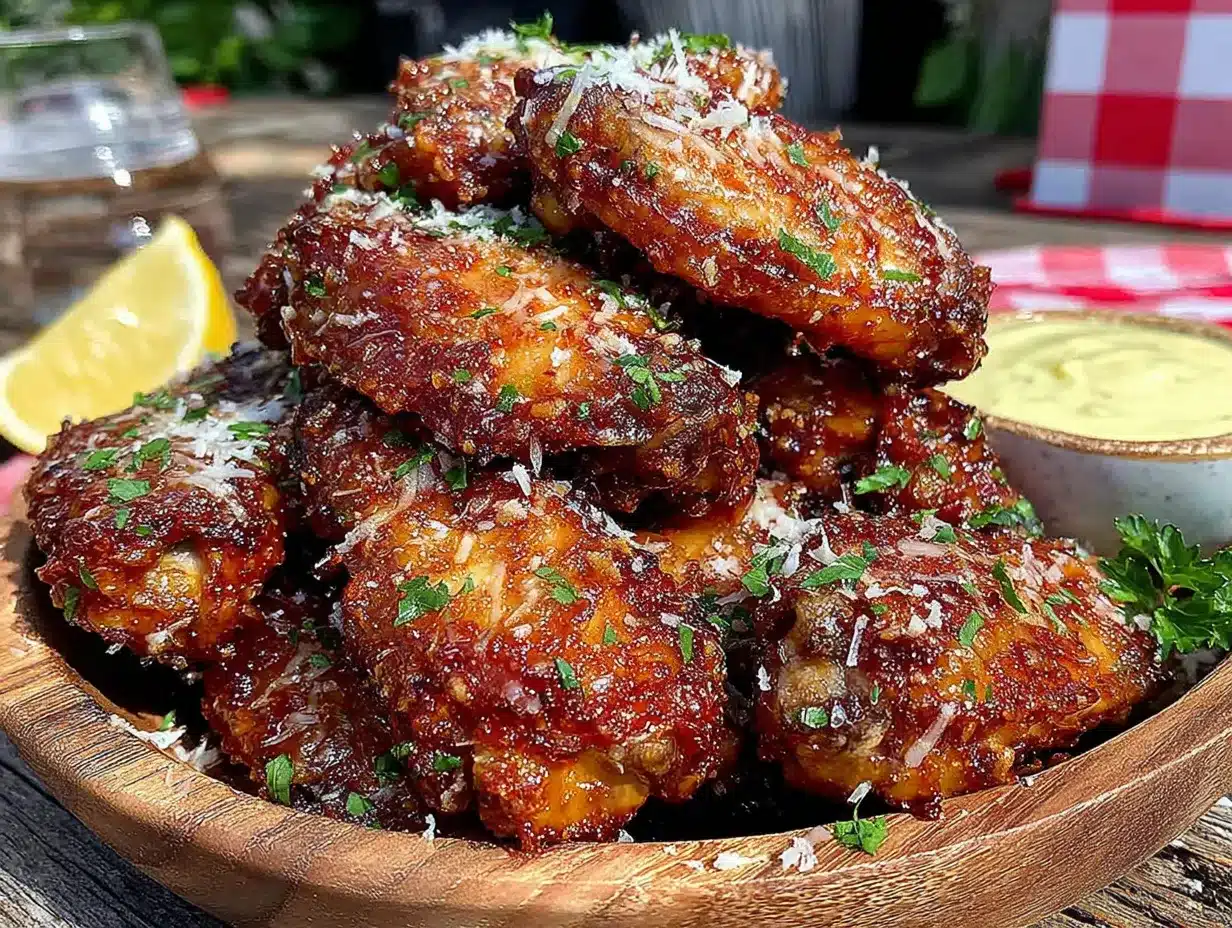
- Preheat your oven to 400°F (200°C). Position the rack in the upper third of the oven. This higher heat is crucial for getting that golden, crispy exterior. While the oven heats, line your baking sheet with aluminum foil for easy cleanup, then place the wire rack on top.
- Prepare the chicken wings. If using whole wings, cut them at the joints to separate the drumettes from the flats. Discard the wing tips or save them for making stock. Pat every single piece completely dry with paper towels. I cannot stress this enough—moisture is the enemy of crispy skin. Take your time with this step. I usually go through three or four paper towels per batch.
- Make the Parmesan coating. In a large bowl, combine the freshly grated Parmesan cheese, garlic powder, onion powder, paprika, salt, black pepper, and cayenne pepper if using. Mix everything together with a fork until evenly distributed. The cheese should look like coarse sand with some slightly larger pieces mixed in.
- Coat the wings. Pour the melted butter over the dried wings and toss until every piece is evenly coated. Then, working in batches, add the wings to the Parmesan mixture and toss gently but thoroughly. You want each wing to be completely covered in the cheesy coating. Use your hands for this—it’s messy but you get better coverage.
- Arrange on the wire rack. Place the coated wings on the wire rack in a single layer, making sure they’re not touching each other. Crowding the pan will steam the wings instead of baking them, and you’ll lose that crispy texture. If necessary, use two baking sheets or bake in batches.
- Bake for 45-50 minutes. Place the baking sheet in the preheated oven and bake for 25 minutes. After 25 minutes, rotate the pan and continue baking for another 20-25 minutes. The wings are done when they’re golden brown, the cheese has formed a crispy crust, and the internal temperature reaches 165°F (74°C) when checked with a meat thermometer.
- Optional broiling step for extra crispiness. If you want even more crunch, switch the oven to broil for the last 2-3 minutes of cooking. Watch them carefully—they can go from perfect to burnt very quickly under the broiler. I do this when I’m feeling extra ambitious about texture.
- Rest before serving. Let the wings rest on the wire rack for 5 minutes after removing them from the oven. This allows the coating to set and become even crispier. Don’t skip this step—it makes a real difference.
- Garnish and serve. Transfer the wings to a serving platter and sprinkle with fresh chopped parsley. Serve immediately with your favorite dipping sauce. I like to serve them with celery sticks and carrot sticks on the side for a classic game day spread.
One thing I learned from a failed early batch—don’t be tempted to flip the wings halfway through if you’re using a wire rack. The air circulation does the work for you, and flipping can actually knock off some of that precious Parmesan coating. Trust the process.
Cooking Tips & Techniques
After making these wings more times than I can count, I’ve picked up some tricks that make a real difference. Here are the ones that matter most.
Dry those wings thoroughly. This is the number one tip I give anyone making baked wings. Even a little bit of moisture on the skin will create steam in the oven, which prevents the skin from crisping up. I pat each wing individually with paper towels and then let them sit on a paper towel-lined tray for about 10 minutes before coating. The extra time makes a noticeable difference.
Use fresh Parmesan, not the pre-grated stuff. I learned this the hard way. The first time I made these wings, I used pre-shredded Parmesan from a bag, and the coating didn’t crisp up properly. The anti-caking agents in pre-shredded cheese prevent it from melting and browning the way fresh-grated cheese does. Grate your own—it takes two minutes and the results are infinitely better.
Don’t overcrowd the pan. This is another mistake I’ve made. When wings are too close together, they steam instead of bake. The moisture released during cooking gets trapped between the wings, and you end up with soggy skin. Give each wing some breathing room. If you’re making a large batch, use two baking sheets or bake in shifts.
Let the wings come to room temperature. About 20 minutes before baking, take the coated wings out of the refrigerator. Cold wings going into a hot oven can cause uneven cooking. Room temperature wings cook more evenly and the coating crisps up better.
Use a meat thermometer. Chicken wings are small and cook quickly, but the only way to be sure they’re safe to eat is to check the internal temperature. Insert the thermometer into the thickest part of a drumette without touching the bone. You’re looking for 165°F (74°C). I’ve had wings that looked done on the outside but weren’t quite there on the inside.
Save those wing tips. Don’t throw them away! Collect them in a freezer bag and use them to make chicken stock. They’re full of collagen and add wonderful body to homemade broth. I keep a bag in my freezer specifically for this purpose.
Variations & Adaptations
One of the best things about this recipe is how easily it adapts to different tastes and dietary needs. Here are some variations I’ve tried and loved.
Spicy Buffalo-Parmesan Wings: After baking, toss the wings in your favorite buffalo sauce (I like a mix of melted butter and Frank’s RedHot) and then sprinkle with extra Parmesan. You get the classic buffalo heat with that cheesy crust. This is my husband’s favorite variation.
Lemon-Herb Parmesan Wings: Add the zest of one lemon and two tablespoons of fresh chopped rosemary or thyme to the Parmesan coating. The citrus brightens up the richness of the cheese and the herbs add an aromatic quality that’s perfect for spring gatherings.
Gluten-Free Adaptation: This recipe is naturally gluten-free as written, since there’s no flour in the coating. Just double-check that your Parmesan cheese and seasonings are certified gluten-free if that’s a concern. Some pre-grated cheeses contain wheat starch as an anti-caking agent, which is another reason to grate your own.
Air Fryer Method: If you have an air fryer, you can make these wings in about half the time. Preheat the air fryer to 380°F (193°C), arrange the coated wings in a single layer in the basket (work in batches), and cook for 20-25 minutes, shaking the basket halfway through. The texture is incredible—even crispier than the oven version.
Extra Cheesy Version: For those who can’t get enough cheese, mix in 1/4 cup of finely grated Pecorino Romano along with the Parmesan. The Pecorino adds a sharper, saltier flavor that pairs beautifully with the mellow Parmesan. I tried this on a whim one day and it’s become my go-to for special occasions.
Low-Sodium Option: Use unsalted butter, reduce the added salt to 1/2 teaspoon, and use a low-sodium Parmesan cheese if available. The garlic and onion powder provide plenty of flavor without relying on salt. This version is great for anyone watching their sodium intake.
Serving & Storage Suggestions
These wings are best served hot and fresh from the oven, but they’re surprisingly good at room temperature too, which makes them perfect for parties and buffets.
Serving Temperature: Serve the wings within 10-15 minutes of coming out of the oven for maximum crispiness. If you’re hosting a party, you can keep them warm in a 200°F (93°C) oven on the wire rack for up to 30 minutes without losing too much texture. Just don’t cover them with foil—that traps steam and makes the coating soggy.
Presentation Ideas: Arrange the wings on a large platter lined with parchment paper or a bed of fresh lettuce leaves. Sprinkle with chopped parsley and extra grated Parmesan for a restaurant-worthy look. Add small bowls of dipping sauces—ranch, blue cheese, and a simple garlic aioli all work beautifully.
Complementary Dishes: These wings pair perfectly with classic game day sides. I love serving them alongside creamy loaded baked potato soup for a complete comfort food spread. For something lighter, a simple celery and carrot sticks with ranch dressing balances out the richness. And if you’re planning a full game day menu, these wings go great with cozy Guinness beef stew for a hearty pre-game meal.
Storage Instructions: Store leftover wings in an airtight container in the refrigerator for up to 4 days. The coating will soften over time, but they’re still delicious. To reheat, place them on a wire rack over a baking sheet and warm them in a 350°F (175°C) oven for 10-15 minutes. The microwave will make them soggy, so avoid it if possible.
Freezing Tips: You can freeze these wings either before or after baking. To freeze before baking, arrange the coated wings on a baking sheet and freeze until solid, then transfer to a freezer bag. Bake from frozen, adding about 10 minutes to the cooking time. To freeze after baking, let the wings cool completely, then freeze in a single layer on a baking sheet before transferring to a freezer bag. Reheat directly from frozen in a 350°F (175°C) oven for 15-20 minutes.
Flavor Development: Interestingly, these wings taste even better the next day. The flavors have time to meld and deepen overnight. I’ve been known to make a double batch specifically for leftovers. They’re fantastic cold straight from the fridge—don’t judge me until you’ve tried it.
Nutritional Information & Benefits
While chicken wings aren’t exactly health food, this baked version is definitely better for you than the deep-fried alternative. Here’s a rough breakdown per serving (about 6 wings):
- Calories: Approximately 380-420
- Protein: 28-32 grams
- Fat: 28-32 grams (mostly from the chicken skin and butter)
- Carbohydrates: 2-4 grams
- Calcium: 15-20% of daily value (from the Parmesan)
- Sodium: 650-750 mg (varies based on cheese and added salt)
Health Benefits: Chicken wings are a good source of high-quality protein, which is essential for muscle repair and maintenance. The Parmesan cheese adds calcium for bone health, and if you include the cayenne pepper, you get a small metabolism boost from capsaicin. Baking instead of frying reduces the overall fat content significantly—you’re saving about 100-150 calories per serving compared to traditional fried wings.
Dietary Considerations: This recipe is naturally gluten-free and low-carb, making it suitable for keto and paleo diets (depending on your specific guidelines). It’s not suitable for vegetarians or vegans, but you could try the same technique with cauliflower florets for a plant-based version. If you’re watching your sodium intake, use unsalted butter and reduce the added salt as mentioned in the variations section.
Allergen Information: This recipe contains dairy (butter and Parmesan cheese). It does not contain nuts, soy, or eggs, but always check your specific ingredient labels if you have severe allergies.
Conclusion
These crispy baked Parmesan chicken wings have become a staple in our home for good reason. They deliver everything you want from a game day appetizer—crunchy texture, savory flavor, and that satisfying feeling of eating something truly delicious—without the hassle and mess of deep frying. The first time I made them, I honestly didn’t expect them to become a regular request. But now, I can’t imagine game day without a batch on the table.
What I love most about this recipe is how forgiving it is. You can adjust the seasonings to your taste, add more heat or less, experiment with different cheeses, and it still turns out great. It’s the kind of recipe that becomes your own after a few tries. My version now includes a pinch of smoked paprika and a little extra garlic powder, but yours might be different, and that’s exactly how it should be.
I’d love to hear how these wings turn out for you. Did you add your own twist? Did they disappear before halftime? Drop a comment below and let me know. And if you’re looking for more game day inspiration, don’t miss our crispy Reuben sandwich with tangy thousand island dressing—it’s another crowd favorite that pairs perfectly with these wings. Happy cooking, and enjoy the game!
Frequently Asked Questions
Can I make these wings ahead of time for a party?
Absolutely! You can prepare the wings up to the point of baking, then cover and refrigerate for up to 24 hours. When you’re ready to serve, just pop them in the oven. You may need to add 5-10 minutes to the baking time since they’ll be starting from cold. For best results, let them sit at room temperature for 20 minutes before baking.
Why did my Parmesan coating not stick to the wings?
This usually happens for one of two reasons. Either the wings weren’t dried thoroughly enough before coating, or the butter wasn’t evenly distributed. Make sure you pat the wings completely dry with paper towels and toss them well in the melted butter before adding the Parmesan mixture. Using your hands to coat the wings helps ensure better coverage than using a spoon.
Can I use chicken thighs or drumsticks instead of wings?
Yes, you can use this coating on any chicken pieces. Keep in mind that larger pieces will need longer cooking times. Chicken thighs typically need 35-40 minutes at 400°F (200°C), while drumsticks need about 30-35 minutes. Always check that the internal temperature reaches 165°F (74°C) before serving.
How do I get the wings extra crispy without deep frying?
The wire rack is your best friend here. It allows hot air to circulate all around the wings, ensuring even crisping. Also, make sure your oven is fully preheated before adding the wings, and don’t open the oven door too often during baking. The broiling step at the end also adds extra crunch if you’re willing to watch them carefully.
Can I use this recipe for a gluten-free diet?
Yes, this recipe is naturally gluten-free as written. There’s no flour in the coating, and all the ingredients are typically gluten-free. Just make sure to check your specific brands of Parmesan cheese and seasonings, as some may contain gluten-based additives. Grating your own cheese from a block is the safest bet.
Pin This Recipe!
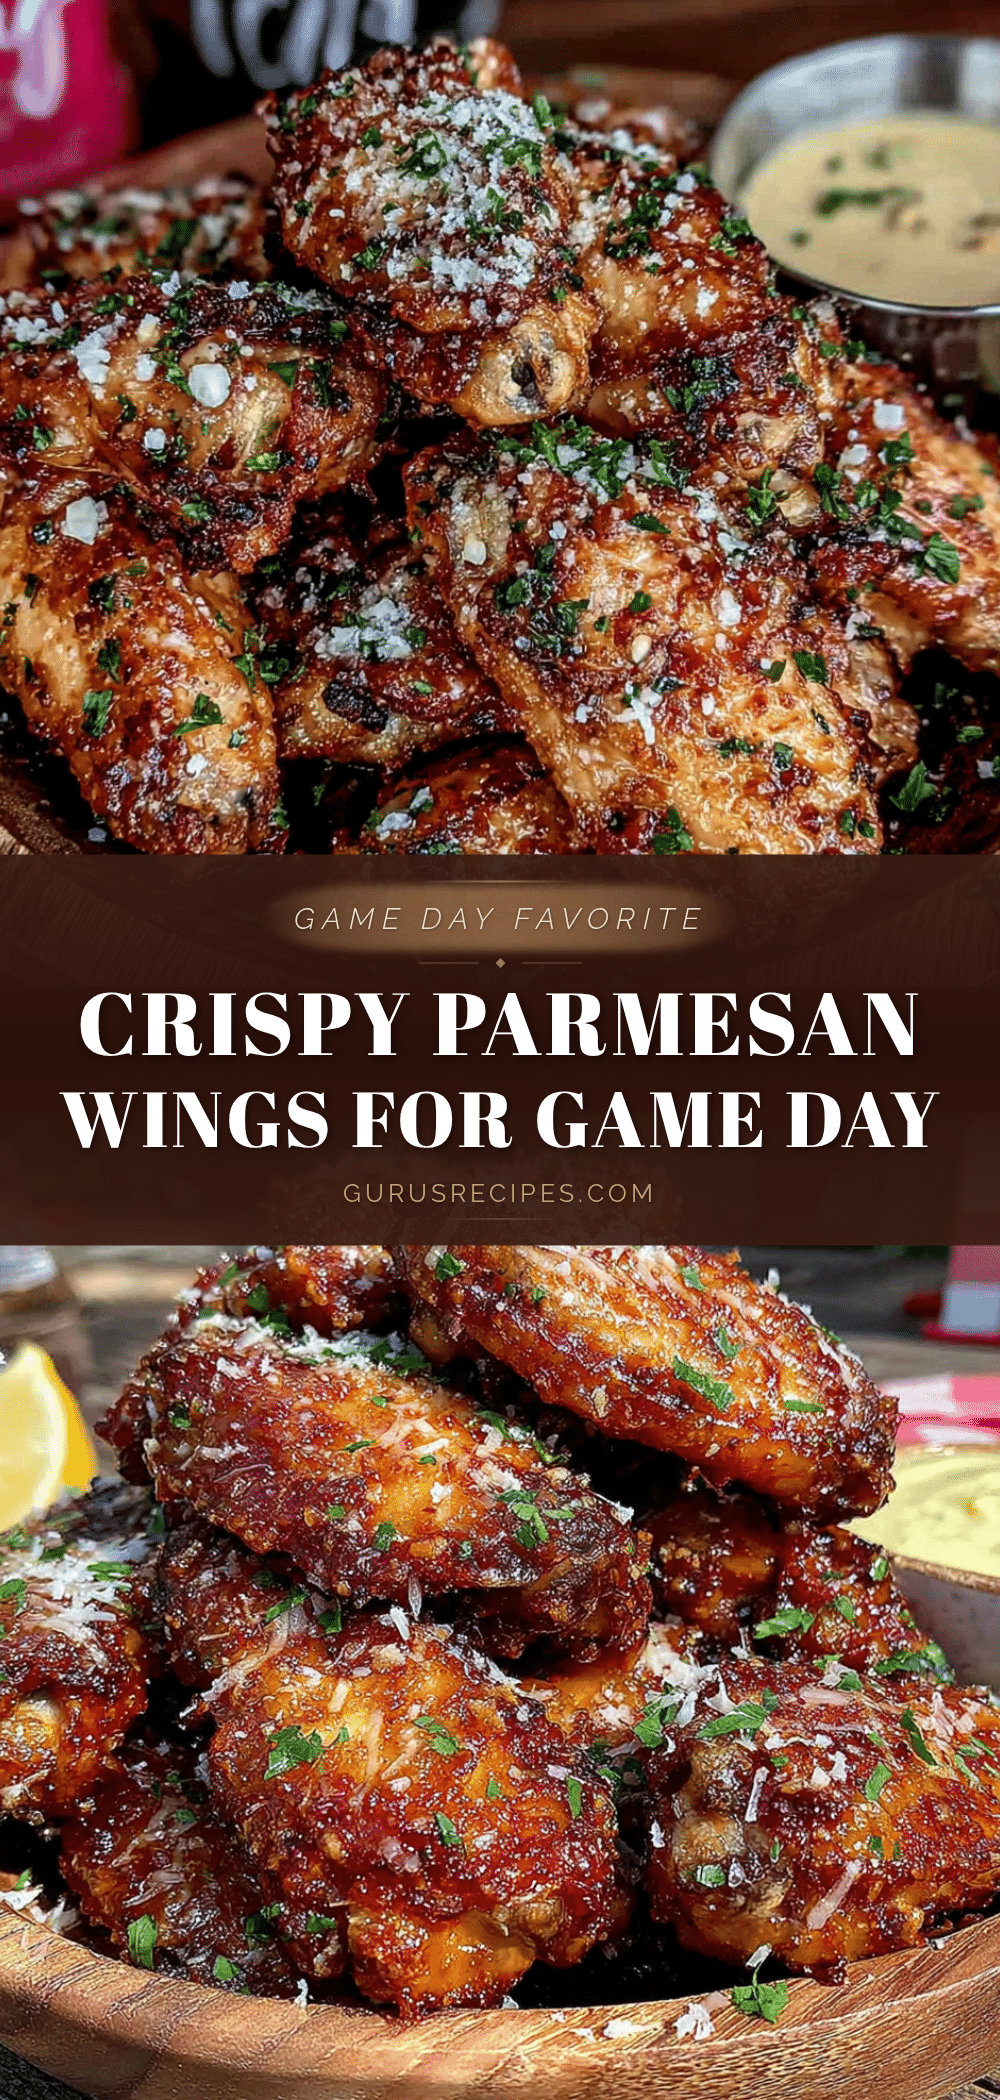

Crispy Baked Parmesan Chicken Wings: Best Game Day Appetizer
These crispy baked Parmesan chicken wings deliver a shatteringly crisp coating without deep frying. The cheese melts into the skin creating a golden, lacy crust that stays crunchy longer than traditional fried wings, making them the perfect game day appetizer.
- Total Time: 1 hour 10 minutes
- Yield: 4 servings 1x
Ingredients
- 3 pounds (1.4 kg) chicken wings
- 1 cup (100 g) freshly grated Parmesan cheese
- 4 tablespoons (57 g) unsalted butter, melted
- 1 tablespoon garlic powder
- 1 teaspoon onion powder
- 1 teaspoon paprika
- 1 teaspoon salt
- 1/2 teaspoon black pepper
- 1/4 teaspoon cayenne pepper (optional)
- 2 tablespoons fresh parsley, chopped
Instructions
- Preheat your oven to 400°F (200°C). Position the rack in the upper third of the oven. Line a baking sheet with aluminum foil and place a wire rack on top.
- If using whole wings, cut them at the joints to separate drumettes from flats. Discard wing tips or save for stock. Pat every piece completely dry with paper towels.
- In a large bowl, combine freshly grated Parmesan cheese, garlic powder, onion powder, paprika, salt, black pepper, and cayenne pepper (if using). Mix until evenly distributed.
- Pour melted butter over the dried wings and toss until evenly coated. Working in batches, add wings to the Parmesan mixture and toss gently but thoroughly until each wing is completely covered.
- Arrange coated wings on the wire rack in a single layer, making sure they are not touching each other.
- Bake for 45-50 minutes. After 25 minutes, rotate the pan and continue baking for another 20-25 minutes. Wings are done when golden brown, cheese forms a crispy crust, and internal temperature reaches 165°F (74°C).
- Optional: For extra crispiness, switch oven to broil for the last 2-3 minutes, watching carefully to prevent burning.
- Let wings rest on the wire rack for 5 minutes after removing from the oven to allow the coating to set.
- Transfer to a serving platter, sprinkle with fresh chopped parsley, and serve immediately with your favorite dipping sauce.
Notes
Dry wings thoroughly for maximum crispiness. Use freshly grated Parmesan, not pre-shredded. Do not overcrowd the pan. Let wings come to room temperature for 20 minutes before baking. Use a meat thermometer to ensure internal temperature reaches 165°F (74°C). Save wing tips for making chicken stock.
- Prep Time: 20 minutes
- Cook Time: 50 minutes
- Category: Appetizer
- Cuisine: American
Nutrition
- Serving Size: 6 wings
- Calories: 400
- Sugar: 1
- Sodium: 700
- Fat: 30
- Saturated Fat: 12
- Carbohydrates: 3
- Protein: 30
Keywords: baked chicken wings, Parmesan chicken wings, game day appetizer, crispy wings, oven baked wings


