
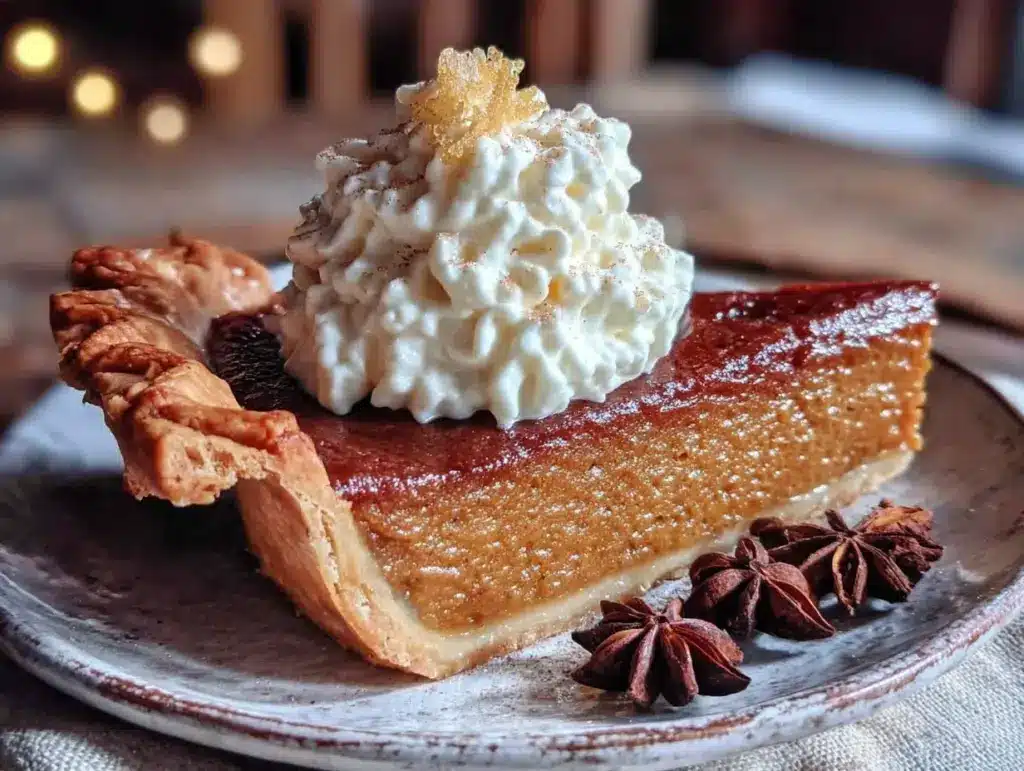
The Thanksgiving potluck at my son’s preschool was in 36 hours, and I’d completely forgotten. Everyone else would be bringing elaborate, multi-day preparations — my neighbor Karen had been perfecting her grandmother’s pecan pie recipe for a week, and another mom had actually brined her own turkey breast. I had a single can of pumpkin puree in the pantry, some evaporated milk I’d bought for a recipe I never made, and a vague memory of my own grandmother’s no-fuss pie. I mean, I was literally standing in my kitchen at 9 PM, staring at these ingredients, wondering if I should just show up with a store-bought pie and accept the shame.
Let me tell you, desperation is a powerful motivator. I grabbed my phone, texted my mom for her “emergency pie recipe,” and got to work. The crust was a mess — I forgot to chill the butter, and it kept sticking to everything. I honestly thought I’d ruined it. But you know that feeling when something turns out way better than you had any right to expect? This was that. The pie came out with this perfect, velvety texture and a spicy warmth that filled the whole kitchen. It wasn’t fancy. It wasn’t complicated. It was just… right.
At the potluck the next day, I sheepishly placed my humble pie next to Karen’s elaborate lattice-crusted masterpiece. And then something funny happened. People kept coming back for seconds. And thirds. By the end of the night, my simple pie was completely gone, and there were still slices of the fancy ones left. Someone actually asked for the recipe. I had to laugh — the recipe that saved me was literally just four ingredients and a whole lot of panic. And honestly, that’s why I keep making it. Not because it’s fancy, but because it works. Every single time. Maybe you’ve been there — needing a dessert that looks like you tried way harder than you actually did. This is that pie.
Why You’ll Love This Recipe
This isn’t just another pumpkin pie recipe. This is the one you’ll come back to year after year, the one that makes you look like a seasoned baker even when you’re running on three hours of sleep and caffeine. I’ve tested this version more times than I care to count, tweaking the ratios and the method until it was absolutely foolproof. Here’s why it’s earned a permanent spot in my rotation:
- Quick & Easy: From start to oven in about 15 minutes. No stand mixer, no complicated techniques, no stress.
- Simple Ingredients: You probably have half of these in your pantry right now. No fancy extracts or hard-to-find spices.
- Perfect for Holidays & Weeknights: Works for Thanksgiving, Christmas, or just a random Tuesday when you need pie.
- Crowd-Pleaser: My picky-eater nephew ate two slices. That’s a miracle in our house.
- Unbelievably Delicious: The texture is silky smooth, the flavor is perfectly spiced, and it’s not overly sweet.
What makes this different from every other pumpkin pie recipe out there? It’s the method. By whisking the filling by hand and letting it rest before pouring, you get this incredibly smooth, crack-free top every single time. No blender needed, no food processor required. It’s the kind of recipe that makes you wonder why you ever thought pumpkin pie was hard. And honestly? It’s comfort food at its finest — warm, spiced, and utterly satisfying without any of the fuss.
What Ingredients You Will Need
This recipe relies on a handful of simple, pantry-friendly ingredients that come together to create something truly special. The beauty is in the simplicity — each ingredient has a specific job, and together they create that classic pumpkin pie flavor and texture we all crave.
- 1 can (15 oz) pumpkin puree (not pumpkin pie filling — make sure you grab the plain stuff. I prefer Libby’s for consistent texture, but any brand works)
- 1 can (12 oz) evaporated milk (this is the secret to that silky texture. Don’t substitute with regular milk — it changes the consistency entirely)
- 3/4 cup granulated sugar (adds just the right amount of sweetness without overpowering the pumpkin)
- 2 large eggs (room temperature is best — they incorporate more smoothly into the filling)
- 2 teaspoons pumpkin pie spice (or make your own blend: 1 tsp cinnamon, 1/2 tsp ginger, 1/4 tsp nutmeg, 1/4 tsp cloves)
- 1/2 teaspoon salt (don’t skip this — it balances the sweetness and enhances the spices)
- 1 unbaked 9-inch pie crust (homemade or store-bought — I won’t judge. If you’re feeling ambitious, a buttery all-butter crust is incredible here)
A few notes from my kitchen to yours: Make sure your pumpkin puree is completely plain — I once grabbed the pre-sweetened pie filling by accident, and the pie was cloyingly sweet. Also, if you can’t find evaporated milk, you can make your own by simmering 1 1/2 cups of whole milk until it reduces to 1 cup. It’s not quite the same, but it works in a pinch. For a dairy-free version, full-fat coconut milk is a surprisingly good substitute — just give the can a good shake before measuring.
Equipment Needed
You don’t need a fancy kitchen to make this pie work. Here’s what you’ll need:
- Large mixing bowl (any size works, but bigger is better for whisking without splashing)
- Whisk (a balloon whisk is ideal, but a fork works in a pinch — I’ve done it)
- 9-inch pie dish (glass or ceramic is best for even baking. I use a standard Pyrex dish)
- Measuring cups and spoons (for accuracy — eyeballing spices can lead to disaster)
- Rubber spatula (to scrape every last bit of filling into the crust)
- Baking sheet (place the pie dish on this to catch any drips and make handling easier)
- Cooling rack (essential for even cooling and preventing a soggy bottom)
If you don’t have a pie dish, a 9-inch cake pan works — just adjust the baking time slightly. I’ve also used disposable aluminum pans in a pinch, and they work fine, though the crust doesn’t get quite as golden. One tip I learned the hard way: always place your pie dish on a baking sheet before putting it in the oven. It makes sliding it in and out so much easier, and it catches any filling that might bubble over.
Preparation Method
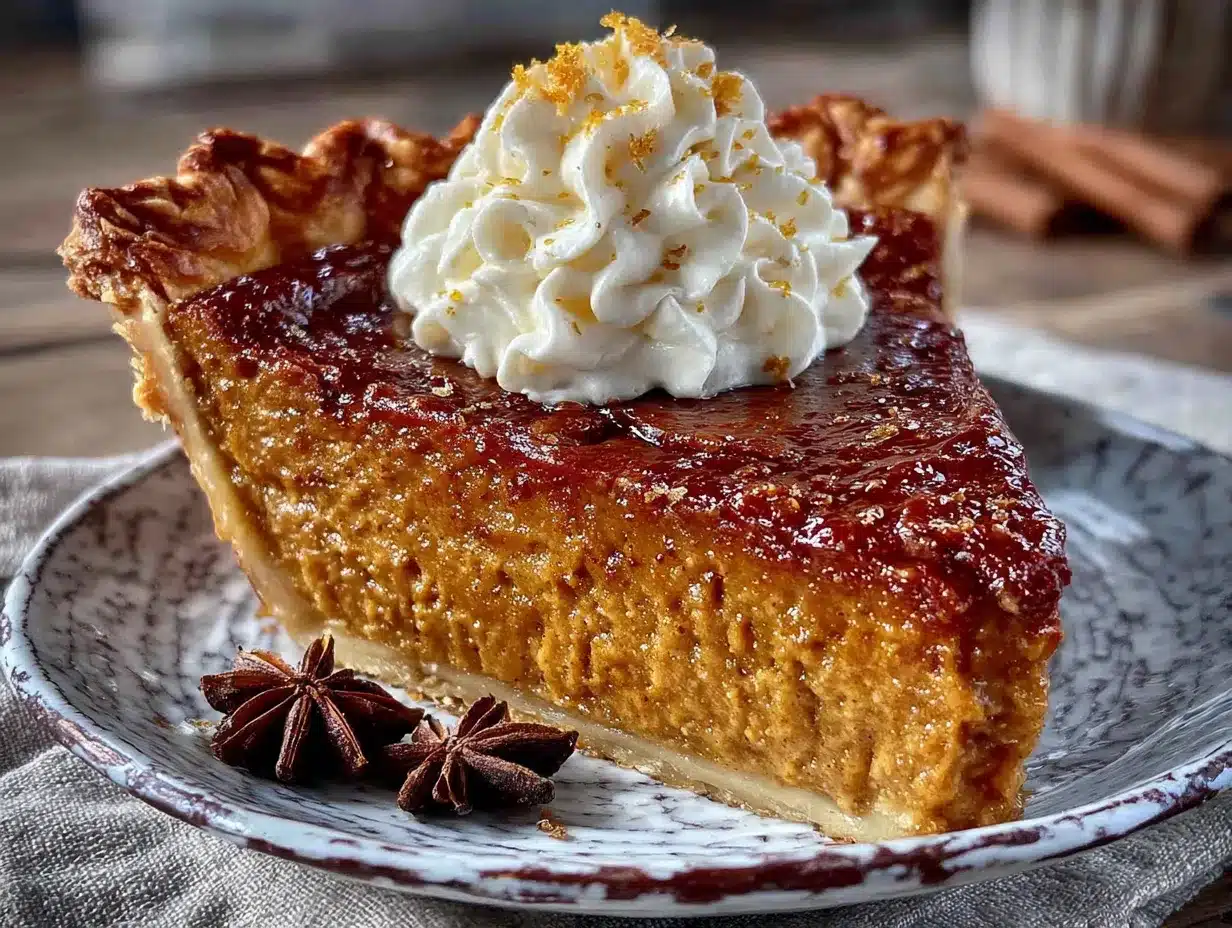
Alright, let’s make some pie. This is the easy part — I promise.
- Preheat your oven to 425°F (220°C). Place a baking sheet on the middle rack to preheat with the oven. This helps the bottom crust cook evenly and prevents that dreaded soggy bottom.
- Prepare your pie crust. If you’re using a store-bought crust, let it sit at room temperature for about 15 minutes before unrolling. If you’re making your own, roll it out to about 12 inches in diameter and gently press it into your pie dish. Crimp the edges however you like — I’m partial to a simple fork press. Place the crust in the refrigerator while you make the filling. Cold crust = flaky crust.
- In your large mixing bowl, whisk together the eggs and sugar until they’re well combined and slightly lighter in color, about 30 seconds. Don’t over-whisk — you’re not making a meringue here. Just until there are no streaks of egg white.
- Add the pumpkin puree and whisk until smooth. The mixture will be thick and gorgeous at this point. Take a moment to appreciate that deep orange color — it’s the color of fall.
- Pour in the evaporated milk, pumpkin pie spice, and salt. Whisk everything together until it’s completely smooth and uniform. Scrape the bottom and sides of the bowl with your spatula to make sure there are no hidden pockets of unmixed pumpkin.
- Here’s the trick: let the filling rest for 10 minutes. I know you’re eager, but trust me on this. This rest period lets any air bubbles rise to the surface and pop, and it allows the flavors to start mingling. You’ll see tiny bubbles on the surface — gently pop them with a toothpick or just let them be.
- Pour the filling into your chilled pie crust. Pour slowly to avoid splashing, and fill right up to the rim. The filling won’t rise much during baking, so you can fill it generously.
- Carefully transfer the pie (on its baking sheet) to the preheated oven. Bake at 425°F for 15 minutes. This high heat blast helps set the crust and gives the filling a good start.
- After 15 minutes, reduce the oven temperature to 350°F (175°C) without opening the door. Continue baking for 40-50 minutes, or until the filling is set around the edges but still has a slight jiggle in the center. It should look like Jell-O — wobbly but not liquid.
- Let the pie cool completely on a wire rack. This is crucial — at least 2 hours at room temperature. The filling will continue to set as it cools. Don’t rush this step, or you’ll end up with a runny pie.
A few sensory cues to watch for: The kitchen will smell like autumn heaven around the 20-minute mark. The crust should be golden brown when done, and the filling should be set with a slight, gentle wobble in the very center. If you insert a knife near the center, it should come out clean — that’s your test.
Cooking Tips & Techniques
I’ve made this pie more times than I can count, and I’ve learned a few things along the way. Here are my best tips for pie success:
Don’t overmix the filling. I know it’s tempting to keep whisking until it’s perfectly smooth, but overmixing incorporates too much air, which can cause cracks during baking. Just mix until everything is combined — about 30 seconds of whisking after adding the milk.
Watch your oven temperature. Every oven runs differently. I learned this the hard way when my first pie came out with a burnt crust and a raw center. If your oven runs hot, check the pie at the 35-minute mark. If it runs cool, it might need the full 50 minutes. Trust your senses over the timer.
Prevent a soggy bottom. The preheated baking sheet trick is a game-changer. It gives the bottom crust a head start on cooking, so it stays crisp and flaky instead of getting soggy. Also, don’t skip chilling the crust — cold butter creates steam pockets that make it flaky.
Deal with cracks. If your pie cracks, don’t panic. It happens to everyone. You can cover it with whipped cream and no one will ever know. But if you want to prevent cracks, don’t overbake. That slight jiggle in the center? That’s your friend. The pie continues to cook from residual heat as it cools.
Make ahead magic. This pie actually tastes better the next day. The spices have time to meld and mellow, and the texture becomes even silkier. I often make it a day ahead and just add the whipped cream before serving.
Variations & Adaptations
Once you’ve mastered the basic recipe, feel free to play around. Here are some variations I’ve tried and loved:
Spiced Maple Pumpkin Pie: Replace 1/4 cup of the sugar with maple syrup. Reduce the evaporated milk by 2 tablespoons to account for the extra liquid. The maple flavor adds a lovely depth that pairs beautifully with the pumpkin. I made this for a Friendsgiving once, and it was gone in 20 minutes.
Chocolate Swirl Pumpkin Pie: Melt 1/2 cup of semi-sweet chocolate chips and drizzle it into the filling before baking. Use a knife to gently swirl it through — don’t overmix, or you’ll lose the marbled effect. This is my niece’s favorite version, and honestly, it’s pretty amazing.
Ginger snap Crust: Instead of a traditional pie crust, use crushed ginger snaps mixed with melted butter. Press into the pie dish and bake at 350°F for 10 minutes before adding the filling. The spicy ginger flavor complements the pumpkin beautifully.
Dairy-Free Version: Replace the evaporated milk with full-fat coconut milk. The texture is slightly different — a bit more custard-like — but it’s still delicious. I’ve served this to dairy-free friends who couldn’t tell the difference.
Mini Pies: Use a muffin tin and small circles of pie crust to make individual pies. Reduce the baking time to about 20-25 minutes at 350°F. Perfect for parties or portion control.
Serving & Storage Suggestions
This pie is fantastic at room temperature, but I actually prefer it slightly chilled. The filling firms up beautifully, making for clean, perfect slices. Here’s how to serve and store it:
Serve: Top with a generous dollop of lightly sweetened whipped cream. For extra flair, add a sprinkle of cinnamon or a drizzle of caramel sauce. The pie is also wonderful with a scoop of vanilla ice cream — the temperature contrast is heavenly.
Storage: Once cooled, cover the pie loosely with plastic wrap or foil and refrigerate. It will keep for up to 4 days. In fact, the flavor improves after a day in the fridge — the spices have time to really settle in.
Freezing: You can freeze the fully baked pie for up to 3 months. Wrap it tightly in plastic wrap, then foil. Thaw overnight in the refrigerator before serving. I’ve done this for holiday prep, and it works beautifully.
Reheating: If you prefer warm pie, reheat individual slices in the microwave for about 20 seconds, or place the whole pie in a 300°F oven for 10-15 minutes. Just watch the crust — it can burn quickly.
Flavor development: The flavors actually deepen and meld over time. Day-old pie is often better than fresh-baked. The spices become more integrated, and the texture becomes even creamier. So don’t stress about making it the day before — it’s actually the smart move.
Nutritional Information & Benefits
Let’s be real — this is pie, not a health food. But it does have some redeeming qualities. Pumpkin is packed with vitamin A and fiber, and the eggs add protein. Here’s the estimated breakdown per slice (based on 8 servings):
- Calories: Approximately 280
- Fat: 10g
- Carbohydrates: 42g
- Protein: 6g
- Fiber: 3g
- Sugar: 28g
Pumpkin is rich in beta-carotene, which your body converts to vitamin A — great for eye health and immune function. The cinnamon and ginger in the spice blend have anti-inflammatory properties, and the eggs provide choline, which supports brain health. It’s not exactly a superfood, but it’s a lot better for you than, say, a slice of cheesecake.
For those with dietary restrictions: This recipe contains gluten (from the crust), dairy (from the evaporated milk), and eggs. For a gluten-free version, use a gluten-free pie crust. For dairy-free, use coconut milk and a dairy-free crust. The eggs are harder to replace — flax eggs don’t work well here, but you can try a commercial egg replacer if needed.
Conclusion
This easy classic pumpkin pie from scratch has saved me more times than I can count. From forgotten potlucks to last-minute holiday desserts, it’s the recipe I turn to when I need something reliable, delicious, and genuinely simple. No fuss, no stress, no complicated techniques — just honest, good pie that tastes like fall in every bite.
I love that this recipe doesn’t pretend to be something it’s not. It’s not fancy. It’s not complicated. It’s just really, really good. And that’s exactly what I need on a busy weeknight or a hectic holiday morning. It’s the kind of pie that makes you close your eyes after the first bite, not because it’s groundbreaking, but because it’s exactly right.
Now it’s your turn. Give this recipe a try, and don’t be afraid to make it your own. Add a little extra cinnamon, swap in a different crust, or top it with something unexpected. I’d love to hear how it turns out — drop a comment below and let me know your favorite way to serve it. Happy baking, friends!
Frequently Asked Questions
Can I use pumpkin pie filling instead of pumpkin puree?
No, please don’t. Pumpkin pie filling is pre-sweetened and spiced, so using it will throw off the entire recipe. Stick with plain pumpkin puree — it gives you control over the sweetness and spice levels.
Why did my pumpkin pie crack on top?
Cracks usually happen from overbaking. The filling continues to cook from residual heat after you take it out of the oven, so it’s better to pull it when it still has a slight jiggle in the center. Also, cooling it slowly on a wire rack helps prevent sudden temperature changes that cause cracks.
Can I make this pie ahead of time?
Absolutely! In fact, I recommend it. The pie tastes even better the next day after the flavors have had time to meld. Just bake it, cool it completely, and refrigerate it covered. Add whipped cream right before serving.
How do I know when the pie is done baking?
The edges should be set and slightly puffed, while the center should have a gentle wobble — like Jell-O. If you insert a knife about an inch from the center, it should come out clean. The internal temperature should be around 175°F if you’re using a thermometer.
Can I freeze this pumpkin pie?
Yes! Wrap the fully cooled pie tightly in plastic wrap, then a layer of foil. It will keep in the freezer for up to 3 months. Thaw overnight in the refrigerator before serving. The texture remains surprisingly good — I’ve done this for holiday prep many times.
Pin This Recipe!

Easy 4-Ingredient Classic Pumpkin Pie from Scratch
This simple, foolproof pumpkin pie uses just four main ingredients and comes together in minutes. Perfect for holidays or last-minute desserts, it delivers a silky, perfectly spiced filling every time.
- Total Time: 2 hours 10 minutes (including cooling)
- Yield: 8 servings 1x
Ingredients
- 1 can (15 oz) pumpkin puree (not pumpkin pie filling)
- 1 can (12 oz) evaporated milk
- 3/4 cup granulated sugar
- 2 large eggs (room temperature)
- 2 teaspoons pumpkin pie spice (or 1 tsp cinnamon, 1/2 tsp ginger, 1/4 tsp nutmeg, 1/4 tsp cloves)
- 1/2 teaspoon salt
- 1 unbaked 9-inch pie crust (homemade or store-bought)
Instructions
- Preheat your oven to 425°F (220°C). Place a baking sheet on the middle rack to preheat with the oven.
- Prepare your pie crust. If using store-bought, let it sit at room temperature for 15 minutes before unrolling. If making your own, roll it out to about 12 inches in diameter and press into a 9-inch pie dish. Crimp edges as desired. Place crust in the refrigerator while making the filling.
- In a large mixing bowl, whisk together the eggs and sugar until well combined and slightly lighter in color, about 30 seconds.
- Add the pumpkin puree and whisk until smooth.
- Pour in the evaporated milk, pumpkin pie spice, and salt. Whisk until completely smooth and uniform. Scrape bottom and sides of bowl with a spatula.
- Let the filling rest for 10 minutes to allow air bubbles to rise and pop.
- Pour the filling into the chilled pie crust, filling right up to the rim.
- Carefully transfer the pie (on its baking sheet) to the preheated oven. Bake at 425°F for 15 minutes.
- After 15 minutes, reduce the oven temperature to 350°F (175°C) without opening the door. Continue baking for 40-50 minutes, or until the filling is set around the edges but still has a slight jiggle in the center (like Jell-O).
- Let the pie cool completely on a wire rack for at least 2 hours at room temperature. The filling will continue to set as it cools.
Notes
For a dairy-free version, replace evaporated milk with full-fat coconut milk. For a gluten-free version, use a gluten-free pie crust. The pie tastes even better the next day after flavors meld. To prevent cracks, don’t overbake; the center should have a slight jiggle when done. If cracks occur, cover with whipped cream.
- Prep Time: 15 minutes
- Cook Time: 55-65 minutes
- Category: Dessert
- Cuisine: American
Nutrition
- Serving Size: 1 slice (1/8 of pie)
- Calories: 280
- Sugar: 28
- Sodium: 320
- Fat: 10
- Saturated Fat: 4
- Carbohydrates: 42
- Fiber: 3
- Protein: 6
Keywords: pumpkin pie, easy pumpkin pie, classic pumpkin pie, 4-ingredient pumpkin pie, Thanksgiving dessert, fall dessert, homemade pumpkin pie


