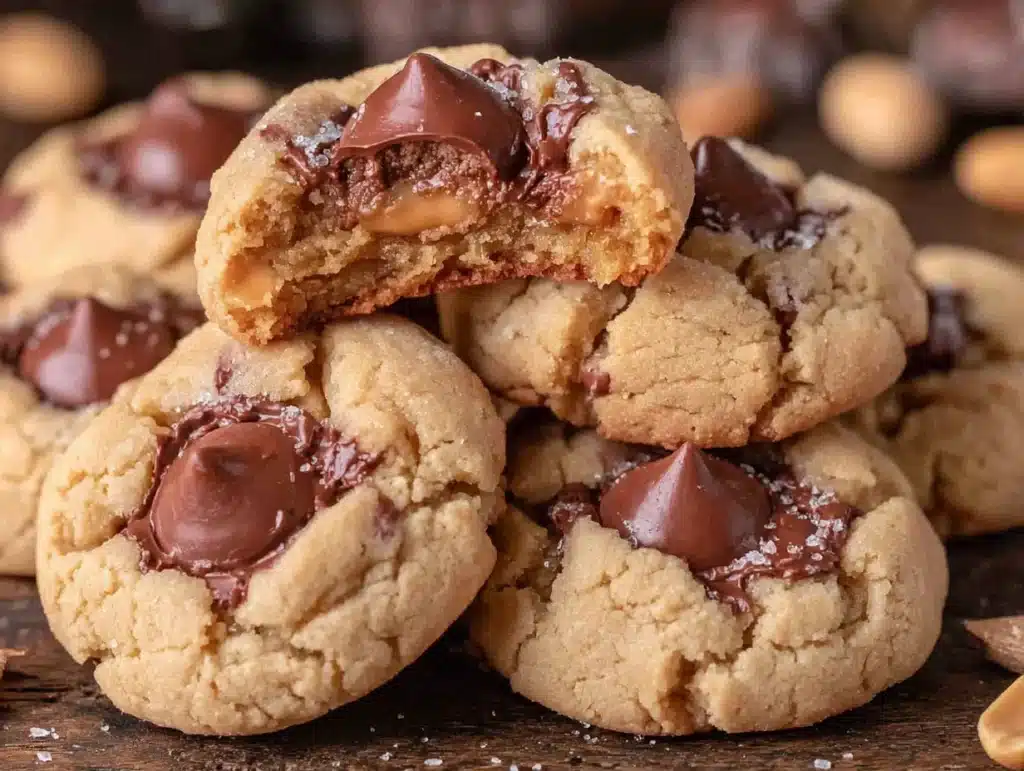
I was standing in the frozen foods aisle last Tuesday, reaching for a bag of peas, when this faint, sweet smell drifted over from somewhere — maybe a bakery delivery door propped open, maybe someone’s lunch in the parking lot. And just like that, I was seven years old, standing on a step stool in Mrs. Gable’s yellow kitchen, my fingers dusted with powdered sugar. She wasn’t my grandmother, not even a relative. She was the elderly widow next door who let me “help” bake every other Saturday. Her peanut butter blossoms were the only cookies she ever made, and she made them the same way every time — soft, pillowy, with a chocolate kiss pressed in just as they came out of the oven. I remember how the warmth would melt the chocolate just a little, so when you bit into one, it left a smear on your upper lip. I haven’t thought about Mrs. Gable in years. She moved away when I was eleven, and I never got her recipe. Honestly, I’ve been chasing that specific softness ever since — that perfect peanut butter cookie that doesn’t crumble into a thousand pieces the second you pick it up. Maybe you’ve been there too, testing batch after batch, getting frustrated with cookies that look perfect but fall apart in your hand. I’ve tried so many versions over the years, and let me tell you, most of them were disappointing. Some were too dry, some were too greasy, and some just didn’t have that nostalgic, cozy feel. But this one? This one finally feels right. It’s the cookie I wish I could bring to Mrs. Gable’s porch one more time.
Why You’ll Love This Recipe
Let’s be real for a second — not all peanut butter blossom cookies are created equal. Some are dry and crumbly, some are greasy and flat, and some just don’t deliver that nostalgic comfort we’re all craving. This recipe is different. It’s been tested, tweaked, and tested again until it hit that sweet spot between soft, sturdy, and utterly satisfying.
- Soft & Sturdy: These cookies hold their shape and their texture. No crumbling, no falling apart. Just a tender bite that melts in your mouth.
- Simple Pantry Ingredients: You probably have everything you need already. No weird specialty items or expensive extracts.
- Perfect for Cozy Evenings: Cold weather, a rough day, or just one of those quiet nights when you need something warm and sweet — these cookies deliver.
- Crowd-Pleaser: I’ve brought these to potlucks, holiday parties, and casual get-togethers. They disappear every single time, and someone always asks for the recipe.
- Unbelievably Delicious: The combination of soft peanut butter cookie and melty chocolate kiss is pure comfort. It’s the kind of cookie that makes you close your eyes after the first bite.
What makes this version different from the rest? It’s all in the technique. I use a specific ratio of brown to white sugar for moisture, I chill the dough (yes, it matters), and I press the chocolate kiss in at exactly the right moment. No more crumbly edges or cracked tops. This is the peanut butter blossom cookie you’ve been searching for — the one that tastes like a hug.
What Ingredients You Will Need
This recipe uses simple, wholesome ingredients to deliver that soft, rich texture without any fuss. Most of these are pantry staples, which makes these cookies perfect for spontaneous baking cravings.
- Unsalted butter – 1 cup (2 sticks), softened to room temperature. I prefer Land O’Lakes for consistent results. Make sure it’s truly soft, not melted — this affects the texture.
- Creamy peanut butter – 1 cup. Use a standard brand like Jif or Skippy for best results. Natural peanut butter that separates can make the cookies greasy and crumbly. Trust me on this one — I learned the hard way.
- Granulated sugar – 1 cup, plus extra for rolling. The sugar in the dough adds sweetness, while the rolling sugar gives that classic crackly exterior.
- Light brown sugar – 1/2 cup, packed. This is the secret to softness. The molasses in brown sugar keeps the cookies tender and moist.
- Large eggs – 2, at room temperature. If you forget to take them out ahead of time, place them in a bowl of warm water for 5 minutes.
- Whole milk – 2 tablespoons. Adds just enough moisture without making the dough sticky. You can use 2% or even oat milk in a pinch.
- Vanilla extract – 2 teaspoons. Pure vanilla is worth the splurge here. Imitation works, but the flavor won’t be as warm and rich.
- All-purpose flour – 2 1/4 cups. Spoon and level your flour — don’t scoop directly from the bag. Scooping packs the flour and makes cookies dry.
- Baking soda – 1 teaspoon. Helps the cookies spread just enough without becoming flat.
- Baking powder – 1/2 teaspoon. Adds a little lift for that soft, pillowy texture.
- Salt – 1/2 teaspoon. Balances the sweetness and enhances the peanut butter flavor.
- Chocolate kiss candies – About 48, unwrapped. Hershey’s Kisses are classic. Try milk chocolate, dark chocolate, or even white chocolate for a twist.
Equipment Needed
You don’t need a fancy kitchen to make these cookies, but having the right tools makes the process smoother and more enjoyable.
- Electric mixer – A stand mixer with paddle attachment is ideal, but a hand mixer works perfectly. I’ve made these with both, and honestly, the hand mixer is easier to clean.
- Large mixing bowls – At least two. One for wet ingredients, one for dry.
- Baking sheets – Two or three standard half-sheet pans. If you only have one, let it cool completely between batches — warm pans cause cookies to spread too much.
- Parchment paper or silicone baking mats – Parchment is my go-to. It prevents sticking and makes cleanup a breeze. Silicone mats work great too, but cookies might spread slightly more.
- Cookie scoop – A 1.5-tablespoon scoop creates uniform cookies. If you don’t have one, use a regular spoon and try to make each portion the same size.
- Cooling rack – Essential for cooling cookies properly. Stacking warm cookies makes them soggy.
- Small bowl – For the extra granulated sugar you’ll roll the dough balls in.
Preparation Method
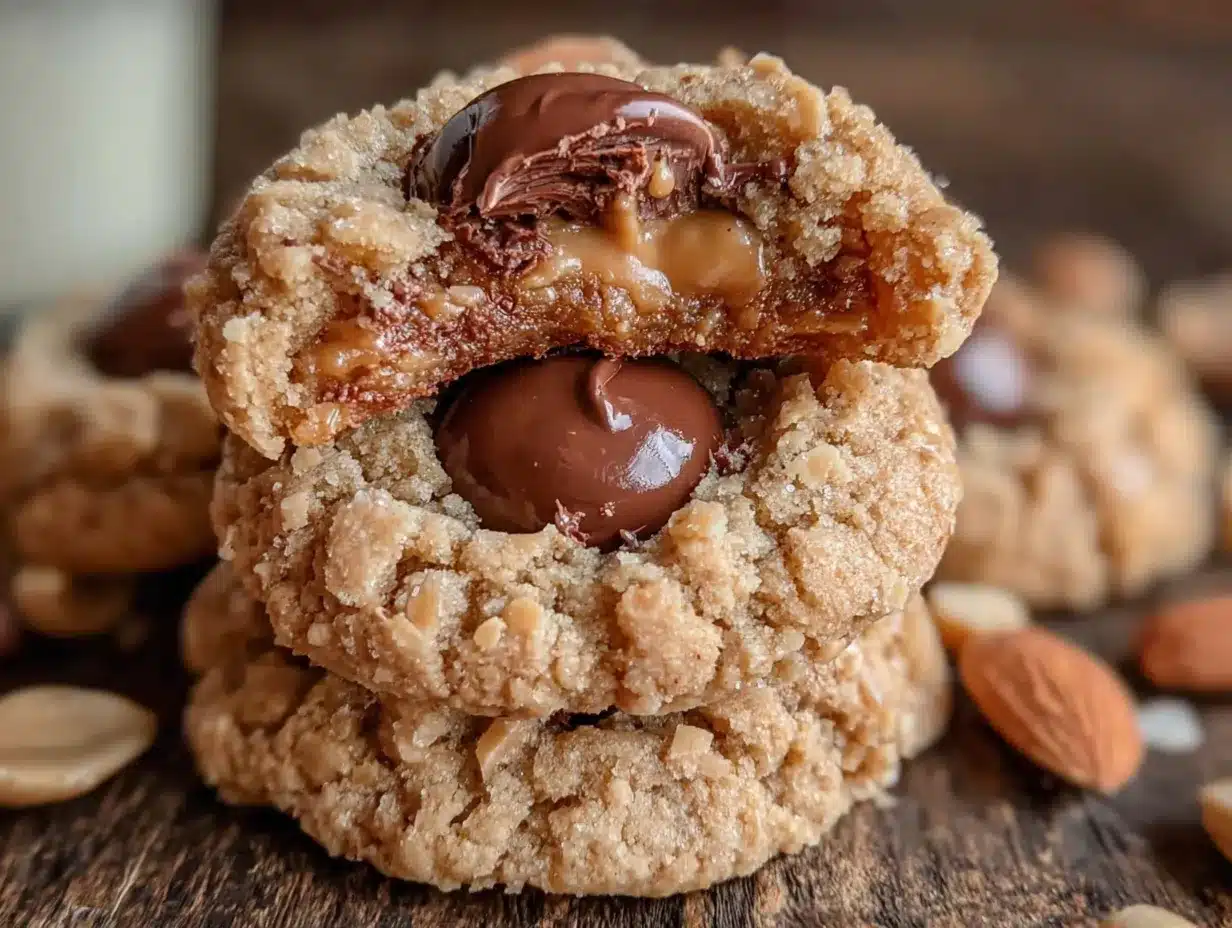
- Cream the butter and sugars. In a large bowl, beat the softened butter, creamy peanut butter, granulated sugar, and brown sugar together on medium speed until light and fluffy. This takes about 2-3 minutes. Scrape down the sides of the bowl halfway through. The mixture should look pale and feel soft when you touch it.
- Add the wet ingredients. Beat in the eggs one at a time, mixing well after each addition. Add the milk and vanilla extract, then mix until combined. The batter might look slightly separated at this point — that’s normal. Don’t panic.
- Combine the dry ingredients. In a separate bowl, whisk together the flour, baking soda, baking powder, and salt. Whisking ensures everything is evenly distributed so you don’t get a pocket of baking soda in one cookie.
- Mix dry into wet. Gradually add the dry ingredients to the wet mixture, mixing on low speed just until combined. Overmixing at this stage develops gluten, which makes cookies tough. Stop as soon as you don’t see any more white flour streaks.
- Chill the dough. This step is non-negotiable. Cover the bowl with plastic wrap and refrigerate for at least 1 hour, or up to 24 hours. Chilling solidifies the fat, which prevents the cookies from spreading too thin in the oven. It also deepens the flavor — I promise you’ll taste the difference.
- Preheat and prepare. When you’re ready to bake, preheat your oven to 375°F (190°C). Line your baking sheets with parchment paper. Place about 1/2 cup of granulated sugar in a small bowl for rolling.
- Shape and roll. Scoop chilled dough into 1.5-tablespoon portions (about the size of a walnut). Roll each portion into a smooth ball, then roll it in the granulated sugar until fully coated. Place the sugared dough balls on the prepared baking sheets, spacing them about 2 inches apart.
- Bake. Bake for 10-12 minutes, or until the cookies are puffed and lightly golden around the edges. The centers will still look slightly soft and underdone — that’s what you want. Don’t overbake, or you’ll lose that soft texture.
- Add the chocolate kisses. Remove the baking sheet from the oven. While the cookies are still hot, gently press one chocolate kiss into the center of each cookie. Press just until the cookie cracks slightly around the edges — don’t push all the way through. The heat from the cookie will soften the chocolate perfectly.
- Cool completely. Let the cookies cool on the baking sheet for 5 minutes — this allows them to set without breaking. Then transfer them to a wire rack to cool completely. The chocolate kisses will firm up as they cool, creating that classic blossom look.
Cooking Tips & Techniques
I’ve made more batches of peanut butter blossoms than I can count, and I’ve messed up plenty along the way. Here’s what I’ve learned so you don’t have to repeat my mistakes.
Don’t skip the chill time. I know it’s tempting to just scoop and bake, but warm dough spreads into flat, thin cookies that can’t hold the chocolate kiss. Chilled dough gives you thick, soft cookies with that perfect domed top. If you’re in a rush, 30 minutes in the freezer works in a pinch.
Watch the oven temperature. Every oven runs differently. I burned my first batch because my oven runs hot. If yours does too, check the cookies at 9 minutes. They’re done when the edges are just barely golden and the tops look set but still soft.
Press the kisses at the right moment. This is crucial. If you press them in while the cookies are too hot, the chocolate melts into a puddle. If you wait too long, the cookies cool and the kiss won’t stick. The sweet spot is about 30 seconds after they come out of the oven — still hot but not screaming hot.
Use room temperature ingredients. Cold eggs or cold butter don’t cream properly, which affects the texture. Set everything out about 30 minutes before you start baking. I forgot once and ended up with lumpy dough — not the end of the world, but the cookies weren’t as soft.
Measure flour correctly. This is the number one reason cookies turn out dry. Spoon the flour into your measuring cup and level it off with a knife. Don’t scoop directly from the bag — that packs in extra flour and throws off the ratio.
Variations & Adaptations
These cookies are wonderful as-is, but sometimes you want to switch things up. Here are some variations I’ve tried and loved.
Chocolate Lover’s Twist: Swap the milk chocolate kisses for dark chocolate or white chocolate. I made a batch with dark chocolate kisses last winter, and the slight bitterness balanced the sweet peanut butter beautifully. You can also use chocolate chunks pressed into the center for a different look.
Gluten-Free Option: Substitute the all-purpose flour with a 1:1 gluten-free baking flour blend. I’ve tested this with Bob’s Red Mill 1:1 Baking Flour, and the texture was surprisingly close to the original. Just make sure your blend contains xanthan gum for structure.
Nut-Free Version: Use sunflower seed butter instead of peanut butter. The flavor will be different, obviously, but the texture stays soft and delicious. Sunflower seed butter can turn green when baked (it’s a chemical reaction, totally safe), so don’t be alarmed.
Seasonal Variation: Around the holidays, I press a peppermint bark kiss into the center instead of regular chocolate. The minty crunch adds a festive twist that’s perfect for cookie exchanges. You can also roll the dough in colored sugar for holidays or birthdays.
Extra Crunch: If you like a little texture, add 1/2 cup of chopped salted peanuts to the dough. The saltiness plays beautifully with the sweet cookie and chocolate. I tried this on a whim one afternoon, and it’s become a favorite.
Serving & Storage Suggestions
These cookies are best served slightly warm, when the chocolate kiss is still a little soft and the cookie is tender. Let them cool on the baking sheet for 5 minutes, then transfer to a plate and enjoy with a glass of cold milk or a warm cup of coffee. Honestly, there’s nothing cozier than that combination on a chilly evening.
For storage, keep the cookies in an airtight container at room temperature. They’ll stay soft for up to 5 days — if they last that long. I like to layer them with parchment paper between stacks to prevent the chocolate kisses from sticking together.
You can also freeze these cookies. Place the baked and cooled cookies in a single layer in a freezer-safe container, separating layers with parchment paper. They freeze beautifully for up to 3 months. To thaw, just leave them at room temperature for about 30 minutes. The texture stays surprisingly soft.
If you want to freeze the dough instead, scoop the dough balls, place them on a baking sheet, and freeze until solid. Then transfer the frozen dough balls to a freezer bag. When you’re ready to bake, roll them in sugar and bake straight from frozen, adding 2-3 minutes to the baking time. This is my favorite trick for spontaneous cookie cravings.
The flavors actually develop and deepen after a day or two. I’ve noticed the peanut butter taste becomes more pronounced, and the cookies seem even softer. So if you can resist eating them all immediately, they might taste even better tomorrow.
Nutritional Information & Benefits
Let’s be honest — these are indulgent cookies, not health food. But there are a few redeeming qualities worth mentioning.
| Nutrient | Per Cookie (approximate) |
|---|---|
| Calories | 185 |
| Total Fat | 10g |
| Saturated Fat | 4g |
| Carbohydrates | 22g |
| Sugar | 14g |
| Protein | 4g |
Peanut butter provides a small amount of protein and healthy monounsaturated fats. It also contains vitamin E, magnesium, and potassium — nothing groundbreaking, but it’s nice to know there’s a little substance behind the sweetness. The dark chocolate version adds antioxidants, if that makes you feel better about having a second cookie.
These cookies are not gluten-free, dairy-free, or vegan in their standard form, but the variations section above offers alternatives for most dietary needs. The main allergens are peanuts, dairy, wheat, and eggs, so keep that in mind if you’re baking for a crowd.
My personal take? These are soul food. They’re meant to be enjoyed in the moment, without guilt. One cookie with a cup of tea on a quiet afternoon is a small act of self-care. And honestly, that has its own kind of nutritional value.
Conclusion
These soft peanut butter blossom cookies are everything I’ve been looking for since those Saturday mornings in Mrs. Gable’s kitchen. They’re tender without being fragile, sweet without being cloying, and nostalgic without being complicated. Every time I make them, I think about her — the way she’d let me press the chocolate kisses in myself, even though half of them ended up crooked. She never corrected me. She just smiled and said they were perfect.
This recipe is worth trying because it works. It’s been tested by someone who ruined plenty of batches along the way, and it delivers exactly what it promises: a soft, cozy peanut butter cookie that doesn’t crumble. Whether you’re baking for a holiday gathering, a rainy afternoon, or just because you need a little comfort, these cookies will deliver.
I’d love to hear how yours turn out. Did you try a variation? Did your family fight over the last one? Drop a comment below and let me know. And if you love these as much as I do, share the recipe with someone who needs a cozy moment. Happy baking!
Frequently Asked Questions
Why did my cookies spread too much?
This usually happens when the dough wasn’t chilled long enough, or the butter was too soft. Make sure you chill the dough for at least 1 hour. If your kitchen is warm, pop the baking sheet with the shaped dough balls into the fridge for 15 minutes before baking.
Can I use natural peanut butter?
I don’t recommend it. Natural peanut butter has a different fat content and can separate, which makes the cookies greasy and crumbly. Stick with standard creamy peanut butter like Jif or Skippy for the best texture.
How do I keep the chocolate kisses from falling off?
Press the kisses in while the cookies are still warm but not piping hot — about 30 seconds after they come out of the oven. Press gently until the cookie cracks slightly. As the cookies cool, the chocolate will set and stay in place.
Can I make these cookies ahead of time?
Absolutely. You can bake them up to 3 days ahead and store them in an airtight container. Or freeze the dough balls for up to 3 months and bake them fresh whenever you want. The frozen dough actually bakes up beautifully.
Why are my cookies dry?
Overbaking is the most common culprit. These cookies should look slightly underdone in the center when you take them out. They continue to bake on the hot pan. Also, make sure you’re measuring your flour correctly — spoon and level, don’t scoop.
Pin This Recipe!
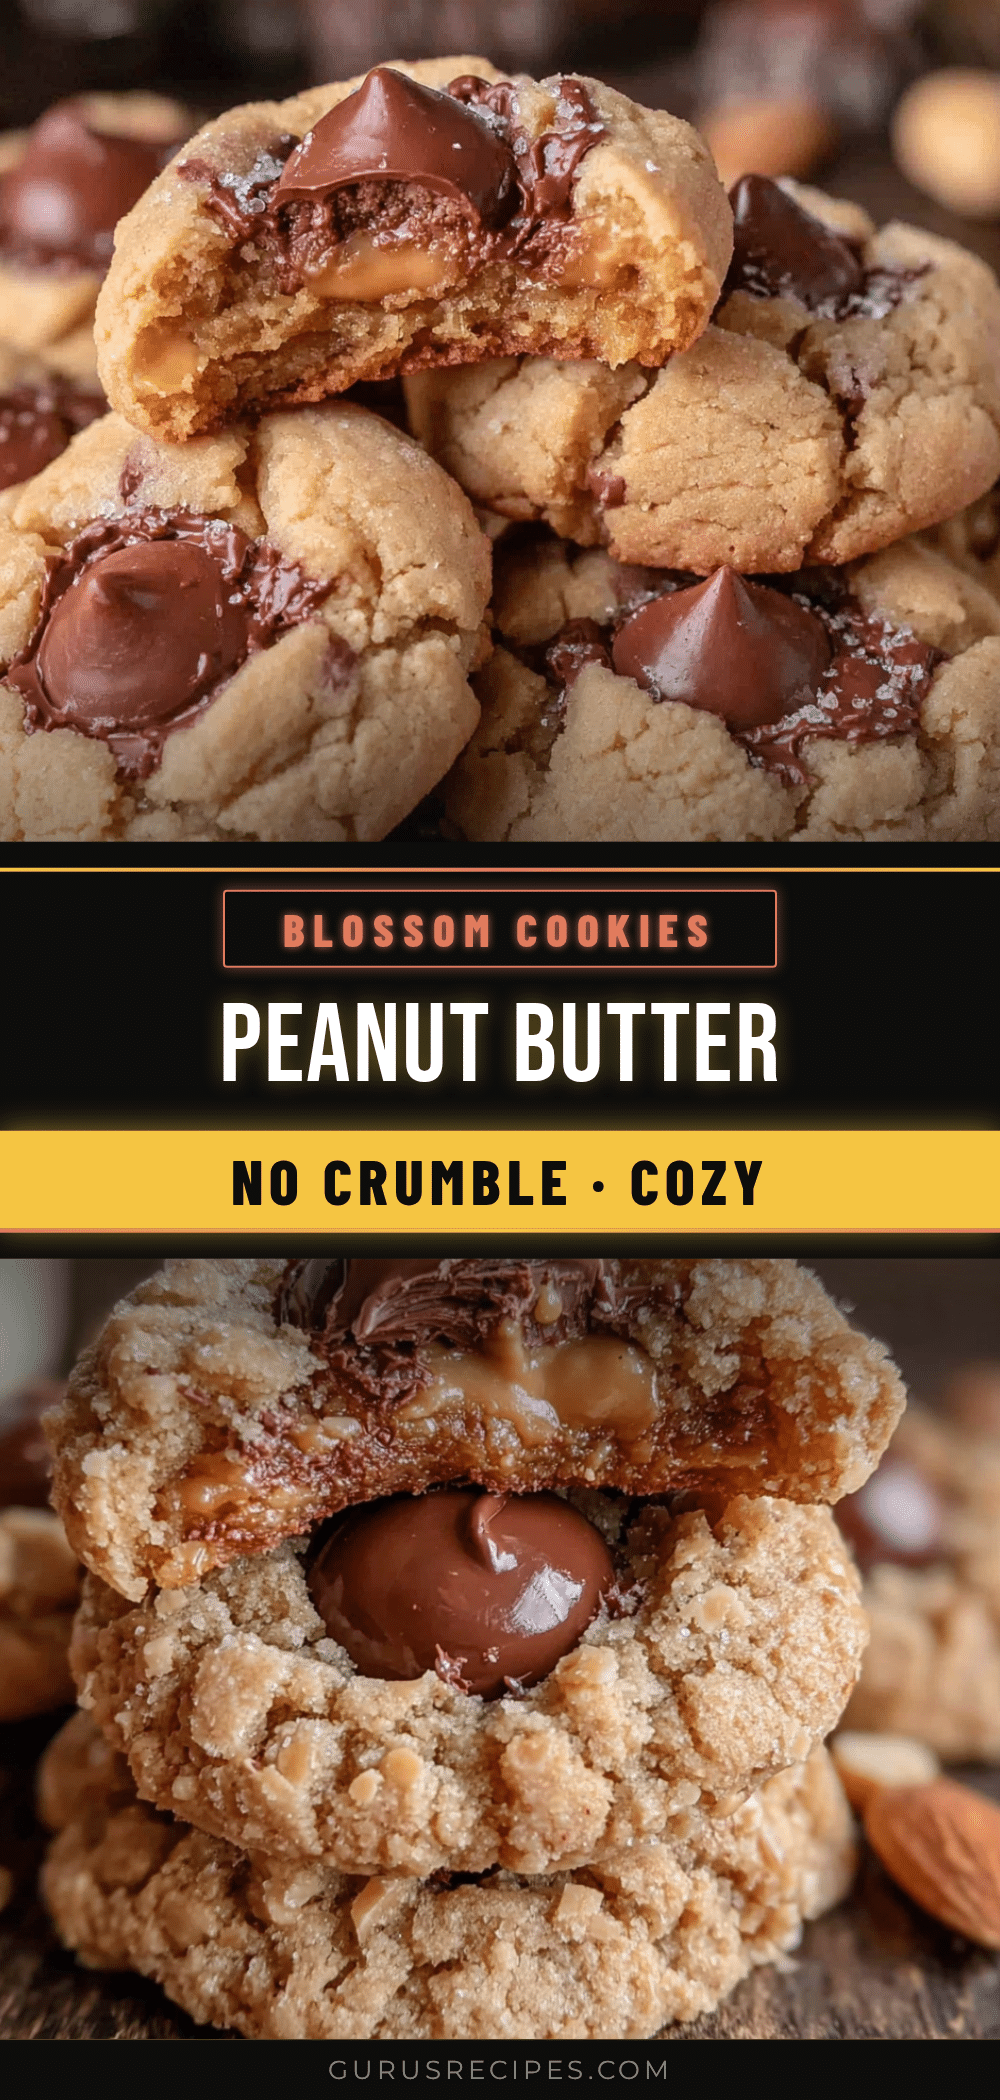

Cozy Soft Peanut Butter Blossom Cookies (No Crumble)
These soft, pillowy peanut butter blossom cookies are the perfect nostalgic treat. With a tender, no-crumble texture and a melty chocolate kiss pressed in the center, they deliver pure comfort in every bite.
- Total Time: 1 hour 32 minutes (includes 1 hour chilling)
- Yield: 48 cookies 1x
Ingredients
- 1 cup (2 sticks) unsalted butter, softened to room temperature
- 1 cup creamy peanut butter (e.g., Jif or Skippy)
- 1 cup granulated sugar, plus extra for rolling
- 1/2 cup light brown sugar, packed
- 2 large eggs, at room temperature
- 2 tablespoons whole milk
- 2 teaspoons vanilla extract
- 2 1/4 cups all-purpose flour, spooned and leveled
- 1 teaspoon baking soda
- 1/2 teaspoon baking powder
- 1/2 teaspoon salt
- About 48 chocolate kiss candies (e.g., Hershey’s Kisses), unwrapped
Instructions
- Cream the butter and sugars: In a large bowl, beat the softened butter, creamy peanut butter, granulated sugar, and brown sugar together on medium speed until light and fluffy, about 2-3 minutes. Scrape down the sides of the bowl halfway through.
- Add the wet ingredients: Beat in the eggs one at a time, mixing well after each addition. Add the milk and vanilla extract, then mix until combined.
- Combine the dry ingredients: In a separate bowl, whisk together the flour, baking soda, baking powder, and salt.
- Mix dry into wet: Gradually add the dry ingredients to the wet mixture, mixing on low speed just until combined. Do not overmix.
- Chill the dough: Cover the bowl with plastic wrap and refrigerate for at least 1 hour, or up to 24 hours.
- Preheat and prepare: When ready to bake, preheat oven to 375°F (190°C). Line baking sheets with parchment paper. Place about 1/2 cup of granulated sugar in a small bowl for rolling.
- Shape and roll: Scoop chilled dough into 1.5-tablespoon portions (about the size of a walnut). Roll each portion into a smooth ball, then roll it in the granulated sugar until fully coated. Place on prepared baking sheets, spacing them about 2 inches apart.
- Bake: Bake for 10-12 minutes, or until the cookies are puffed and lightly golden around the edges. The centers will still look slightly soft and underdone.
- Add the chocolate kisses: Remove the baking sheet from the oven. While the cookies are still hot, gently press one chocolate kiss into the center of each cookie. Press just until the cookie cracks slightly around the edges.
- Cool completely: Let the cookies cool on the baking sheet for 5 minutes, then transfer them to a wire rack to cool completely.
Notes
Chilling the dough is non-negotiable for thick, soft cookies. Press the chocolate kisses in about 30 seconds after the cookies come out of the oven for the best melt. Use standard creamy peanut butter (not natural) for the best texture. Measure flour by spooning and leveling to avoid dry cookies. Cookies stay soft in an airtight container at room temperature for up to 5 days. Freeze baked cookies for up to 3 months, or freeze dough balls for baking later.
- Prep Time: 20 minutes
- Cook Time: 12 minutes
- Category: Dessert
- Cuisine: American
Nutrition
- Serving Size: 1 cookie
- Calories: 185
- Sugar: 14
- Sodium: 120
- Fat: 10
- Saturated Fat: 4
- Carbohydrates: 22
- Fiber: 1
- Protein: 4
Keywords: peanut butter blossom cookies, soft peanut butter cookies, no crumble cookies, chocolate kiss cookies, easy cookie recipe, holiday cookies, nostalgic cookies