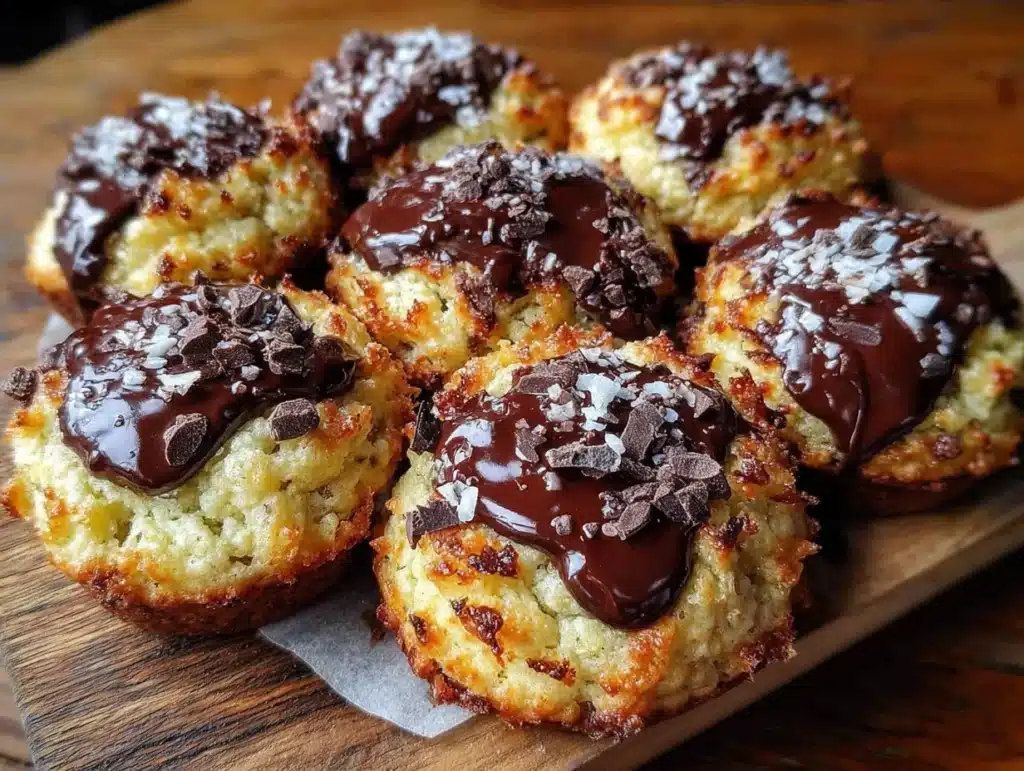
There used to be a tiny bakery tucked next to a laundromat on Grand Avenue that made the most perfect chocolate chip cookies I have ever eaten. When they closed—just vanished one Tuesday with a “Thank You” sign taped to the window—I honestly felt a little lost. Those cookies were my Tuesday afternoon ritual, the thing that got me through the midweek slump. After twelve tries—some burned, some flat as pancakes, one that tasted suspiciously like baking soda—I finally got it. This small batch chocolate chip cookies recipe is that bakery window, recreated in my own kitchen, and now it can be yours too.
The first attempt was a disaster. I forgot the eggs. The second batch spread into one giant cookie pancake. My husband, bless his heart, ate every single one and said, “They’re… interesting.” But I was determined. I wanted that specific combination: crispy edges, chewy centers, and those melty pockets of chocolate that make you close your eyes for a second. Maybe you’ve been there—chasing a food memory that feels impossible to recreate. Let me tell you, it is possible.
This recipe gives you exactly six cookies. No more, no less. Perfect for when you want fresh-baked cookies without a mountain of dough staring at you from the fridge. It’s the kind of recipe that feels like a secret—simple ingredients, straightforward steps, and a result that tastes like you spent hours in the kitchen. Honestly, you’ll wonder why you ever made a full batch in the first place.
Why You’ll Love This Recipe
This small batch chocolate chip cookies recipe has become my go-to for so many reasons. Let me break it down for you.
- Quick & Easy: From start to finish, you’re looking at about 25 minutes. Mix the dough in one bowl, scoop, bake, and done. Perfect for that sudden cookie craving at 9 PM.
- Simple Ingredients: You probably have everything in your pantry right now. Butter, sugar, an egg, flour, chocolate chips—no special trips to the store required.
- Perfect for Small Households: If you’re cooking for one or two, a full batch of cookies is dangerous. This gives you just enough to satisfy the craving without leftovers calling your name all week.
- Crowd-Pleaser: I’ve served these at playdates, book club meetings, and random Tuesday dinners. They disappear every single time. Kids and adults alike reach for that second cookie.
- Unbelievably Delicious: The texture is exactly what you want—crispy golden edges, soft chewy centers, and chocolate in every bite. It’s comfort food at its finest.
What makes this recipe different from all the others? It’s the technique. I spent months testing ratios, trying different butter temperatures, and experimenting with chilling times. The secret here is using melted butter and a brief resting period for the dough. This gives you that bakery-style texture without any complicated steps. It’s a tested, family-approved method that works every single time.
This recipe isn’t just good—it’s the kind that makes you close your eyes after the first bite. It’s comfort food reimagined: faster, simpler, but with the same soul-soothing satisfaction. Perfect for impressing your family without stress, or turning a quiet evening into something memorable.
What Ingredients You Will Need
This recipe uses simple, wholesome ingredients to deliver bold flavor and satisfying texture without the fuss. Most of these are pantry staples you likely already have on hand.
- Unsalted butter, 3 tablespoons (42g) – melted and slightly cooled. I prefer unsalted so I can control the salt level. If you only have salted butter, just reduce the added salt by a pinch.
- Granulated sugar, 2 tablespoons (25g) – adds sweetness and helps create those crispy edges.
- Light brown sugar, 2 tablespoons (25g), packed – this is the secret to chewy cookies. The molasses in brown sugar gives them that soft, tender texture. I recommend Domino or C&H for consistent results.
- Large egg yolk, 1 – just the yolk, not the whole egg. This gives you richness without making the dough too wet. Save the egg white for breakfast or freeze it for later.
- Vanilla extract, ½ teaspoon – pure vanilla extract makes a noticeable difference. Imitation works in a pinch, but pure adds a deeper flavor.
- All-purpose flour, ¼ cup plus 2 tablespoons (48g) – spoon and level it. Don’t scoop directly from the bag or you’ll pack in too much flour and get dry cookies.
- Baking soda, ¼ teaspoon – helps the cookies spread just the right amount and gives them that golden color.
- Salt, ¼ teaspoon – balances the sweetness and enhances the chocolate flavor. I use fine sea salt.
- Semi-sweet chocolate chips, ¼ cup plus 2 tablespoons (70g) – I’m partial to Ghirardelli or Guittard for their melt quality. You can also chop a chocolate bar for those irregular, melty puddles.
For substitutions: If you need a dairy-free option, use vegan butter sticks (not spreadable margarine). For a gluten-free version, swap the all-purpose flour with a 1:1 gluten-free baking flour blend. I’ve tried Bob’s Red Mill with good results. And if you’re out of brown sugar, mix 2 tablespoons of granulated sugar with ½ teaspoon of molasses—it works beautifully.
Equipment Needed
You don’t need fancy equipment for this small batch chocolate chip cookies recipe. Here’s what I use:
- Mixing bowl – any medium bowl works. I use a glass Pyrex bowl because I can see if the butter is fully incorporated.
- Whisk – for mixing the wet ingredients. A fork works too, but a whisk makes it easier.
- Rubber spatula – for folding in the flour and chocolate chips. A wooden spoon is a fine substitute.
- Measuring spoons and cups – accuracy matters in a small batch. Use proper measuring spoons, not your silverware.
- Baking sheet – a standard half-sheet pan works great. No need for anything fancy.
- Parchment paper – this prevents sticking and makes cleanup a breeze. Silicone baking mats also work.
- Cookie scoop – a 1.5-tablespoon scoop gives you uniform cookies. If you don’t have one, use two spoons to portion the dough.
- Cooling rack – lets the cookies cool evenly so they don’t get soggy on the bottom.
I bought my cookie scoop at a kitchen supply store for about five dollars, and it’s one of the best investments I’ve made. But honestly, a couple of spoons work just as well. The key is making sure your baking sheet is at room temperature before placing the dough on it—a hot sheet will make the cookies spread too much.
Preparation Method
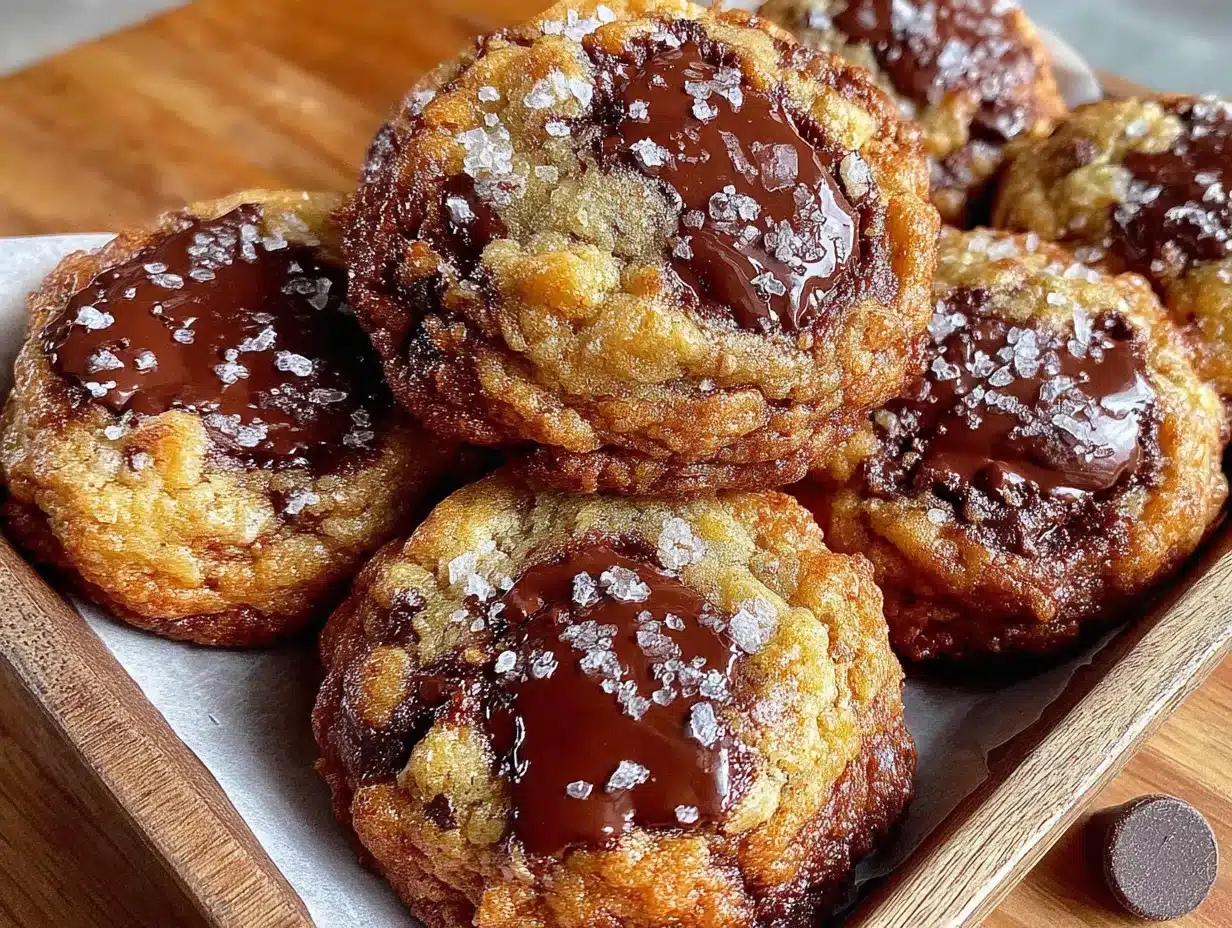
Let’s make these small batch chocolate chip cookies. I’ll walk you through each step with all the little details I’ve learned from my many trials.
- Preheat your oven to 350°F (175°C). Line a baking sheet with parchment paper. This is important—don’t skip the parchment. It gives you those perfect golden bottoms.
- Melt the butter. Place 3 tablespoons of unsalted butter in a microwave-safe bowl. Microwave in 15-second bursts until just melted. You want it melted but not hot—if it’s too warm, it will cook the egg yolk. Let it cool for 2-3 minutes. I learned this the hard way after scrambling an egg yolk in hot butter.
- Mix the sugars and butter. In your mixing bowl, combine the melted butter, 2 tablespoons granulated sugar, and 2 tablespoons packed light brown sugar. Whisk them together until they’re well combined and the mixture looks like wet sand. This should take about 30 seconds. Don’t overmix—you’re not trying to dissolve the sugar completely.
- Add the egg yolk and vanilla. Drop in the egg yolk and ½ teaspoon of vanilla extract. Whisk vigorously for about 1 minute. The mixture should look lighter in color and slightly thickened. This step is crucial—it’s what gives the cookies their chewy texture. I count to 60 in my head while whisking.
- Add the dry ingredients. Sprinkle ¼ cup plus 2 tablespoons of all-purpose flour, ¼ teaspoon of baking soda, and ¼ teaspoon of salt over the wet mixture. Use a rubber spatula to fold everything together. Stir just until you no longer see streaks of flour. Overmixing at this stage will make your cookies tough. The dough will be thick and slightly sticky—that’s exactly what you want.
- Fold in the chocolate chips. Add ¼ cup plus 2 tablespoons of semi-sweet chocolate chips. Fold gently until they’re evenly distributed throughout the dough. If you want chocolate in every bite, press a few extra chips onto the tops of the dough balls after scooping.
- Let the dough rest. This is the step most people skip, and it makes all the difference. Cover the bowl with plastic wrap and let the dough rest at room temperature for 10-15 minutes. This allows the flour to fully hydrate and the flavors to meld. The dough will be easier to scoop, and the cookies will bake up with better texture.
- Scoop the dough. Use a 1.5-tablespoon cookie scoop or two spoons to portion the dough into 6 equal balls. Place them on the prepared baking sheet, spacing them about 2 inches apart. They will spread, so give them room. I usually place 4 on one side and 2 on the other—just make sure they’re not touching.
- Bake. Place the baking sheet on the middle rack of your preheated oven. Bake for 9-11 minutes. At 9 minutes, the edges should be golden brown and the centers should look slightly underdone and puffy. That’s the sweet spot. If you prefer crispier cookies, go to 11 minutes, but watch them closely—they go from perfect to overdone fast.
- Cool on the baking sheet. Remove the baking sheet from the oven and let the cookies cool on the sheet for 5 minutes. This allows them to set up without overbaking. After 5 minutes, transfer them to a wire rack to cool completely. Or, let’s be honest, eat one warm—it’s the best part.
The smell in your kitchen right now is exactly what that bakery on Grand Avenue smelled like. Pure joy.
Cooking Tips & Techniques
After making this small batch chocolate chip cookies recipe more times than I care to count, I’ve picked up a few tricks that make a real difference.
Don’t skip the dough resting time. I know it’s tempting to rush, but that 10-15 minute rest is non-negotiable. The first time I skipped it, my cookies spread into thin, crispy discs. The resting time lets the flour absorb the moisture, which gives you thicker, chewier cookies. It’s a small wait for a big payoff.
Use room temperature egg yolk. Cold egg yolk can seize the melted butter and make the dough lumpy. Let your egg sit out for 15 minutes before using, or place it in a bowl of warm water for 5 minutes. I learned this after my third batch came out with tiny butter chunks.
Watch the baking time closely. Ovens vary, and those last two minutes are critical. Start checking at 9 minutes. The cookies should look slightly underdone in the center—they’ll continue cooking on the hot baking sheet after you pull them out. If you wait until they look fully baked in the oven, they’ll be overdone once they cool.
Chocolate chip placement hack. After scooping the dough balls, press 3-4 extra chocolate chips onto the tops. This gives you those beautiful chocolate puddles on top and ensures every cookie looks bakery-worthy. It’s a small detail that makes a big visual impact.
Multitasking strategy. While the dough rests, clean up your mixing bowl and measuring spoons. By the time the cookies are done, your kitchen will be clean and you can focus on enjoying them. I always do this—it makes the whole experience feel less chaotic.
One mistake I still make: Forgetting to check if my baking soda is fresh. Baking soda loses its potency over time. If your cookies aren’t spreading or browning properly, your baking soda might be old. Test it by dropping a little into vinegar—if it fizzes vigorously, it’s good.
Variations & Adaptations
This small batch chocolate chip cookies recipe is wonderfully versatile. Here are some variations I’ve tried and loved.
Double Chocolate Version: Replace 1 tablespoon of flour with 1 tablespoon of unsweetened cocoa powder. Use white chocolate chips or dark chocolate chunks instead of semi-sweet. The result is a rich, fudgy cookie that feels decadent. I made these for a friend’s birthday and they disappeared in minutes.
Nutty Crunch: Add 2 tablespoons of chopped toasted walnuts or pecans along with the chocolate chips. Toast the nuts in a dry skillet for 3-4 minutes first—it brings out their flavor. This variation adds a lovely texture contrast to the soft cookie.
Gluten-Free Adaptation: Substitute the all-purpose flour with a 1:1 gluten-free baking flour blend. I’ve used Bob’s Red Mill and King Arthur Measure for Measure with great results. Add an extra teaspoon of milk or water if the dough seems too dry. The texture is slightly different but still delicious.
Sea Salt Finish: Just before baking, sprinkle a tiny pinch of flaky sea salt on top of each dough ball. This is my personal favorite variation. The salt enhances the chocolate flavor and balances the sweetness. It’s what gives cookies that gourmet bakery feel.
Peanut Butter Swirl: Drop ½ teaspoon of creamy peanut butter onto each dough ball and swirl it in with a toothpick before baking. The peanut butter creates little pockets of salty, nutty goodness. My kids go crazy for this version.
Feel free to mix and match these ideas. The base recipe is so forgiving that you can really make it your own.
Serving & Storage Suggestions
These small batch chocolate chip cookies are best served warm, about 10 minutes after they come out of the oven. That’s when the edges are still crispy and the centers are soft and gooey. Pair them with a cold glass of milk, a cup of coffee, or a mug of hot cocoa for the ultimate comfort experience.
For presentation, arrange the cookies on a small plate or a wooden board. A dusting of powdered sugar or a drizzle of melted chocolate makes them look extra special if you’re serving guests. I sometimes add a few fresh berries on the side for a pop of color.
Storage instructions: Store leftover cookies in an airtight container at room temperature for up to 3 days. Place a slice of bread in the container—it absorbs excess moisture and keeps the cookies soft. Replace the bread slice every day if you’re storing them longer.
Freezer instructions: You can freeze the baked cookies for up to 3 months. Wrap each cookie individually in plastic wrap, then place them in a freezer-safe bag. To thaw, let them sit at room temperature for 15 minutes. For that fresh-baked taste, pop them in a 300°F oven for 3-4 minutes.
Reheating tip: Microwave a single cookie for 10-15 seconds to restore that just-baked softness. Be careful not to overheat—10 seconds is usually enough. The chocolate gets melty again, and it’s like having a fresh cookie all over again.
These cookies actually develop more flavor after a day. The flavors meld together, and the texture becomes even more chewy. So if you can resist eating them all on day one, day two is a treat.
Nutritional Information & Benefits
Here’s the estimated nutritional breakdown for one cookie (based on 6 cookies per batch):
| Nutrient | Amount per Cookie |
|---|---|
| Calories | 185 |
| Total Fat | 10g |
| Saturated Fat | 6g |
| Cholesterol | 45mg |
| Sodium | 135mg |
| Total Carbohydrates | 23g |
| Dietary Fiber | 1g |
| Sugars | 15g |
| Protein | 2g |
These values are estimates and will vary based on the specific brands and ingredients you use.
The dark chocolate in these cookies provides a small dose of antioxidants, and the butter gives you a bit of vitamin A. While these are definitely a treat, using semi-sweet chocolate instead of milk chocolate reduces the sugar content slightly. For a slightly healthier version, you can swap half the all-purpose flour for whole wheat pastry flour—it adds fiber without changing the texture too much.
If you’re watching your sugar intake, consider using sugar-free chocolate chips or a sugar substitute like monk fruit sweetener. Just note that the texture may change slightly. These cookies are best enjoyed as an occasional indulgence—the kind that makes you smile and feel good.
Conclusion
This small batch chocolate chip cookies recipe is more than just a way to satisfy a craving—it’s a little piece of joy you can create in your own kitchen. After all those failed attempts chasing that bakery memory, I finally have a recipe that delivers every single time. The crispy edges, the chewy centers, the melty chocolate—it’s all there, in just six perfect cookies.
I love this recipe because it’s honest. No fuss, no complicated techniques, just good ingredients and a little patience. It’s the kind of recipe you can make on a whim, on a Tuesday night, when you need a little comfort. And honestly, isn’t that what cookies are all about?
I’d love to hear how yours turn out. Did you try any of the variations? Did you add your own twist? Drop a comment below and let me know. Share this recipe with a friend who needs a little sweetness in their life. And remember—the best cookie is the one you share with someone you love. Happy baking!
Frequently Asked Questions
Can I double this recipe to make 12 cookies?
Absolutely! Simply double all the ingredients. The baking time and temperature remain the same. Just make sure your mixing bowl is large enough to accommodate the doubled dough.
Why did my cookies spread too much?
This usually happens if the butter was too warm or the dough wasn’t rested. Make sure your melted butter has cooled for 2-3 minutes before mixing. Also, don’t skip the 10-minute dough rest—it helps prevent excessive spreading.
Can I use margarine instead of butter?
I don’t recommend it. Butter gives these cookies their signature flavor and texture. Margarine has a higher water content, which can make the cookies spread more and turn out greasy. Stick with real butter for the best results.
How do I make these cookies softer?
For softer cookies, reduce the baking time by 1 minute and let them cool completely on the baking sheet. You can also replace 1 tablespoon of granulated sugar with an extra tablespoon of brown sugar—the extra moisture keeps them soft.
Can I make the dough ahead of time?
Yes! You can prepare the dough, scoop it into balls, and refrigerate them for up to 48 hours. Let the dough balls sit at room temperature for 10 minutes before baking. Chilled dough actually produces thicker, more flavorful cookies.
Pin This Recipe!

Easy Small Batch Chocolate Chip Cookies: Best 6-Cookie Recipe
This small batch chocolate chip cookies recipe yields exactly six perfect cookies with crispy edges, chewy centers, and melty chocolate pockets. Made with simple ingredients and straightforward steps, it’s the ideal solution for a sudden cookie craving without a mountain of dough.
- Total Time: 25 minutes
- Yield: 6 cookies 1x
Ingredients
- 3 tablespoons (42g) unsalted butter, melted and slightly cooled
- 2 tablespoons (25g) granulated sugar
- 2 tablespoons (25g) light brown sugar, packed
- 1 large egg yolk
- 1/2 teaspoon vanilla extract
- 1/4 cup plus 2 tablespoons (48g) all-purpose flour
- 1/4 teaspoon baking soda
- 1/4 teaspoon salt
- 1/4 cup plus 2 tablespoons (70g) semi-sweet chocolate chips
Instructions
- Preheat your oven to 350°F (175°C). Line a baking sheet with parchment paper.
- Melt the butter in a microwave-safe bowl in 15-second bursts until just melted. Let it cool for 2-3 minutes.
- In a mixing bowl, combine the melted butter, granulated sugar, and brown sugar. Whisk until well combined and the mixture looks like wet sand (about 30 seconds).
- Add the egg yolk and vanilla extract. Whisk vigorously for about 1 minute until the mixture is lighter in color and slightly thickened.
- Sprinkle the flour, baking soda, and salt over the wet mixture. Fold with a rubber spatula until just combined and no streaks of flour remain.
- Fold in the chocolate chips until evenly distributed. Optionally, press a few extra chips onto the tops of the dough balls after scooping.
- Cover the bowl with plastic wrap and let the dough rest at room temperature for 10-15 minutes.
- Using a 1.5-tablespoon cookie scoop or two spoons, portion the dough into 6 equal balls. Place them on the prepared baking sheet, spacing them about 2 inches apart.
- Bake on the middle rack for 9-11 minutes. The edges should be golden brown and the centers slightly underdone and puffy.
- Let the cookies cool on the baking sheet for 5 minutes, then transfer to a wire rack to cool completely.
Notes
Don’t skip the dough resting time—it prevents excessive spreading and gives thicker, chewier cookies. Use room temperature egg yolk to avoid seizing the melted butter. Start checking cookies at 9 minutes; they should look slightly underdone in the center as they’ll continue cooking on the hot baking sheet. For bakery-style tops, press extra chocolate chips onto the dough balls before baking. Store leftovers in an airtight container at room temperature for up to 3 days; add a slice of bread to keep them soft. Baked cookies can be frozen for up to 3 months.
- Prep Time: 15 minutes
- Cook Time: 10 minutes
- Category: Dessert
- Cuisine: American
Nutrition
- Serving Size: 1 cookie
- Calories: 185
- Sugar: 15
- Sodium: 135
- Fat: 10
- Saturated Fat: 6
- Carbohydrates: 23
- Fiber: 1
- Protein: 2
Keywords: small batch chocolate chip cookies, 6 cookie recipe, easy chocolate chip cookies, bakery style cookies, chewy chocolate chip cookies