
My sister-in-law wasn’t trying to impress anyone. I’d stopped by to drop off a casserole dish she’d lent me, and the smell of chocolate and vanilla hit me before I even got through the front door. There she was, standing at her kitchen counter with a bowl of cake crumbs and frosting, rolling little balls between her palms like she’d done it a thousand times before.
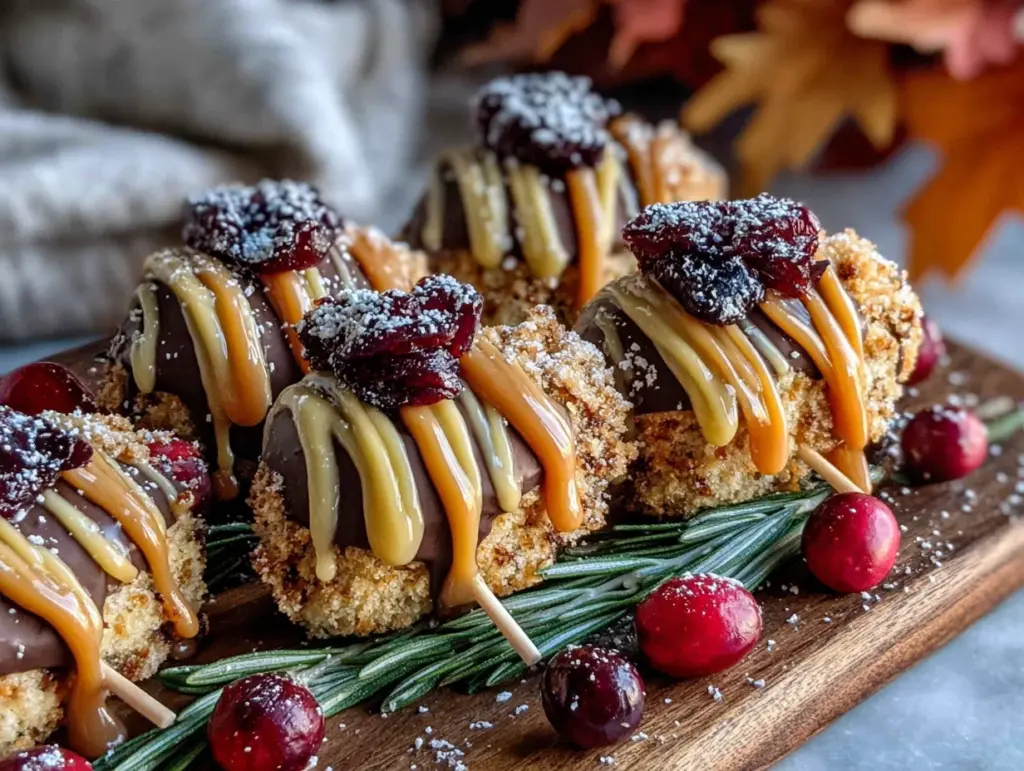
“Oh, those are just for the kids’ school party,” she said when I asked what she was making. Just for the kids’ school party. She said it like it was nothing, like she wasn’t creating the most adorable things I’d ever seen sitting on a baking sheet. Little turkey bodies made out of cake pops, complete with candy corn feathers and candy eyes staring up at me. Honestly, I stood there for a good five minutes just watching her work, completely mesmerized.
She let me help with the last few, and I’ll never forget how the chocolate coating felt warm against my fingertips as I dipped each one. Maybe you’ve been there, standing in someone else’s kitchen, realizing you’re witnessing pure magic disguised as an afternoon snack project. That day changed how I think about holiday treats forever. These festive Thanksgiving turkey cake pops aren’t complicated, and that’s exactly what makes them so special.
Why You’ll Love This Recipe
Let me tell you why these little turkeys have become my go-to for every Thanksgiving gathering. I’ve tested this recipe at least six times now, tweaking the chocolate-to-frosting ratio and experimenting with different candy combinations, until I got it just right.
- Quick & Easy: From start to finish, you’re looking at about 45 minutes of active work. The rest is just chilling time, which means you can multitask while they set.
- Simple Ingredients: Cake mix, frosting, candy melts, and a few decorative candies. That’s it. No fancy grocery store runs or specialty items you’ll never use again.
- Perfect for Thanksgiving: Whether it’s the kids’ table at the big dinner or a classroom party, these little guys steal the show every single time.
- Crowd-Pleaser: I’ve watched grown adults fight over the last one. There’s something about food on a stick that makes everyone happy.
- Unbelievably Adorable: The candy corn feathers and candy eyes give these turkey cake pops a personality that’s impossible to resist.
What makes this recipe different from all the others? It’s the texture. I use a specific ratio of frosting to cake crumbs that gives you a dense, fudge-like center that holds its shape perfectly. No crumbling, no falling apart, no frustration. Plus, I’ve figured out the trick to getting the chocolate coating smooth without any weird streaks or bubbles.
These aren’t just cute, they’re the kind of treat that makes you feel like a holiday hero. You know that feeling when someone takes a bite and their eyes go wide? That’s what we’re going for here.
What Ingredients You Will Need
This recipe uses simple, familiar ingredients that come together to create something truly special. Most of these are probably already sitting in your pantry or fridge, which makes this a last-minute lifesaver when you need a quick Thanksgiving contribution.
For the Cake Pops
- 1 box chocolate cake mix (I prefer Duncan Hines for its moist texture)
- Ingredients listed on the cake mix box (typically eggs, oil, and water)
- 1/2 cup cream cheese frosting, room temperature (store-bought is fine, or use my homemade recipe)
For the Coating
- 16 oz orange candy melts (Wilton brand works great)
- 1 tablespoon coconut oil or shortening (for thinning the coating)
For the Decorations
- Candy corn (for the feathers)
- Candy eyeballs (the little white ones with black pupils)
- Orange jelly beans or orange M&Ms (for the beak)
- Red candy melts or red fruit leather (for the wattle, that little red dangly bit under the beak)
- Lollipop sticks (the 6-inch ones work best)
A quick note on the candy melts: don’t skip the coconut oil or shortening. I learned this the hard way when my first batch came out thick and lumpy. A little fat makes the coating silky smooth and gives you that perfect dip every time.
For the cake, you can use any flavor you like. I stick with chocolate because it contrasts beautifully with the orange coating and candy corn, but vanilla or red velvet work just as well. If you’re feeling ambitious, make the cake from scratch. I’ve done it both ways, and honestly, the box mix version is just as good for this application.
Equipment Needed
You don’t need a professional bakery setup for these turkey cake pops, but a few specific tools will make your life much easier.
- Large baking sheet lined with parchment paper
- Medium mixing bowl
- Electric hand mixer or stand mixer
- Lollipop sticks (at least 24 of them)
- Styrofoam block or cardboard box for drying the pops upright
- Small microwave-safe bowl for melting candy
- Toothpicks (for adjusting decorations)
- Cookie scoop or tablespoon measure (for uniform cake balls)
If you don’t have a Styrofoam block, don’t worry. I’ve used a cardboard box with holes poked in it more times than I can count. You can also stick the pops into an upside-down colander or even a thick piece of floral foam wrapped in foil. Get creative with what you have.
One thing I recommend splurging on is a good candy melting pot if you plan to make these regularly. I bought one after my third batch and wondered why I hadn’t done it sooner. It keeps the candy at the perfect temperature and saves you from having to reheat every few minutes.
Preparation Method
Let’s walk through this step by step. I’ve broken it down so even a beginner can follow along without any stress.
- Bake the cake: Prepare the chocolate cake mix according to the package directions. Bake in a 9×13 inch pan and let it cool completely. This is important, friends. Warm cake crumbs mixed with frosting turn into a sticky, unworkable mess. Give it at least an hour to cool down.
- Crumble the cake: Once the cake is completely cool, crumble it into a large mixing bowl using your hands or a fork. You want fine, even crumbs with no large chunks. This takes about 3-4 minutes of patient crumbling.
- Add the frosting: Add the cream cheese frosting to the cake crumbs. Mix with your hands until everything comes together like a soft dough. The mixture should hold together when you squeeze it in your palm. If it’s too dry, add a teaspoon more frosting. If it’s too sticky, add a few more cake crumbs.
- Shape the balls: Roll the mixture into 1-inch balls and place them on the parchment-lined baking sheet. You should get about 24 balls from this batch. Pop them in the refrigerator for 30 minutes to firm up.
- Prepare the coating: While the balls chill, melt the orange candy melts in a microwave-safe bowl. Heat in 30-second intervals, stirring between each, until smooth. Stir in the coconut oil or shortening until the mixture is thin enough to dip easily.
- Insert the sticks: Remove the chilled cake balls from the fridge. Dip the tip of each lollipop stick into the melted candy, then insert it about halfway into a cake ball. This acts like glue and keeps the pop from sliding off later.
- Chill again: Place the pops back in the fridge for another 15 minutes. This step is crucial. The candy glue needs to set before you dip the whole pop.
- Dip the pops: Hold each pop by the stick and dip it into the melted orange candy, covering the entire cake ball. Gently tap the stick on the edge of the bowl to let excess candy drip off. Don’t swirl it around or you’ll introduce air bubbles.
- Set the pops: Stick the pops into your Styrofoam block or drying setup. Let them set completely, about 10-15 minutes at room temperature.
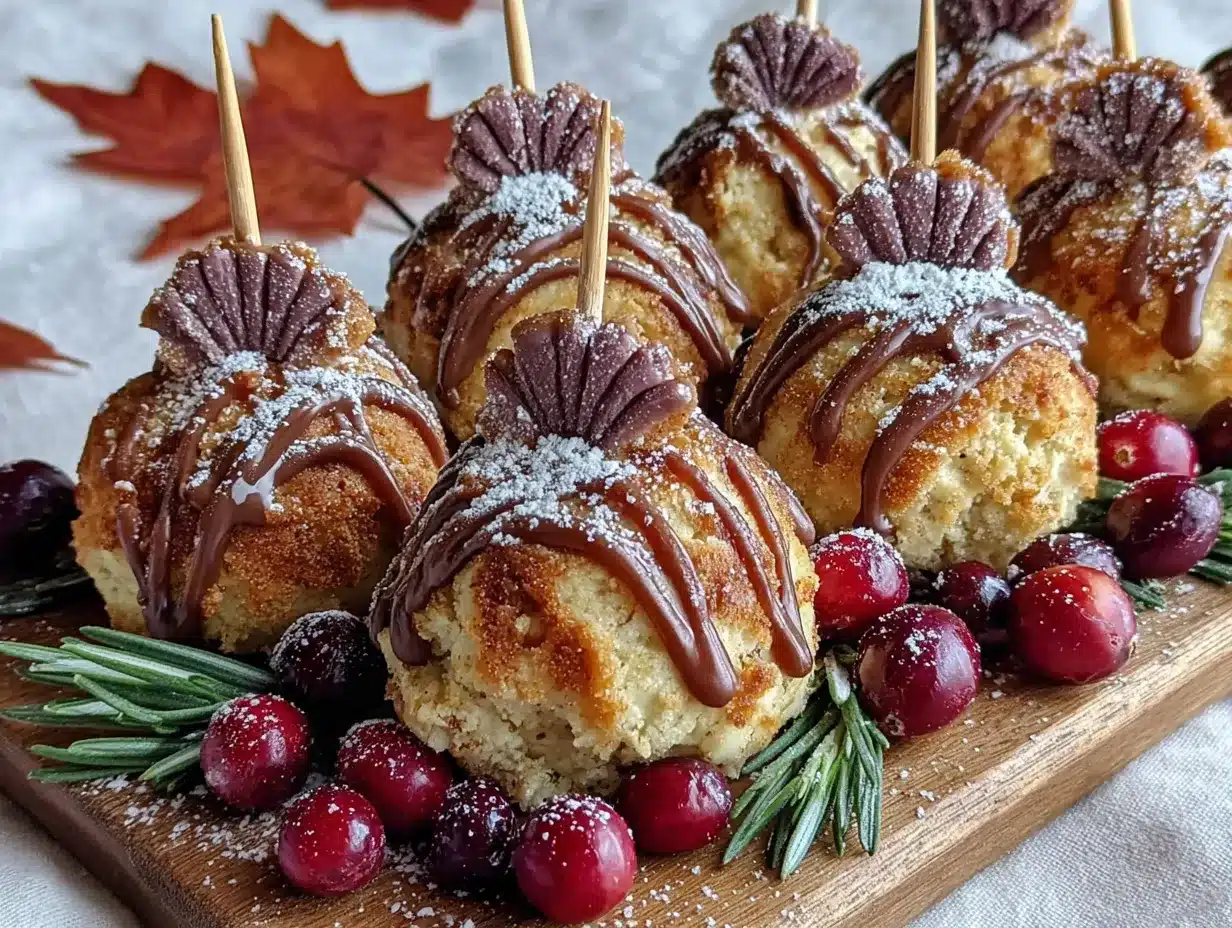
- Decorate the turkeys: While the coating is still slightly tacky, add the candy corn feathers in a fan pattern on the back of each pop. Place two candy eyeballs on the front. Add an orange jelly bean for the beak and a small piece of red candy for the wattle. Use a toothpick dipped in melted candy to attach anything that won’t stick on its own.
A few things to watch for: if your candy coating starts to thicken while you’re working, pop it back in the microwave for 10 seconds. If the cake balls start to crack when you insert the sticks, let them warm up for a minute at room temperature. And if you’re anything like me, you’ll probably eat at least two cake balls before they ever make it to the coating stage. That’s fine, I promise.
Cooking Tips & Techniques
After making these festive Thanksgiving turkey cake pops more times than I care to count, I’ve collected a few tricks that separate the good batches from the great ones.
Temperature is everything. The cake balls need to be cold when you dip them, but not frozen. If they’re too cold, the candy coating will crack as it sets. If they’re too warm, the coating will slide right off. I aim for that sweet spot where the balls feel firm but not rock hard, usually after about 30 minutes in the fridge.
Don’t overmix the cake and frosting. I made this mistake on my second attempt. I kept mixing and mixing, trying to get everything perfectly combined, and ended up with a greasy, dense texture that tasted more like frosting than cake. You want the mixture to just come together, with some tiny cake crumb texture still visible.
The candy melt thickness test. Here’s how I know if my coating is ready: I dip a spoon in and let it drip. If the candy flows off in a steady stream without breaking into drops, it’s perfect. If it comes off in thick globs, it needs more thinning. If it runs off like water, you’ve added too much oil and need to start over with fresh candy.
Work in small batches. Only take 4-5 cake balls out of the fridge at a time. If you take them all out at once, they’ll warm up and start sweating, which makes the candy coating bubble and peel. I learned this one the hard way during a particularly ambitious Thanksgiving prep session.
The toothpick trick. When placing candy eyeballs or other small decorations, use a toothpick dipped in a tiny bit of melted candy to pick up and position each piece. Your fingers will thank you, and the decorations will stay put much better.
Variations & Adaptations
One of the best things about these turkey cake pops is how easy they are to customize. I’ve tried several variations over the years, and each one brings something different to the table.
Gluten-Free Version: Swap the regular cake mix for a gluten-free chocolate cake mix. All the other ingredients are naturally gluten-free, including the candy melts and decorations. I’ve tested this with King Arthur’s gluten-free mix and it works beautifully.
Flavor Variations: Try vanilla cake with cream cheese frosting for a lighter flavor profile that pairs wonderfully with the orange coating. Or go with red velvet for a richer, more decadent treat that looks stunning against the bright orange candy.
Different Candy Feathers: Not a fan of candy corn? Use colored candy melts to pipe feather shapes directly onto parchment paper. Let them set, then attach them to the pops. I did this one year when I couldn’t find candy corn anywhere, and honestly, they looked even more impressive.
Mini Version: Make smaller cake balls, about the size of a walnut, and use shorter lollipop sticks. These mini turkey cake pops are perfect for kids’ parties or as edible place card holders for your Thanksgiving table.
Chocolate Coating: For a completely different look, use chocolate candy melts instead of orange. Add candy corn feathers and the same face decorations, and you’ve got a more sophisticated version that adults tend to gravitate toward.
Serving & Storage Suggestions
These turkey cake pops are best served at room temperature, which is when the cake center is soft and fudge-like and the candy coating has a satisfying snap. I usually take them out of the fridge about 15 minutes before serving.
For presentation, I like to arrange them in a small vase or mason jar filled with decorative beans or rice to hold the sticks upright. They make a fantastic centerpiece for the kids’ table or a dessert buffet. You can also wrap each pop individually in cellophane bags tied with a ribbon for party favors that guests will actually fight over.
Storage is simple. Place the finished pops in an airtight container in the refrigerator for up to one week. Make sure they’re completely set before stacking them, and use parchment paper between layers to prevent sticking. I don’t recommend freezing these, as the candy coating can develop condensation and lose its shine when thawed.
If you’re making these ahead of time for Thanksgiving, prepare the undipped cake balls up to three days in advance and keep them in the fridge. Dip and decorate them the day before your event for the freshest results. The flavors actually meld together beautifully overnight, so they taste even better on day two.
Nutritional Information & Benefits
Let’s be honest, these are a treat, not a health food. But I believe in enjoying the holidays without guilt, and everything in moderation is my personal philosophy.
Each turkey cake pop contains approximately 180-200 calories, with about 8 grams of fat, 28 grams of carbohydrates, and 2 grams of protein. The exact numbers will vary depending on the specific brands and ingredients you use.
On the bright side, dark chocolate cake mix provides a small amount of antioxidants, and the cream cheese frosting adds a touch of calcium and protein. The candy corn, while mostly sugar, does bring a smile to everyone’s face, and that counts for something in my book.
For those with dietary restrictions, this recipe contains gluten, dairy, and eggs. I’ve included gluten-free and dairy-free variations in the section above that work wonderfully. Always check the labels on your candy melts and decorations, as some brands may contain allergens you need to avoid.
Conclusion
These festive Thanksgiving turkey cake pops have become a tradition in my house, and I hope they become one in yours too. There’s something magical about creating little edible turkeys that make everyone smile, from the youngest kid at the table to the grumpiest uncle who claims he doesn’t like sweets.
What I love most about this recipe is how forgiving it is. Your first batch might not look perfect, and that’s okay. Mine certainly didn’t. But each time you make them, you’ll get a little faster, a little neater, and a lot more confident. And honestly, even the imperfect ones taste amazing.
I’d love to hear how yours turn out. Did you try a different flavor combination? Did your kids help with the decorating? Drop a comment below and share your creations. Tag me in your photos on social media, because nothing makes my day like seeing these little turkeys come to life in someone else’s kitchen.
Happy Thanksgiving, friends. May your table be full, your turkey be juicy, and your cake pops be absolutely adorable.
Frequently Asked Questions
Can I use a different cake flavor?
Absolutely. Vanilla, red velvet, lemon, or even spice cake all work beautifully with this recipe. Just make sure whatever flavor you choose is fully cooled before you crumble it.
Why did my candy coating crack?
This usually happens when the cake balls are too cold when you dip them. Let them sit at room temperature for 5-10 minutes before dipping. If the coating still cracks, try adding a bit more coconut oil to thin it out.
How far in advance can I make these?
You can make the undipped cake balls up to three days ahead and store them in the fridge. Dip and decorate them the day before you plan to serve them for the freshest appearance and best texture.
Can I freeze turkey cake pops?
I don’t recommend freezing them once they’re decorated. The candy coating can develop condensation when thawed, which ruins the shiny finish and can make the decorations slide off.
What if I can’t find candy corn?
No problem at all. Use colored candy melts to pipe feather shapes onto parchment paper, let them set, and attach them to the pops. You can also use small pretzel sticks arranged in a fan pattern for a salty-sweet version.
Pin This Recipe!

Best Homemade Thanksgiving Turkey Cake Pops
These adorable turkey cake pops feature a dense, fudge-like chocolate center coated in orange candy melts, decorated with candy corn feathers and candy eyes. Perfect for Thanksgiving gatherings, they are quick to make and sure to be a crowd-pleaser.
- Total Time: 1 hour 15 minutes
- Yield: 24 servings 1x
Ingredients
- 1 box chocolate cake mix (preferably Duncan Hines)
- Ingredients listed on the cake mix box (typically eggs, oil, and water)
- 1/2 cup cream cheese frosting, room temperature
- 16 oz orange candy melts (Wilton brand works great)
- 1 tablespoon coconut oil or shortening
- Candy corn (for the feathers)
- Candy eyeballs
- Orange jelly beans or orange M&Ms (for the beak)
- Red candy melts or red fruit leather (for the wattle)
- Lollipop sticks (6-inch ones work best)
Instructions
- Bake the chocolate cake mix according to package directions in a 9×13 inch pan. Let it cool completely (at least 1 hour).
- Crumble the cooled cake into a large mixing bowl using your hands or a fork until you have fine, even crumbs.
- Add the cream cheese frosting to the cake crumbs and mix with your hands until the mixture holds together like a soft dough when squeezed.
- Roll the mixture into 1-inch balls and place on a parchment-lined baking sheet. Refrigerate for 30 minutes to firm up.
- While the balls chill, melt the orange candy melts in a microwave-safe bowl in 30-second intervals, stirring between each, until smooth. Stir in the coconut oil or shortening until thin enough to dip.
- Remove the chilled cake balls from the fridge. Dip the tip of each lollipop stick into the melted candy, then insert it about halfway into a cake ball. Place back in the fridge for another 15 minutes.
- Hold each pop by the stick and dip it into the melted orange candy, covering the entire cake ball. Gently tap the stick on the edge of the bowl to let excess drip off.
- Stick the pops into a Styrofoam block or drying setup and let them set completely, about 10-15 minutes at room temperature.
- While the coating is still slightly tacky, add candy corn feathers in a fan pattern on the back, two candy eyeballs on the front, an orange jelly bean for the beak, and a small piece of red candy for the wattle. Use a toothpick dipped in melted candy to attach anything that won’t stick.
Notes
Temperature is key: cake balls should be cold but not frozen when dipping. Work in small batches to prevent sweating. Use a toothpick dipped in melted candy to place small decorations. If coating thickens, microwave for 10 seconds. Undipped cake balls can be made up to 3 days ahead and stored in the fridge.
- Prep Time: 45 minutes
- Cook Time: 30 minutes
- Category: Dessert
- Cuisine: American
Nutrition
- Serving Size: 1 cake pop
- Calories: 190
- Sugar: 18
- Sodium: 180
- Fat: 8
- Saturated Fat: 3
- Carbohydrates: 28
- Fiber: 1
- Protein: 2
Keywords: Thanksgiving, turkey cake pops, cake pops, holiday treats, chocolate cake pops, candy corn, festive desserts


