
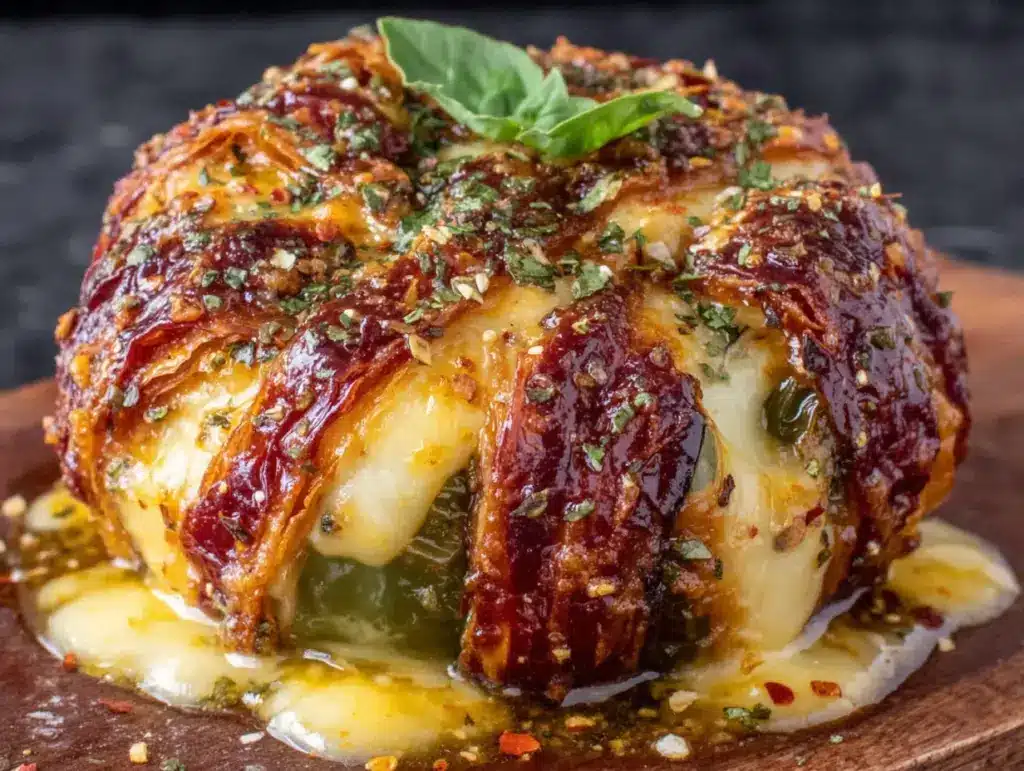
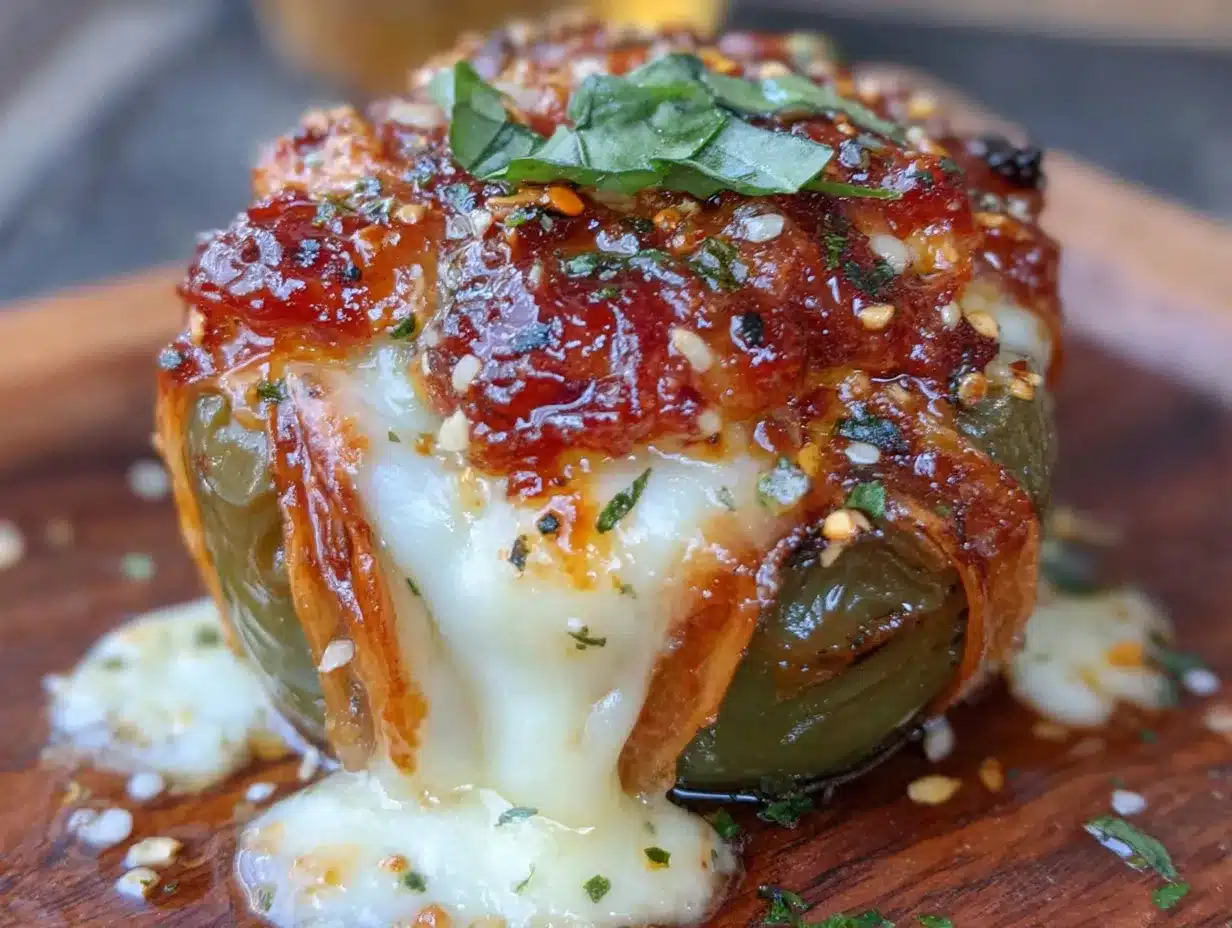
The way the mozzarella pulls—thin, elastic, unbroken—that’s the whole point of these Creamy Mummy Stuffed Peppers. I didn’t set out to make anything spooky, honestly. It was a Tuesday night, I had a block of mozzarella staring at me from the fridge, and a bag of bell peppers that needed using up before they got wrinkly. I just started cutting, and somehow, the idea of wrapping the peppers in strips of something felt right. Not for Halloween, not for a party, just for a dinner that felt a little more fun than usual.
These aren’t your typical stuffed peppers. You know the ones—heavy on the rice, sometimes dry, always a bit of a project. This version is creamy on the inside, with a filling that’s rich and satisfying, and the outside is where the magic happens. Strips of pepper hold a creamy, cheesy center, all wrapped up with a blanket of melted mozzarella that gets golden and bubbly in the oven. It’s the kind of meal that looks like you spent hours on it, but honestly, it comes together in under an hour. And that first bite, where the cheese stretches from the pan to your plate? That’s the moment it all makes sense.
I’ve made these Creamy Mummy Stuffed Peppers about six times now. The first time, the filling was too loose. The second time, I forgot to season the cream cheese. But by the third try, I had it right—a creamy, savory filling that stays put, pepper strips that soften just enough, and a mozzarella topping that turns into a crispy, golden crown. This is the recipe that stuck, the one I keep coming back to when I want something that feels special without the stress.
Why You’ll Love This Recipe
Let me tell you why this one is different. I’ve tested this recipe more times than I care to admit, and every version taught me something. The version I’m sharing today is the one that finally made me close my eyes after the first bite. Here’s why it works:
- Quick & Easy: Comes together in about 45 minutes, perfect for a weeknight when you want something that feels like a treat without spending hours in the kitchen.
- Simple Ingredients: No fancy grocery trips needed. You likely have everything in your kitchen right now—bell peppers, cream cheese, mozzarella, garlic, and a few seasonings.
- Perfect for Halloween or Any Night: Sure, these look like little mummies, but they’re not just for October. They’re great for dinner parties, cozy nights in, or when you just want to eat something that looks adorable and tastes incredible.
- Crowd-Pleaser: Kids love the mummy look, and adults love the creamy, cheesy filling. It’s a win-win.
- Unbelievably Delicious: The texture is what gets me every time. The peppers soften in the oven, the filling stays creamy, and the mozzarella on top gets that perfect golden-brown crust. It’s comfort food at its finest.
What makes this recipe different from the rest? It’s the technique. Instead of stuffing whole peppers with rice and meat, we’re cutting the peppers into strips and wrapping them around a creamy filling. This means every bite has the perfect ratio of pepper to filling to cheese. No dry ends, no boring bites. It’s a simple twist that changes everything.
This isn’t just another stuffed pepper recipe. It’s the kind of dish that makes you text a photo to your friends. It’s comfort food reimagined—healthier, faster, but with the same soul-soothing satisfaction. Perfect for impressing guests without stress, or turning a simple Tuesday into something memorable.
What Ingredients You Will Need
This recipe uses simple, wholesome ingredients that come together to create something truly special. The beauty is in the balance—creamy, savory, and just a little bit indulgent. Here’s what you’ll need:
For the Peppers
- 4 large bell peppers (any color works, but red or orange add sweetness; look for peppers that are wide and squat, not tall and narrow, so they hold the filling better)
- 2 tablespoons olive oil (for roasting the pepper strips; I prefer extra virgin for flavor)
- 1 teaspoon salt (kosher salt is best for even seasoning)
- ½ teaspoon black pepper (freshly ground, always)
For the Creamy Filling
- 8 ounces cream cheese (softened to room temperature; this is crucial for a smooth filling—trust me, I learned the hard way)
- ½ cup ricotta cheese (whole milk ricotta gives the creamiest texture; part-skim works too, but it won’t be as rich)
- 1 cup shredded mozzarella (low-moisture mozzarella, the kind you buy in a bag; fresh mozzarella is too watery here)
- ¼ cup grated Parmesan cheese (adds a salty, nutty depth that balances the creaminess)
- 2 cloves garlic (minced; I use a microplane for the finest texture, but a knife works fine)
- 1 teaspoon dried oregano (or 1 tablespoon fresh, chopped)
- ½ teaspoon red pepper flakes (optional, for a little heat; I add it because I like the contrast)
- ¼ cup chopped fresh parsley (for freshness and color; flat-leaf parsley is best)
- 1 large egg (lightly beaten; this helps bind the filling so it doesn’t fall apart)
For the Topping
- 1 ½ cups shredded mozzarella (for the mummy wraps; use the same low-moisture kind)
- 2 tablespoons cream cheese (softened; this helps the topping stay creamy and not dry out)
- Optional: black olives or peppercorns (for making eyes on the mummies; totally optional, but fun)
Ingredient Tips: I recommend using Philadelphia cream cheese for the smoothest texture—it melts beautifully and doesn’t get grainy. For the ricotta, look for a brand like Galbani or Whole Foods 365; they have a good balance of creaminess and structure. If you’re dairy-free, you can use dairy-free cream cheese and mozzarella, but the texture will be slightly different—still good, just not as stretchy.
Equipment Needed
You don’t need a lot of fancy equipment for this recipe, which is part of why I love it. Here’s what you’ll need:
- Baking dish (a 9×13-inch dish works perfectly; glass or ceramic is best because it heats evenly)
- Sharp knife (for cutting the peppers into strips; a chef’s knife is ideal)
- Cutting board (a large wooden or plastic board for prep)
- Mixing bowls (one medium bowl for the filling, one small bowl for the topping)
- Spatula (a rubber spatula for mixing the filling; a wooden spoon works too, but the spatula gets every last bit)
- Measuring cups and spoons (for accuracy; I’m a big believer in measuring, especially with cheese)
- Oven (preheated to 375°F; a convection oven works great but reduce the temperature by 25°F)
- Parchment paper (optional, but it makes cleanup a breeze; I use it every time)
Budget-Friendly Tip: If you don’t have a 9×13-inch dish, a cast-iron skillet works beautifully. Just make sure it’s at least 10 inches wide so the peppers have room to breathe. I’ve also used a round cake pan in a pinch—it works, but the peppers will be a little more crowded.
Preparation Method
Let’s get cooking. I’ve broken this down into clear steps so you can follow along without any stress. Take your time, and don’t skip the sensory cues—they’re your best friend here.
- Preheat your oven to 375°F (190°C). While the oven heats, line your baking dish with parchment paper if you’re using it. This step isn’t mandatory, but I promise you’ll thank me later when cleanup takes two seconds.
- Prepare the peppers. Wash and dry the bell peppers. Cut each pepper in half lengthwise, then remove the stem, seeds, and white membranes. Now, cut each half into 3-4 strips, about 1.5 inches wide. You want strips that are wide enough to hold the filling but thin enough to roll. Aim for 12-16 strips total. Toss the strips in a bowl with 2 tablespoons olive oil, 1 teaspoon salt, and ½ teaspoon black pepper. Set aside.
- Make the creamy filling. In a medium mixing bowl, combine 8 ounces softened cream cheese, ½ cup ricotta, 1 cup shredded mozzarella, ¼ cup grated Parmesan, 2 minced garlic cloves, 1 teaspoon dried oregano, ½ teaspoon red pepper flakes (if using), and ¼ cup chopped parsley. Add the beaten egg and mix everything together with a rubber spatula until smooth and fully combined. The mixture should be thick and spreadable, not runny. If it looks too loose, add a tablespoon more mozzarella.
- Assemble the mummies. Take one pepper strip and place it on your work surface. Spoon about 2 tablespoons of the filling onto the center of the strip. Gently wrap the pepper strip around the filling, overlapping the edges slightly. The filling should be completely enclosed by the pepper. Place the wrapped mummy seam-side down in the prepared baking dish. Repeat with the remaining pepper strips and filling. You should have 12-16 mummies, depending on how many strips you got.
- Make the mozzarella topping. In a small bowl, mix 1 ½ cups shredded mozzarella with 2 tablespoons softened cream cheese. Use your fingers or a fork to combine them until the cream cheese is evenly distributed. This mixture will melt into a golden, bubbly blanket that looks like mummy wrappings.
- Top the mummies. Sprinkle the mozzarella mixture evenly over the assembled mummies. Don’t press it down—just let it fall naturally over the tops. If you’re making eyes, place two black olive slices or peppercorns on each mummy now, pressing them gently into the cheese.
- Bake. Place the dish in the preheated oven and bake for 25-30 minutes, or until the cheese is melted, bubbly, and golden brown on top. The peppers should be tender but still hold their shape—you don’t want them mushy. At 25 minutes, check the dish: the cheese should be golden in spots, and the filling should be hot all the way through. If the cheese isn’t browning, broil for 1-2 minutes at the end, but watch it closely—it burns fast.
- Rest and serve. Remove the dish from the oven and let it rest for 5 minutes. This is important—the filling needs a moment to set so it doesn’t ooze out when you cut into it. Serve warm, with extra parsley on top if you like.
Sensory Cues: When you’re mixing the filling, it should smell like garlic and herbs—earthy and inviting. When the peppers are roasting, you’ll smell their sweetness mingling with the olive oil. And when the mozzarella starts to brown, the kitchen will smell like a pizzeria. That’s your cue that dinner is almost ready.
Cooking Tips & Techniques
I’ve made this recipe enough times to know where things can go wrong. Here are my best tips for getting it right every time:
- Soften the cream cheese properly. This is the number one mistake I made. If the cream cheese is too cold, it won’t mix smoothly into the filling, and you’ll end up with lumps. Leave it on the counter for at least 30 minutes before you start. If you’re in a hurry, microwave it in 10-second bursts until it’s soft but not melted.
- Don’t overfill the pepper strips. It’s tempting to pile on the filling, but if you add too much, the peppers won’t close properly, and the filling will leak out during baking. Stick to about 2 tablespoons per strip. You want a nice, plump mummy that’s fully enclosed.
- Use low-moisture mozzarella for the topping. Fresh mozzarella has too much water, which will make the topping soggy instead of golden and bubbly. Low-moisture mozzarella melts beautifully and gets those perfect brown spots. I’ve tested both, and low-moisture wins every time.
- Let the mummies rest after baking. I know it’s hard to wait, but those 5 minutes make a huge difference. The filling firms up, the cheese sets, and the flavors meld together. If you cut into them too soon, you’ll have a messy plate and a less satisfying bite.
- Multitask like a pro. While the peppers are roasting (if you roast them separately), you can make the filling. Or, if you’re short on time, skip the pre-roasting and just assemble everything raw—the peppers will cook in the oven just fine. I’ve done it both ways, and the texture is slightly different, but both are delicious.
Variations & Adaptations
One of the best things about this recipe is how easy it is to adapt. Here are some of my favorite variations:
- Meat Lover’s Version: Add ½ cup cooked ground beef, Italian sausage, or shredded chicken to the creamy filling. Brown the meat first, let it cool slightly, then mix it in. The meat adds heartiness and makes this a full meal.
- Vegetarian & Vegan Version: Use dairy-free cream cheese, ricotta, and mozzarella. I’ve tested this with Kite Hill brand cream cheese and Daiya mozzarella, and it worked well—though the texture is slightly less stretchy. Add a handful of sautéed mushrooms or spinach to the filling for extra flavor.
- Spicy Kick: Add 1-2 tablespoons of chopped pickled jalapeños or a teaspoon of chipotle powder to the filling. The smoky heat pairs beautifully with the creamy cheese and sweet peppers. I made this version for a game day party, and it disappeared in minutes.
- Italian Herb Twist: Swap the oregano for a mix of basil, thyme, and rosemary. Add a tablespoon of sun-dried tomato pesto to the filling for an extra layer of flavor. This version feels more like a fancy restaurant dish.
- Low-Carb/Keto Version: This recipe is already low in carbs—peppers have about 5g net carbs per serving. To make it keto, use full-fat cream cheese and ricotta, and skip the egg (or use a flax egg). Serve with a side salad for a complete meal.
Serving & Storage Suggestions
These Creamy Mummy Stuffed Peppers are best served warm, straight from the oven. The cheese is stretchy, the filling is creamy, and the peppers are tender. Here’s how to serve and store them:
- Serving Temperature: Serve hot, but let them rest for 5 minutes first. A side of marinara or pesto for dipping is always a good idea—it adds acidity that cuts through the richness.
- Complementary Dishes: These pair beautifully with a simple green salad dressed with lemon vinaigrette, or with a bowl of soup like our cozy French onion soup. For a heartier meal, serve with crispy rosemary sea salt bread to soak up any extra cheese.
- Storage: Store leftovers in an airtight container in the refrigerator for up to 4 days. The flavors actually meld together overnight, making them even better the next day. Reheat in the oven at 350°F for 10-15 minutes, or in the microwave for 1-2 minutes. The microwave will soften the cheese, so the oven is better for maintaining that golden crust.
- Freezing: These freeze beautifully. Assemble the mummies completely, but don’t bake them. Place them on a parchment-lined baking sheet and freeze until solid, then transfer to a freezer bag. They’ll keep for up to 3 months. To bake, add 10-15 minutes to the cooking time—no need to thaw first.
- Flavor Development: The filling gets even creamier after a day in the fridge. The herbs meld with the cheese, and the peppers soften slightly. I actually prefer these as leftovers—the flavors are more rounded and cozy.
Nutritional Information & Benefits
Here’s a rough estimate of the nutritional value per serving (based on 4 servings, with 3-4 mummies each):
- Calories: ~420
- Protein: 22g
- Fat: 32g
- Carbohydrates: 12g
- Fiber: 3g
- Sugar: 6g
Health Benefits: Bell peppers are packed with vitamin C—one serving provides over 150% of your daily needs. They’re also rich in antioxidants like beta-carotene and lutein, which support eye health. The cream cheese and ricotta add calcium and protein, while the garlic and oregano offer anti-inflammatory properties. This recipe is naturally gluten-free and can be made low-carb or keto with minimal adjustments. It’s a balanced meal that feels indulgent but is actually pretty good for you.
Dietary Considerations: This recipe is gluten-free, nut-free, and can be made vegetarian or vegan with substitutions. If you’re lactose intolerant, use dairy-free alternatives—just note that the texture will be slightly different. I’ve served this to friends with various dietary needs, and it’s always a hit.
Conclusion
These Creamy Mummy Stuffed Peppers are the kind of recipe that makes you feel like a kitchen genius without actually trying that hard. They’re fun, they’re delicious, and they’re surprisingly easy to pull off. Whether you’re making them for Halloween, a dinner party, or just a random Tuesday night, they deliver every single time.
I love this recipe because it’s proof that simple ingredients can create something truly special. The creamy filling, the tender peppers, the golden mozzarella—it all comes together in a way that’s greater than the sum of its parts. And honestly, the mummy look is just the cherry on top. It makes people smile, and that’s worth something.
I’d love to hear how yours turn out. Did you add meat? Try a different cheese? Forget the eyes and just eat them anyway? Drop a comment below and let me know. And if you’re looking for more cozy, comforting meals, check out our creamy loaded baked potato soup or our comforting shepherd’s pie. Happy cooking, friends!
Frequently Asked Questions
Can I make these ahead of time?
Absolutely. Assemble the mummies completely, cover the dish, and refrigerate for up to 24 hours before baking. Add 5-10 minutes to the baking time since you’re starting from cold. This is a great option for parties or busy weeknights.
Can I use a different type of pepper?
Yes! Mini sweet peppers work great for bite-sized appetizers. Poblano peppers add a mild heat, and shishito peppers are fun for a spicy twist. Just adjust the cooking time based on the size—smaller peppers need less time in the oven.
My filling came out too runny. What went wrong?
This usually happens if the cream cheese wasn’t softened enough, or if you added too much egg. Next time, make sure the cream cheese is at room temperature, and add the egg slowly, mixing until just combined. If it’s still runny, add a tablespoon of shredded mozzarella or Parmesan to thicken it.
Can I grill these instead of baking?
Yes! Preheat your grill to medium heat. Place the assembled mummies on a grill-safe pan or directly on the grates (if they’re sturdy enough). Grill for 15-20 minutes, covered, until the cheese is melted and the peppers have nice grill marks. The smoky flavor is incredible.
How do I get the mozzarella topping extra crispy?
For an extra-crispy top, broil the mummies for the last 2-3 minutes of baking. Watch them closely—the cheese can go from golden to burnt in seconds. You can also sprinkle a little extra Parmesan on top before broiling for an even crispier crust.
Pin This Recipe!
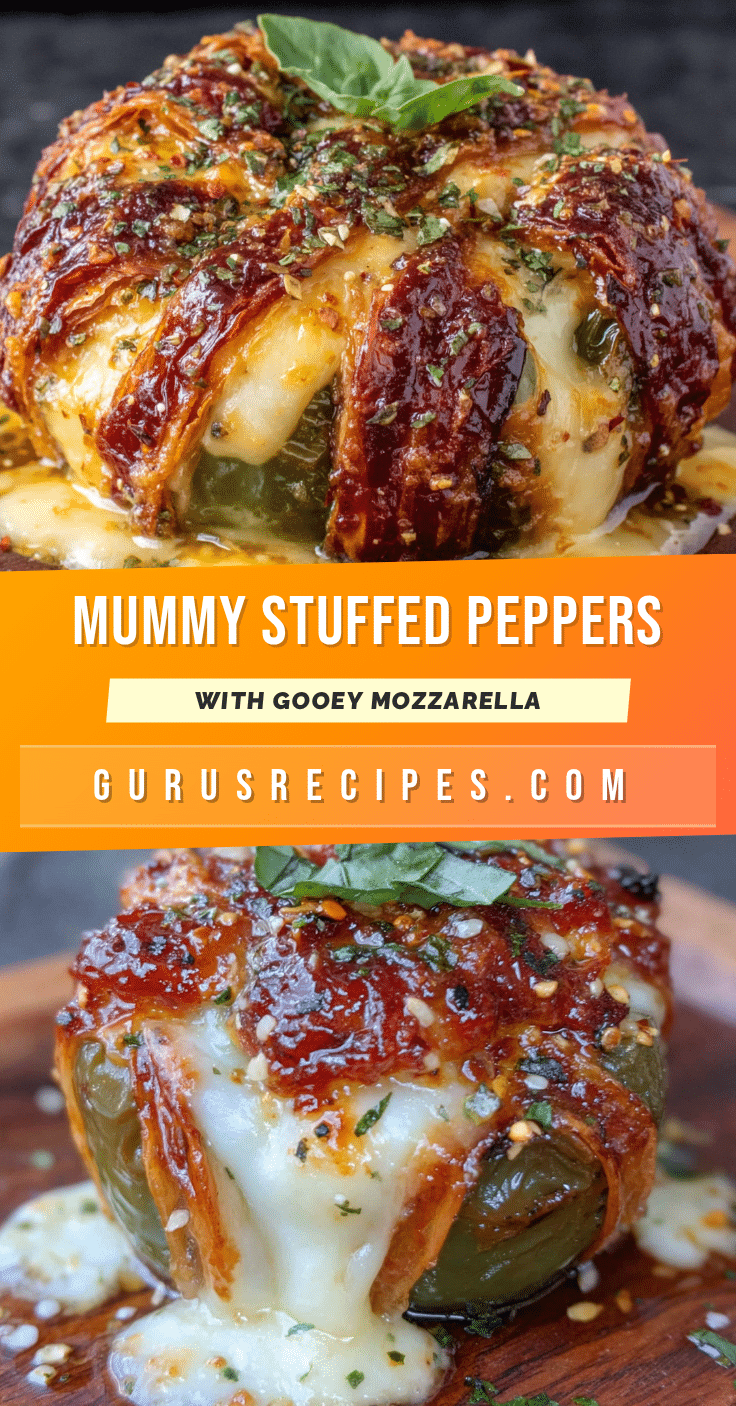

Creamy Mummy Stuffed Peppers: Easy Mozzarella Dinner
These Creamy Mummy Stuffed Peppers are a fun and delicious twist on classic stuffed peppers. Bell pepper strips are wrapped around a creamy, cheesy filling and topped with golden, bubbly mozzarella, creating a dish that’s perfect for Halloween or any night of the week.
- Total Time: 45 minutes
- Yield: 4 servings 1x
Ingredients
- 4 large bell peppers (any color, wide and squat)
- 2 tablespoons olive oil
- 1 teaspoon kosher salt
- ½ teaspoon freshly ground black pepper
- 8 ounces cream cheese, softened
- ½ cup whole milk ricotta cheese
- 1 cup shredded low-moisture mozzarella
- ¼ cup grated Parmesan cheese
- 2 cloves garlic, minced
- 1 teaspoon dried oregano
- ½ teaspoon red pepper flakes (optional)
- ¼ cup chopped fresh flat-leaf parsley
- 1 large egg, lightly beaten
- 1 ½ cups shredded low-moisture mozzarella (for topping)
- 2 tablespoons cream cheese, softened (for topping)
- Black olives or peppercorns (optional, for eyes)
Instructions
- Preheat oven to 375°F (190°C). Line a 9×13-inch baking dish with parchment paper if desired.
- Wash and dry bell peppers. Cut each pepper in half lengthwise, remove stem, seeds, and membranes. Cut each half into 3-4 strips, about 1.5 inches wide. Toss strips with olive oil, salt, and black pepper. Set aside.
- In a medium bowl, combine 8 ounces softened cream cheese, ricotta, 1 cup mozzarella, Parmesan, garlic, oregano, red pepper flakes (if using), parsley, and beaten egg. Mix with a rubber spatula until smooth and thick.
- Place one pepper strip on work surface. Spoon about 2 tablespoons of filling onto center. Wrap pepper strip around filling, overlapping edges slightly. Place seam-side down in prepared dish. Repeat with remaining strips and filling.
- In a small bowl, mix 1 ½ cups mozzarella with 2 tablespoons softened cream cheese until evenly distributed.
- Sprinkle mozzarella mixture evenly over assembled mummies. If using, place two olive slices or peppercorns on each mummy for eyes, pressing gently.
- Bake for 25-30 minutes, until cheese is melted, bubbly, and golden brown. If cheese isn’t browning, broil for 1-2 minutes, watching closely.
- Remove from oven and let rest for 5 minutes. Serve warm, with extra parsley if desired.
Notes
Soften cream cheese to room temperature for smooth filling. Use low-moisture mozzarella for best melting. Let mummies rest 5 minutes after baking to set filling. For extra crispy topping, broil last 2-3 minutes. Can be assembled up to 24 hours ahead and refrigerated; add 5-10 minutes to baking time.
- Prep Time: 15 minutes
- Cook Time: 30 minutes
- Category: Main Course
- Cuisine: American
Nutrition
- Serving Size: 3-4 mummies
- Calories: 420
- Sugar: 6
- Sodium: 800
- Fat: 32
- Saturated Fat: 18
- Carbohydrates: 12
- Fiber: 3
- Protein: 22
Keywords: stuffed peppers, mummy peppers, creamy stuffed peppers, mozzarella, Halloween dinner, easy dinner, bell peppers, cream cheese


