
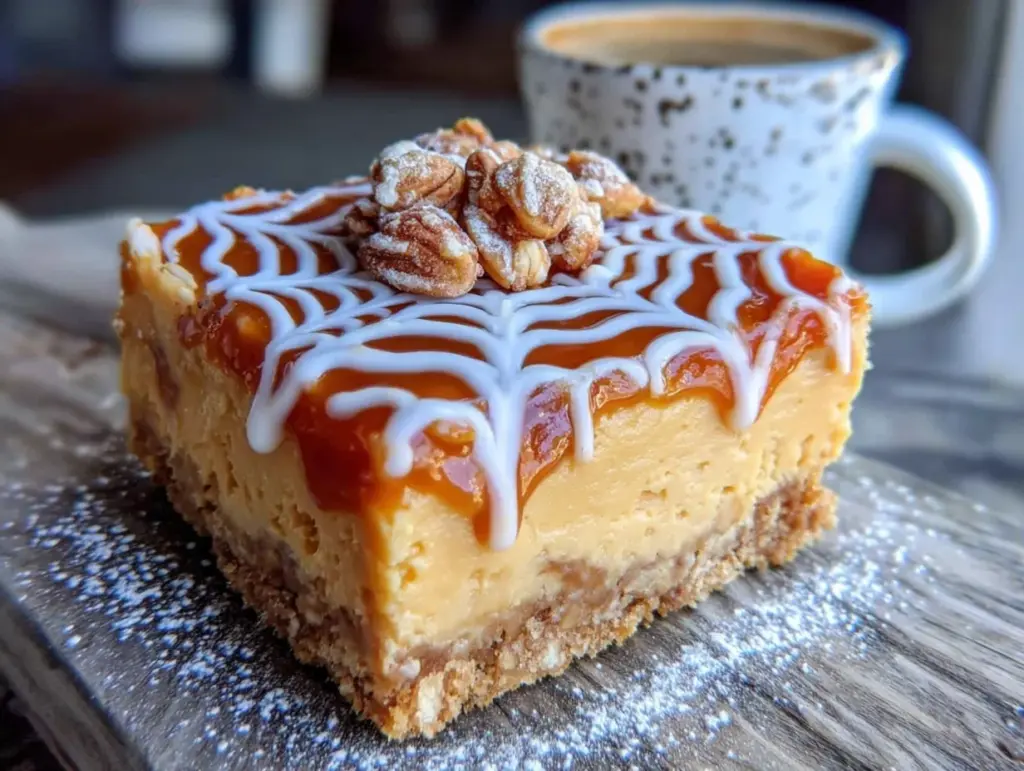
The crack on top. That’s what I was after. Not the creamy pumpkin layer underneath, not the buttery shortbread crust, not even the tangy cheesecake filling swirled with dark molasses. Just that one moment when the surface splits just enough to reveal something darker beneath, like a web catching the last bit of October light. I’d seen a picture somewhere—Pinterest, probably, late at night when I should have been sleeping—and I couldn’t stop thinking about it. Not the taste. The way it looked. That spiderweb pattern, delicate and intentional, like the dessert was daring you to take a bite.
So I spent a whole Sunday in my tiny kitchen, testing batch after batch of these Easy Spiderweb Pumpkin Cheesecake Bars. The first one? Total disaster. The web sank into the filling like a spider that had given up. The second one looked like a child’s art project. But the third—the third one had that crack. That beautiful, deliberate, spooky little web staring back at me. And honestly, the taste? It was almost beside the point. Almost. Because when you nail the look and the flavor, that’s when you know you’ve got something.
These bars are the kind of dessert you make when you want to impress without stress. They’re for the Halloween party where everyone shows up in costume, or the cozy Friendsgiving where you need something that looks like you tried harder than you actually did. I’ve made them for both. They work every time. And the best part? That spiderweb pattern is way easier than it looks. You’re basically just dragging a toothpick through chocolate. That’s it. No piping bags, no steady hands, no pastry school required.
Why You’ll Love This Recipe
I tested this recipe six times before I got it right. Six times. My neighbors probably thought I was running a pumpkin cheesecake factory out of my apartment. But here’s the thing—I learned something from every single failure. The first batch was too runny. The second had a crust that crumbled into dust. The third was actually pretty good, but the spiderweb sank into the filling like it was embarrassed. By batch number four, I had it figured out. By batch six, I was eating the scraps straight from the pan with a spoon, and I knew I had to share it with you.
- Quick & Easy: These come together in about 20 minutes of active prep time. The oven does the rest. Perfect for busy weeknights or last-minute Halloween gatherings.
- Simple Ingredients: Nothing fancy here. Canned pumpkin, cream cheese, eggs, sugar, and a little cocoa powder for that web. You probably already have most of this in your kitchen.
- Perfect for Fall Gatherings: Halloween parties, Thanksgiving dessert tables, cozy Sunday dinners—these bars fit right in. They’re festive without being fussy.
- Crowd-Pleaser: Kids love the spooky web design. Adults love the creamy, not-too-sweet filling. Everyone goes back for seconds.
- Unbelievably Delicious: The texture is what gets me every time. That buttery crust, the silky pumpkin cheesecake, the slight bitterness of the chocolate web cutting through the sweetness. It’s comfort food with a Halloween twist.
What makes these different from every other pumpkin cheesecake recipe out there? It’s the technique. I figured out that you have to let the cheesecake layer set up just a little bit before you add the spiderweb. If you do it too soon, the chocolate sinks. Too late, and it won’t spread. There’s a sweet spot—about 10 minutes into baking—and once you know it, you’ll nail it every single time. That’s the kind of insider knowledge you only get from making a recipe over and over until it’s perfect.
These bars are the kind of dessert that makes people close their eyes after the first bite. I’ve seen it happen. My friend Sarah took one bite at our Halloween party and just stood there, fork in hand, eyes shut, nodding. That’s the reaction you want. That’s the reaction this recipe delivers.
What Ingredients You Will Need
This recipe uses simple, wholesome ingredients to create something that looks way more complicated than it actually is. Most of these are pantry staples, especially if you do any kind of fall baking. Let me walk you through what you’ll need and why each one matters.
For the Crust:
- 1 ½ cups graham cracker crumbs (about 12 full sheets, crushed fine) — I prefer the cinnamon variety for extra warmth, but plain works great too.
- ¼ cup granulated sugar — just enough to sweeten the crust without making it candy-like.
- 6 tablespoons unsalted butter, melted — use real butter here, not margarine. The flavor difference is noticeable.
- Pinch of salt — balances the sweetness and keeps the crust from being one-dimensional.
For the Pumpkin Cheesecake Filling:
- 16 ounces cream cheese, softened to room temperature — this is non-negotiable. Cold cream cheese creates lumps that won’t smooth out. Let it sit on the counter for at least an hour.
- ¾ cup granulated sugar — sweet enough to balance the pumpkin and tangy cream cheese.
- 2 large eggs, room temperature — same rule as the cream cheese. Cold eggs can seize the batter.
- 1 cup canned pumpkin puree — not pumpkin pie filling. Make sure you grab the pure stuff. I like Libby’s for consistent results.
- 1 teaspoon vanilla extract — pure, not imitation. It makes a difference.
- 1 teaspoon pumpkin pie spice — or make your own with cinnamon, nutmeg, ginger, and cloves.
- ½ teaspoon cinnamon — because more cinnamon is always the answer.
- ¼ teaspoon salt — enhances all the flavors and keeps it from tasting flat.
For the Spiderweb:
- ¼ cup semi-sweet chocolate chips — I recommend Ghirardelli for smooth melting, but any good-quality chip works.
- 1 tablespoon heavy cream — helps the chocolate flow smoothly when you draw the web.
Substitution Notes: If you need a gluten-free version, use gluten-free graham crackers or crushed gluten-free cookies. For a dairy-free option, use dairy-free cream cheese and butter substitute—just know the texture will be slightly different. I’ve tried it with vegan cream cheese and it works, but the filling isn’t quite as silky.
One thing I learned the hard way: don’t skip the room temperature step. I know it’s annoying. I know you’re in a hurry. But cold ingredients create a lumpy, uneven filling that won’t bake properly. Trust me on this. I’ve made that mistake at least three times, and every time I regretted it.
Equipment Needed
You don’t need a fancy kitchen to make these bars. Here’s what you’ll actually use:
- 9×9-inch baking pan — this is the sweet spot for bar thickness. An 8×8 works too, but your bars will be slightly thicker and may need a few extra minutes of baking time.
- Parchment paper — line the pan with two overlapping sheets, leaving overhang on all sides. This makes lifting the bars out so much easier. I learned this trick after destroying my first batch trying to get them out of the pan.
- Mixing bowls — one large, one medium, one small. Nothing fancy.
- Electric hand mixer or stand mixer — you can do this by hand with some elbow grease, but a mixer makes the filling silky smooth in half the time.
- Spatula — for scraping every last bit of filling into the pan. Don’t waste a drop.
- Toothpick or skewer — this is your spiderweb-drawing tool. A toothpick works perfectly for the thin lines.
- Small piping bag or zip-top bag — for drizzling the chocolate. A zip-top bag with the corner snipped off works great and costs nothing.
- Food processor or rolling pin — for crushing the graham crackers. I use a rolling pin and a zip-top bag because I hate washing extra dishes.
If you don’t have a 9×9 pan, you can use a 9×13 and just make thinner bars. The baking time will be shorter, so start checking at 25 minutes. I’ve done this when I needed more bars for a party, and it worked beautifully.
Preparation Method
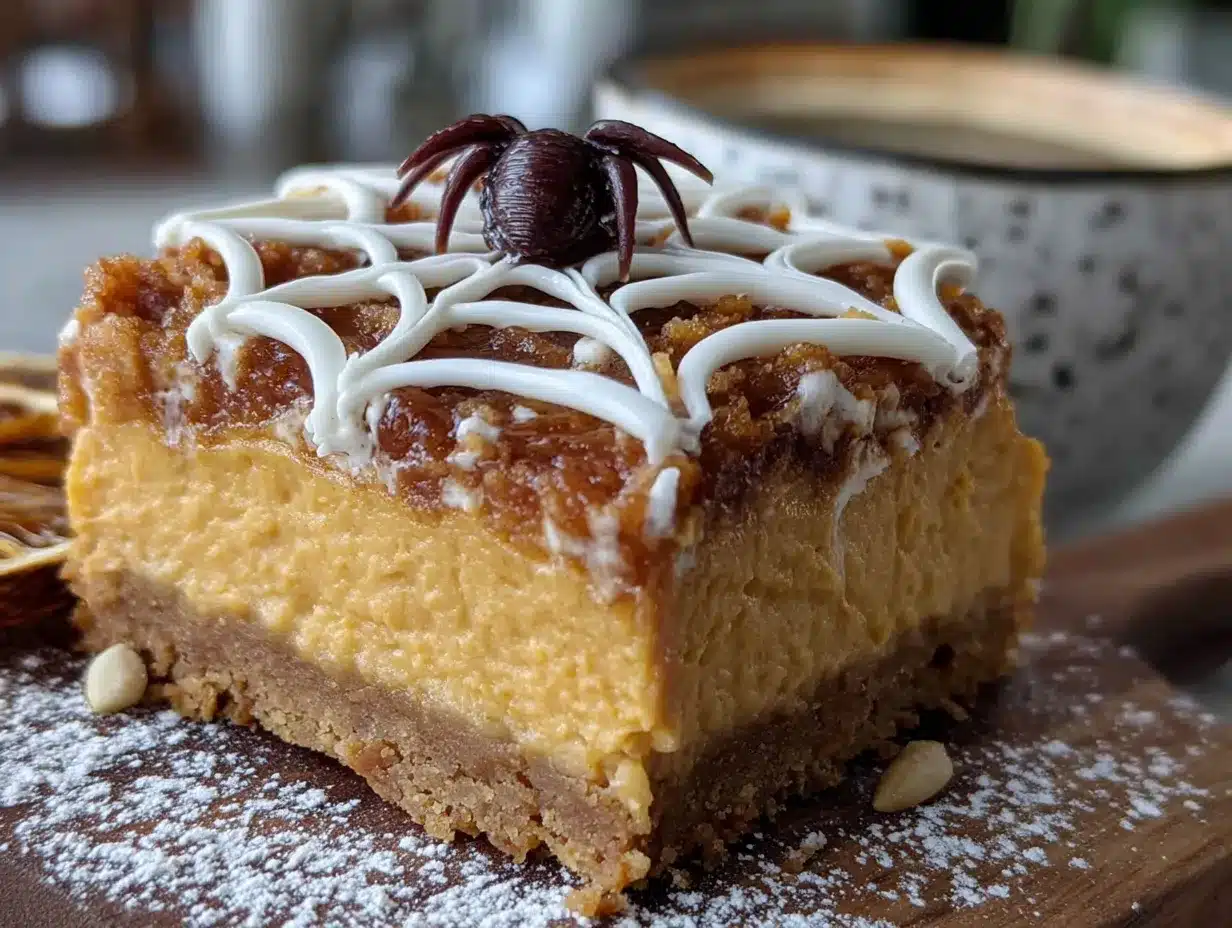
Alright, let’s get into it. I’m going to walk you through this step by step, including all the little things I wish someone had told me before my first attempt.
- Preheat and prep. Preheat your oven to 350°F (175°C). Line your 9×9 baking pan with parchment paper, leaving enough overhang on two opposite sides to use as handles later. This is one of those steps that feels optional until you’re trying to lift a warm, fragile cheesecake bar out of the pan and it breaks in half. Trust me on this one.
- Make the crust. In a medium bowl, combine 1 ½ cups graham cracker crumbs, ¼ cup sugar, and a pinch of salt. Pour in 6 tablespoons of melted butter and stir until the mixture looks like wet sand. Every crumb should be coated. Press this mixture firmly into the bottom of your prepared pan. I use the bottom of a measuring cup to really pack it down. Bake for 10 minutes, then set aside to cool slightly. The crust should be lightly golden and smell like butter and cinnamon.
- Start the filling. In a large bowl, beat 16 ounces of softened cream cheese with ¾ cup sugar until smooth and creamy. This takes about 2 minutes with an electric mixer on medium speed. Scrape down the sides of the bowl halfway through. You want absolutely no lumps here.
- Add the eggs. Add the 2 room-temperature eggs one at a time, beating on low speed after each addition until just combined. Overmixing at this stage adds too much air, which can cause cracks in your cheesecake. We want a few intentional cracks for the spiderweb, but not a canyon.
- Add the pumpkin and spices. Add 1 cup pumpkin puree, 1 teaspoon vanilla, 1 teaspoon pumpkin pie spice, ½ teaspoon cinnamon, and ¼ teaspoon salt. Mix on low until everything is combined and the color is uniform. The batter should be thick, smooth, and a beautiful deep orange. Give it a taste—it should be sweet, spiced, and just a little tangy from the cream cheese.
- Pour and spread. Pour the filling over the pre-baked crust and spread it evenly with a spatula. Give the pan a gentle tap on the counter to release any air bubbles.
- Bake the base. Bake at 350°F for 15 minutes. The filling should be just starting to set around the edges but still jiggly in the center. This is the magic window for adding the spiderweb.
- Make the chocolate web mixture. While the cheesecake bakes, combine ¼ cup chocolate chips and 1 tablespoon heavy cream in a small microwave-safe bowl. Microwave in 20-second intervals, stirring between each, until smooth and glossy. This usually takes about 40-60 seconds total. Let it cool slightly—you want it warm but not hot.
- Draw the spiderweb. Transfer the melted chocolate to a small piping bag or a zip-top bag with a tiny corner snipped off. Working quickly, pipe concentric circles starting from the center of the cheesecake and working outward. You want about 4-5 circles total, spaced about an inch apart. Then, take a toothpick and drag it from the center outward through all the circles, like you’re drawing spokes on a wheel. Wipe the toothpick clean between each drag. Then drag from the outside inward between each spoke. This creates that classic web pattern. It sounds complicated, but it takes about 30 seconds.
- Finish baking. Return the pan to the oven and bake for another 20-25 minutes. The edges should be set and the center should still have a slight jiggle when you gently shake the pan. It will continue to set as it cools. Overbaking leads to dry cheesecake, so err on the side of underdone.
- Cool completely. Let the bars cool at room temperature for about an hour, then transfer to the refrigerator for at least 4 hours, preferably overnight. This is the hardest step because your kitchen will smell amazing and you’ll want to cut into them immediately. Don’t do it. Warm cheesecake is a mess. Cold cheesecake cuts cleanly and holds its shape.
- Slice and serve. Use the parchment handles to lift the entire block out of the pan. Place on a cutting board and slice into 16 squares (4 rows by 4 rows). Wipe your knife clean between cuts for the neatest edges.
One thing I want to emphasize: when you’re drawing the spiderweb, don’t overthink it. The first time I did it, I was so nervous I’d mess it up that my hand was shaking. The web looked more like a scribble. The second time, I relaxed and just let the toothpick do the work. It came out perfect. The chocolate will spread naturally as you drag through it. Trust the process.
Cooking Tips & Techniques
I’ve made this recipe enough times to know exactly where things can go wrong. Here are the tips I wish I’d had from the beginning.
The room temperature rule is real. I know I keep saying this, but I’ve ruined enough batches to know it matters. Cold cream cheese creates lumps that no amount of beating will fix. Cold eggs can seize the batter and create a grainy texture. Set everything out on the counter at least an hour before you start. Set a timer if you have to. Your future self will thank you.
Don’t overmix the filling. Once you add the eggs, mix on low speed and stop as soon as everything comes together. Overmixing incorporates too much air, which causes the cheesecake to puff up dramatically in the oven and then collapse, creating large cracks. We want delicate, web-like cracks, not gaping fissures.
The water bath shortcut. Traditional cheesecake recipes call for a water bath to prevent cracking. I don’t use one here because the bars are sturdy enough without it, and honestly, I hate the hassle. But if you’re nervous about cracking, place a shallow pan of hot water on the oven rack below the cheesecake. The steam creates a humid environment that helps the cheesecake bake more evenly.
The toothpick drag technique. When drawing the spiderweb, wipe the toothpick clean between each drag. If you don’t, the chocolate smears instead of creating clean lines. I learned this after my first web turned into a brown mess. Also, drag quickly and confidently. Hesitation creates wobbly lines.
Patience with cooling. This is the hardest tip to follow. I know you want to eat these immediately. But warm cheesecake is soft, sticky, and impossible to cut cleanly. Let it cool completely at room temperature, then refrigerate for at least 4 hours. Overnight is even better. The texture firms up, the flavors meld, and the spiderweb sets into a beautiful, clean design.
I once served these at a party where someone asked if I’d hired a professional baker. That’s the kind of compliment that makes all the testing and tweaking worth it. And honestly? It’s just cream cheese, pumpkin, and a toothpick. You can do this.
Variations & Adaptations
One of the best things about this recipe is how easy it is to adapt. Here are some variations I’ve tried and loved.
Gluten-Free Version: Swap the graham crackers for gluten-free graham crackers or crushed gluten-free cookies. I’ve used gluten-free shortbread cookies with great results. The crust might be a little more delicate, so press it firmly and handle with care.
Dairy-Free Version: Use dairy-free cream cheese (I like Kite Hill or Violife) and a plant-based butter substitute. The texture won’t be quite as silky, but it’s still delicious. I’ve also used coconut cream in place of the heavy cream for the chocolate web—just warm it gently and stir until smooth.
White Chocolate Spiderweb: Instead of semi-sweet chocolate, use white chocolate chips for a ghostly, pale web. This looks especially striking against the orange pumpkin filling. Just be careful not to overheat white chocolate—it seizes easily.
Extra Spicy: Add ¼ teaspoon of cayenne pepper or a pinch of black pepper to the filling for a warm, spicy kick that pairs beautifully with the chocolate. I tried this on a whim one year and it was a hit at our Halloween party.
Pecan Praline Topping: After the bars are baked and cooled, drizzle with a simple caramel sauce and sprinkle with toasted pecans. It adds crunch and sweetness that contrasts beautifully with the creamy filling.
Individual Mini Bars: Use a mini cheesecake pan or a muffin tin lined with paper liners. Press the crust into the bottom of each cup, add the filling, and bake for about 12-15 minutes before adding the spiderweb. These are perfect for parties where everyone wants their own little dessert.
My personal favorite variation? I add a tablespoon of bourbon to the filling. The warmth of the bourbon plays beautifully with the pumpkin and spice, and it adds a grown-up twist that’s perfect for an adult Halloween gathering. Just don’t tell the kids.
Serving & Storage Suggestions
These bars are best served cold, straight from the refrigerator. The texture is firm and creamy, and the spiderweb pattern is clearest when the bars are chilled. If you let them sit at room temperature too long, the chocolate web can soften and lose its definition.
Serving Ideas:
- Serve on a platter with a dusting of powdered sugar for a snowy effect.
- Add a dollop of whipped cream and a sprinkle of cinnamon on each bar.
- Pair with hot apple cider or a spiced chai latte for the ultimate fall dessert experience.
- For a Halloween party, arrange the bars on a black platter with candy corn scattered around. It’s spooky and festive without being over the top.
Storage:
- Store in an airtight container in the refrigerator for up to 5 days. The bars actually get better after a day or two as the flavors meld.
- To freeze, wrap individual bars tightly in plastic wrap, then place in a freezer-safe bag or container. Freeze for up to 3 months. Thaw in the refrigerator overnight before serving.
- I don’t recommend leaving these out at room temperature for more than 2 hours, especially if you’re serving them at a party. The cream cheese filling needs to stay chilled for food safety.
Reheating: These bars are meant to be served cold, but if you prefer them slightly warm, microwave individual bars for about 10-15 seconds. Just know that the spiderweb will soften and may lose its crisp definition.
One thing I love about these bars is how the flavors develop over time. The first day, the pumpkin and spice are bright and forward. By day three, everything has mellowed and blended together into something deeper and more complex. If you can resist eating them all immediately, they’re even better on day two.
Nutritional Information & Benefits
These bars are a treat, so I’m not going to pretend they’re health food. But they do have some redeeming qualities, especially compared to other Halloween desserts.
Estimated Nutritional Values (per bar, based on 16 servings):
- Calories: 285
- Fat: 18g
- Carbohydrates: 28g
- Protein: 5g
- Fiber: 2g
- Sugar: 20g
Health Highlights:
- Pumpkin is packed with vitamin A, which supports eye health and immune function. It’s also a good source of fiber.
- Cream cheese provides calcium and a small amount of protein.
- Dark chocolate (if you use semi-sweet chips) contains antioxidants and can help satisfy sweet cravings with a smaller portion.
Dietary Considerations:
- Contains dairy, gluten, and eggs. See the variations section for substitutions.
- Can be made gluten-free with alternative crust ingredients.
- Not suitable for vegan diets without significant modifications.
I’m not a nutritionist, and I don’t pretend to be one. But I do believe that dessert should be enjoyed without guilt. These bars are made with real ingredients, and that counts for something. If you’re looking for a lighter option, you can reduce the sugar to ½ cup or use a sugar substitute like monk fruit sweetener. I’ve tried it, and while the texture is slightly different, it still works.
If you’re looking for another fall dessert that’s a bit lighter, I also love making this homemade fresh strawberry galette with vanilla glaze for a change of pace. It’s rustic, beautiful, and uses seasonal fruit in a totally different way.
Conclusion
These Easy Spiderweb Pumpkin Cheesecake Bars are the kind of recipe that makes you look like a hero with very little effort. The spiderweb pattern is impressive enough to draw oohs and ahhs at any gathering, but it’s simple enough that anyone can do it. The flavor is everything you love about fall—warm, spiced, creamy, and just sweet enough. And the texture? That buttery crust against the silky filling is pure comfort.
I’ve made these bars for Halloween parties, Thanksgiving dinners, and random Tuesday nights when I needed a little seasonal joy. They’ve never let me down. And now that you have the recipe, with all my tips and tricks baked in, I know they won’t let you down either.
If you make these, I’d love to hear how they turn out. Leave a comment below and let me know if your spiderweb came out perfect on the first try—or if it took a few attempts like mine did. Share a photo if you’re proud of it. And if you have your own variation, please share that too. I’m always looking for new ideas.
Go ahead, preheat that oven. Your kitchen is about to smell incredible.
Frequently Asked Questions
Can I use fresh pumpkin instead of canned?
Yes, but you’ll need to roast and puree it first, then strain it to remove excess moisture. Fresh pumpkin has more water than canned, which can make the filling runny. I recommend roasting, pureeing, and then draining through a cheesecloth-lined sieve for at least an hour before using.
Why did my spiderweb sink into the filling?
This usually happens when you add the chocolate too early, before the cheesecake has had a chance to set up. Make sure you bake the base for the full 15 minutes before adding the web. The filling should be just starting to set around the edges but still jiggly in the center.
Can I make these ahead of time?
Absolutely. These bars actually get better after a day or two in the refrigerator. You can make them up to 3 days in advance and keep them covered in the fridge. They’re perfect for party prep.
My crust is too crumbly. What went wrong?
You probably didn’t use enough butter or didn’t press it firmly enough into the pan. The mixture should feel like wet sand and hold together when squeezed. If it’s too dry, add another tablespoon of melted butter. Press it down firmly with the bottom of a measuring cup or glass.
Can I freeze these bars?
Yes! Wrap individual bars tightly in plastic wrap and place in a freezer-safe bag. They’ll keep for up to 3 months. Thaw in the refrigerator overnight before serving. The texture remains creamy and the spiderweb stays intact.
For another easy dessert that’s perfect for fall, try this creamy strawberry cheesecake stuffed french toast for a breakfast twist on cheesecake flavors. And if you’re in the mood for something savory to balance out all the sweets, this crispy garlic parmesan focaccia bread is the perfect side for soups and stews this season.
Pin This Recipe!
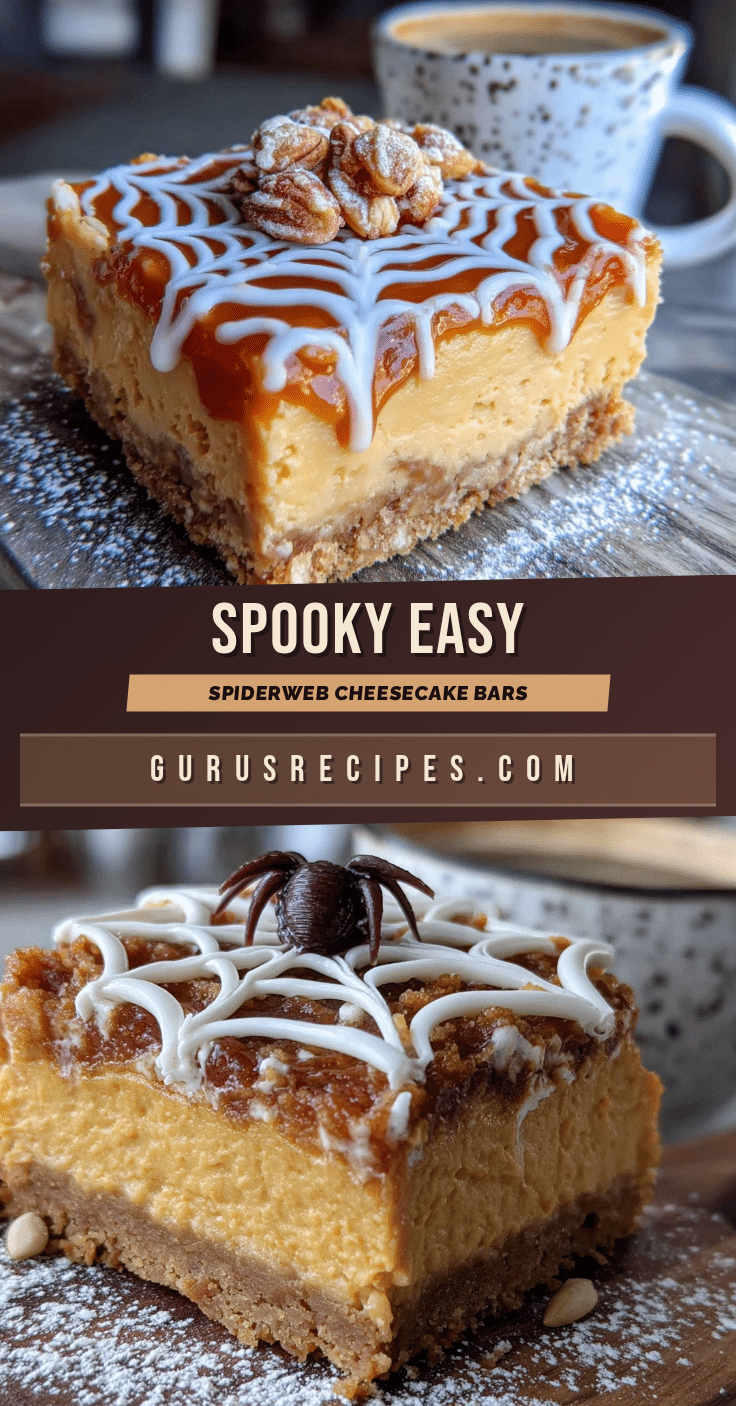

Easy Spiderweb Pumpkin Cheesecake Bars: Best Fall Dessert
These Easy Spiderweb Pumpkin Cheesecake Bars feature a buttery shortbread crust, creamy pumpkin cheesecake filling, and a delicate chocolate spiderweb pattern. Perfect for Halloween parties or fall gatherings, they’re impressive yet simple to make.
- Total Time: 5 hours 5 minutes (includes cooling and chilling)
- Yield: 16 servings 1x
Ingredients
- 1 ½ cups graham cracker crumbs (about 12 full sheets, crushed fine)
- ¼ cup granulated sugar
- 6 tablespoons unsalted butter, melted
- Pinch of salt
- 16 ounces cream cheese, softened to room temperature
- ¾ cup granulated sugar
- 2 large eggs, room temperature
- 1 cup canned pumpkin puree
- 1 teaspoon vanilla extract
- 1 teaspoon pumpkin pie spice
- ½ teaspoon cinnamon
- ¼ teaspoon salt
- ¼ cup semi-sweet chocolate chips
- 1 tablespoon heavy cream
Instructions
- Preheat oven to 350°F (175°C). Line a 9×9-inch baking pan with parchment paper, leaving overhang on two opposite sides.
- In a medium bowl, combine graham cracker crumbs, ¼ cup sugar, and a pinch of salt. Stir in melted butter until mixture resembles wet sand. Press firmly into the bottom of the prepared pan. Bake for 10 minutes, then set aside to cool slightly.
- In a large bowl, beat softened cream cheese and ¾ cup sugar with an electric mixer on medium speed until smooth and creamy, about 2 minutes. Scrape down sides of bowl.
- Add eggs one at a time, beating on low speed after each addition until just combined. Do not overmix.
- Add pumpkin puree, vanilla extract, pumpkin pie spice, cinnamon, and ¼ teaspoon salt. Mix on low until combined and color is uniform.
- Pour filling over pre-baked crust and spread evenly. Tap pan gently on counter to release air bubbles.
- Bake at 350°F for 15 minutes, until edges are just starting to set but center is still jiggly.
- While cheesecake bakes, combine chocolate chips and heavy cream in a small microwave-safe bowl. Microwave in 20-second intervals, stirring between each, until smooth and glossy. Let cool slightly.
- Transfer melted chocolate to a small piping bag or zip-top bag with a tiny corner snipped off. Pipe concentric circles on the cheesecake, starting from center and working outward, spacing about 1 inch apart. Use a toothpick to drag from center outward through all circles (like spokes), wiping toothpick clean between each drag. Then drag from outside inward between each spoke to create web pattern.
- Return pan to oven and bake for another 20-25 minutes, until edges are set and center has a slight jiggle.
- Cool at room temperature for 1 hour, then refrigerate for at least 4 hours, preferably overnight.
- Use parchment handles to lift cheesecake out of pan. Slice into 16 squares (4×4), wiping knife clean between cuts.
Notes
Room temperature ingredients are crucial for a smooth filling. Let cream cheese and eggs sit out for at least 1 hour before starting. For the spiderweb, bake the base for exactly 15 minutes before adding chocolate. Wipe toothpick clean between each drag for clean lines. Cool completely before slicing for best results. Bars can be stored in refrigerator for up to 5 days or frozen for up to 3 months.
- Prep Time: 20 minutes
- Cook Time: 45 minutes
- Category: Dessert
- Cuisine: American
Nutrition
- Serving Size: 1 bar
- Calories: 285
- Sugar: 20
- Sodium: 220
- Fat: 18
- Saturated Fat: 10
- Carbohydrates: 28
- Fiber: 2
- Protein: 5
Keywords: pumpkin cheesecake bars, spiderweb dessert, Halloween dessert, fall dessert, pumpkin bars, cheesecake bars, easy dessert


