
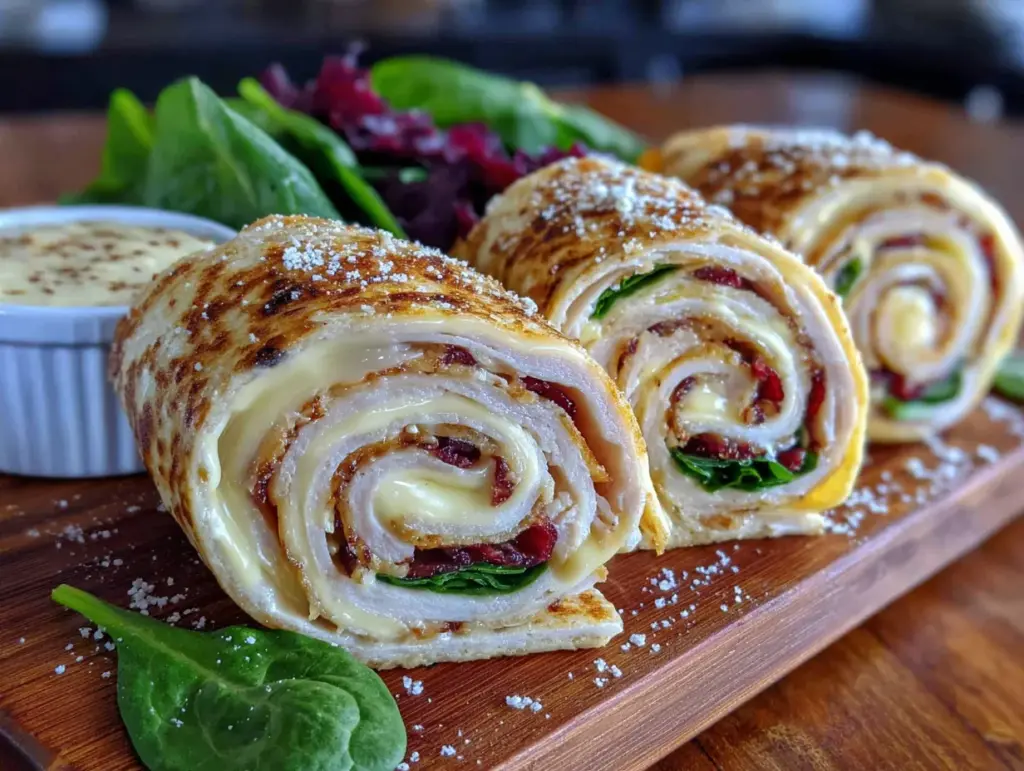
That first bite—the cool, soft tortilla giving way to a creamy, savory center with just the right snap of cheddar—still takes me straight to my sister’s cramped apartment kitchen, circa 2017. She was trying to convince me that meal prep didn’t have to be a chore, and she pulled out a plastic container filled with these perfect little spirals. I was skeptical, honestly. They looked almost too neat, like something you’d buy at a fancy deli counter, not something you’d make on a Tuesday night between loads of laundry. But one taste, and I was hooked. It wasn’t just that they were good; it was that they made sense. They solved the problem of the boring lunch without creating a mountain of dishes or a complicated shopping list.
This isn’t a story about my grandmother’s secret recipe or a trip to some far-off market. It’s a story about necessity, about the simple genius of wrapping a few good ingredients in a flour tortilla and slicing them into something that feels more like a treat than a last-minute scramble. These easy turkey & cheddar pinwheel wraps have become my go-to for everything from school lunches to casual get-togethers. They’re the kind of thing you make when you want to look like you put in effort, but you really, really didn’t. And honestly? That’s the best kind of recipe to have in your back pocket.
So, whether you need a quick lunch for a busy workday or a crowd-pleasing appetizer for a party, these little spirals are your answer. They’re proof that you don’t need a lot of time or fancy ingredients to make something genuinely satisfying. Let me show you just how simple it is.
Why You’ll Love This Recipe
I’ve tested a lot of lunch recipes over the years, and these pinwheels always win. They’re not just another sandwich—they’re a better version of one. Here’s why I keep coming back to them, and why I think you will too.
- Ready in 5 Minutes: No cooking, no heating, no fuss. You can literally make these while your coffee is brewing in the morning. It’s the ultimate shortcut for a homemade lunch that doesn’t feel like a compromise.
- Simple Ingredients: You probably have most of these in your fridge right now. Deli turkey, cheddar cheese, a tortilla, and a little cream cheese or mayo. No exotic grocery store runs required. This is real, everyday food.
- Perfect for Meal Prep: Make a batch on Sunday, and you have lunches for the whole week. They hold up beautifully in the fridge, and they’re just as good on day four as they are on day one. It’s a game-changer for busy weeks.
- Always a Crowd-Pleaser: I’ve brought these to potlucks, picnics, and kids’ birthday parties. They disappear fast. Adults love them, and kids think they’re way more fun than a regular sandwich. It’s a win-win.
- Unbelievably Customizable: The basic formula is a blank canvas. Swap the turkey for ham or roast beef. Use pepper jack for a kick, or add spinach and roasted red peppers. You can make a different version every single week and never get bored.
What makes this recipe different from all the other pinwheel recipes out there? It’s the texture. The trick is to use a schmear of cream cheese that’s been softened just right. It acts as a glue, holding everything together so your pinwheels don’t unravel. It’s a small detail, but it’s the difference between a sad, floppy roll and a perfect, tidy spiral that you can actually pick up and eat without a mess. This isn’t just another version; it’s the one that works every single time.
What Ingredients You Will Need
This recipe uses simple, everyday ingredients to create something that feels much more special than the sum of its parts. Each one plays a key role in delivering that perfect flavor and texture without any fuss.
- Large Flour Tortillas (10-inch): You want the burrito-sized ones for the best pinwheels. They give you enough surface area to pack in plenty of filling and create nice, thick slices. I prefer a brand like Mission or Guerrero for their pliability. If they’re a little stiff, pop them in the microwave for 10 seconds to make them more flexible and prevent cracking.
- Deli Turkey Breast (8 oz): Look for oven-roasted or smoked turkey for the best flavor. I like to buy it sliced from the deli counter rather than pre-packaged—it’s usually thicker and more flavorful. You can use leftover roasted turkey here too, which is a fantastic way to use up holiday leftovers! (Thinly sliced is key for a tight roll).
- Cheddar Cheese (4 oz): Sharp cheddar gives you the most bang for your buck in terms of flavor. You can use block cheese and shred it yourself, or buy pre-sliced deli cheddar. I find that shredded cheese melts into the cream cheese a little better, creating a more cohesive filling. For a milder taste, use mild cheddar or even provolone.
- Cream Cheese (4 oz), Softened: This is the secret weapon. It acts as the glue that holds everything together. Make sure it’s at room temperature so it spreads easily. If you forget to take it out of the fridge, just microwave it in 10-second bursts until it’s soft but not melted. You can also use a flavored cream cheese, like chive and onion, for an extra layer of flavor.
- Mayonnaise (2 tablespoons): Just a little bit adds moisture and a touch of tanginess. It helps the cream cheese mixture spread more smoothly. You can substitute with plain Greek yogurt for a lighter option, or even a little Dijon mustard for a different flavor profile.
- Salt and Black Pepper: Don’t skip these. A pinch of salt enhances all the other flavors, and a little fresh-cracked black pepper adds a subtle warmth. It’s a small step that makes a big difference.
- Optional Add-ins: This is where you can really make the recipe your own. Some of my favorites include a handful of fresh spinach leaves, a few slices of crisp lettuce, thin strips of roasted red pepper, or a sprinkle of everything bagel seasoning. Get creative!
Equipment Needed
One of the best things about this recipe is that you don’t need any fancy gadgets. You probably have everything you need in your kitchen right now. Here’s the short list:
- A Sharp Knife: This is the most important tool. A sharp chef’s knife or a serrated bread knife will give you clean cuts without squishing the pinwheels. A dull knife will just smash them flat, and nobody wants that.
- A Cutting Board: A sturdy, flat surface is all you need. I prefer a large wooden or plastic board that gives you plenty of room to work.
- A Small Mixing Bowl: For combining the cream cheese and mayo. You could even do this on a plate if you’re in a pinch.
- A Spatula or Butter Knife: For spreading the cream cheese mixture. An offset spatula is my secret weapon here—it makes getting an even, thin layer so much easier.
- Plastic Wrap: This is optional, but it’s a game-changer. Wrapping the rolled tortilla tightly in plastic wrap before chilling helps it hold its shape and makes for much cleaner slices. It’s worth the extra 30 seconds, I promise.
- Toothpicks: If you’re serving these at a party, a toothpick through the center of each pinwheel keeps them from unrolling and makes them easy to grab.
Preparation Method
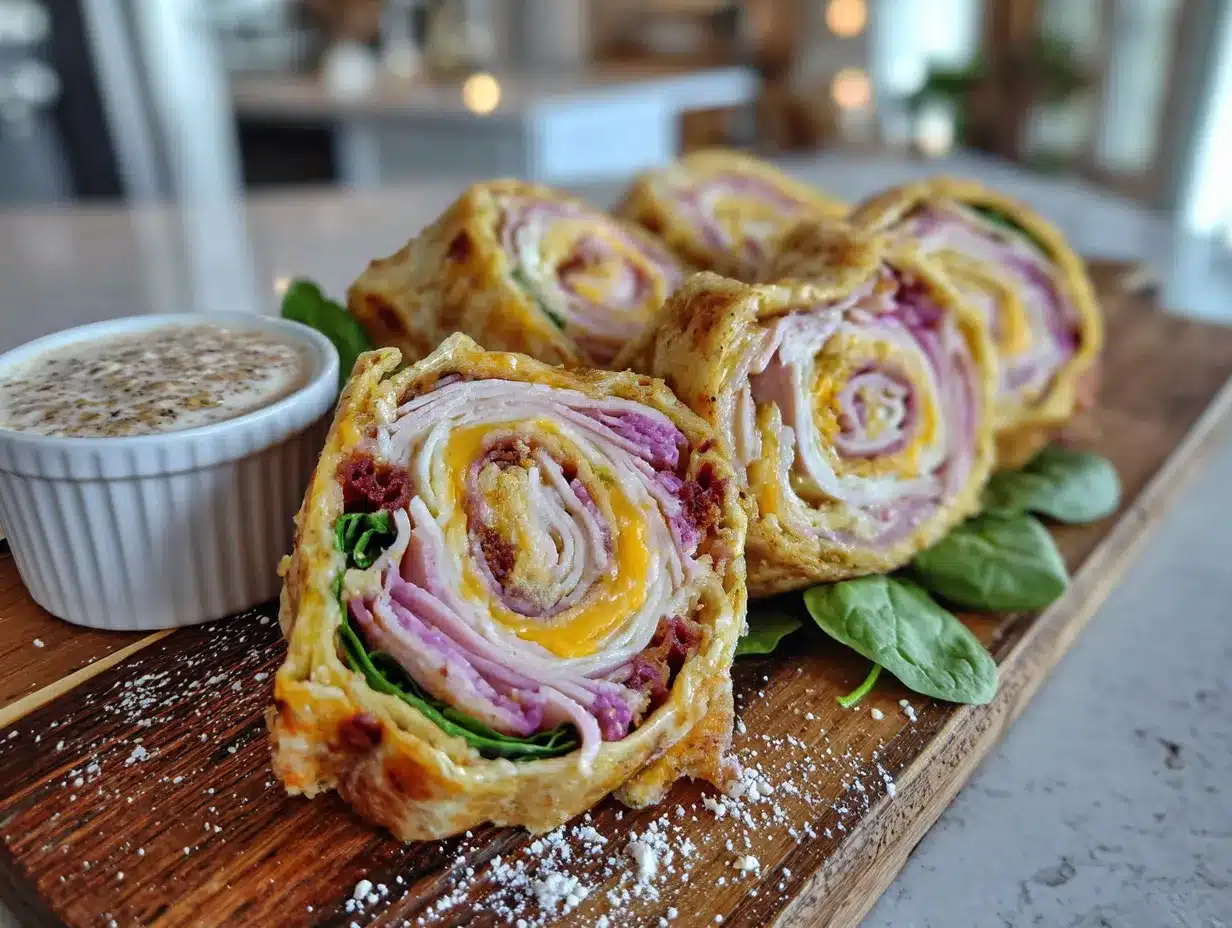
Okay, let’s get to the fun part. This is so simple, you’ll memorize it after the first time. I’ll walk you through every step so your pinwheels come out perfect.
- Make the Cream Cheese Spread: In your small bowl, combine the 4 oz of softened cream cheese with 2 tablespoons of mayonnaise. Add a pinch of salt and a few grinds of black pepper. Mix it all together with your spatula until it’s smooth and creamy. Give it a taste and adjust the seasoning if you need to. This is your flavor base, so make it good!
- Prep Your Tortillas: Lay one large flour tortilla flat on your cutting board. If it seems a little dry or stiff, you can microwave it for about 10 seconds to make it more pliable. This step is a lifesaver and prevents those annoying cracks when you roll it up.
- Spread the Mixture: Using your spatula or butter knife, spread an even, thin layer of the cream cheese mixture all the way to the edges of the tortilla. You don’t want it too thick, or it will squish out when you roll it. A thin, even coat is the goal here. Think of it like you’re buttering a piece of toast.
- Layer the Turkey: Place your slices of deli turkey evenly over the cream cheese. Overlap them slightly to cover the entire surface of the tortilla. Don’t pile it too high in one spot, or your pinwheels will be lumpy. A single, even layer is perfect.
- Add the Cheddar: Sprinkle your shredded or place your sliced cheddar cheese evenly over the turkey. If you’re using shredded cheese, it will distribute more easily. If you’re using slices, just lay them on top, breaking them up to fit as needed.
- Add Any Extras: Now’s the time for your optional add-ins. If you’re using spinach or lettuce, lay a few leaves on top of the cheese. A few thin strips of roasted red pepper add a lovely sweetness. Don’t go overboard, or your roll will be too thick to cut neatly.
- Roll It Up Tightly: This is the most important step. Starting at one edge, begin to roll the tortilla as tightly as you can. Use your fingers to keep the filling tucked in as you go. Roll it like you would a sleeping bag, applying gentle but firm pressure. Once it’s completely rolled, give it a gentle squeeze to seal it.
- Wrap and Chill (Optional, but Recommended): This is the secret to perfect, clean slices. Wrap the rolled tortilla tightly in a piece of plastic wrap, twisting the ends to secure it. Pop it in the fridge for at least 30 minutes. This allows the cream cheese to firm up again, which makes slicing much, much easier. If you’re in a hurry, you can skip this, but your slices might be a little messy. I’ve done it both ways, and the chilled version is always prettier.
- Slice and Serve: When you’re ready to eat, unwrap the roll and place it on your cutting board. Using your sharp knife, slice the roll into 1-inch thick pieces. A gentle sawing motion works best to avoid squishing them. If you’re serving them at a party, stick a toothpick through the center of each one to keep them from unrolling.
Cooking Tips & Techniques
I’ve made these pinwheels more times than I can count, and I’ve learned a few things along the way. Here are my best tips for guaranteed success, straight from my kitchen to yours.
The Softened Cream Cheese Rule: I cannot stress this enough—your cream cheese must be at room temperature. Cold cream cheese will tear your tortilla when you try to spread it. It’s the number one rookie mistake, and I’ve made it myself more than once. Set it out 20 minutes before you start, or give it a quick 10-second zap in the microwave.
The “Tight Roll” Technique: A loose roll means messy, floppy pinwheels. Use your fingertips to keep the filling tucked in as you roll, and apply steady, even pressure. Think of it like rolling a cigar—firm, but not so tight that the filling squeezes out the ends. A little practice goes a long way here.
Why Chilling is a Game-Changer: I used to skip the chilling step when I was in a hurry, and I always regretted it. The warm cream cheese makes the tortilla soft, and your knife just smushes everything. Thirty minutes in the fridge firms everything up, giving you those gorgeous, clean spirals that look like they came from a professional kitchen. It’s a small investment of time for a huge payoff.
Using the Right Knife: A serrated bread knife is actually my favorite tool for this job. The little teeth grab the tortilla without squishing it. If you’re using a chef’s knife, make sure it’s razor-sharp. A dull knife is your enemy here. Use a gentle sawing motion, don’t just press straight down.
Don’t Overfill: It’s tempting to pile on the ingredients, but less is more. Too much filling makes the roll bulky and difficult to slice. The ingredients will fall out, and you’ll be left with a sad pile of filling and a torn tortilla. A thin, even layer of each component is the key to a perfect pinwheel.
Variations & Adaptations
This basic recipe is a fantastic starting point, but the real fun begins when you start playing with it. Here are some of my favorite variations that I’ve tried and loved over the years.
- The Italian Job: Swap the turkey for salami and pepperoni, use provolone or mozzarella instead of cheddar, and add a few pepperoncini for a tangy kick. Spread a little Italian dressing or pesto in with the cream cheese for extra flavor. It’s like an Italian sub in a spiral!
- The Veggie Lover: Skip the turkey entirely and load up on fresh vegetables. Thinly sliced cucumber, bell peppers, shredded carrots, and alfalfa sprouts work beautifully. A smear of hummus instead of cream cheese is a fantastic, protein-packed swap. This version is incredibly fresh and crunchy.
- The Spicy Southwest: Use pepper jack cheese and add a few slices of jalapeño or a sprinkle of chili powder to the cream cheese mix. Swap the turkey for some shredded rotisserie chicken or even black beans. A spoonful of salsa verde inside the roll is a game-changer. It’s got a fantastic little kick.
- The Breakfast Pinwheel: Who says pinwheels are just for lunch? Use a flour tortilla, spread it with cream cheese, and layer on some crispy bacon, scrambled eggs, and a little shredded cheddar. Roll it up, slice it, and you have a portable breakfast that’s way more fun than a boring egg sandwich.
- Gluten-Free Option: This is an easy fix. Just swap the flour tortilla for a large gluten-free tortilla. Be gentle when rolling, as gluten-free tortillas can be a little more fragile. The filling will hold everything together just the same. It works like a charm.
Serving & Storage Suggestions
These pinwheels are incredibly versatile, and knowing how to serve and store them makes them an even more valuable recipe in your rotation. Here’s everything you need to know.
Serving Temperature: These are best served cold or at room temperature. I usually take them straight from the fridge and arrange them on a platter. If I’m serving them at a party, I’ll let them sit out for about 10-15 minutes to take the chill off, but they’re delicious straight from the fridge too.
Presentation Ideas: For a simple lunch, just arrange the pinwheels on a plate with a handful of baby carrots or a small salad. For a party, arrange them in a circular pattern on a large platter, with a small bowl of ranch dressing or honey mustard in the center for dipping. The spirals look so pretty when they’re all lined up!
What to Serve With Them: These pinwheels are a fantastic side dish or main course. They pair beautifully with a bowl of tomato soup, a simple hearty lentil stew for a more filling meal, or a fresh green salad. For a party, they’re perfect alongside a crispy Reuben sandwich or even a bowl of creamy loaded baked potato soup for a cozy lunch spread.
Storage Instructions: This is where these pinwheels really shine for meal prep. Store the uncut rolls (wrapped tightly in plastic wrap) or the sliced pinwheels in an airtight container in the refrigerator. They will stay fresh and delicious for up to 4-5 days. The flavors actually meld together and get even better after a day in the fridge.
Reheating: I do not recommend reheating these. They are designed to be enjoyed cold. The tortilla will get soggy, and the cheese will melt into a mess. They are at their absolute best straight from the fridge or at room temperature. Trust me on this one.
Nutritional Information & Benefits
While I’m not a nutritionist, I like to know what’s in my food, and I think you do too. Here’s a rough estimate of the nutritional information for one serving (about 4-5 pinwheels), based on the basic recipe. Remember, this will vary based on the specific brands and ingredients you use.
- Calories: Approximately 350-400 calories per serving.
- Protein: Around 25-30 grams, thanks to the turkey and cheese. This makes it a very satisfying and filling lunch option.
- Fat: About 20-25 grams, primarily from the cheese and cream cheese. It’s a good source of energy.
- Carbohydrates: Around 25-30 grams, mostly from the tortilla.
- Fiber: Minimal, about 1-2 grams. You can boost this by using a whole wheat tortilla.
Health Benefits: The turkey is a fantastic source of lean protein, which is great for muscle repair and keeping you full. Cheddar cheese provides calcium for strong bones. The cream cheese adds a little bit of vitamin A. This is a balanced, satisfying meal that won’t weigh you down. For a lighter version, you can use low-fat cream cheese and turkey, and add lots of fresh veggies.
Dietary Considerations: This recipe is naturally nut-free and egg-free (as long as your mayo is egg-free, which most are). To make it gluten-free, just swap the tortilla. To make it lower in carbs, use a low-carb or lettuce wrap instead of a flour tortilla. It’s an easy recipe to adapt to many different needs.
Conclusion
These easy turkey & cheddar pinwheel wraps are proof that you don’t need a complicated recipe or hours in the kitchen to make something genuinely good. They’re quick, they’re simple, and they are endlessly adaptable. Whether you’re packing a lunch for a busy workday, looking for a stress-free appetizer for your next get-together, or just want a snack that feels a little more special, these little spirals have your back.
I love this recipe because it makes me feel like I have my act together, even on the most chaotic days. It’s a small win that makes a big difference. So go ahead, give them a try. Play with the fillings, make them your own, and don’t be afraid to get creative. I have a feeling they’re going to become a regular in your kitchen, just like they are in mine.
If you make these, I’d love to hear about it! Drop a comment below and tell me what your favorite filling combination is. And if you’re feeling generous, share this recipe with a friend who needs a little lunchtime inspiration. Happy rolling!
Frequently Asked Questions
Can I make these pinwheels ahead of time?
Absolutely! In fact, they are perfect for meal prep. Make the rolls, wrap them tightly in plastic wrap, and store them in the fridge for up to 4-5 days. Slice them just before serving for the best presentation.
How do I keep my pinwheels from getting soggy?
The key is to not overdo it with wet ingredients. Make sure your vegetables are patted dry before adding them. The cream cheese layer also acts as a barrier, preventing moisture from the turkey or veggies from soaking into the tortilla.
Can I freeze turkey and cheddar pinwheels?
I don’t recommend freezing them. The texture of the tortilla and cream cheese changes when thawed, and they can become watery and mushy. They’re best enjoyed fresh from the fridge.
What is the best tortilla to use for pinwheels?
Large (10-inch) flour tortillas are your best bet. They are pliable and sturdy enough to hold a good amount of filling without tearing. Sun-dried tomato or spinach flavored tortillas also work great and add a pop of color!
My pinwheels keep unrolling. What am I doing wrong?
This usually happens for two reasons: the cream cheese isn’t spread all the way to the edges, or you didn’t roll them tight enough. Make sure you cover the entire tortilla with the cream cheese mixture—it acts like glue. Also, apply firm, even pressure as you roll, and don’t forget to give the final roll a gentle squeeze to seal it.
Pin This Recipe!
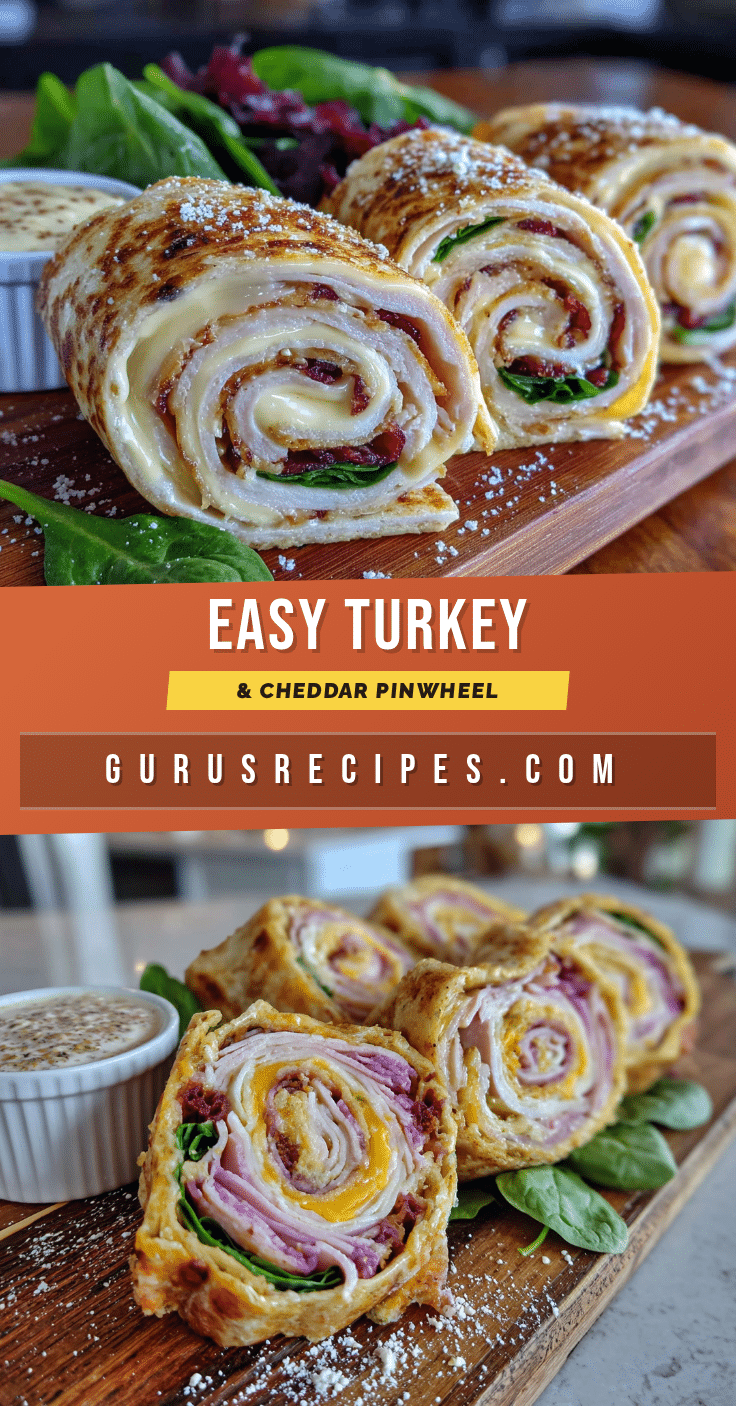

Easy Turkey & Cheddar Pinwheel Wraps: Best 5-Minute Lunch
These easy turkey & cheddar pinwheel wraps are ready in just 5 minutes and perfect for meal prep, school lunches, or party appetizers. Cream cheese holds everything together for perfect, tidy spirals every time.
- Total Time: 5 minutes (plus 30 minutes chilling time)
- Yield: 4 servings 1x
Ingredients
- 4 large flour tortillas (10-inch)
- 8 oz deli turkey breast, thinly sliced
- 4 oz sharp cheddar cheese, shredded or sliced
- 4 oz cream cheese, softened
- 2 tablespoons mayonnaise
- Salt and black pepper to taste
- Optional: fresh spinach leaves, lettuce, roasted red peppers, everything bagel seasoning
Instructions
- In a small bowl, combine softened cream cheese, mayonnaise, salt, and pepper. Mix until smooth and creamy.
- Lay one tortilla flat on a cutting board. If stiff, microwave for 10 seconds to soften.
- Spread an even, thin layer of the cream cheese mixture over the entire tortilla.
- Layer turkey slices evenly over the cream cheese, overlapping slightly.
- Sprinkle or place cheddar cheese evenly over the turkey.
- Add any optional add-ins (spinach, lettuce, roasted red peppers) in a thin layer.
- Starting at one edge, roll the tortilla tightly, using fingers to keep filling tucked in. Squeeze gently to seal.
- Wrap the rolled tortilla tightly in plastic wrap and refrigerate for at least 30 minutes (or up to 4-5 days).
- When ready to serve, unwrap and slice into 1-inch thick pieces using a sharp knife. Use a gentle sawing motion.
- If serving as appetizers, secure each pinwheel with a toothpick.
Notes
Cream cheese must be at room temperature to spread easily without tearing the tortilla. Chilling the rolled tortilla for at least 30 minutes makes slicing much cleaner. Do not overfill; thin, even layers are key. Store uncut rolls wrapped in plastic wrap or sliced pinwheels in an airtight container in the refrigerator for up to 4-5 days. Do not reheat.
- Prep Time: 5 minutes
- Cook Time: 0 minutes
- Category: Lunch
- Cuisine: American
Nutrition
- Serving Size: 4-5 pinwheels
- Calories: 375
- Sugar: 3
- Sodium: 850
- Fat: 22
- Saturated Fat: 10
- Carbohydrates: 28
- Fiber: 1
- Protein: 27
Keywords: turkey pinwheels, cheddar pinwheels, easy lunch, 5-minute lunch, meal prep, party appetizer, no-cook recipe


