

I burned the edges of my first batch of sugar cookies three times before I finally realized my oven’s quirks were turning my Halloween spider web sugar cookies into little burnt frisbees. Honestly, I wasn’t even a huge fan of decorated sugar cookies back then—too much fuss, too little payoff, right? But that all changed when I nailed the royal icing consistency and that perfect web pattern. The smell of vanilla and buttery sugar wafting through the kitchen, combined with the slow swirl of black icing lines catching in the light, somehow turned this into my go-to Halloween treat.
There’s something oddly satisfying about seeing those spider webs come to life on crisp, tender cookies. The first time I made them right, I remember sitting back with a cup of tea, totally hooked, thinking, “Okay, these aren’t just cute, they’re actually delicious.” It’s funny because this recipe stuck around not just for the spooky vibes, but because it’s actually simple enough to make with kids, friends, or a last-minute Halloween party crowd.
So yeah, these Perfect Halloween Spider Web Sugar Cookies with Royal Icing became the treat I didn’t expect to love this much. The slightly crisp edges, the smooth, glossy icing, and that little thrill of piping the web freehand—well, it’s a ritual now. And if you’re anything like me, you’ll get a quiet kind of joy from getting the web just right, even if it takes a few tries. Let’s just say, this recipe is worth the little learning curve.
Why You’ll Love This Recipe
After a handful of attempts and a few frosting mishaps, this recipe became my trusted Halloween cookie secret. Here’s why it’s a keeper:
- Quick & Easy: From mixing dough to decorating, you can have these ready in under 90 minutes—perfect when you’re juggling costumes and candy runs.
- Simple Ingredients: No weird additives or specialty items. Just pantry staples you probably have on hand, making it stress-free.
- Perfect for Halloween Parties: These cookies are not just treats, they’re conversation starters. The spider web design adds that eerie charm kids and adults love.
- Crowd-Pleaser: Whether it’s the kids at school or grown-ups at a spooky gathering, everyone bites in with a smile.
- Unbelievably Delicious: The buttery sugar cookie base pairs flawlessly with the sweet, slightly tangy royal icing—trust me, it’s a texture and flavor win.
What makes this recipe stand apart is the royal icing technique. I recommend mixing your icing just right—not too runny, not too stiff—for that smooth spider web effect that doesn’t crack or smear. Plus, the cookies hold their shape beautifully, so no droopy webs here.
This recipe isn’t just about looking good; it’s about the nostalgia and fun of Halloween baking, the kind that leaves you feeling a little proud (and a little spooky) with every bite.
What Ingredients You Will Need
This recipe uses straightforward, wholesome ingredients that come together to create that classic sugar cookie flavor with a Halloween twist. Most of these are pantry staples, and I’ve included some handy substitution tips below.
- For the Sugar Cookies:
- All-purpose flour – 2 ¾ cups (345 g), for structure and tenderness
- Baking powder – 1 tsp, helps the cookies rise just right
- Salt – ½ tsp, balances sweetness
- Unsalted butter – 1 cup (225 g), softened (adds richness)
- Granulated sugar – 1 ¼ cups (250 g), for sweetness and crisp edges
- Large egg – 1, room temperature (binds the dough)
- Pure vanilla extract – 1 tsp, for that classic flavor
- Milk – 2 tbsp (30 ml), optional, to adjust dough consistency
- For the Royal Icing:
- Powdered sugar – 4 cups (480 g), sifted for smoothness
- Egg whites – 3 large, or 4 tbsp (60 ml) pasteurized egg whites (for safety)
- Pure vanilla extract – 1 tsp, adds subtle flavor
- Fresh lemon juice – 1 tsp, balances sweetness and helps icing set
- Food coloring – black gel or paste (for spider web design)
- Water – as needed, to adjust icing consistency
For best results, I like using King Arthur’s all-purpose flour—it gives a nice texture without too much spread. If you’re short on fresh eggs, pasteurized whites work perfectly for the royal icing and keep it safe for little ones. And if you want to make these gluten-free, swapping the flour for a 1-to-1 gluten-free blend works well, though the texture shifts a bit.
Equipment Needed
- Mixing bowls – one large for dough, one medium for icing
- Hand mixer or stand mixer – makes creaming butter and beating icing a breeze
- Rolling pin – for rolling out cookie dough evenly
- Cookie cutters – round shape, about 3 inches (7.5 cm) diameter works best for webs
- Baking sheets – lined with parchment paper or silicone mats
- Piping bags – disposable or reusable for icing application
- Small round piping tip (Wilton #1 or #2) – essential for drawing spider web lines
- Toothpicks or fine brushes – handy for fixing small icing mistakes
If you don’t have a stand mixer, a sturdy hand mixer will do just fine. For rolling out dough, a silicone rolling pin helps prevent sticking, but a regular wooden one works too. I keep a set of fine tips and toothpicks in my decorating kit — they really save the day when delicate spider web lines go awry.
Preparation Method

- Prepare the Dough: In a bowl, whisk together the flour, baking powder, and salt. In a separate large bowl, cream the softened butter and granulated sugar until light and fluffy (about 3 to 4 minutes with a mixer). Add the egg and vanilla extract, mixing until combined. Gradually add the dry ingredients, mixing just until incorporated. If the dough feels too stiff, add milk one teaspoon at a time to reach a pliable but firm texture.
- Chill the Dough: Shape the dough into a disk, wrap tightly in plastic wrap, and refrigerate for at least 1 hour. This step helps prevent excessive spreading during baking and makes rolling easier.
- Roll and Cut: Preheat your oven to 350°F (175°C). On a lightly floured surface, roll out the chilled dough to about ¼ inch (6 mm) thickness. Use your round cookie cutter to cut out shapes. Transfer cookies to baking sheets lined with parchment paper, spacing about 1 inch (2.5 cm) apart.
- Bake: Bake for 8 to 10 minutes, or until the edges just start to turn golden. Keep a close eye here—overbaking will dry the cookies out. Let them cool completely on a wire rack.
- Make the Royal Icing: In a clean bowl, beat the egg whites and lemon juice until frothy. Gradually add powdered sugar, beating until the icing holds stiff peaks but is still smooth and glossy. Adjust consistency with a few drops of water if it becomes too thick. Separate about ⅓ of the icing and mix in black gel food coloring until you have a rich, opaque black.
- Flood the Cookies: Thin the white royal icing with a few drops of water to a flood consistency (it should slowly level out when spread). Using a piping bag or spoon, cover each cookie with a smooth layer of white icing. Let it set for about 15-20 minutes, until slightly firm but still tacky.
- Create the Spider Web: Fit a piping bag with a small round tip and fill with black icing. Pipe concentric circles over the white base, starting from the center and moving outward. Using a toothpick or skewer, drag lines from the center to the edges in a straight motion, pulling the black icing into the web pattern. Work quickly before the icing sets.
- Dry and Store: Let the decorated cookies dry at room temperature for several hours or overnight to fully set the icing. Store in an airtight container at room temperature for up to 5 days.
Pro tip: If your royal icing feels too stiff or too runny at any point, just add a tiny bit of water or powdered sugar to adjust. Also, practice your piping motions on parchment paper before moving to the cookies — it helps build confidence with the spider web pattern.
Cooking Tips & Techniques
Getting the perfect spider web sugar cookies takes a bit of practice, but these tips will save you some headaches:
- Chill Your Dough: Don’t skip the fridge time. Chilled dough rolls out better and bakes with cleaner edges, less spreading.
- Measure Carefully: Baking is precise. Use a kitchen scale if you can, especially for flour and powdered sugar, to keep texture consistent.
- Royal Icing Consistency: This is where most people trip up. For flooding, thin the icing so it flows but doesn’t run off the cookie. For piping the web, use thicker icing that holds shape but is still smooth.
- Work Quickly: Royal icing dries fast. When piping your spider web lines, move steadily so the icing doesn’t crust over mid-design.
- Practice Makes Perfect: I messed up more webs than I care to admit. Don’t stress if your first few look wonky. Use a toothpick to fix mistakes before the icing sets.
- Use Gel Food Coloring: Liquid colors thin the icing, messing with consistency. Gels keep the black color intense and the icing thick enough to pipe.
Honestly, the spider web design is a little like drawing with icing—you’ll get better with each cookie. I found that multitasking by preparing the dough the night before and handling icing the next day keeps the process relaxed and fun instead of rushed.
Variations & Adaptations
You can customize these Halloween spider web sugar cookies in a few fun ways:
- Flavor Twists: Add a teaspoon of almond extract or orange zest to the dough for a subtle flavor change that pairs beautifully with the vanilla icing.
- Gluten-Free Option: Swap all-purpose flour for a gluten-free blend like Bob’s Red Mill 1-to-1. Texture will be slightly different but still delicious.
- Colorful Webs: Instead of black, try dark purple or blood-red gel colors for a spookier vibe. You can even pipe tiny spider shapes in the icing for extra creep factor.
- Alternative Icing: For a dairy-free or egg-free version, try a simple powdered sugar glaze made with plant-based milk and skip the royal icing. The spider web won’t be as crisp but still festive.
- Different Shapes: Use pumpkin or bat-shaped cookie cutters and decorate with the same technique for variety at your Halloween party.
One time, I tried using a homemade glaze from a fresh strawberry galette recipe for a fruity twist on the icing base—delicious but tricky for web piping. Stick to royal icing if you want those clean, defined webs.
Serving & Storage Suggestions
These cookies are best served at room temperature so the icing stays soft but not sticky. Arrange them on a festive platter with some mini pumpkins or candy corn for a fun Halloween display.
They pair nicely with warm drinks—think hot apple cider or a creamy pumpkin spice latte. If you’re looking to keep things simple after a busy party, these cookies also go surprisingly well with a cold glass of milk.
Store leftover cookies in an airtight container at room temperature for up to 5 days. If you want to keep them longer, freeze undecorated cookies for up to 3 months and decorate after thawing. Decorated cookies don’t freeze well because the royal icing can crack.
Reheat slightly by warming briefly in a microwave (about 10 seconds) to soften the cookie without melting the icing. Over time, the flavor of the cookies deepens, and the icing hardens slightly, which some folks prefer.
Nutritional Information & Benefits
Each sugar cookie (about 3-inch diameter) contains roughly 150-180 calories, with 7-9 grams of fat and 20-22 grams of carbohydrates. The royal icing adds sweetness and texture but does contribute extra sugar.
The main ingredients—flour, butter, sugar—are classic baking staples. Using real butter adds richness and some fat-soluble vitamins, while vanilla extract provides aroma without added calories.
This recipe is naturally gluten-free if you substitute the flour accordingly, and it contains egg whites in the icing, which might be a concern for those with egg allergies. You can use meringue powder or vegan royal icing alternatives if needed.
From a wellness perspective, these cookies are an occasional treat, perfect for celebrating without guilt. The homemade aspect means no preservatives or artificial flavors, which is always a plus.
Conclusion
These Perfect Halloween Spider Web Sugar Cookies with Royal Icing are more than just festive treats—they’re a fun, hands-on way to celebrate the season. They bring a little spooky spirit to your kitchen without complicated steps or fancy ingredients. Plus, the satisfaction of mastering that spider web design makes the whole baking process worthwhile.
Feel free to tweak the flavors, colors, and shapes to suit your Halloween vibe. I love how this recipe brings people together—whether it’s a family baking day or a last-minute party snack, it fits right in.
If you give these a try, I’d love to hear how your webs spun out (pun intended!). Share your decorating wins or mishaps—those stories always make me smile. Happy baking and have a wonderfully spooky Halloween!
FAQs about Perfect Halloween Spider Web Sugar Cookies
How do I prevent my sugar cookies from spreading too much?
Chilling the dough for at least an hour before rolling and baking helps control spreading. Also, avoid using too much butter or sugar, and bake at 350°F (175°C) watching closely for color changes.
Can I make the royal icing ahead of time?
Yes, royal icing can be made a day in advance. Store it in an airtight container with plastic wrap pressed on the surface to prevent drying. Stir well before using.
What’s the best way to get the black icing so dark?
Use gel or paste black food coloring instead of liquid. Add it gradually to your royal icing until you get a rich, deep black without thinning the consistency too much.
Can I use store-bought cookie dough for this recipe?
You can, but homemade dough gives better flavor and texture. Store-bought dough might spread more or not hold the web design as well.
How long does the royal icing take to dry completely?
Royal icing usually sets to the touch within 20-30 minutes, but complete drying can take several hours or overnight, especially for thicker layers or detailed piping.
By the way, if you enjoy festive baking, you might appreciate the creamy, strawberry-filled sweetness in this no-churn strawberry ice cream recipe for a cool contrast after your Halloween treats.
Pin This Recipe!
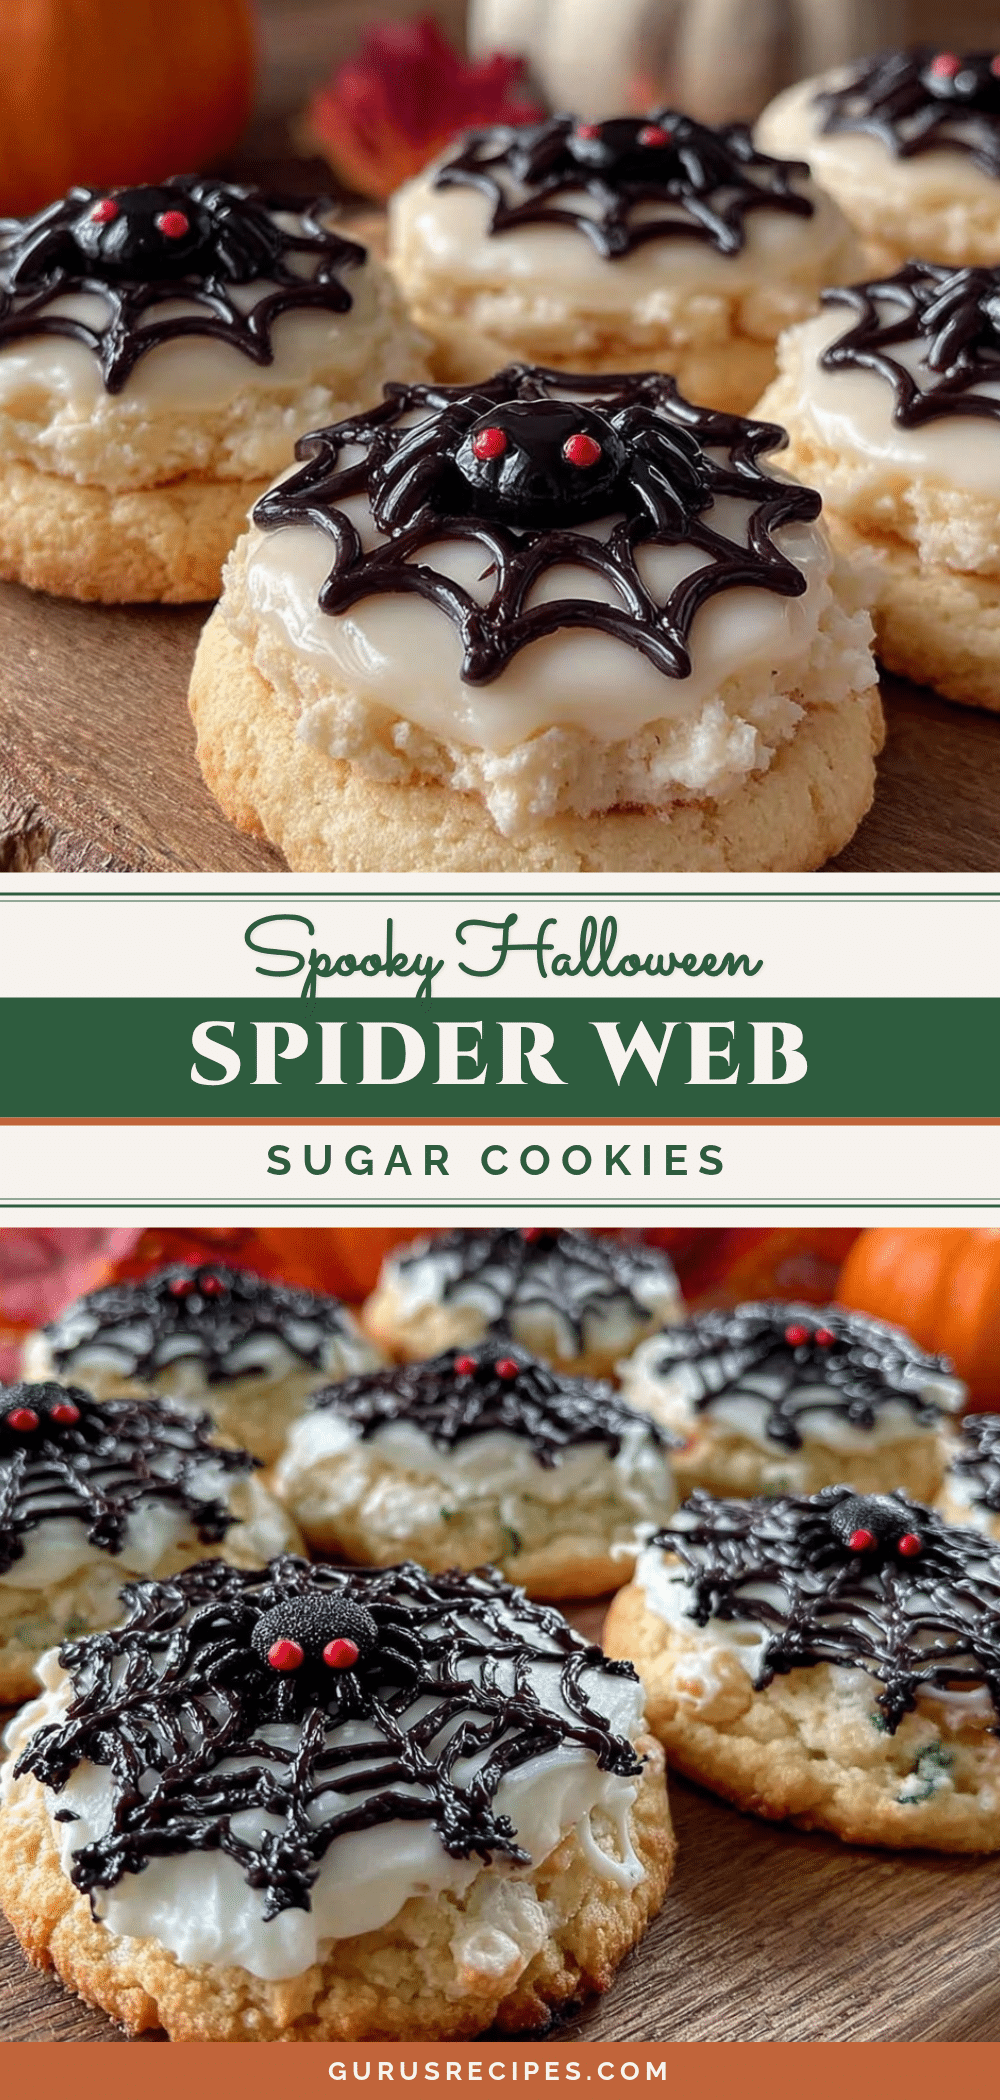

Perfect Halloween Spider Web Sugar Cookies
These Halloween-themed sugar cookies feature a buttery, tender base decorated with smooth royal icing piped into spooky spider web designs. Perfect for parties and fun to make with kids.
- Total Time: 1 hour 30 minutes
- Yield: 24 cookies 1x
Ingredients
- 2 ¾ cups all-purpose flour (345 g)
- 1 tsp baking powder
- ½ tsp salt
- 1 cup unsalted butter, softened (225 g)
- 1 ¼ cups granulated sugar (250 g)
- 1 large egg, room temperature
- 1 tsp pure vanilla extract
- 2 tbsp milk (optional, to adjust dough consistency)
- 4 cups powdered sugar, sifted (480 g)
- 3 large egg whites or 4 tbsp pasteurized egg whites (60 ml)
- 1 tsp pure vanilla extract
- 1 tsp fresh lemon juice
- Black gel or paste food coloring
- Water as needed to adjust icing consistency
Instructions
- Prepare the Dough: In a bowl, whisk together the flour, baking powder, and salt. In a separate large bowl, cream the softened butter and granulated sugar until light and fluffy (about 3 to 4 minutes with a mixer). Add the egg and vanilla extract, mixing until combined. Gradually add the dry ingredients, mixing just until incorporated. If the dough feels too stiff, add milk one teaspoon at a time to reach a pliable but firm texture.
- Chill the Dough: Shape the dough into a disk, wrap tightly in plastic wrap, and refrigerate for at least 1 hour to prevent spreading and ease rolling.
- Roll and Cut: Preheat oven to 350°F (175°C). On a lightly floured surface, roll out the chilled dough to about ¼ inch (6 mm) thickness. Use a round cookie cutter about 3 inches (7.5 cm) in diameter to cut shapes. Transfer cookies to baking sheets lined with parchment paper, spacing about 1 inch (2.5 cm) apart.
- Bake: Bake for 8 to 10 minutes, or until edges just start to turn golden. Watch closely to avoid overbaking. Cool completely on a wire rack.
- Make the Royal Icing: In a clean bowl, beat egg whites and lemon juice until frothy. Gradually add powdered sugar, beating until icing holds stiff peaks but remains smooth and glossy. Adjust consistency with a few drops of water if too thick. Separate about ⅓ of the icing and mix in black gel food coloring until rich and opaque.
- Flood the Cookies: Thin the white royal icing with a few drops of water to flood consistency (should slowly level out). Using a piping bag or spoon, cover each cookie with a smooth layer of white icing. Let set for 15-20 minutes until slightly firm but tacky.
- Create the Spider Web: Fit a piping bag with a small round tip and fill with black icing. Pipe concentric circles over the white base, starting from the center outward. Using a toothpick or skewer, drag lines from center to edges to form the web pattern. Work quickly before icing sets.
- Dry and Store: Let decorated cookies dry at room temperature for several hours or overnight to fully set icing. Store in an airtight container at room temperature for up to 5 days.
Notes
Chill dough for at least 1 hour to prevent spreading. Use gel food coloring for intense black without thinning icing. Practice piping on parchment paper before decorating cookies. Royal icing can be made a day ahead and stored airtight. Store decorated cookies at room temperature up to 5 days; freeze undecorated dough up to 3 months. Adjust icing consistency with water or powdered sugar as needed.
- Prep Time: 20 minutes
- Cook Time: 10 minutes
- Category: Dessert
- Cuisine: American
Nutrition
- Serving Size: 1 cookie (about 3-in
- Calories: 165
- Sugar: 14
- Sodium: 90
- Fat: 8
- Saturated Fat: 5
- Carbohydrates: 21
- Protein: 2
Keywords: Halloween cookies, sugar cookies, royal icing, spider web cookies, Halloween treats, decorated cookies, easy sugar cookies


