
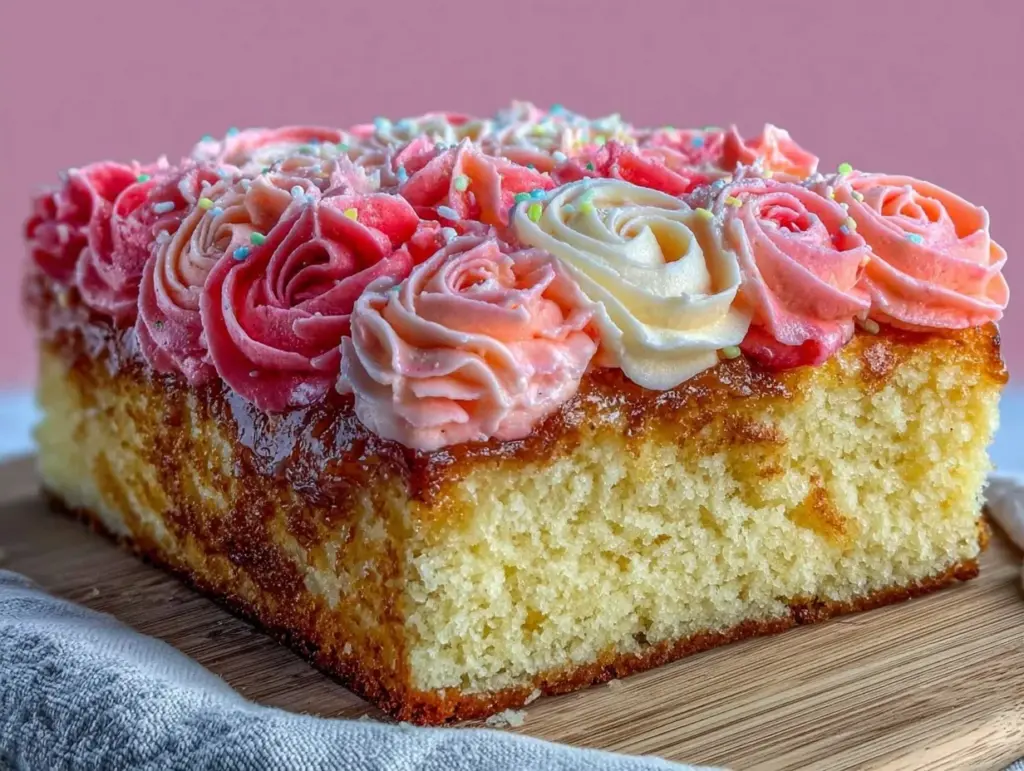
“Can you believe I actually made this cake by accident?” I heard myself say, half in disbelief, as my friend eyed the Perfect Ombre Rosette Sheet Cake with Vanilla Buttercream sitting proudly on the counter. Honestly, it started as a rushed afternoon project—I was juggling a million things and thought, “Why not just throw together a quick sheet cake with a simple swirl of frosting?” But then, as the layers baked, I got this wild idea to tint the batter in shades of pink, hoping for a subtle gradient. The baking timer dinged, and the kitchen filled with that warm vanilla scent that instantly calms a busy mind.
I wasn’t expecting much, but once I piped on the vanilla buttercream rosettes in a gentle ombre pattern, the cake looked like a little work of art. Friends kept asking for the recipe, and honestly, it became my go-to for both last-minute celebrations and those times when I just needed a little creative outlet without the fuss. The texture was soft, tender, and the buttercream? Smooth and sweet, but not overpowering.
What really stuck with me was how this cake, born from a rushed afternoon and a sprinkle of whimsy, turned into something that felt special and joyful. It’s the kind of recipe that’s approachable enough for a casual baker, but pretty enough to impress without hours of decorating stress. That quiet moment when I sliced into it and saw those soft gradient layers made me realize this recipe was more than just dessert—it was a little celebration in every bite.
Why You’ll Love This Recipe
This Perfect Ombre Rosette Sheet Cake with Vanilla Buttercream isn’t just another cake recipe you’ll scroll past. Trust me, I’ve tested this one multiple times (sometimes more than once in a week!) to nail the balance between flavor, texture, and presentation. Here’s what makes it stand out:
- Quick & Easy: The cake comes together in under an hour, making it ideal for busy weeknights or unexpected guests.
- Simple Ingredients: No rare finds here—basic pantry staples and fresh dairy ingredients you likely have on hand.
- Perfect for Celebrations: Whether it’s birthdays, baby showers, or casual brunches, this cake adds that wow factor.
- Crowd-Pleaser: Kids love the soft vanilla flavor and pretty ombre layers, while adults appreciate the delicate, not-too-sweet buttercream.
- Unbelievably Delicious: The tender crumb paired with creamy vanilla buttercream is pure comfort food with a pretty twist.
What sets this recipe apart is the gentle ombre effect in the batter paired with the classic vanilla buttercream piped as rosettes—no fancy tools or skills required, just a little patience and love. It’s comfort food reimagined as a charming centerpiece. Honestly, the first time I served this cake at a small gathering, people kept closing their eyes after the first bite, savoring that perfect vanilla sweetness.
If you want a cake recipe that’s equally suited to impressing guests and brightening an ordinary day, this one will stick with you. And hey, if you love strawberry flavors, you might enjoy pairing this cake with a fresh fruit dessert like a homemade fresh strawberry galette with vanilla glaze for a delightful finish.
What Ingredients You Will Need
This recipe uses simple, wholesome ingredients to create a soft vanilla cake with a smooth buttercream frosting. You don’t need a specialty store run—most are pantry staples or easy to find at any grocery. The ombre effect comes from gently tinting the batter with food coloring, so feel free to customize your favorite hues.
- For the Cake Batter:
- 2 ½ cups (312 g) all-purpose flour, sifted
- 2 ½ tsp baking powder
- ½ tsp salt
- 1 cup (227 g) unsalted butter, softened (I prefer Land O’Lakes for a creamy texture)
- 1 ¾ cups (350 g) granulated sugar
- 4 large eggs, room temperature
- 1 tbsp pure vanilla extract
- 1 cup (240 ml) whole milk, room temperature (can swap for almond milk if needed)
- Gel food coloring—choose 3 shades of your preferred color to create the ombre effect (I use AmeriColor gels for vibrant, consistent color)
- For the Vanilla Buttercream:
- 1 cup (227 g) unsalted butter, softened
- 4 cups (480 g) powdered sugar, sifted
- 2 tsp pure vanilla extract
- 2–4 tbsp (30–60 ml) heavy cream or whole milk (adjust for desired consistency)
- Pinch of salt (balances the sweetness)
Look for fresh eggs and good-quality butter, as they really make a difference in cake texture and flavor. If you prefer a dairy-free version, swap butter with plant-based margarine and milk with coconut or oat milk. The gel food coloring works best here to keep the batter thick and not watery—liquid dyes can thin the batter too much.
Equipment Needed
- 9×13-inch (23×33 cm) sheet cake pan
- Mixing bowls (preferably glass or metal)
- Electric mixer (handheld or stand mixer) for batter and frosting
- Measuring cups and spoons
- Rubber spatula for folding and scraping batter
- Piping bags with large star tips (Wilton 1M is perfect for rosettes)
- Cooling rack
- Offset spatula for smoothing frosting
If you don’t have a piping bag, a sturdy plastic sandwich bag with a small corner cut off works in a pinch. For mixing, I find a stand mixer helpful, but a handheld mixer does the job well too. Keeping your buttercream at the right softness makes piping much easier—if it’s too warm, it won’t hold shape; too cold, it’s tough to spread. If you’re serious about cake decorating, investing in good piping tips will pay off, but for this cake, the Wilton 1M is a budget-friendly classic.
Preparation Method
- Preheat and Prepare: Preheat your oven to 350°F (175°C). Grease your 9×13-inch pan and line it with parchment paper for easy release. This step saves you a lot of stress when it’s time to unmold the cake.
- Mix Dry Ingredients: In a medium bowl, whisk together the sifted flour, baking powder, and salt. Set aside. This ensures your leavening is evenly distributed and prevents clumps.
- Cream Butter and Sugar: In a large bowl, beat the softened butter and granulated sugar on medium speed for about 3-4 minutes, until the mixture is light and fluffy. This step traps air, giving the cake a tender crumb.
- Add Eggs and Vanilla: Beat in the eggs one at a time, mixing well after each addition. Stir in the vanilla extract. Make sure eggs are room temperature to avoid curdling.
- Alternate Adding Dry and Wet Ingredients: Reduce mixer speed to low. Gradually add the flour mixture in three parts, alternating with the milk in two parts, beginning and ending with flour. Mix just until combined—overmixing can make the cake tough.
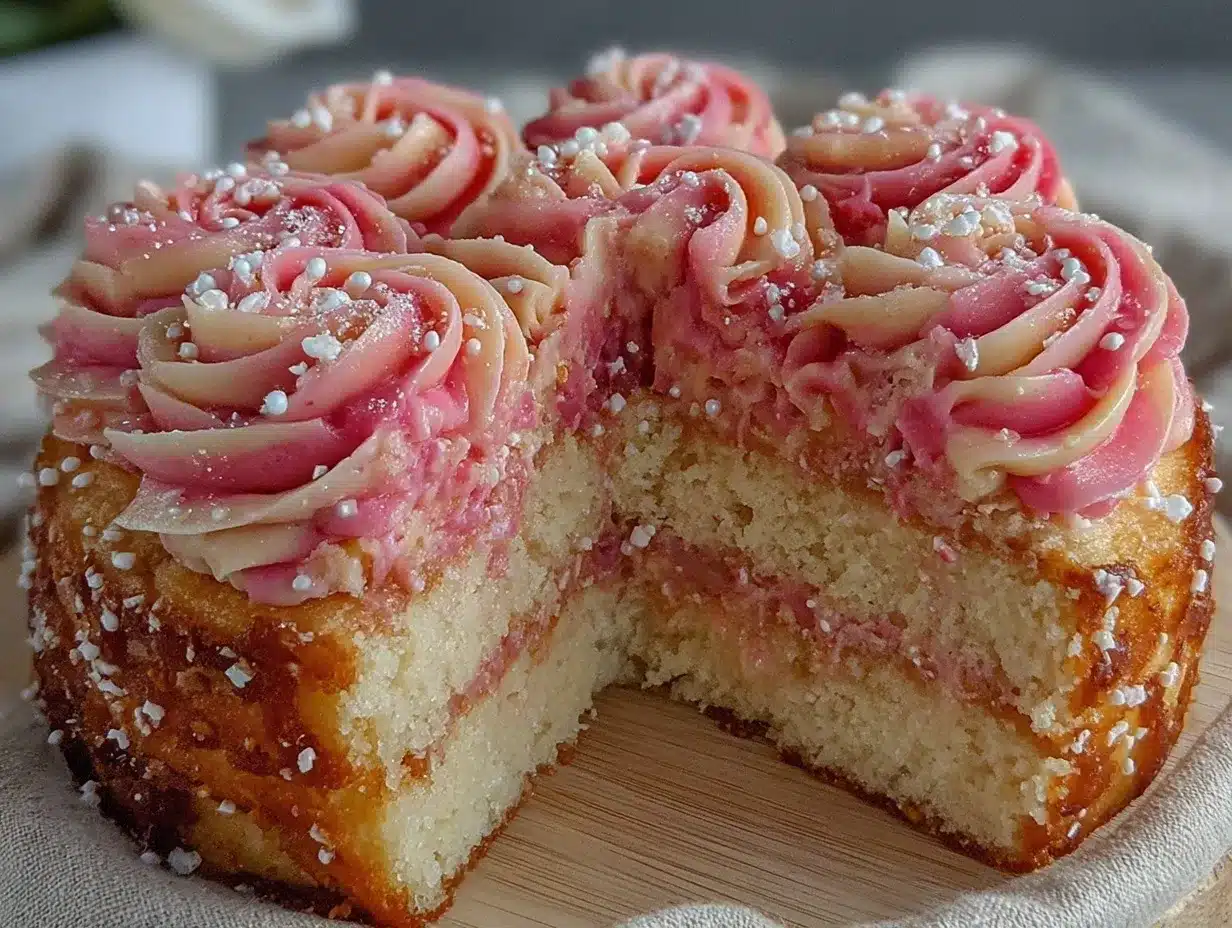
- Create Ombre Batters: Divide the batter evenly into three bowls. Add a small amount of gel food coloring to each bowl to create a gradient—from light to dark. Mix gently to keep the batter smooth and avoid air bubbles.
- Layer the Batter: Pour the darkest batter into the prepared pan first, spreading evenly. Follow with the medium shade, then the lightest on top. Use a spatula to smooth each layer gently. The layers should be distinct but not mixed.
- Bake: Bake for 35-40 minutes, or until a toothpick inserted in the center comes out clean. Check at 35 minutes to avoid overbaking. The cake should spring back lightly to the touch.
- Cool Completely: Let the cake cool in the pan for 15 minutes, then transfer to a cooling rack to cool fully before frosting. Patience here prevents frosting from melting.
- Make the Vanilla Buttercream: Beat the softened butter on medium speed until creamy, about 2 minutes. Gradually add powdered sugar, one cup at a time, mixing on low. Add vanilla extract, salt, and 2 tablespoons of cream. Beat on high for 3-4 minutes until light and fluffy. Adjust consistency with more cream or sugar as needed.
- Pipe the Rosettes: Fill a piping bag fitted with a Wilton 1M tip with the buttercream. Starting at the center of each rosette, pipe in a tight spiral moving outward. Cover the entire cake surface with rosettes, working row by row. The ombre effect here can be created by tinting portions of the buttercream in matching shades or using the vanilla white for a classic look.
- Final Touches: Chill the cake for 20 minutes to set the frosting before slicing. This helps keep the rosettes intact.
Pro tip: If your buttercream feels too soft while piping, pop it in the fridge for 10 minutes but don’t let it harden completely or it’ll be tough to pipe smoothly.
Cooking Tips & Techniques
Getting the Perfect Ombre Rosette Sheet Cake with Vanilla Buttercream right involves a few little tricks I picked up after some trial and error. Let me share what I learned:
- Softened Butter is Key: For both cake batter and buttercream, make sure butter is softened—not melted. It creams better and traps air for fluffiness.
- Room Temperature Ingredients: Eggs and milk at room temp mix more evenly, preventing curdling or dense spots.
- Don’t Overmix: Overworking the batter develops gluten, making the cake tough. Mix until just combined.
- Gel Food Coloring Over Liquid: I’ve found gel colors give a richer hue without watering down the batter, which can affect texture.
- Practice Piping: If you’re new to rosettes, practice on parchment before decorating the cake. Keep steady pressure and move your wrist in a smooth spiral.
- Temperature Matters for Buttercream: If it’s too warm, the buttercream can get runny; too cold, it’s stiff. Aim for a consistency that holds shape but is still soft to pipe.
- Timing: Bake the cake first, then let it cool fully before frosting—rushing this leads to melty, sad buttercream.
Once, I tried to rush the cooling step and ended up with a frosting mess that looked more like a melting snowman than a rosette garden. Lesson learned: patience pays off big time in cake decorating.
Variations & Adaptations
This recipe is quite flexible and lends itself well to customization. Here are a few ways I’ve tweaked it:
- Flavor Twists: Add a teaspoon of almond extract in the batter for a subtle nutty note, or fold in lemon zest to brighten the vanilla base.
- Color Themes: Swap the pink ombre for blues or purples for a birthday party theme, or use natural coloring like beet juice or matcha powder for a healthier option.
- Gluten-Free: Substitute the all-purpose flour with a 1:1 gluten-free baking flour blend. I recommend brands like Bob’s Red Mill for reliable results.
- Dairy-Free Buttercream: Use vegan butter and coconut milk instead of dairy for a plant-based version that still pipes beautifully.
- Layer Cake Adaptation: If you want to go fancy, bake the batter in three separate round pans for a tiered ombre cake decorated with the same rosette technique.
One personal favorite variation was adding a layer of fresh strawberry slices between the cake and frosting—a nod to the fruity flavors I adore in my creamy no-churn strawberry ice cream. It adds a juicy surprise that cuts through the richness.
Serving & Storage Suggestions
This cake is best served at room temperature, allowing that vanilla buttercream to be soft and luscious. I like to cut it into generous squares and pair it with a simple cup of tea or coffee for a cozy afternoon treat.
If you want to add a little freshness, a side of lightly macerated berries makes a lovely complement, echoing the soft pastel hues.
Store leftovers covered tightly in the refrigerator for up to 4 days. Bring slices back to room temperature before serving to soften the buttercream again. For longer storage, this cake freezes well—wrap tightly in plastic wrap and foil, and freeze for up to 3 months. Thaw overnight in the fridge before serving.
Over time, the flavors meld and the cake becomes even more moist. Just keep the rosettes covered to prevent drying out. If you want a quick refresh, a light dusting of powdered sugar right before serving adds a delicate touch.
Nutritional Information & Benefits
Per serving (based on 12 servings), this Perfect Ombre Rosette Sheet Cake offers approximately:
| Calories | Fat | Carbohydrates | Protein | Sugar |
|---|---|---|---|---|
| 420 kcal | 22 g | 55 g | 5 g | 38 g |
The key ingredients like eggs and butter provide protein and healthy fats, while vanilla extract adds flavor without calories. Using whole milk keeps the crumb tender and moist. For those watching carbs or dairy, swapping ingredients as suggested earlier can help tailor this to your needs.
This cake isn’t a health food, but it’s a lovely treat made from real ingredients, without artificial preservatives or fillers. I always say—balance is key, and enjoying a slice of cake like this, especially when shared with friends, feels worth every bite.
Conclusion
The Perfect Ombre Rosette Sheet Cake with Vanilla Buttercream has become one of my favorite recipes to pull off when I want something pretty but not complicated. It’s a sweet reminder that sometimes the best creations come from a bit of whimsy and a dash of patience. Whether you’re new to baking or looking to impress without stress, this cake is a reliable winner.
Feel free to tweak the colors, flavors, or frosting to fit your mood or occasion. I love how adaptable it is—just like those comforting recipes like my classic strawberry pretzel salad bars, it’s a recipe that invites your own spin.
If you try it, I’d love to hear how your rosettes turned out or what fun variations you came up with. Baking is better when shared, after all. So grab your mixer, pick your colors, and enjoy the sweet satisfaction of a homemade cake made just for you.
FAQs
- Can I make this cake without food coloring?
Yes, you can skip the food coloring for a classic vanilla sheet cake. The buttercream rosettes will still look beautiful piped in white. - How do I store leftover frosted cake?
Keep it covered in the fridge for up to 4 days. Bring to room temperature before serving for the best texture. - Can I use a different frosting?
Absolutely! Cream cheese frosting or whipped cream can work, but buttercream holds rosette shapes best. - What if I don’t have a piping bag?
A sturdy plastic bag with a small corner cut off works fine for piping rosettes. - Can I freeze the cake after frosting?
Yes, freeze tightly wrapped for up to 3 months. Thaw in the fridge overnight before serving.
Pin This Recipe!
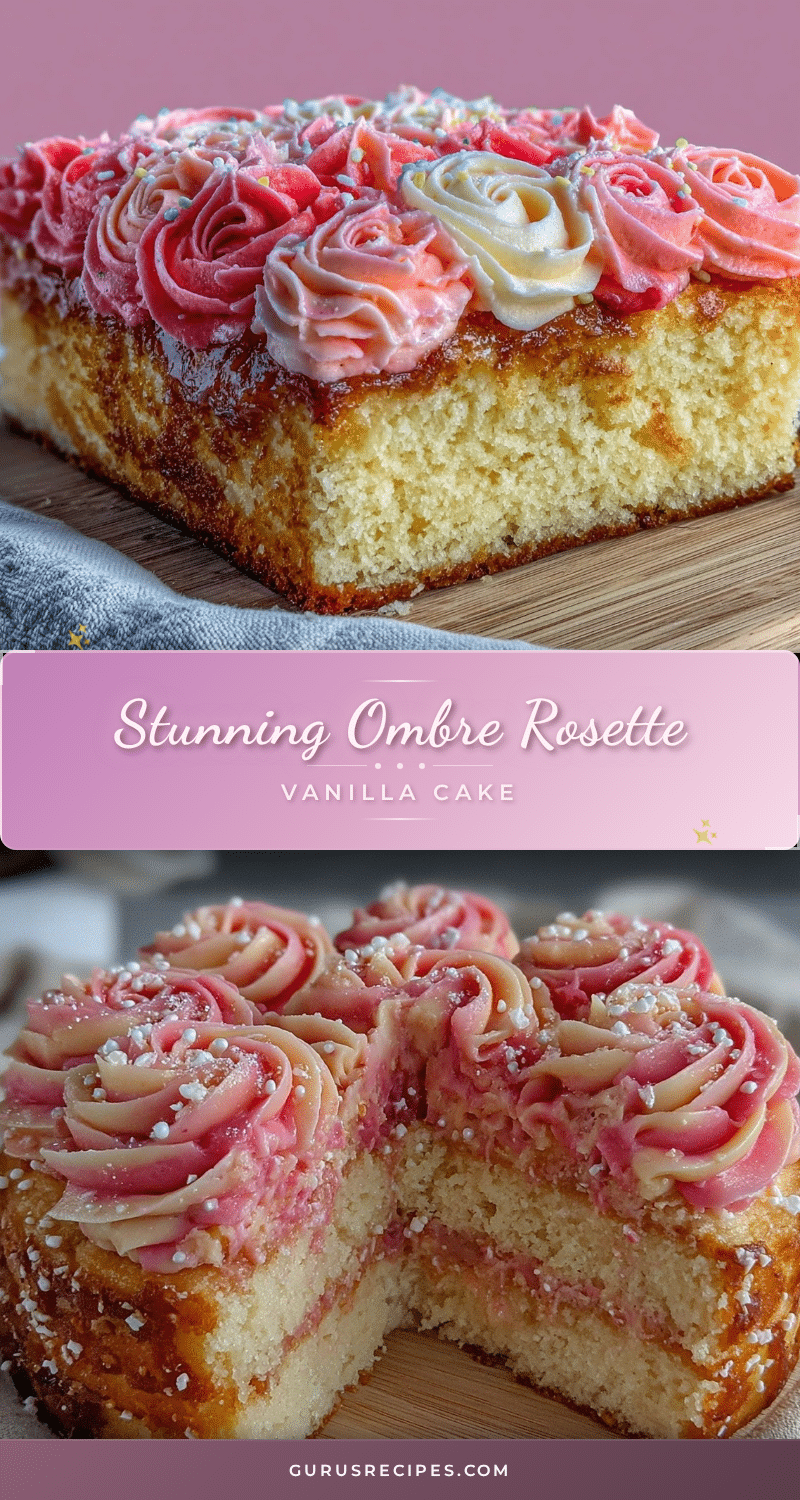

Perfect Ombre Rosette Sheet Cake with Vanilla Buttercream
A soft and tender vanilla sheet cake with a beautiful ombre effect, topped with smooth vanilla buttercream piped as rosettes. Quick and easy to make, perfect for celebrations or casual treats.
- Total Time: 1 hour
- Yield: 12 servings 1x
Ingredients
- 2 ½ cups (312 g) all-purpose flour, sifted
- 2 ½ tsp baking powder
- ½ tsp salt
- 1 cup (227 g) unsalted butter, softened
- 1 ¾ cups (350 g) granulated sugar
- 4 large eggs, room temperature
- 1 tbsp pure vanilla extract
- 1 cup (240 ml) whole milk, room temperature
- Gel food coloring (3 shades for ombre effect)
- 1 cup (227 g) unsalted butter, softened (for buttercream)
- 4 cups (480 g) powdered sugar, sifted
- 2 tsp pure vanilla extract (for buttercream)
- 2–4 tbsp (30–60 ml) heavy cream or whole milk (for buttercream)
- Pinch of salt (for buttercream)
Instructions
- Preheat oven to 350°F (175°C). Grease a 9×13-inch pan and line with parchment paper.
- In a medium bowl, whisk together sifted flour, baking powder, and salt. Set aside.
- In a large bowl, beat softened butter and granulated sugar on medium speed for 3-4 minutes until light and fluffy.
- Beat in eggs one at a time, mixing well after each addition. Stir in vanilla extract.
- Reduce mixer speed to low. Gradually add flour mixture in three parts, alternating with milk in two parts, beginning and ending with flour. Mix just until combined.
- Divide batter evenly into three bowls. Add gel food coloring to each to create a gradient from light to dark. Mix gently.
- Pour darkest batter into prepared pan, spreading evenly. Follow with medium shade, then lightest on top. Smooth each layer gently.
- Bake for 35-40 minutes or until a toothpick inserted in center comes out clean. Check at 35 minutes to avoid overbaking.
- Let cake cool in pan for 15 minutes, then transfer to cooling rack to cool completely.
- For buttercream: Beat softened butter on medium speed until creamy, about 2 minutes.
- Gradually add powdered sugar, one cup at a time, mixing on low speed.
- Add vanilla extract, salt, and 2 tablespoons cream. Beat on high for 3-4 minutes until light and fluffy. Adjust consistency with more cream or sugar as needed.
- Fill piping bag fitted with Wilton 1M tip with buttercream. Pipe rosettes in tight spirals covering entire cake surface, working row by row.
- Chill cake for 20 minutes to set frosting before slicing.
Notes
Use softened butter (not melted) for best texture. Room temperature eggs and milk prevent curdling. Do not overmix batter to avoid toughness. Gel food coloring is preferred over liquid to maintain batter consistency. If buttercream is too soft for piping, chill for 10 minutes but do not let harden. Let cake cool completely before frosting to prevent melting buttercream. Practice piping rosettes on parchment paper if new to decorating.
- Prep Time: 20 minutes
- Cook Time: 35-40 minutes
- Category: Dessert
- Cuisine: American
Nutrition
- Serving Size: 1 slice (1/12th of c
- Calories: 420
- Sugar: 38
- Fat: 22
- Carbohydrates: 55
- Protein: 5
Keywords: ombre cake, rosette cake, vanilla buttercream, sheet cake, easy cake recipe, celebration cake, vanilla cake, baking, dessert


