

I need a Halloween treat that looks creepy but tastes amazing, and I have everything except the almond slivers. That’s how these spooky white chocolate witch finger pretzel rods came to be. Honestly, I was standing in my kitchen last October, staring at a bag of pretzel rods and a block of white chocolate, and the idea just clicked. My brain went straight to those witch fingers you see at Halloween parties—the ones made from butter cookies with an almond for a nail. But I wanted something crunchier. Something that satisfied that salty-sweet craving without falling apart after one bite.
So I grabbed the pretzels, melted the white chocolate, and started experimenting. The first batch looked more like alien tentacles than witch fingers, but by the third try, I had it down. A little almond extract in the white chocolate gives them that eerie, almost medicinal sweetness you associate with candy. A dab of red gel food coloring at the “cuticle” makes them look genuinely disturbing. And the almond sliver nail? That’s the detail that sells the whole creepy illusion.
These are the kind of Halloween treats that make people do a double take. They’re so simple a kid could help make them, but they look like something from a professional bakery. That’s my favorite kind of recipe—one that does all the work without making you feel like you’re sacrificing your evening to the kitchen gods.
These spooky white chocolate witch finger pretzel rods have become my go-to Halloween party contribution. They disappear fast, and someone always asks for the recipe. That’s how you know you’ve got a keeper.
Why You’ll Love This Recipe
Let me tell you why these witch finger pretzels deserve a spot on your Halloween menu this year. I’ve tested these through three different Halloweens, two kids’ parties, and one very skeptical husband who now requests them annually. They’ve earned their place.
- Fast & Simple: You can make a whole batch in under 20 minutes. No baking required, no complicated techniques. Just melt, dip, decorate, and chill. Perfect for those last-minute Halloween cravings or when you realize the party is tomorrow and you have nothing to bring.
- Minimal Ingredients: You probably have most of these in your pantry right now. Pretzel rods, white chocolate chips, almond slivers, and a little food coloring. That’s it. No special trips to the craft store for weird candy eyes or fondant.
- Perfect for Halloween Parties: These are the kind of treat that gets photographed before it gets eaten. They’re creepy without being gross, which means both kids and adults go for them. I’ve seen grown men hesitate before taking one, then immediately grab three more.
- Crowd-Pleaser: The salty-sweet combo is basically irresistible. The pretzel gives you that satisfying crunch, the white chocolate adds creamy sweetness, and the almond brings a nutty finish. It’s a flavor trifecta that works every time.
- Kid-Friendly Activity: This is a great recipe to make with kids. They can dip the pretzels, place the almond nails, and add the “blood” details. Just be prepared for some creative interpretations—my nephew’s batch looked like zombie fingers, and honestly, that was even better.
What makes these different from other witch finger recipes? It’s the texture. Most versions use soft cookies or shortbread, which can crumble or break. Pretzel rods give you that sturdy, satisfying crunch that holds up on a dessert table for hours. Plus, the salt from the pretzel cuts through the sweetness of the white chocolate perfectly. It’s not just another Halloween treat—it’s the best version of a creepy classic.
What Ingredients You Will Need
This recipe uses simple, everyday ingredients to create something that looks genuinely spooky. The magic is in how you put them together, not in hunting down obscure baking supplies.
- Pretzel rods: 12-15 standard-sized rods. Look for thick, sturdy ones that won’t snap easily when you dip them. I prefer the brand Snyder’s of Hanover for their consistent size and crunch. Avoid the thin, fragile sticks—they’ll break under the weight of the chocolate.
- White chocolate chips or melting wafers: 12 ounces (about 2 cups). Use good-quality white chocolate for the best flavor and smoothest melt. Ghirardelli or Guittard are my go-to brands. Avoid white candy melts if you can—they have a waxy texture that doesn’t taste as good. If you’re dairy-free, there are excellent vegan white chocolate options that melt beautifully.
- Coconut oil or shortening: 1 tablespoon. This helps thin the white chocolate so it coats the pretzels evenly. It also gives the finished product a nice shine. Refined coconut oil works best since it has no coconut flavor.
- Almond extract: 1/2 teaspoon. This is optional but highly recommended. It gives the white chocolate a subtle marzipan-like flavor that makes the witch fingers taste more authentic. Trust me on this one.
- Whole almond slivers: 12-15 pieces. These become the fingernails. Look for slivers that are relatively flat and uniform in size. You want them to look like natural nails, not weird chunks. I buy the pre-sliced almonds and pick out the best-shaped pieces.
- Red gel food coloring: A small bottle. This creates the “blood” at the cuticle area and any additional creepy details. Gel coloring works better than liquid because it doesn’t thin out the chocolate. Americolor or Wilton brands are reliable.
- Parchment paper or silicone baking mat: For setting the finished pretzels. Parchment is fine, but a silicone mat gives you a non-stick surface that’s reusable.
Optional additions: A dusting of edible glitter for a magical witchy vibe, or a sprinkle of black sanding sugar for extra texture. I’ve also added a drop of green food coloring to the white chocolate for a more “witchy” green tint, but that’s entirely optional.
For substitution guidance: If you need a nut-free version, skip the almond extract and use a small piece of dried cranberry or a chocolate chip for the nail instead. For a vegan version, use dairy-free white chocolate and coconut oil. The recipe is flexible enough to accommodate most dietary needs without losing its creepy charm.
Equipment Needed
You don’t need much for this recipe, which is part of its beauty. Here’s what you’ll need:
- Microwave-safe bowl or double boiler: For melting the white chocolate. I use a glass measuring cup because the pour spout makes dipping easier. If you don’t have a microwave, a double boiler works perfectly.
- Baking sheet: Lined with parchment paper or a silicone mat. This is where your witch fingers will set. Make sure it fits in your refrigerator.
- Small offset spatula or butter knife: For spreading the chocolate and adding details. A toothpick also works for the finer blood vessel details.
- Tweezers: Optional but helpful for placing the almond slivers precisely. I started using them after my clumsy fingers kept knocking the almonds off-center.
- Piping bag or small zip-top bag: For adding the red gel details. A tiny piping tip gives you more control, but snipping the corner of a zip-top bag works in a pinch.
You don’t need a candy thermometer or any specialized equipment. If you have a microwave and a baking sheet, you’re good to go. I’ve made these in a hotel room for a Halloween party once, using a coffee mug and a butter knife. They turned out fine.
Preparation Method
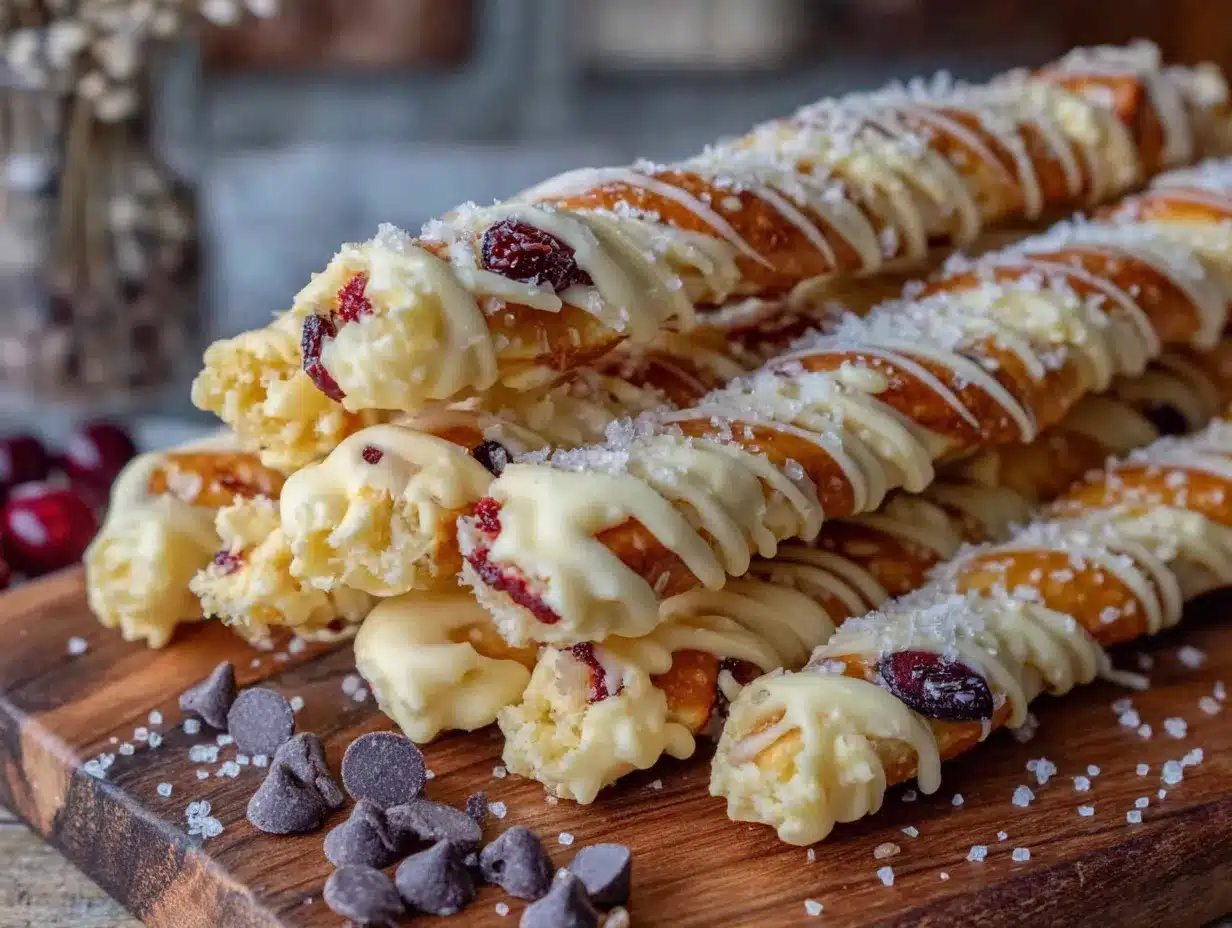
Let’s make some witch fingers. This process is straightforward, but there are a few tricks that make the difference between “oh, those are cute” and “wait, those are actually creepy.”
- Prep your workspace: Line a baking sheet with parchment paper or a silicone mat. Arrange your pretzel rods nearby. Have your almond slivers ready in a small bowl. This goes fast once you start dipping, so you want everything within arm’s reach.
- Melt the white chocolate: Place the white chocolate chips and coconut oil in a microwave-safe bowl. Microwave in 30-second intervals, stirring thoroughly after each. White chocolate burns easily, so don’t rush this. It should be completely smooth and slightly warm to the touch—not hot. If you’re using almond extract, stir it in after the chocolate is melted. The heat can cause the extract to lose its potency if added too early.
- Test the consistency: Dip a pretzel rod about two-thirds of the way into the melted chocolate. Lift it out and let the excess drip back into the bowl. The chocolate should coat the pretzel evenly without being too thick or too runny. If it’s too thick, add another teaspoon of coconut oil. If it’s too thin, let it cool for a minute and stir again.
- Dip the pretzels: Working one at a time, dip each pretzel rod into the melted white chocolate. Use a spoon to help coat the top portion if needed. Gently tap the pretzel against the side of the bowl to remove excess chocolate. You want a thin, even coating—not a thick blob.
- Create the finger shape: Place the dipped pretzel on your prepared baking sheet. While the chocolate is still wet, use your finger or a small spatula to gently shape the chocolate at the tip into a rounded “fingertip” shape. This is where the almond nail will go, so make sure there’s enough chocolate to hold it.
- Add the almond nail: Press an almond sliver into the chocolate at the tip of the pretzel, pointed end facing outward. It should look like a fingernail growing out of the chocolate. Press gently so it stays in place. If the chocolate has started to set, the almond won’t stick—work quickly.
- Create the knuckle lines: Use a toothpick or the tip of a small knife to draw 2-3 horizontal lines across the chocolate-covered portion of the pretzel. These create the illusion of knuckles. Make them slightly curved for a more natural look. Don’t press too hard—you don’t want to cut through to the pretzel.
- Add the “blood” detail: Dip a toothpick into the red gel food coloring and dab a small amount at the base of the almond nail, where the cuticle would be. This creates the creepy “blood” effect. You can also add a few tiny dots along the sides for extra gore factor. Less is more here—you want it to look unsettling, not like a crime scene.
- Let them set: Place the baking sheet in the refrigerator for 15-20 minutes, or until the chocolate is completely firm. Don’t skip this step—the chocolate needs to set fully to hold its shape and keep the almond nails in place.
- Add final details (optional): Once set, you can add more red gel details using a piping bag or toothpick. Create tiny “blood vessels” or “bruises” for extra realism. I’ve also added a light dusting of edible glitter for a magical witchy vibe.
A few troubleshooting tips: If your chocolate starts to thicken while you’re working, microwave it for 10 seconds and stir. If the almond nails keep falling off, your chocolate was too thick or too cool when you applied them. Next time, make sure the chocolate is warm enough to be fluid. If the pretzel breaks while you’re dipping, don’t panic—just eat it and move on. Nobody’s counting.
Cooking Tips & Techniques
I’ve made these witch finger pretzels at least a dozen times, and I’ve learned a few things the hard way. Let me save you some trouble.
Temperature matters: White chocolate is finicky. It seizes (turns grainy and clumpy) if it gets too hot or if even a drop of water gets into it. Melt it slowly and stir often. If it does seize, you can sometimes save it by adding a teaspoon of coconut oil and stirring vigorously. But honestly, it’s often easier to start over with fresh chocolate.
Work in small batches: Don’t try to dip all 15 pretzels at once. The chocolate will start to set, and your later pretzels will have thick, uneven coatings. Dip 3-4 at a time, let them set, then melt more chocolate if needed. It takes a little longer, but the results are worth it.
My biggest failure: The first time I made these, I used liquid red food coloring instead of gel. The liquid made the chocolate seize around the cuticle area, creating weird clumps that looked nothing like blood. I ended up with a tray of lumpy, sad witch fingers that looked more like diseased toes. Gel coloring is non-negotiable for this recipe.
Timing strategy: These are best made the day before your event. The chocolate sets fully overnight, and the flavors meld together. Plus, you’re not running around like a headless chicken on Halloween morning. Make them during a quiet evening, store them in the fridge, and you’re set for the party.
Consistency tips: For the most uniform witch fingers, use pretzel rods that are roughly the same length and thickness. Sort through your bag and pick out the best ones. The rejects can be your snack while you work. That’s the rule.
Variations & Adaptations
This recipe is surprisingly versatile. Here are some ways I’ve adapted it over the years:
Dark Chocolate Witch Fingers: Swap the white chocolate for dark or milk chocolate. The dark chocolate gives them a more sinister look, and the bitterness balances the saltiness of the pretzel beautifully. Use white chocolate chips or a dab of white candy melt for the almond nail instead of the whole sliver.
Green Witch Fingers: Add a few drops of green gel food coloring to the white chocolate before dipping. This gives them a moldy, witchy green tint that’s genuinely unsettling. I did this for a “Wicked Witch” themed party, and they were a hit.
Gluten-Free Version: Use gluten-free pretzel rods. They’re widely available now and work just as well. Just check the package to make sure they’re sturdy enough to hold the chocolate coating.
Mummy Pretzels: Instead of witch fingers, drizzle the dipped pretzels with thin lines of melted dark chocolate to create a mummy wrap effect. Add tiny candy eyes for the full mummy look. This is a fun variation if you’re doing a mix of Halloween treats.
Spider Web Design: After dipping in white chocolate, use a toothpick to drag lines of dark chocolate from the center outward, creating a spider web pattern. It’s more work, but the result is stunning.
I once made a batch using classic strawberry pretzel salad bars as inspiration, swapping the white chocolate for a strawberry-flavored candy melt. The pink color was less creepy but more festive. My kids loved them, even if they didn’t look particularly witchy.
Serving & Storage Suggestions
These witch finger pretzels are best served cold or at room temperature. The chocolate holds its shape better when it’s cool, and the creepy factor is higher when they’re firm to the touch.
Presentation ideas: Arrange them upright in a tall glass jar or a small vase, with the fingernails pointing up. It looks like a bouquet of severed fingers, which is exactly the vibe you want for Halloween. You can also lay them on a platter with some fake spider webs or plastic spiders scattered around for extra atmosphere.
Complementary treats: These pair beautifully with other Halloween desserts. Serve them alongside a batch of decadent Irish cream chocolate mousse for a sophisticated Halloween spread, or with creamy Baileys Irish cream cheesecake for an adult-only party. The salty-sweet contrast works with almost anything.
Storage: Store the witch fingers in an airtight container in the refrigerator for up to 5 days. Layer them between sheets of parchment paper to prevent them from sticking together. They’ll stay fresh and crunchy for the entire week, though they rarely last that long in my house.
Freezer storage: You can freeze these for up to 2 months. Place them in a single layer on a baking sheet and freeze until solid, then transfer to a freezer-safe container. Thaw in the refrigerator for about 30 minutes before serving. The texture is slightly less crunchy after freezing, but they’re still delicious.
Reheating: Don’t. These are meant to be served cold or at room temperature. Heat will melt the chocolate and ruin the creepy finger illusion.
Flavor development: These actually improve after a day in the refrigerator. The white chocolate sets completely, and the flavors meld together. The almond extract becomes more pronounced, and the saltiness of the pretzel balances the sweetness perfectly. Make them a day ahead if you can.
Nutritional Information & Benefits
Let’s be honest—these are a treat, not a health food. But here’s what you’re working with per serving (1 witch finger pretzel):
Estimated Nutrition (per pretzel):
– Calories: 180-220
– Fat: 10-12g
– Carbohydrates: 22-26g
– Sugar: 14-18g
– Protein: 3-4g
– Sodium: 200-300mg
Health considerations: White chocolate contains calcium and a small amount of protein from the milk solids. Pretzels provide quick energy from carbohydrates. Almond slivers offer healthy fats, vitamin E, and magnesium. It’s not a nutritional powerhouse, but it’s not the worst thing you could eat either.
Dietary notes: This recipe is vegetarian. For a vegan version, use dairy-free white chocolate and skip the almond extract (some brands contain dairy). For a gluten-free version, use gluten-free pretzel rods. The recipe contains dairy, gluten, and tree nuts (almonds).
My perspective: I’m a firm believer that treats have a place in a balanced diet. Halloween comes once a year. Make the witch fingers, enjoy them, and don’t stress about the nutritional breakdown. The joy of sharing something creepy and delicious with your friends and family is worth every calorie.
Conclusion
These spooky white chocolate witch finger pretzel rods are everything I want in a Halloween treat. They’re easy enough for a beginner to make, impressive enough to steal the show at any party, and delicious enough that people will reach for seconds before they even realize what they’re eating.
I love that this recipe lets me be creative without spending hours in the kitchen. You can make them as simple or as elaborate as you want. Add extra “blood” details, experiment with different colors, or keep them classic and creepy. There’s no wrong way to make a witch finger.
I’d love to hear how yours turn out. Did you add any creative twists? Did your kids help? Did anyone at your party actually scream when they saw them? Drop a comment below and share your Halloween baking adventures. And if you’re looking for more easy dessert ideas, try my easy crispy no-knead rosemary sea salt bread for a savory counterpoint to all that Halloween sugar. Happy haunting, and happy baking!
Frequently Asked Questions
Can I use milk chocolate instead of white chocolate?
Absolutely. Milk chocolate gives them a different look—less “witchy” and more “chocolate-covered pretzel with a weird nail.” They’ll still taste amazing, but the creepy factor drops slightly. Dark chocolate works too and actually looks more sinister.
How far in advance can I make these?
You can make them up to 5 days ahead and store them in the refrigerator. They actually taste better after a day or two because the flavors meld together. Just keep them in an airtight container with parchment paper between layers.
My white chocolate seized and turned grainy. What did I do wrong?
White chocolate seizes when it gets too hot or when even a tiny amount of water gets into it. Always melt it slowly in 30-second intervals, stirring thoroughly between each. If it does seize, try adding a teaspoon of coconut oil and stirring vigorously. If that doesn’t work, start over with fresh chocolate.
Can I make these nut-free?
Yes. Skip the almond extract and use a small dried cranberry, a chocolate chip, or a piece of dried apricot for the nail instead. The texture will be different, but they’ll still look creepy. Just make sure all your other ingredients are nut-free as well.
How do I transport these to a party without breaking them?
Place them in a single layer in a shallow container with a tight-fitting lid. Layer parchment paper between any additional layers. Keep them refrigerated until you’re ready to leave, and transport them in a cooler if it’s a warm day. They’re sturdy, but the chocolate can crack if they’re jostled too much.
Pin This Recipe!


Spooky White Chocolate Witch Finger Pretzels: Easy Halloween Treat
These spooky white chocolate witch finger pretzel rods are a creepy yet delicious Halloween treat. Made with pretzel rods, white chocolate, and almond slivers, they are easy to make and perfect for parties.
- Total Time: 15 minutes
- Yield: 12-15 servings 1x
Ingredients
- 12–15 pretzel rods
- 12 ounces (about 2 cups) white chocolate chips or melting wafers
- 1 tablespoon coconut oil or shortening
- 1/2 teaspoon almond extract (optional)
- 12–15 whole almond slivers
- Red gel food coloring
- Parchment paper or silicone baking mat
Instructions
- Prep your workspace: Line a baking sheet with parchment paper or a silicone mat. Arrange pretzel rods nearby and have almond slivers ready in a small bowl.
- Melt the white chocolate: Place white chocolate chips and coconut oil in a microwave-safe bowl. Microwave in 30-second intervals, stirring thoroughly after each, until completely smooth and slightly warm. Stir in almond extract if using.
- Test the consistency: Dip a pretzel rod about two-thirds into the melted chocolate. Lift and let excess drip back. The coating should be even. If too thick, add more coconut oil; if too thin, let cool slightly.
- Dip the pretzels: Working one at a time, dip each pretzel rod into the melted white chocolate. Use a spoon to coat the top if needed. Gently tap to remove excess chocolate.
- Create the finger shape: Place dipped pretzel on prepared baking sheet. While chocolate is still wet, use your finger or a small spatula to shape the tip into a rounded ‘fingertip’ shape.
- Add the almond nail: Press an almond sliver into the chocolate at the tip, pointed end outward, to resemble a fingernail. Press gently to secure.
- Create the knuckle lines: Use a toothpick or small knife to draw 2-3 horizontal lines across the chocolate-covered portion to create knuckles. Make them slightly curved.
- Add the ‘blood’ detail: Dip a toothpick into red gel food coloring and dab a small amount at the base of the almond nail (cuticle area). Add tiny dots along the sides if desired.
- Let them set: Place the baking sheet in the refrigerator for 15-20 minutes, or until the chocolate is completely firm.
- Add final details (optional): Once set, add more red gel details using a piping bag or toothpick for extra realism. Optionally dust with edible glitter.
Notes
White chocolate can seize if overheated or if water gets in. Melt slowly in 30-second intervals. For best results, make a day ahead and store in the refrigerator. Use gel food coloring, not liquid, to avoid seizing.
- Prep Time: 10 minutes
- Cook Time: 5 minutes
- Category: Dessert
- Cuisine: American
Nutrition
- Serving Size: 1 witch finger pretz
- Calories: 200
- Sugar: 16
- Sodium: 250
- Fat: 11
- Saturated Fat: 6
- Carbohydrates: 24
- Fiber: 1
- Protein: 3.5
Keywords: Halloween treats, witch finger pretzels, white chocolate pretzels, easy Halloween dessert, spooky snacks


