
“You really think this will work in a jar?” my friend asked, eyeing the suspiciously simple concoction I was layering for the third time that afternoon. Honestly, I wasn’t sure either at first. The idea of banana pudding in a mason jar had simmered in my mind for weeks, sparked by a last-minute invite to an outdoor party when all I had was a handful of ripe bananas and a tub of vanilla pudding in the fridge. I threw it together with zero expectations, just hoping it wouldn’t turn into a mushy mess on the picnic table.
To my surprise, those little layered parfaits became the hit of the afternoon—something about the creamy custard, fresh banana slices, and crispy vanilla wafers nestled in a cute jar just clicked. The rustic charm of mason jars mixed with the nostalgic comfort of banana pudding made for a winning combo. Since then, I’ve found myself making these parfaits multiple times a week when the sunshine calls for easy, crowd-friendly desserts that travel well and keep cool without fuss.
Turns out, this recipe wasn’t just a quick fix—it became a staple that I trust when I want something that feels both homey and special, especially for outdoor gatherings where keeping things simple but tasty is key. Plus, they’re perfectly portioned, so no messy serving dishes to worry about, which is a lifesaver when hosting casual get-togethers.
There’s something calming about peeling back that jar’s lid and seeing the creamy layers ready to be devoured after a day spent under the sun. It’s one of those recipes that sticks with you—not because it’s fancy, but because it’s honest, comforting, and just plain good. If you’ve got a few ripe bananas and a craving for something sweet yet fresh, these Creamy Mason Jar Banana Pudding Parfaits might just become your new go-to for those laid-back outdoor parties.
Why You’ll Love This Recipe
After a few rounds of testing and tweaking, I can say with some confidence that this banana pudding parfait recipe hits all the right notes for outdoor parties. I’ve seen friends and family dig in without hesitation, and I’ve learned what makes this version stand out from the rest. Here’s why it’s worth making:
- Quick & Easy: Ready in under 20 minutes, this recipe is perfect for busy afternoons or last-minute gatherings. No oven required, just simple assembly.
- Simple Ingredients: You don’t need fancy or hard-to-find items. If you can grab ripe bananas, vanilla pudding mix, and vanilla wafers, you’re good to go.
- Perfect for Outdoor Parties: Mason jars keep portions neat and make it easy for guests to grab dessert without extra plates or mess.
- Crowd-Pleaser: Kids, adults, picky eaters—everyone loves that creamy, layered texture combined with the crunch of wafers and sweet banana slices.
- Unbelievably Delicious: The pudding’s smoothness paired with fresh banana flavor and the slight crunch gives you a comforting, nostalgic bite in every spoonful.
What sets this recipe apart? Instead of using just instant pudding (which can sometimes be a bit artificial-tasting), I add a touch of cream cheese to the pudding mix for extra creaminess and richness. Also, layering the pudding and bananas carefully prevents sogginess and keeps each bite fresh and distinct. I’ve even swapped in coconut milk and almond wafers for dairy-free parties, and it still holds up beautifully.
This isn’t just banana pudding in a jar—it’s a little slice of sunshine and comfort you can carry anywhere. It’s the kind of dessert that makes you close your eyes after the first bite and smile, knowing you nailed it without a fuss.
What Ingredients You Will Need
This recipe uses simple, wholesome ingredients to deliver bold flavor and satisfying texture without the fuss. Most of these are pantry staples or fresh items you can find easily, and many have easy substitutions if needed.
- For the Pudding Layer:
- 1 package (3.4 oz / 96 g) instant vanilla pudding mix (I prefer Jell-O brand for best flavor)
- 2 cups (480 ml) whole milk, chilled (or use almond/coconut milk for dairy-free)
- 4 oz (115 g) cream cheese, softened (adds richness and creaminess)
- 1 teaspoon pure vanilla extract
- 2 tablespoons powdered sugar (optional, for added sweetness)
- For the Fruit Layer:
- 3 ripe bananas, peeled and sliced (firm but ripe works best to avoid mushiness)
- For the Crunch Layer:
- 1 ½ cups (about 50 g) vanilla wafers (Nilla Wafers are classic, but gluten-free vanilla cookies work too)
- Optional Toppings:
- Whipped cream (store-bought or homemade)
- Fresh mint leaves or a light dusting of cinnamon for garnish
If you want to switch things up, frozen banana slices can work in a pinch (just thaw before assembling) or swap out vanilla wafers for crushed graham crackers for a different crunch. When I’m feeling a little indulgent, I add a drizzle of caramel sauce between layers. It’s a fun twist for those who like extra sweetness.
Equipment Needed
- Mason jars (8 oz / 240 ml size works great for individual parfaits) or small clear cups
- Mixing bowls (one medium for pudding, one small for cream cheese)
- Hand mixer or whisk (a hand mixer gives a smoother pudding texture, but whisking by hand works if you have patience)
- Spoon or spatula for layering (a small offset spatula helps create neat layers)
- Measuring cups and spoons
If you don’t have mason jars, clear plastic cups or small dessert glasses can substitute nicely—just make sure they’re sturdy enough for stacking layers. I’ve used plastic parfait cups for outdoor picnics with great success; they’re lightweight, and no one worries about broken glass.
For cream cheese softening, popping it in the microwave for 10-15 seconds helps if you’re in a hurry. Also, I find cleaning up is easier when I use silicone spatulas—they scrape every bit of pudding out of the bowl.
Preparation Method
- Prepare the Pudding Mixture (10 minutes): In a medium bowl, whisk together the instant vanilla pudding mix and cold milk until it begins to thicken—about 2 minutes. Meanwhile, in a separate bowl, beat the softened cream cheese with vanilla extract and powdered sugar until smooth and creamy. Gently fold the cream cheese mixture into the pudding until fully combined and silky. Set aside.
- Slice the Bananas (5 minutes): Peel and slice the bananas into roughly ¼-inch (0.6 cm) rounds. To keep them from browning too quickly, you can toss the slices with a teaspoon of lemon juice, especially if you’re prepping ahead of time.
- Crush the Vanilla Wafers (optional): You can leave the wafers whole for crunch or lightly crush half of them to create texture contrast. For crushing, place wafers in a zip-lock bag and gently roll over them with a rolling pin or bottle.
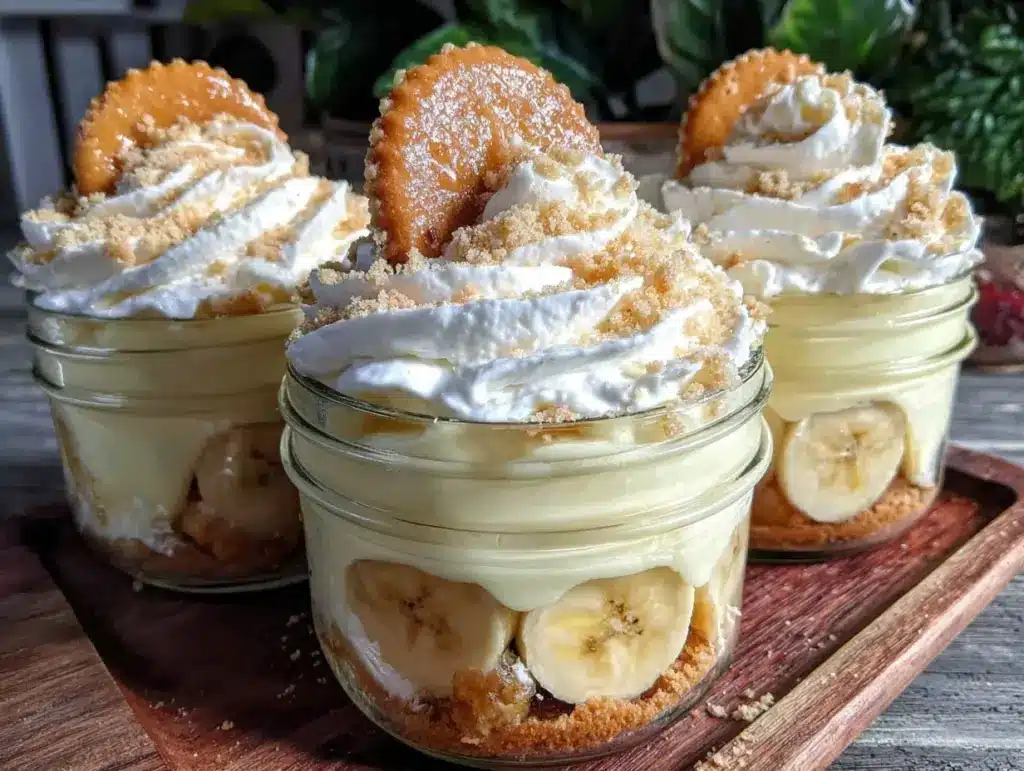
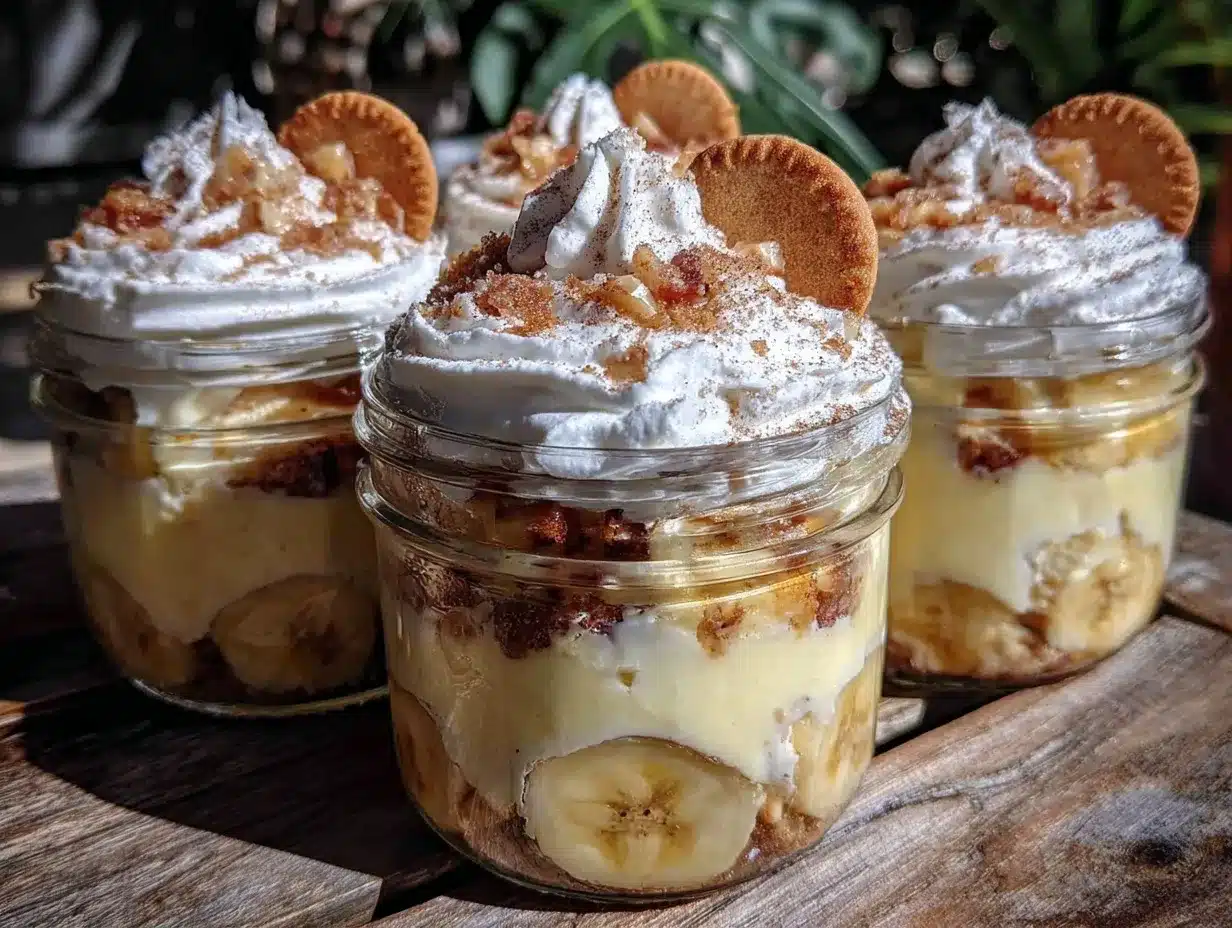
- Layer the Parfaits (5-10 minutes): Start by spooning about 2 tablespoons (30 g) of pudding into the bottom of each mason jar. Next, add a layer of banana slices, followed by a small handful of vanilla wafers. Repeat the layering process until the jar is nearly full, finishing with pudding on top. You can add a few wafers or a dollop of whipped cream as a final garnish.
- Chill Before Serving (minimum 1 hour): Cover the jars with lids or plastic wrap and refrigerate for at least 1 hour to let the flavors meld and the pudding set completely. This step is key to avoid a watery or bland pudding experience.
Pro tip: When layering, try not to overcrowd the bananas or wafers in one spot; spread them evenly so each spoonful gets a bit of everything. Also, if you want to make these a day ahead, keep the wafers separate and add them just before serving to maintain their crunch.
Cooking Tips & Techniques
Getting creamy, luscious banana pudding parfaits is easier than you think, but a few tricks help avoid common pitfalls.
- Don’t skip the cream cheese: Adding cream cheese to instant pudding gives it a smooth, rich texture that feels homemade, not chalky. Softening it well before mixing makes all the difference.
- Use ripe but firm bananas: Too ripe and they turn mushy quickly, which can make the pudding watery. Too green and the banana flavor is underwhelming. The sweet spot is bananas with a few brown spots but still holding shape.
- Layer carefully: Pressing too hard when layering can crush the wafers and turn them soggy fast. Gentle spooning keeps the textures distinct.
- Chill properly: Instant pudding needs time to set. If you’re in a rush, chilling for at least an hour helps the layers bind and flavors meld.
- Multitask wisely: While the pudding chills, prep other party dishes or set the outdoor table. It’s a good way to stay efficient and keep the dessert fresh.
One time, I tried skipping the chilling step because the guests arrived early, and the pudding was runny with soggy wafers. Lesson learned! Patience pays off when it comes to those creamy layers.
Variations & Adaptations
This banana pudding parfait recipe is pretty versatile, and I’ve experimented with several tweaks to suit different tastes and dietary needs.
- Dairy-Free Version: Swap whole milk for almond or coconut milk and use dairy-free cream cheese alternatives. Use gluten-free vanilla cookies to keep it allergy-friendly.
- Chocolate Banana Pudding: Stir in 2 tablespoons of cocoa powder into the pudding mix and use chocolate wafer cookies instead of vanilla for a richer flavor.
- Berry Banana Twist: Add a layer of fresh strawberries or raspberries alongside the bananas for a fruity contrast—similar to the fresh berry layers you find in a fresh strawberry galette. This adds a refreshing pop of color and taste.
- Alcohol-Infused: For adult outdoor parties, a tablespoon of banana liqueur or rum folded into the pudding introduces a subtle warmth and complexity.
- Nutty Crunch: Sprinkle chopped toasted pecans or walnuts on the top layer for an extra crunch and nutty flavor.
Personally, I enjoy the berry banana combo the most during warmer months, and the cocoa twist is a crowd favorite for cozy backyard evenings. Feel free to play around—it’s hard to go wrong with this flexible base.
Serving & Storage Suggestions
These parfaits are best served chilled straight from the fridge. The cold temperature makes the pudding silky and the bananas refreshingly sweet. I like to garnish with a small sprig of fresh mint or a light dusting of cinnamon—just enough to add a hint of aroma without overpowering the classic flavors.
They pair wonderfully with light beverages like iced tea or a sparkling lemonade, making them perfect for warm outdoor afternoons. For more hearty savory sides to round out your meal, consider serving alongside a batch of easy no-knead rosemary sea salt bread that guests can nibble on before dessert.
For storage, cover the jars tightly and refrigerate for up to 2 days. The wafers will soften over time, so if you want to keep them crisp, store the wafers separately and assemble just before serving. Leftovers can be enjoyed cold or at room temperature, but I don’t recommend freezing since the texture changes.
The flavors meld beautifully after a few hours, so these parfaits can be made ahead and actually taste better once the pudding and bananas have had a chance to marry.
Nutritional Information & Benefits
Each serving of these banana pudding parfaits provides a satisfying balance of carbs, protein, and a touch of fat, mainly from the cream cheese and milk. Here’s a rough estimate per 8 oz jar:
| Nutrient | Amount |
|---|---|
| Calories | 250-300 kcal |
| Protein | 6-8 g |
| Fat | 8-12 g |
| Carbohydrates | 35-40 g |
| Fiber | 2-3 g |
| Sugar | 20-25 g |
Bananas provide potassium and vitamin C, while the milk and cream cheese add calcium and protein. Using almond or coconut milk can reduce calories and make it lactose-free, which is great for sensitive eaters.
While this dessert is not low-carb, it fits well into balanced eating habits when enjoyed in moderation. It’s free from artificial preservatives if you stick to fresh ingredients and trusted brands, making it a wholesome treat for outdoor celebrations.
Conclusion
These Creamy Mason Jar Banana Pudding Parfaits aren’t just a dessert; they’re a little moment of sweet relief and joy you can take anywhere. Whether you’re throwing a backyard barbecue, packing a picnic, or just craving a no-fuss treat, this recipe delivers that classic comfort with a fresh, portable twist.
Feel free to tailor the layers to your taste—add berries, swap cookies, or play with dairy-free options—and make it your own. I love this recipe because it’s forgiving, quick, and always brings smiles, whether you’re serving kids or adults.
If you try it out, I’d love to hear how you personalized your parfaits or what outdoor party you took them to. Sharing your tweaks and stories makes this little recipe community all the richer.
Here’s to many sunny days filled with creamy, dreamy banana pudding in a jar!
Frequently Asked Questions
Can I make these banana pudding parfaits ahead of time?
Yes! They taste even better after chilling for a few hours or overnight. Just keep the wafers separate if you want to maintain their crunch and add them right before serving.
What can I use instead of vanilla wafers?
Graham crackers, crushed shortbread, or gluten-free vanilla cookies work well as alternatives. Just choose something that offers a mild sweetness and crisp texture.
Can I use homemade pudding instead of instant mix?
Absolutely. Homemade vanilla pudding will add extra richness and freshness, though it takes a bit longer to prepare. Adjust the sweetness and thickness to your liking before layering.
How do I prevent the bananas from browning?
Toss banana slices gently with a little lemon juice before layering. Also, assembling the parfaits shortly before serving helps keep them looking fresh.
Is there a vegan version of this parfait?
Yes. Use dairy-free pudding mix or homemade coconut milk pudding, vegan cream cheese, and plant-based milk. Choose vegan cookies for the crunch, and you’re set.
Pin This Recipe!
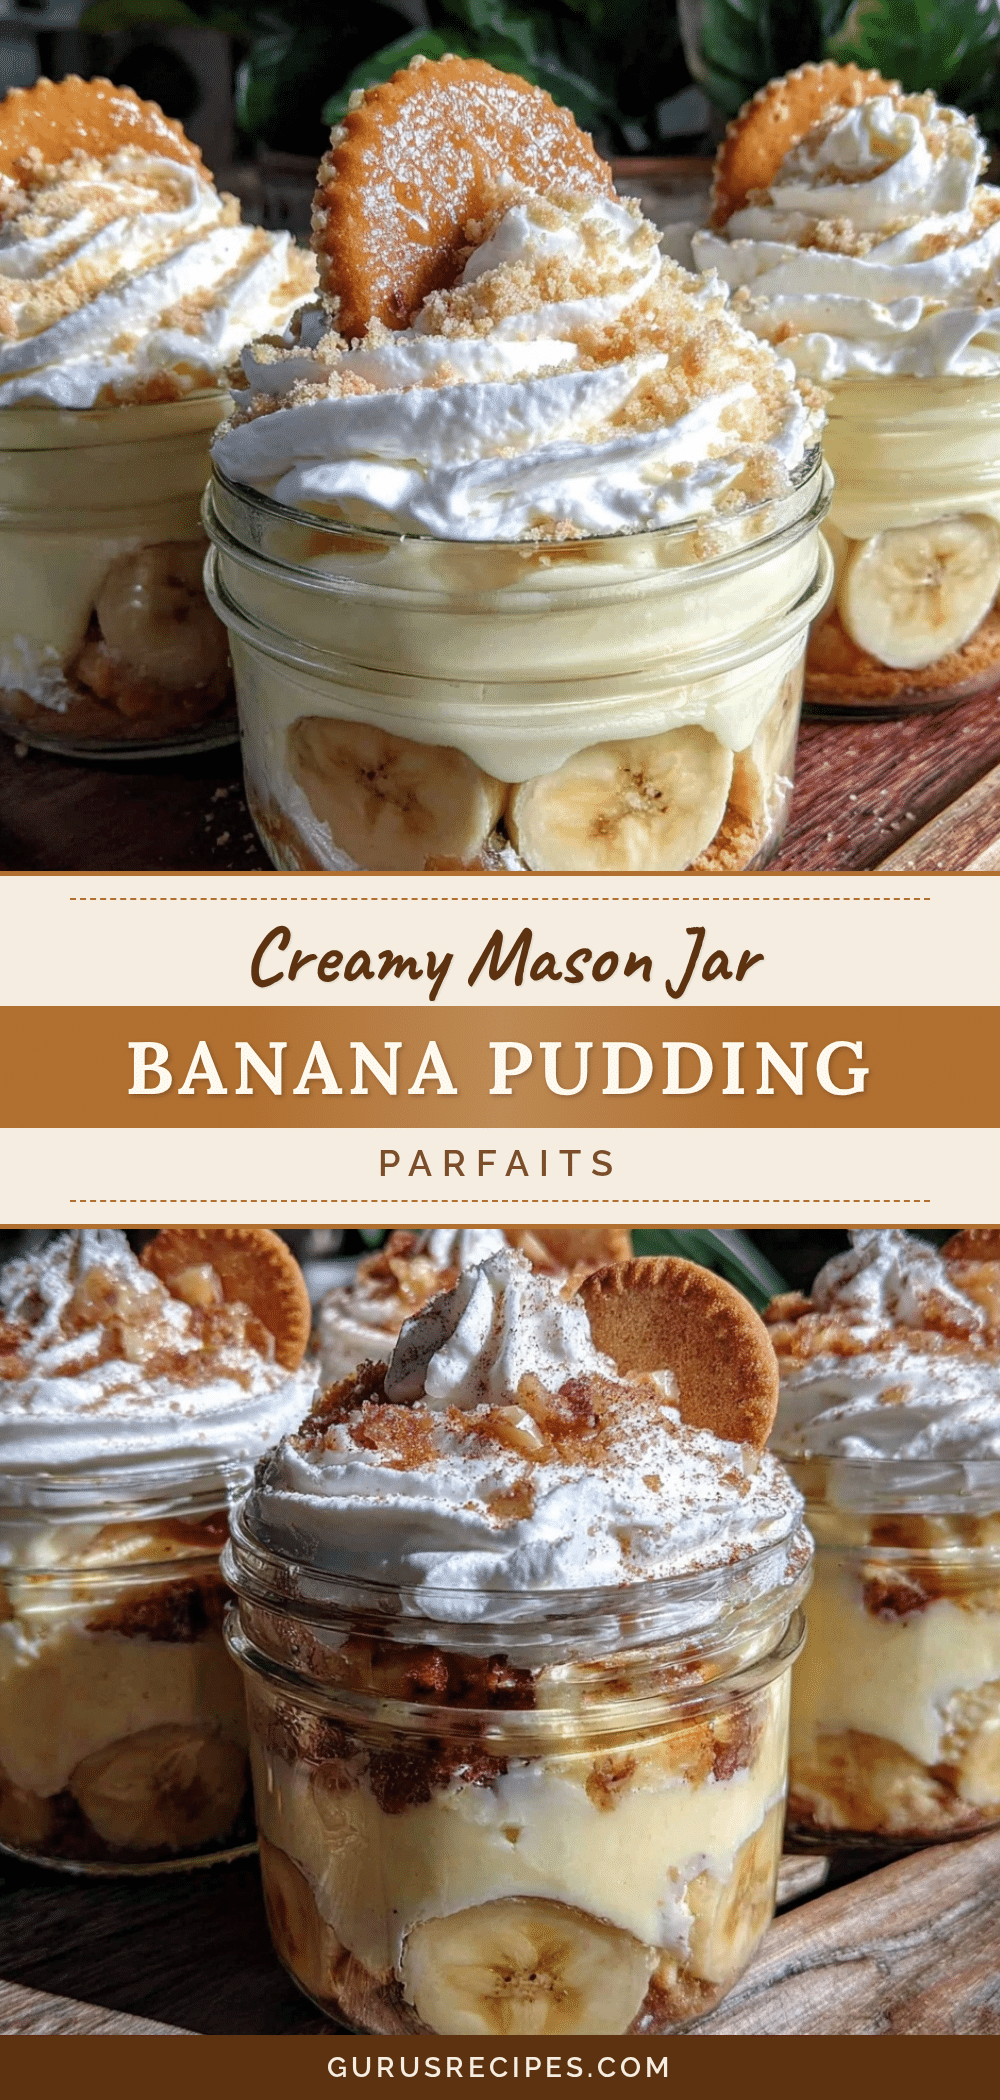

Creamy Mason Jar Banana Pudding Parfaits
A quick and easy layered banana pudding parfait served in mason jars, perfect for outdoor parties and gatherings. Creamy pudding, fresh bananas, and crunchy vanilla wafers combine for a nostalgic and crowd-pleasing dessert.
- Total Time: 1 hour 15 minutes
- Yield: 4 servings 1x
Ingredients
- 1 package (3.4 oz / 96 g) instant vanilla pudding mix (Jell-O brand preferred)
- 2 cups (480 ml) whole milk, chilled (or almond/coconut milk for dairy-free)
- 4 oz (115 g) cream cheese, softened
- 1 teaspoon pure vanilla extract
- 2 tablespoons powdered sugar (optional)
- 3 ripe bananas, peeled and sliced
- 1 ½ cups (about 50 g) vanilla wafers (Nilla Wafers or gluten-free vanilla cookies)
- Optional toppings: whipped cream, fresh mint leaves, cinnamon, caramel sauce, chopped toasted pecans or walnuts
Instructions
- Prepare the pudding mixture: In a medium bowl, whisk together the instant vanilla pudding mix and cold milk until it begins to thicken, about 2 minutes.
- In a separate bowl, beat the softened cream cheese with vanilla extract and powdered sugar until smooth and creamy.
- Gently fold the cream cheese mixture into the pudding until fully combined and silky. Set aside.
- Peel and slice the bananas into roughly ¼-inch rounds. Toss with a teaspoon of lemon juice if prepping ahead to prevent browning.
- Optionally crush half of the vanilla wafers for texture contrast.
- Layer the parfaits: Spoon about 2 tablespoons of pudding into the bottom of each mason jar, add a layer of banana slices, then a handful of vanilla wafers.
- Repeat layering until the jar is nearly full, finishing with pudding on top. Garnish with wafers or whipped cream if desired.
- Cover jars with lids or plastic wrap and refrigerate for at least 1 hour before serving to let flavors meld and pudding set.
Notes
Use ripe but firm bananas to avoid mushiness. Add cream cheese for extra creaminess. Chill for at least 1 hour to set pudding and meld flavors. Keep wafers separate if making ahead to maintain crunch. Optional substitutions include dairy-free milk and cream cheese, gluten-free cookies, and adding cocoa powder for chocolate variation.
- Prep Time: 15 minutes
- Cook Time: 0 minutes
- Category: Dessert
- Cuisine: American
Nutrition
- Serving Size: 1 jar (8 oz)
- Calories: 275
- Sugar: 22
- Sodium: 150
- Fat: 10
- Saturated Fat: 6
- Carbohydrates: 38
- Fiber: 2.5
- Protein: 7
Keywords: banana pudding, mason jar dessert, parfait, outdoor party recipe, easy dessert, layered pudding, vanilla wafers, creamy dessert


