
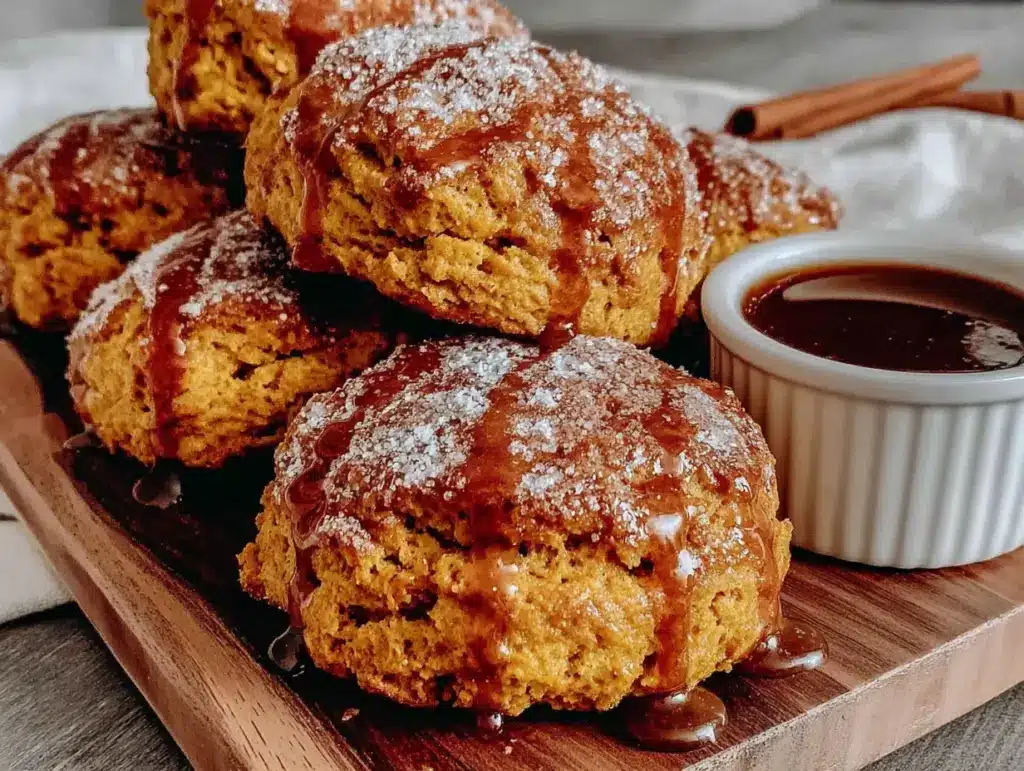
The crumb is where it all starts. Not the glaze, not the pumpkin spice smell filling the kitchen—the crumb. That first gentle break when you pull a wedge apart, the way the interior gives just slightly before releasing a tiny puff of steam. That’s what I was after when I first started tinkering with this recipe on a gray Sunday afternoon when the sky looked like it couldn’t decide whether to rain or just stay heavy all day.
I wanted a scone that wasn’t dry. You know the ones I mean—the ones that demand a full mug of tea just to get through a single bite. No, I wanted something tender. Something that felt like it was made for a quiet morning, not a bakery display case. These cozy small-batch pumpkin scones with maple glaze ended up being exactly that. They’re soft in the middle with just enough structure to hold their shape, and that maple glaze seeps into the cracks in the most satisfying way.
Honestly, I wasn’t even planning to write down the recipe at first. I was just baking because I had half a can of pumpkin in the fridge and a restless feeling that needed something warm to focus on. But after the third batch (yes, third—the first two were too dense), I knew this one was different. It had that thing. That soft, slightly craggy texture that makes you close your eyes without thinking about it. That’s the one I’m sharing today.
So if you’ve been burned by dry scones before, I get it. But these? These are different. They’re the kind of scone you make for yourself on a Tuesday morning, just because.
Why You’ll Love This Recipe
I’ve tested this recipe more times than I’d like to admit, and here’s what I’ve learned: it works every single time. No special mixer needed, no complicated folding techniques. Just simple ingredients and a light hand.
- Small-Batch Perfection : Makes just 6 scones—enough for a few days of cozy breakfasts without a mountain of leftovers.
- No Special Equipment : A bowl, a fork, and a baking sheet. That’s it. No stand mixer required.
- Real Pumpkin Flavor : Not just spice—actual pumpkin that keeps the scones tender and moist.
- Maple Glaze That Sinks In : The glaze isn’t just a topping; it soaks into the warm scone, creating little pockets of sweetness throughout.
- Ready in Under 30 Minutes : From bowl to plate in about 25 minutes. That’s faster than deciding what to order for delivery.
What makes these different from other pumpkin scone recipes is the technique. Most recipes overwork the dough, which makes scones tough. I use a method that keeps the butter in distinct pieces, creating those flaky layers without any complicated laminating. Plus, the maple glaze isn’t just a drizzle—it’s brushed on while the scones are still warm, so it sinks in and becomes part of the scone itself. That little trick makes all the difference.
This is the recipe you turn to when you want something that feels special but doesn’t require a trip to the store. It’s comfort food in its purest form, and honestly, it’s the kind of baking that reminds you why you love being in the kitchen in the first place.
What Ingredients You Will Need
This recipe uses simple, wholesome ingredients that you probably already have in your kitchen. The key is getting the proportions right and using ingredients at the right temperature.
- All-purpose flour (1.5 cups / 180g) – Standard all-purpose flour works best here. Don’t substitute with bread flour or the scones will be too dense. I use King Arthur Flour for consistent results.
- Granulated sugar (3 tablespoons / 36g) – Just enough to sweeten the scone without overpowering the pumpkin. You can reduce this to 2 tablespoons if you prefer a less sweet scone.
- Baking powder (1.5 teaspoons) – Make sure it’s fresh. Old baking powder is the number one reason scones don’t rise properly. Test it by dropping a little in hot water—if it fizzes, it’s good.
- Pumpkin pie spice (1 teaspoon) – Store-bought is fine, or make your own with 1/2 teaspoon cinnamon, 1/4 teaspoon ginger, 1/4 teaspoon nutmeg, and a pinch of cloves.
- Salt (1/4 teaspoon) – Balances the sweetness and enhances the pumpkin flavor. Don’t skip it.
- Cold unsalted butter (4 tablespoons / 56g, cubed) – This is crucial. The butter needs to be straight from the fridge, cut into small cubes. If it softens at all, the scones won’t be as flaky.
- Pumpkin purée (1/3 cup / 80ml) – Not pumpkin pie filling. Make sure you’re getting 100% pumpkin purée. Libby’s is my go-to brand. If you open a can, you’ll have leftover—use it in creamy baked potato soup for a subtle sweetness.
- Heavy cream (3 tablespoons / 45ml) – Adds richness and tenderness. You can substitute with whole milk in a pinch, but the scones won’t be as soft.
- Vanilla extract (1/2 teaspoon) – Pure vanilla is best, but imitation works fine here since the pumpkin and maple are the stars.
- Maple syrup (for the glaze, 1/4 cup / 60ml) – Use real maple syrup, not pancake syrup. Grade A dark amber has the strongest maple flavor and works beautifully here.
- Powdered sugar (for the glaze, 1/2 cup / 60g) – Sift it if it’s lumpy. Nobody wants a lumpy glaze.
- Milk (for the glaze, 1-2 teaspoons) – Just enough to thin the glaze to a drizzling consistency. Add it slowly—you can always add more, but you can’t take it out.
Equipment Needed
The beauty of this recipe is how little equipment it requires. Here’s what you’ll need:
- Large mixing bowl – Any bowl will work, but a wide one makes it easier to cut in the butter.
- Pastry cutter or two forks – A pastry cutter makes quick work of cutting butter into flour. If you don’t have one, two forks work just fine. I’ve also used my fingers in a pinch, but try to work quickly so the butter doesn’t warm up.
- Baking sheet – A standard half-sheet pan works perfectly. Line it with parchment paper for easy cleanup.
- Parchment paper – Not strictly necessary, but it prevents sticking and makes transferring the scones much easier.
- Bench scraper or sharp knife – For cutting the dough into wedges. A bench scraper is ideal because it cuts cleanly without dragging the dough.
- Pastry brush – For brushing the glaze onto the warm scones. A silicone brush works well and is easy to clean.
- Small saucepan – For warming the maple glaze ingredients together.
Preparation Method
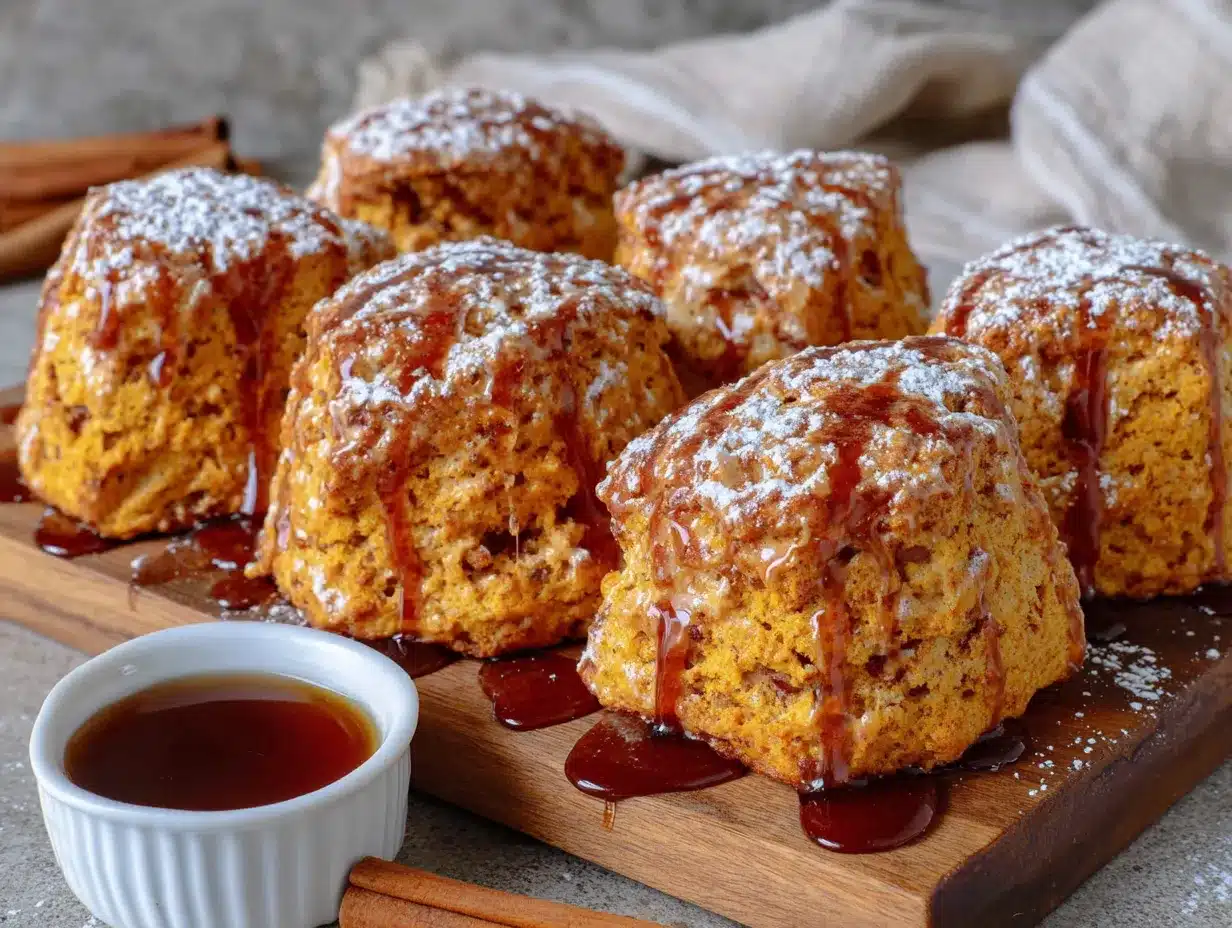
- Preheat your oven to 400°F (200°C). Line a baking sheet with parchment paper. Getting the oven hot before you start mixing is important—you want the scones to go into a hot oven as soon as they’re shaped.
- Whisk the dry ingredients together. In a large bowl, combine the flour, sugar, baking powder, pumpkin pie spice, and salt. Whisk until everything is evenly distributed. This takes about 30 seconds but makes a real difference in how evenly the scones rise.
- Cut in the cold butter. Add the cold, cubed butter to the flour mixture. Using a pastry cutter or two forks, cut the butter into the flour until the mixture resembles coarse meal with pea-sized butter pieces. Some pieces will be smaller, some larger—that’s exactly what you want. The larger pieces create those flaky pockets when they melt in the oven. Work quickly so the butter stays cold.
- Mix the wet ingredients. In a small bowl, whisk together the pumpkin purée, heavy cream, and vanilla extract until smooth. The mixture should be a uniform orange color without any streaks of cream.
- Combine wet and dry ingredients. Pour the wet ingredients into the flour-butter mixture. Stir with a fork just until the dough comes together. It will look shaggy and a little dry in spots—that’s normal. Stop mixing as soon as the flour is incorporated. Overmixing will make the scones tough.
- Shape the dough. Turn the dough out onto a lightly floured surface. Gently bring it together with your hands, being careful not to knead it. Pat the dough into a circle about 3/4 inch thick. It should be about 6 inches across. Don’t use a rolling pin—your hands are gentler.
- Cut the scones. Using a bench scraper or sharp knife, cut the circle into 6 wedges, like you’re cutting a pizza. Try to cut straight down without dragging the knife through the dough. Dragging can seal the edges and prevent the scones from rising properly.
- Transfer to baking sheet. Carefully place the scones on the prepared baking sheet, spacing them about 2 inches apart. They won’t spread much, but they need a little room for air to circulate.
- Bake for 12-15 minutes. The scones are done when they’re lightly golden on the bottom and the tops are firm to the touch. A toothpick inserted into the center should come out clean. Every oven is different, so start checking at 12 minutes.
- Make the maple glaze while the scones bake. In a small saucepan over low heat, combine the maple syrup and powdered sugar. Whisk until smooth and warm. Add milk 1 teaspoon at a time until the glaze is thin enough to drizzle but thick enough to coat the back of a spoon. Remove from heat.
- Glaze the warm scones. As soon as the scones come out of the oven, transfer them to a wire rack. Brush the warm maple glaze over the tops while they’re still hot. The warmth helps the glaze soak in, creating that perfect tender top. Let them cool for 5 minutes before serving.
Cooking Tips & Techniques
After making these scones more times than I can count, here are the things I’ve learned the hard way:
Keep everything cold. The butter, the cream, even your hands if you can manage it. Cold butter creates steam pockets in the oven, which makes the scones light and flaky. If the butter melts before the scones hit the oven, you’ll end up with dense, flat discs. I’ve had it happen. It’s not pretty.
Don’t overwork the dough. This is the most common mistake. Scone dough should be handled as little as possible. Mix until it just comes together, then stop. A few dry spots are fine—they’ll hydrate during baking. I ruined my first batch by trying to make the dough perfectly smooth. Spoiler: it wasn’t smooth, and the scones were tough.
Use a light hand when shaping. Pat the dough gently. Don’t press it down firmly. Think of it like you’re handling a baby bird—gentle and quick. The less you touch it, the better it will be.
Brush the glaze while the scones are warm. This is the trick that makes these scones special. If you wait until they’re cool, the glaze just sits on top. When you brush it on warm, it sinks in and creates that soft, almost candied top that’s impossible to resist.
Bake on the middle rack. Too low and the bottoms will burn before the tops are done. Too high and the tops will brown too quickly. Middle rack gives you even heat distribution.
Let them rest. I know it’s hard to wait, but letting the scones cool for 5 minutes after glazing allows the glaze to set slightly. They’ll still be warm when you eat them, but the glaze won’t slide off.
Variations & Adaptations
One of the best things about this recipe is how easy it is to adapt. Here are some variations I’ve tried and loved:
Vegan Version : Substitute the butter with cold coconut oil or vegan butter (I like Miyoko’s). Use full-fat coconut cream instead of heavy cream. For the glaze, use a plant-based milk. The texture will be slightly different—a bit more crumbly—but still delicious.
Gluten-Free Option : Use a 1:1 gluten-free flour blend that contains xanthan gum. Bob’s Red Mill works well. The dough will be a bit more delicate, so handle it even more gently. Add an extra tablespoon of cream if the dough seems too dry.
Add-Ins : Fold in 1/3 cup of dried cranberries, chopped pecans, or white chocolate chips after combining the wet and dry ingredients. My personal favorite is candied ginger—it adds a little heat that pairs beautifully with the maple glaze.
Spice It Up : Add 1/4 teaspoon of cardamom or a pinch of black pepper to the dry ingredients. The pepper sounds weird, I know, but it actually enhances the pumpkin flavor in a subtle way.
Savory Version : Skip the sugar, pumpkin pie spice, and maple glaze. Add 1/2 cup of shredded sharp cheddar, 2 tablespoons of chopped fresh sage, and a pinch of cayenne. Use the same method—the result is a savory scone that’s perfect with soup or stew. I’ve served these alongside cozy Guinness beef stew and it was a perfect pairing.
Different Glaze : Swap the maple syrup for honey or use a cream cheese glaze (2 oz cream cheese, 1/2 cup powdered sugar, 1-2 tablespoons milk). Both are excellent in their own way.
Serving & Storage Suggestions
These scones are best served warm, right after the glaze has set. The contrast between the tender, slightly warm interior and the sweet, slightly sticky glaze is what makes them special.
Serving Ideas : Serve them for breakfast with a hot cup of coffee or chai tea. They’re also wonderful as an afternoon snack with a cup of French onion soup for a cozy lunch. For dessert, warm them slightly and serve with a scoop of vanilla ice cream or a dollop of whipped cream.
Storage : Store leftover scones in an airtight container at room temperature for up to 3 days. The glaze will soften over time, but they’ll still be delicious. Don’t refrigerate them—it dries them out.
Freezing : You can freeze the unbaked scones on a baking sheet until solid, then transfer to a freezer bag. Bake from frozen, adding 2-3 minutes to the baking time. The glaze can be made fresh when you’re ready to bake. I often make a double batch and freeze half for later.
Reheating : The best way to reheat a scone is in a 300°F oven for 5-7 minutes. The microwave works in a pinch, but it will make the scone soft rather than crisp. If you’re in a hurry, split the scone in half and toast it—the cut side gets nicely crisp while the inside stays tender.
One thing I’ve noticed: the flavors actually get better on the second day. The pumpkin and spices have time to meld together, and the glaze soaks in even more. So don’t feel bad if you have leftovers—they’re just as good the next morning.
Nutritional Information & Benefits
While these scones are definitely a treat, they do offer some nutritional benefits thanks to the pumpkin. Here’s an approximate breakdown per scone (based on 6 servings):
- Calories : 280-310
- Fat : 12-14g
- Carbohydrates : 40-45g
- Fiber : 2g
- Sugar : 18-22g
- Protein : 4g
- Vitamin A : 70% of daily value (from pumpkin)
Pumpkin is a nutritional powerhouse—it’s packed with vitamin A for eye health, fiber for digestion, and antioxidants that support your immune system. The butter and cream provide fat-soluble vitamins A, D, and K, which help your body absorb the nutrients from the pumpkin.
That said, these are still scones. They’re a treat, not a health food. But if you’re going to have a treat, at least it’s one with some actual nutritional value hidden in there. I like to think of them as a “vegetable-forward” breakfast. (Don’t tell anyone I said that.)
For those with dietary restrictions: this recipe contains gluten, dairy, and eggs. For gluten-free and vegan options, check the variations section above.
Conclusion
These cozy small-batch pumpkin scones with maple glaze are exactly what fall baking should be—simple, satisfying, and deeply comforting. They don’t require a trip to the store for specialty ingredients, they don’t demand hours of your time, and they don’t leave you with a mountain of leftovers that go stale before you can finish them.
What they do give you is that perfect moment: a warm scone, a cup of coffee, and a quiet morning all to yourself. Or, if you’re feeling generous, a plate of scones to share with someone who needs a little warmth in their day.
I’d love to hear how these turn out for you. Did you add anything? Change the glaze? Make them for a special occasion? Drop a comment below and let me know—I read every single one. And if you share a photo on social media, tag me so I can see your beautiful scones. Happy baking, friends.
Frequently Asked Questions
Can I use pumpkin pie filling instead of pumpkin purée?
No, don’t do that. Pumpkin pie filling has added sugar and spices already mixed in, which will throw off the sweetness and texture of the scones. Stick with 100% pumpkin purée for the best results.
Why are my scones dry?
Most likely you overworked the dough or baked them too long. Handle the dough as little as possible, and start checking for doneness at 12 minutes. Every oven is different, and scones can go from perfect to dry in just a minute or two.
Can I make these ahead of time?
Absolutely. You can shape the scones and freeze them unbaked for up to 3 months. Bake from frozen, adding 2-3 minutes to the baking time. Make the glaze fresh when you’re ready to serve.
Can I double this recipe?
Yes, it doubles beautifully. Just double all the ingredients and bake in two batches or on two baking sheets. If baking on two sheets, rotate them halfway through baking for even results.
What if I don’t have pumpkin pie spice?
Make your own! Mix 1/2 teaspoon cinnamon, 1/4 teaspoon ginger, 1/4 teaspoon nutmeg, and a pinch of cloves. That’s exactly what’s in pumpkin pie spice, and it works perfectly.
Pin This Recipe!
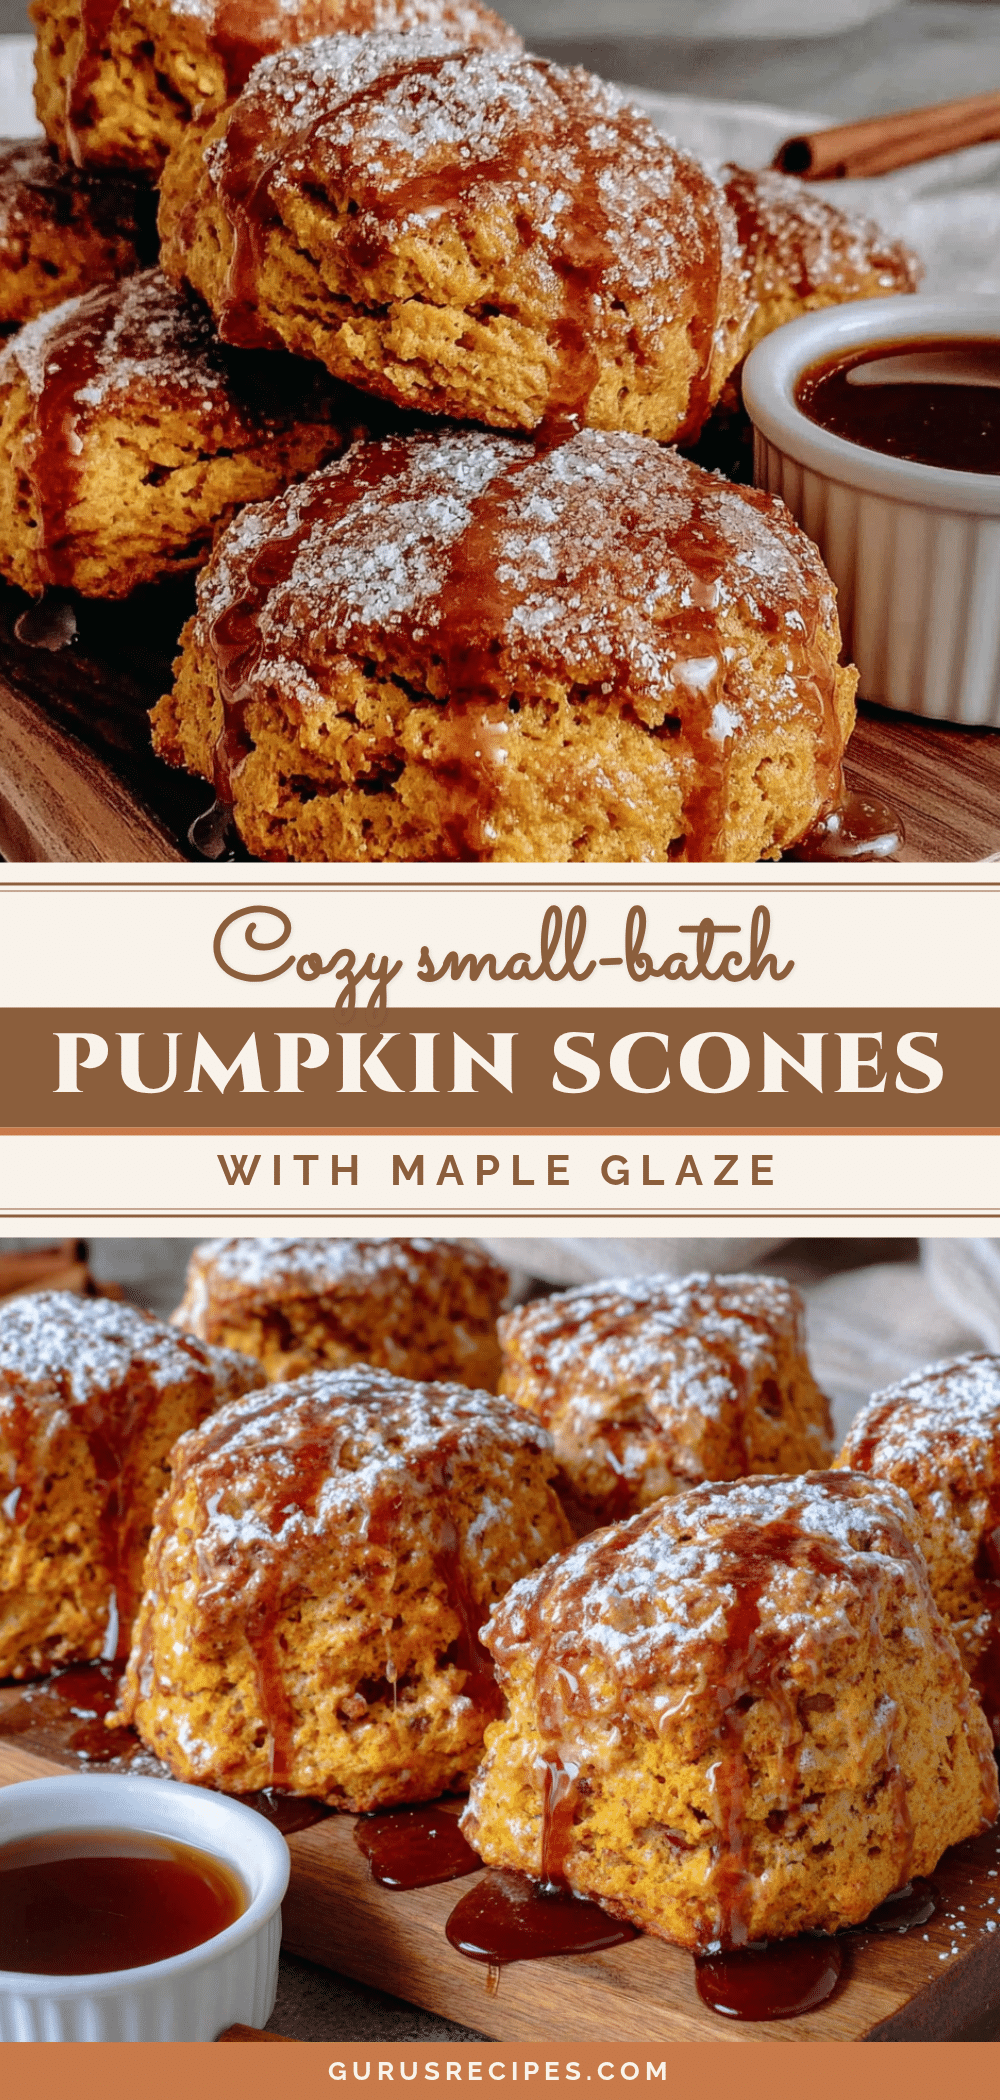

Cozy Small-Batch Pumpkin Scones with Easy Maple Glaze
These tender, flaky pumpkin scones are made in a small batch and brushed with a warm maple glaze that soaks into every bite. Perfect for a cozy morning treat.
- Total Time: 25 minutes
- Yield: 6 scones 1x
Ingredients
- 1.5 cups (180g) all-purpose flour
- 3 tablespoons (36g) granulated sugar
- 1.5 teaspoons baking powder
- 1 teaspoon pumpkin pie spice
- 1/4 teaspoon salt
- 4 tablespoons (56g) cold unsalted butter, cubed
- 1/3 cup (80ml) pumpkin purée
- 3 tablespoons (45ml) heavy cream
- 1/2 teaspoon vanilla extract
- 1/4 cup (60ml) maple syrup
- 1/2 cup (60g) powdered sugar
- 1–2 teaspoons milk
Instructions
- Preheat your oven to 400°F (200°C). Line a baking sheet with parchment paper.
- In a large bowl, whisk together the flour, sugar, baking powder, pumpkin pie spice, and salt.
- Add the cold, cubed butter to the flour mixture. Using a pastry cutter or two forks, cut the butter into the flour until the mixture resembles coarse meal with pea-sized butter pieces.
- In a small bowl, whisk together the pumpkin purée, heavy cream, and vanilla extract until smooth.
- Pour the wet ingredients into the flour-butter mixture. Stir with a fork just until the dough comes together. It will look shaggy and a little dry in spots.
- Turn the dough out onto a lightly floured surface. Gently bring it together with your hands, being careful not to knead it. Pat the dough into a circle about 3/4 inch thick and 6 inches across.
- Using a bench scraper or sharp knife, cut the circle into 6 wedges.
- Place the scones on the prepared baking sheet, spacing them about 2 inches apart.
- Bake for 12-15 minutes, until lightly golden on the bottom and firm to the touch.
- While the scones bake, make the maple glaze: In a small saucepan over low heat, combine the maple syrup and powdered sugar. Whisk until smooth and warm. Add milk 1 teaspoon at a time until the glaze is thin enough to drizzle but thick enough to coat the back of a spoon. Remove from heat.
- As soon as the scones come out of the oven, transfer them to a wire rack. Brush the warm maple glaze over the tops while they’re still hot. Let them cool for 5 minutes before serving.
Notes
Keep all ingredients cold for flaky scones. Do not overwork the dough. Brush glaze on warm scones for best absorption. Scones are best served warm.
- Prep Time: 10 minutes
- Cook Time: 15 minutes
- Category: Breakfast
- Cuisine: American
Nutrition
- Serving Size: 1 scone
- Calories: 295
- Sugar: 20
- Sodium: 180
- Fat: 13
- Saturated Fat: 8
- Carbohydrates: 43
- Fiber: 2
- Protein: 4
Keywords: pumpkin scones, small batch, maple glaze, fall baking, breakfast, easy scone recipe


