
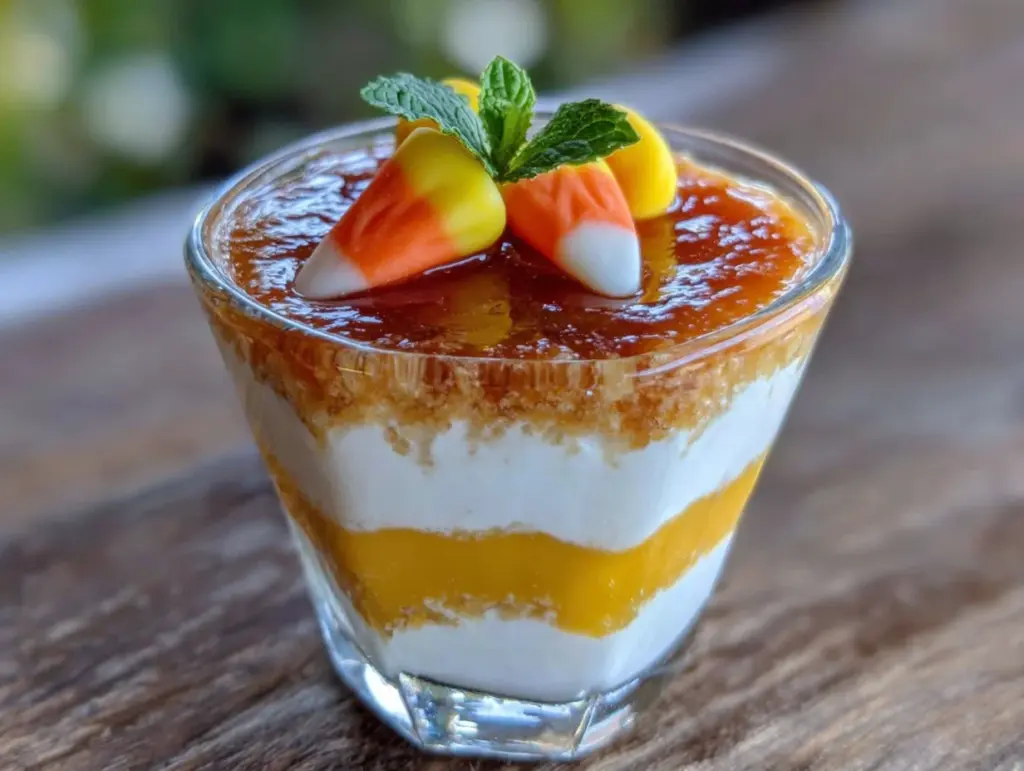
My friend Jenna brought these to a Halloween party last year, and I actually laughed. Candy corn in jello form? That seemed like the kind of thing that would taste like artificial sugar and regret. I told her they looked cute but I was good, thanks. She just raised an eyebrow and said “Just try one.” So I did. And then I stood there eating three more while pretending I was just “checking the texture.”
Look, I’m not someone who gets excited about layered desserts. They usually taste better than they look, or they look better than they taste. But these Easy Candy Corn Layered Jello Cups? They actually pull off both. The trick is the way the creamy top layer sinks into the orange middle just enough, and how the yellow bottom holds everything together without being too firm. It’s not complicated—it’s just honest, simple layers that work. (And honestly, the first time I made them myself, I ate the test batch before anyone even saw them.)
This recipe uses four ingredients and maybe twenty minutes of active work. That’s it. No gelatin sheets, no complicated chilling schedules, no special equipment. If you can boil water and stir, you can make these. They’re the kind of dessert that makes people think you tried way harder than you actually did. And sometimes, that’s exactly the kind of recipe you need in your back pocket.
Why You’ll Love This Recipe
I’ve tested this recipe at least six times to get the layering just right. The first batch looked like a science experiment gone wrong. The second was too firm. The third was too runny. But by the fourth try, I had it dialed in—and I’ve been making it that way ever since. Here is what makes these cups worth your time:
- 4 Ingredients Only : You need lemon jello, orange jello, unflavored gelatin, and sweetened condensed milk. That’s it. No cream cheese, no heavy cream, no weird extracts.
- No Baking Required : This is a no-bake dessert that sets in the fridge. Perfect for hot days or when you don’t want to turn on the oven.
- Make-Ahead Friendly : These cups need at least 4 hours to set, so you can make them the night before and just pull them out when guests arrive.
- Kid-Approved : My niece called them “magic cups” and asked for seconds. That’s a win in my book.
- Perfect for Fall Parties : They look like candy corn, but they taste way better. No waxy texture here—just smooth, creamy, fruity layers.
What makes this recipe different from other jello desserts is the condensed milk layer. Most recipes use Cool Whip or cream cheese, which can separate or get grainy. Sweetened condensed milk stays silky and sets into a firm, creamy layer that doesn’t weep. It’s a small swap, but it makes a big difference.
These cups are the kind of dessert that makes you feel like you pulled off something special without actually doing much work. And honestly? That’s my favorite kind of recipe.
What Ingredients You Will Need
This recipe uses simple, store-bought ingredients that come together to create something that looks way more complicated than it actually is. Here is what you need:
For the Yellow Layer (Bottom)
- 1 box (3 oz) lemon jello (I use Jell-O brand, but store brand works fine too)
- 1 cup boiling water
- 1/2 cup cold water
For the Orange Layer (Middle)
- 1 box (3 oz) orange jello (Jell-O or generic)
- 1 cup boiling water
- 1/2 cup cold water
For the White Cream Layer (Top)
- 1 can (14 oz) sweetened condensed milk
- 1 packet (0.25 oz) unflavored gelatin (like Knox)
- 1/4 cup cold water (to bloom the gelatin)
- 1/2 cup boiling water
Ingredient Tips : I prefer using name-brand jello for the most vibrant colors, but generic works just fine. The unflavored gelatin is important for the cream layer—don’t skip it or the layer will be too soft. If you want a dairy-free version, you can try using coconut condensed milk, but the texture will be slightly different.
One thing I learned the hard way: make sure your sweetened condensed milk is fresh. If it’s been sitting in the pantry for a year, it can get grainy. Check the expiration date before you start.
Equipment Needed
- Small saucepans or heat-safe bowls (for dissolving jello)
- Measuring cups (1 cup and 1/4 cup)
- Measuring spoons
- Whisk or fork (for stirring)
- Small bowl (for blooming gelatin)
- Clear plastic cups (5 oz or 7 oz size work best—I use 5 oz cups for portion control)
- Liquid measuring cup with spout (for easy pouring)
- Refrigerator space (you need room for 12 cups to sit undisturbed)
Budget Tip : You don’t need anything fancy here. I’ve made these using a dollar store whisk and old jam jars. The cups themselves are the only thing you might need to buy, and you can find packs of 50 clear plastic cups for under $5. If you want to be fancy, you can use small glass dessert cups or mini mason jars.
Maintenance Note : If you use glass cups, just make sure they’re heat-safe. Pouring hot jello into thin glass can cause cracking. Let the jello cool for 5 minutes before pouring if you’re using glass.
Preparation Method
This recipe has three separate layers, and each one needs time to set before you add the next. Plan for about 4-6 hours total chilling time, but only about 20 minutes of actual work.
Step 1: Make the Yellow Layer (Bottom)
In a small bowl or liquid measuring cup, combine the lemon jello powder with 1 cup of boiling water. Stir for about 2 minutes until the powder is completely dissolved. Add 1/2 cup cold water and stir again. Pour the mixture evenly into your cups, filling each about one-third of the way. Place the cups in the refrigerator and let them set for about 1 hour, or until firm to the touch. The jello should be set but not rock-hard—you want it to hold its shape when you add the next layer.
Step 2: Make the Orange Layer (Middle)
While the yellow layer sets, make the orange jello. Combine the orange jello powder with 1 cup of boiling water and stir until dissolved. Add 1/2 cup cold water and stir. Let this mixture sit at room temperature while the yellow layer finishes setting. Don’t put it in the fridge or it will set before you’re ready to use it.
Once the yellow layer is firm, gently pour the orange jello on top. Fill each cup about two-thirds full. Return the cups to the refrigerator and let set for another 1 hour.
Step 3: Make the White Cream Layer (Top)
This is the trickiest part, but it’s not hard. In a small bowl, sprinkle the unflavored gelatin over 1/4 cup cold water. Let it sit for 5 minutes—this is called blooming. It will look like a weird, spongy mess. That’s normal.
In a separate small bowl, combine the sweetened condensed milk with 1/2 cup boiling water. Stir until smooth. Microwave the bloomed gelatin for 10-15 seconds until it’s liquid again, then whisk it into the condensed milk mixture. Stir well so there are no lumps. Let this cool for about 5 minutes at room temperature. If it’s too hot, it will melt the orange layer underneath.
Once the orange layer is firm, gently pour the white cream mixture on top. Fill each cup to the brim. Return to the refrigerator and let set for at least 2 hours, or overnight.
Step 4: Serve
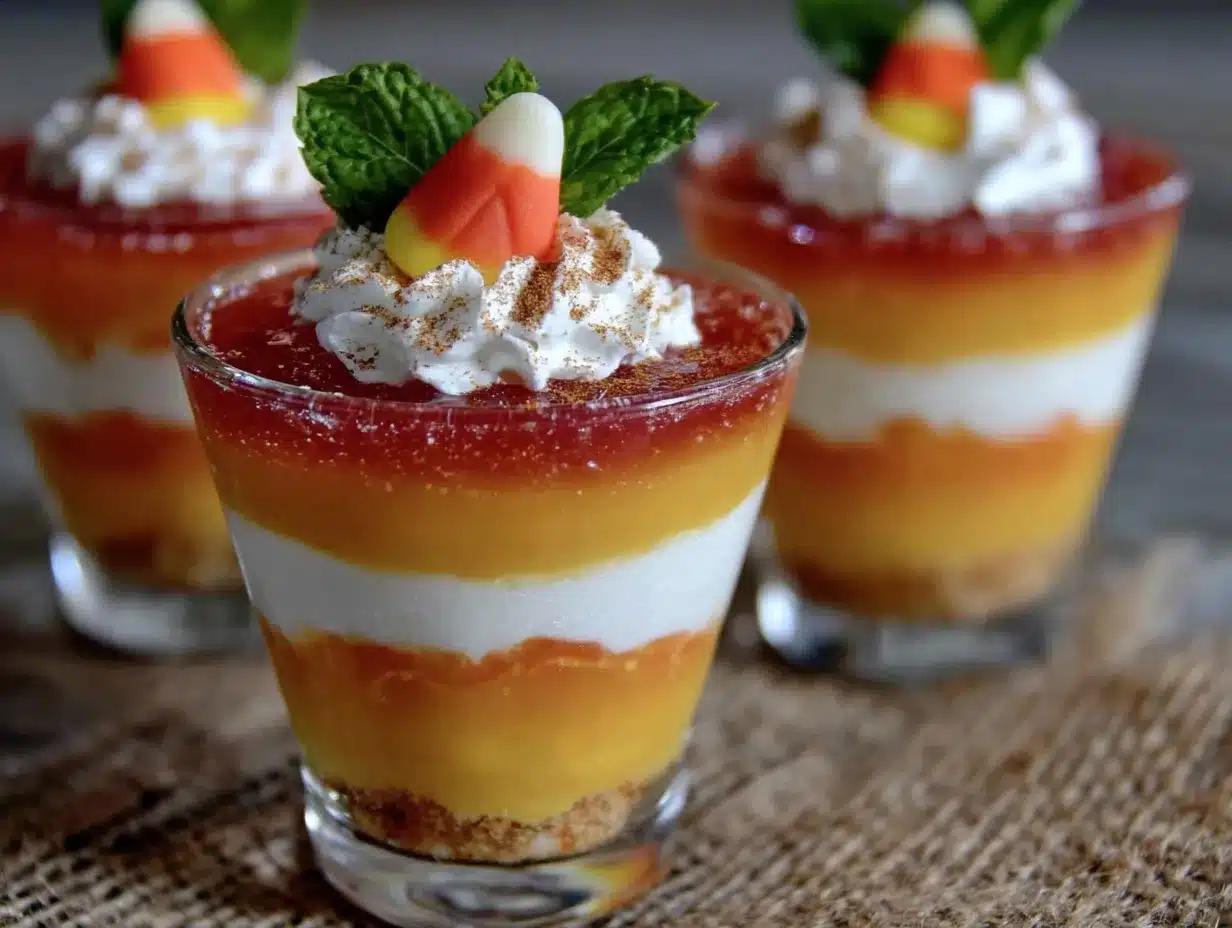
Once all layers are fully set, the cups are ready to serve. They should be eaten cold, straight from the fridge. The layers should be distinct and clean when you look at the side of the cup.
Pro Tip : If your layers look a little blurry or mixed, don’t worry. They’ll still taste great. The first time I made these, my orange layer bled into the yellow because I didn’t let the yellow set long enough. They looked messy, but my friends didn’t care—they ate every single one.
Cooking Tips & Techniques
I’ve made these cups probably a dozen times now, and I’ve learned a few things the hard way. Here is what I wish someone had told me:
Patience is key with the layers. The first time I made these, I tried to rush the process. I added the orange layer after only 30 minutes, and it sank right into the yellow layer. The result was a muddy orange mess that looked nothing like candy corn. Each layer needs a full hour to set. Set a timer and walk away.
Let the white layer cool before pouring. I learned this one the painful way. I poured hot cream mixture onto the orange layer, and it melted right through. The layers blended together and I ended up with one uniform color. Now I always let the white mixture cool for at least 5 minutes at room temperature before pouring.
Use a steady hand when pouring. If you pour too fast, the force can break through the set layer underneath. I pour slowly over the back of a spoon to distribute the liquid gently. It makes a huge difference.
Room temperature ingredients matter. The sweetened condensed milk should be at room temperature before you mix it. Cold milk can cause the gelatin to seize up and create lumps. I take mine out of the fridge about 30 minutes before I start.
Don’t skip the bloom. I know it seems like an extra step, but blooming the gelatin is what gives the cream layer its smooth, silky texture. If you skip it, you’ll end up with grainy lumps. Trust me on this one.
Variations & Adaptations
Once you’ve mastered the basic recipe, here are some ways to change it up:
Flavor Swap : Instead of lemon and orange, try lime and strawberry for a red, white, and green look for Christmas. Or use blue raspberry and lemon for a summer vibe. The technique stays the same, just swap the jello flavors.
Dairy-Free Version : Use canned coconut condensed milk instead of regular sweetened condensed milk. The texture will be slightly softer, but it still sets well. I tried this for a friend with dairy allergies, and it worked beautifully.
Adult Version : Replace half the cold water in each jello layer with vodka or coconut rum. The alcohol will slow down the setting time, so add an extra 30 minutes to each chilling step. These are dangerous because they taste like candy but pack a punch.
Mini Cups : Use 2 oz shot glasses instead of 5 oz cups for party appetizers. You’ll get about 24 mini cups instead of 12. Reduce the chilling time for each layer to about 45 minutes since the cups are smaller.
Extra Creamy Layer : Add 2 tablespoons of cream cheese (softened) to the white cream mixture for a cheesecake-like flavor. Just make sure to whisk it until completely smooth before adding the gelatin.
My personal favorite variation is the coconut version. I use coconut condensed milk and add a drop of coconut extract to the white layer. It gives the cups a tropical twist that’s perfect for summer parties.
Serving & Storage Suggestions
These cups are best served cold, straight from the refrigerator. The layers are firmest and most distinct when they’re chilled. If you let them sit at room temperature for more than 30 minutes, the cream layer will start to soften and the layers may start to blend.
Presentation Tips : Arrange the cups on a tray or platter for a party. They look beautiful when you can see the layers through the clear cups. You can also top each cup with a small dollop of whipped cream and a candy corn for decoration. For a Halloween party, I like to add a small plastic spider ring on top for a fun touch.
What to Serve With Them : These cups are sweet and fruity, so they pair well with something savory or salty. Try them alongside a cozy Guinness beef stew for a fun contrast. The rich, savory stew balances the sweet, creamy dessert perfectly. Or serve them after a creamy loaded baked potato soup for a comforting fall meal.
Storage : These cups will keep in the refrigerator for up to 5 days. Cover them with plastic wrap or a lid to prevent them from absorbing fridge odors. Do not freeze them—the texture will become watery and grainy when thawed.
Reheating : These are meant to be eaten cold, so there’s no need to reheat. If you want to soften the cream layer slightly, let the cup sit at room temperature for 10-15 minutes before serving.
Flavor Development : The flavors actually get better after a day or two in the fridge. The layers meld together slightly, and the sweetness becomes more balanced. I actually prefer these on day two over day one.
Nutritional Information & Benefits
Here is the estimated nutritional breakdown for one 5 oz cup (based on 12 servings):
- Calories: 180
- Total Fat: 4g
- Saturated Fat: 2.5g
- Cholesterol: 15mg
- Sodium: 95mg
- Total Carbohydrates: 34g
- Sugars: 32g
- Protein: 4g
Health Benefits : Let’s be honest—these are a treat, not a health food. But the gelatin provides collagen, which is good for skin, hair, and joint health. The sweetened condensed milk adds calcium and protein. And the jello itself is fat-free and low in calories.
Dietary Considerations : This recipe is nut-free, egg-free, and can be made dairy-free with coconut condensed milk. It is not vegan because of the gelatin, but you can use agar-agar as a substitute (though the texture will be different).
Allergen Note : Contains dairy. If you have a dairy allergy, use the coconut condensed milk version. Always check your jello boxes for any hidden allergens, though most are just sugar, gelatin, and artificial flavors.
I personally don’t stress about the sugar content in these. They’re a special occasion dessert, not an everyday snack. And honestly, one cup is usually enough to satisfy a sweet craving.
Conclusion
These Easy Candy Corn Layered Jello Cups are the kind of recipe that makes you look like a kitchen wizard without actually having to do much work. Four ingredients, twenty minutes of effort, and you get a dessert that people will rave about. The layers are fun, the flavors are nostalgic, and the presentation is impressive. What’s not to love?
I hope you give these a try for your next fall gathering or Halloween party. Don’t stress about perfection—even if your layers aren’t perfectly straight, they’ll still taste amazing. And if you mess up the first batch? Well, that’s just a test batch. (I’ve eaten plenty of test batches myself.)
If you make these, I’d love to hear how they turned out. Leave a comment below or tag me in your photos. Did you try a different flavor combo? Did your kids love them? Tell me all about it! And if you’re looking for another fun, no-bake dessert, check out this creamy no-churn strawberry ice cream—it’s just as easy and just as rewarding.
Happy layering, friends!
Frequently Asked Questions
Can I use sugar-free jello for this recipe?
Yes, you can use sugar-free jello. The layers will still set, but the texture might be slightly softer. The sugar in regular jello helps stabilize the layers, so sugar-free versions may take a little longer to firm up. Add about 30 minutes to each chilling step if you use sugar-free.
How long do these cups need to set in the fridge?
Each layer needs about 1 hour to set, and the final cream layer needs at least 2 hours. So total chilling time is about 4-6 hours. I usually make them the night before and let them set overnight. They’re always perfect the next day.
Can I use different flavors of jello?
Absolutely! The key is to use contrasting colors so the layers are visible. Try lime (green) and strawberry (red) for a Christmas look, or blue raspberry (blue) and lemon (yellow) for a summer vibe. Just make sure the flavors complement each other.
Why did my layers blend together?
This usually happens for two reasons: either you didn’t let the bottom layer set long enough, or you poured the next layer too fast. Make sure each layer is fully firm before adding the next one, and pour slowly over the back of a spoon to distribute the liquid gently.
Can I freeze these cups?
I don’t recommend freezing them. The gelatin structure breaks down when frozen, and they become watery and grainy when thawed. Stick to refrigeration for up to 5 days. They’re best eaten within 3 days of making them.
Pin This Recipe!
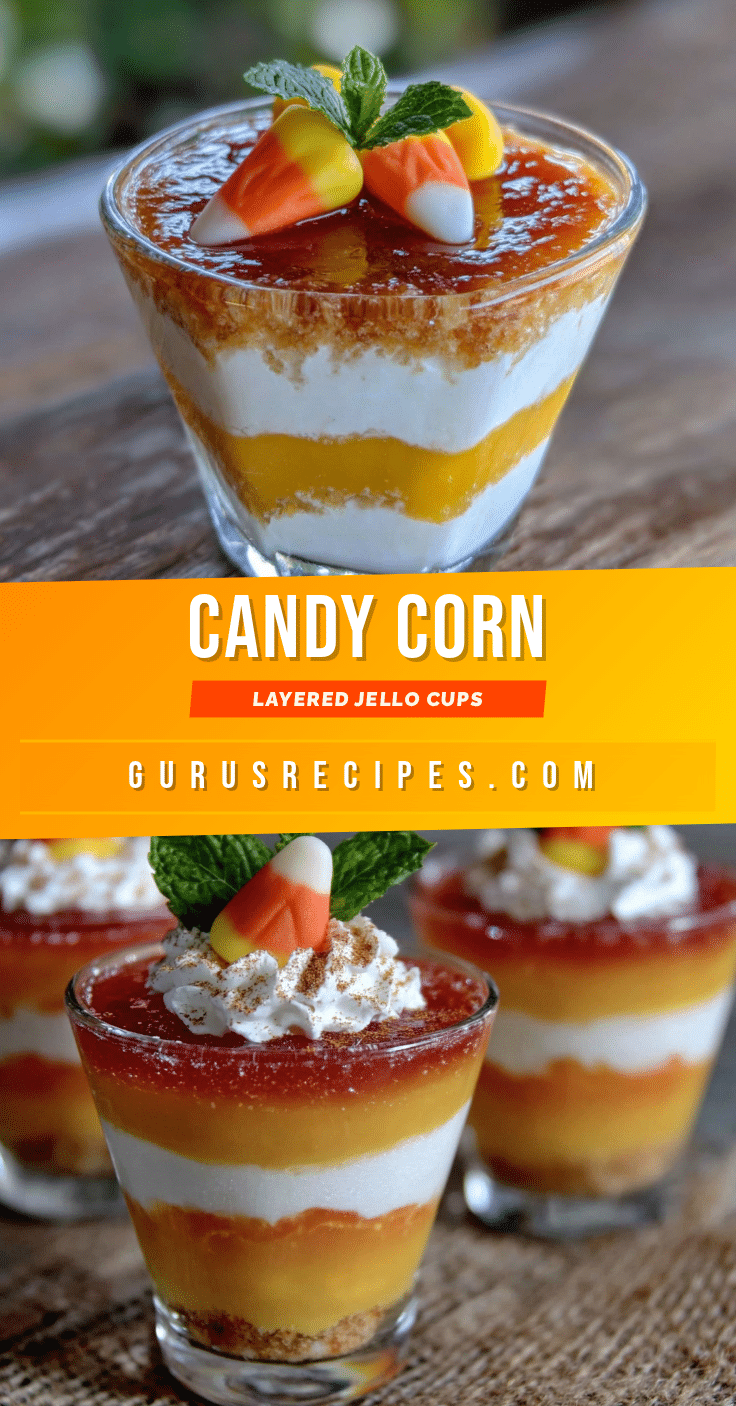

Easy Candy Corn Layered Jello Cups: 4-Ingredient Fall Dessert
These Easy Candy Corn Layered Jello Cups use four ingredients and twenty minutes of active work to create a no-bake dessert that looks impressive and tastes amazing. With creamy, fruity layers that mimic candy corn, they’re perfect for fall parties and Halloween gatherings.
- Total Time: 4 hours 20 minutes (includes chilling)
- Yield: 12 servings 1x
Ingredients
- 1 box (3 oz) lemon jello
- 1 cup boiling water
- 1/2 cup cold water
- 1 box (3 oz) orange jello
- 1 cup boiling water
- 1/2 cup cold water
- 1 can (14 oz) sweetened condensed milk
- 1 packet (0.25 oz) unflavored gelatin
- 1/4 cup cold water
- 1/2 cup boiling water
Instructions
- Make the yellow layer: In a small bowl or liquid measuring cup, combine the lemon jello powder with 1 cup of boiling water. Stir for about 2 minutes until completely dissolved. Add 1/2 cup cold water and stir again. Pour the mixture evenly into cups, filling each about one-third of the way. Refrigerate for about 1 hour, or until firm to the touch.
- Make the orange layer: While the yellow layer sets, combine the orange jello powder with 1 cup of boiling water and stir until dissolved. Add 1/2 cup cold water and stir. Let this mixture sit at room temperature while the yellow layer finishes setting. Once the yellow layer is firm, gently pour the orange jello on top, filling each cup about two-thirds full. Refrigerate for another 1 hour.
- Make the white cream layer: In a small bowl, sprinkle the unflavored gelatin over 1/4 cup cold water. Let it sit for 5 minutes to bloom. In a separate small bowl, combine the sweetened condensed milk with 1/2 cup boiling water and stir until smooth. Microwave the bloomed gelatin for 10-15 seconds until liquid, then whisk it into the condensed milk mixture. Let cool for about 5 minutes at room temperature. Once the orange layer is firm, gently pour the white cream mixture on top, filling each cup…
- Serve: Once all layers are fully set, serve the cups cold straight from the refrigerator. The layers should be distinct and clean when viewed from the side.
Notes
Patience is key with the layers. Each layer needs a full hour to set. Let the white layer cool before pouring to avoid melting the orange layer. Use a steady hand when pouring, preferably over the back of a spoon. Room temperature ingredients matter for the cream layer. Don’t skip blooming the gelatin. These cups keep in the refrigerator for up to 5 days. Do not freeze.
- Prep Time: 20 minutes
- Cook Time: 0 minutes
- Category: Dessert
- Cuisine: American
Nutrition
- Serving Size: 1 cup (5 oz)
- Calories: 180
- Sugar: 32
- Sodium: 95
- Fat: 4
- Saturated Fat: 2.5
- Carbohydrates: 34
- Protein: 4
Keywords: candy corn jello cups, layered jello dessert, no-bake fall dessert, Halloween jello cups, 4-ingredient dessert, easy jello recipe


