

My oldest son, Leo, looked at the lunch I packed him—turkey roll-ups, a string cheese, some grapes—and said, “Mom, everyone else gets the good stuff.” That stung. Not because he was being ungrateful, but because he was right. I was stuck in a rut, throwing together the same sad combinations day after day. The problem was time. I didn’t have twenty minutes in the morning to assemble a masterpiece. I needed something I could make ahead, something that wouldn’t get soggy, and something that would actually make him excited to open his lunchbox.
That’s when I remembered the party sliders. You know the ones—little Hawaiian rolls piled with ham and cheese, baked until the tops are buttery and the cheese is a glorious, molten mess. They’re the first thing to disappear at every potluck. And it hit me: why not make them for lunch? I tweaked the classic recipe, scaling it back for a smaller batch and swapping out the heavy butter sauce for something a little lighter but still packed with flavor. The first batch I made, Leo ate three before I could even get them in the fridge. Honestly, I thought I had finally cracked the code to the perfect lunchbox.
This recipe for Easy Mini Ham & Cheese Sliders for Lunchboxes isn’t just a shortcut; it’s a game-changer. They come together in about 20 minutes of hands-on time, freeze beautifully, and taste just as good cold as they do warm. There’s no sad, soggy bread situation here. The sliders hold their structure, the flavors meld together overnight, and each little sandwich feels like a special treat. It’s the kind of lunch that makes a kid feel like they got “the good stuff,” without you having to sacrifice your entire Sunday meal prep.
Why You’ll Love This Recipe
Let’s be honest, the morning rush is a battlefield. You’re trying to find matching socks, sign permission slips, and somehow assemble a lunch that won’t be traded away. These sliders are your secret weapon. They solve the lunchbox problem in a way that feels almost too easy.
- Make-Ahead Magic: Assemble the entire pan the night before, or even on Sunday for the whole week. Just pop them in the oven in the morning, let them cool, and pack them up. No morning assembly required.
- Kid-Approved & Parent-Approved: They’re a guaranteed crowd-pleaser. The combination of salty ham, melty cheese, and soft, buttery rolls is a classic for a reason. And you’ll love that they use simple, recognizable ingredients.
- Perfectly Portable: Unlike a flimsy sandwich that gets crushed, these sliders are sturdy. The rolls hold everything together, and the little “glue” of the sauce and cheese keeps the ham from sliding out. They travel beautifully.
- Incredibly Versatile: This recipe is a template for success. Swap the ham for turkey, roast beef, or even leftover chicken. Change up the cheese. Add a smear of pesto or some crispy bacon. It’s endlessly adaptable to what your family loves.
- Budget-Friendly: A package of Hawaiian rolls and some deli ham is a lot more affordable than buying pre-made lunch kits. Plus, you control the ingredients, so you know exactly what your kids are eating.
This isn’t just another recipe; it’s a system. It’s the answer to the “what’s for lunch?” dread that creeps in on a Sunday night. After testing this at least a dozen times (much to my family’s delight), I can confidently say it’s the most reliable, foolproof lunchbox solution I’ve ever found.
What Ingredients You Will Need
This recipe relies on simple, pantry-friendly ingredients to create something truly special. The magic is in the combination, not the complexity. Here’s what you’ll need to gather:
For the Sliders
- 12-count package of Hawaiian sweet rolls: These are non-negotiable for the authentic texture and subtle sweetness. I prefer King’s Hawaiian, but any brand works. Don’t split them individually; keep them connected as a slab.
- 1/2 pound of deli-sliced ham: Look for a good quality honey ham or smoked ham. I find that getting it sliced thick (not shaved) gives the sliders a better bite. You’ll need about 8-10 slices.
- 6 slices of Swiss cheese: The nutty, mild flavor of Swiss is a perfect match for the ham. You can use provolone or cheddar in a pinch, but Swiss is the classic for a reason.
- 6 slices of cheddar cheese: I like the sharpness of a good white cheddar to cut through the richness. It adds a layer of flavor that plain Swiss doesn’t.
For the Butter Topping
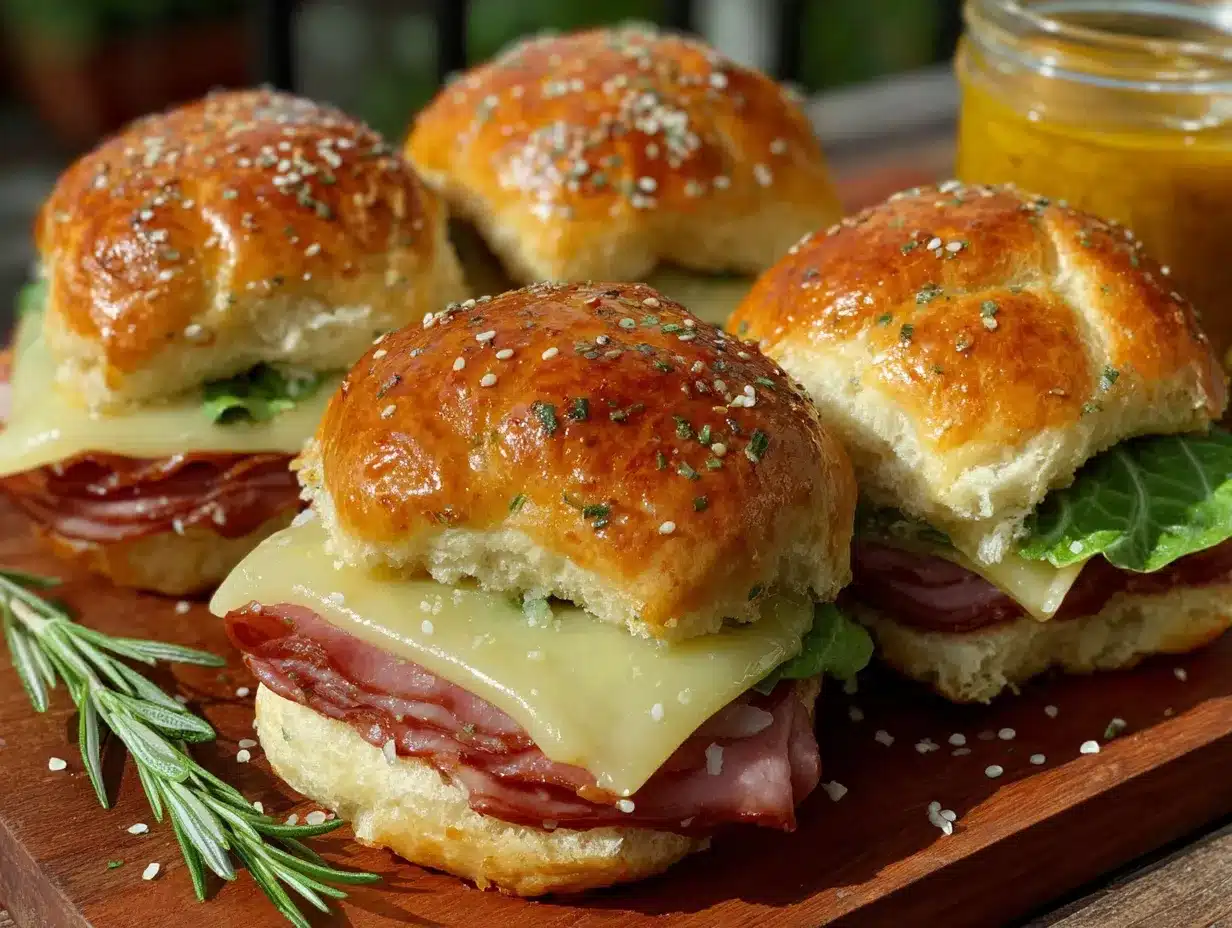
- 4 tablespoons (1/2 stick) of unsalted butter, melted: This is what gives the tops that beautiful, golden-brown, slightly crispy crust. Use salted butter if that’s all you have, just reduce the added salt.
- 1 tablespoon of Dijon mustard: This is the secret ingredient. It adds a tangy kick that balances the sweetness of the rolls and the richness of the ham and cheese. Don’t skip it.
- 1 tablespoon of poppy seeds: These are for texture and visual appeal. They add a lovely little crunch and make the sliders look like they came from a bakery.
- 1 teaspoon of Worcestershire sauce: This adds a deep, savory umami flavor that makes the whole thing taste like it’s been cooking for hours. It’s a tiny addition with a huge impact.
- 1/2 teaspoon of onion powder: For a subtle savory backbone. Garlic powder also works well here.
- Pinch of salt and freshly ground black pepper: To season the butter sauce.
Ingredient Tip: For the best texture, make sure your cheese slices are at room temperature before assembling. Cold cheese won’t melt as evenly. Also, if you’re using a block of cheese and slicing it yourself, aim for a medium-thin slice—not too thick, or it won’t melt into the ham properly.
Equipment Needed
You don’t need any fancy gadgets for this recipe, which is part of its beauty. Here’s what you’ll need:
- 9×13-inch baking dish: This is the perfect size for a 12-count package of rolls. If you don’t have one, a rimmed baking sheet will work in a pinch.
- Sharp serrated knife: For cutting the entire slab of rolls in half horizontally. A regular chef’s knife will squish them.
- Small bowl: For whisking together the butter topping.
- Pastry brush: For evenly coating the tops of the rolls with the butter mixture. A spoon will work, but a brush is much easier.
- Aluminum foil: For covering the sliders while they bake, which prevents the tops from burning before the cheese is fully melted.
That’s it! No stand mixer, no food processor. Just simple tools that you probably already have in your kitchen.
Preparation Method
Follow these steps, and you’ll have a pan of perfect sliders in no time. I’ve included all the little details I’ve learned from making these dozens of times.
- Preheat and Prep: Preheat your oven to 350°F (175°C). Lightly grease your 9×13-inch baking dish with non-stick cooking spray or a thin layer of butter.
- Slice the Rolls: Place the entire slab of 12 Hawaiian rolls on a cutting board. Using a sharp serrated knife, carefully cut the entire slab in half horizontally. You want one large top half and one large bottom half. It’s okay if a few rolls separate a little—just scoot them back together.
- Layer the Bottom: Carefully transfer the bottom half of the rolls to your prepared baking dish. You might need to gently lift them with a large spatula. Now, layer half of the ham slices evenly over the bottom rolls, slightly overlapping them.
- Add the Cheese: Place the 6 slices of Swiss cheese over the ham, followed by the 6 slices of cheddar. Don’t worry if the cheese hangs over the edges a bit—it will melt and become one with the rolls.
- Top with Ham: Layer the remaining ham slices on top of the cheese. This double-layer of ham ensures every bite is filled with meat.
- Cap it Off: Carefully place the top half of the rolls over the ham and cheese, cut-side down. Gently press down to make sure everything is sitting evenly.
- Make the Butter Sauce: In a small bowl, whisk together the melted butter, Dijon mustard, poppy seeds, Worcestershire sauce, onion powder, salt, and pepper until well combined.
- Brush the Tops: Using a pastry brush, generously brush the entire butter mixture over the tops of the rolls. Make sure to get into all the cracks and crevices—that’s where the flavor hides. Let the sliders sit at room temperature for 10 minutes. This allows the rolls to soak up a bit of the butter mixture.
- Bake Covered: Cover the baking dish tightly with aluminum foil. Bake for 15 minutes. The foil traps steam, which helps melt the cheese and warm the ham without drying out the rolls.
- Bake Uncovered: Remove the foil and bake for another 10-12 minutes, or until the tops are golden brown and the cheese is bubbly around the edges. The smell in your kitchen right now is incredible.
- Cool and Slice: Let the sliders cool in the pan for at least 5-10 minutes before cutting. This is the hardest part! Use a sharp knife to cut between the individual rolls. The cheese will be very hot, so be careful.
Pro Tip: For an extra-crispy top, switch your oven to the broil setting for the last 1-2 minutes of baking. Watch them like a hawk so they don’t burn!
Cooking Tips & Techniques
After making these sliders more times than I can count, I’ve learned a few tricks that separate a good slider from a great one. Here are my top tips for success.
The Biggest Mistake: Soggy Bottoms. I learned this the hard way. If you don’t let the sliders rest after baking, the steam gets trapped and makes the bottom rolls soggy. Letting them cool in the pan for 10 minutes is non-negotiable. The residual heat continues to melt the cheese, but the steam has a chance to escape.
Master the Butter Sauce. The butter sauce is everything. Don’t just brush it on the top—use your brush to work it down into the seams between the rolls. That’s where the flavor penetrates. Also, letting the sliders sit for 10 minutes after brushing is a game-changer. It gives the rolls time to absorb that buttery, mustardy goodness.
Don’t Overcrowd the Pan. If you’re using a smaller baking dish, the rolls might be too tight. This prevents the heat from circulating properly, leading to uneven melting. If your dish is a bit too big, that’s fine—just make sure the rolls are snug but not squished.
Multitasking is Key. While the sliders are baking, you can prep the rest of the lunch. Wash some grapes, cut up some carrot sticks, or portion out some apple slices. By the time the sliders are cool enough to pack, the rest of the lunch is ready to go.
Variations & Adaptations
This recipe is a perfect base for experimentation. Don’t be afraid to make it your own! Here are some of my favorite variations.
- The Turkey & Pesto Twist: Swap the ham for sliced turkey breast and spread a thin layer of pesto on the bottom rolls before adding the meat. Use provolone or mozzarella for a more Italian-inspired flavor. This is my go-to for a change of pace.
- The Breakfast Slider: Use the same base of rolls, but fill them with scrambled eggs, cooked breakfast sausage or bacon, and cheddar cheese. Skip the Dijon mustard in the butter sauce and add a pinch of paprika instead. These are perfect for a quick breakfast on the go.
- The Spicy Southwestern: Use pepper jack cheese instead of cheddar and add a layer of pickled jalapeños or a smear of chipotle mayo. The spicy kick pairs beautifully with the sweet rolls. This is a great option for adults who want a little heat.
- Gluten-Free Option: You can find gluten-free Hawaiian-style rolls at many grocery stores now. The rest of the ingredients are naturally gluten-free, so this is an easy swap.
- Vegetarian Version: Instead of ham, use thinly sliced roasted vegetables like zucchini, bell peppers, and eggplant. Add a layer of fresh spinach and use a mix of mozzarella and goat cheese. It’s surprisingly hearty and delicious.
Serving & Storage Suggestions
These sliders are incredibly versatile in how you serve and store them. Here’s everything you need to know.
Serving: These are best served slightly warm or at room temperature. For a lunchbox, pack them directly from the fridge—they’re still delicious cold. The flavors actually meld together even more as they sit. For a party or dinner, serve them right out of the oven with a side of cozy French onion soup for a complete meal.
Storage: Store any leftover sliders in an airtight container in the refrigerator for up to 4 days. To prevent them from getting soggy, place a paper towel at the bottom of the container to absorb any excess moisture.
Freezing: These freeze like a dream! Assemble the sliders completely, but don’t brush them with the butter sauce. Wrap the entire pan tightly in a layer of plastic wrap, then a layer of aluminum foil. Freeze for up to 3 months. When ready to bake, thaw in the refrigerator overnight, then brush with the butter sauce and bake as directed.
Reheating: For a single slider, microwave for 20-30 seconds. For a whole pan, reheat in a 350°F (175°C) oven for 5-7 minutes, covered with foil, until warmed through. The oven method keeps the rolls from getting chewy.
Nutritional Information & Benefits
While these sliders are a treat, they also offer some nutritional benefits. Here’s a rough estimate per slider (based on the recipe as written).
| Nutrient | Amount Per Slider |
|---|---|
| Calories | 280-320 |
| Fat | 16-20g |
| Carbohydrates | 22-26g |
| Protein | 14-18g |
Key Benefits: The ham provides a good source of protein, which is essential for keeping kids full and focused at school. The cheese adds calcium for strong bones. And the whole-wheat version of the Hawaiian rolls (if you can find them) adds a bit of fiber. It’s a balanced lunch option that feels like a treat.
Dietary Considerations: This recipe is not gluten-free (unless you use gluten-free rolls) and contains dairy. For a lower-sodium option, use low-sodium ham and unsalted butter.
Personal Note: I love that this recipe allows me to control the quality of the ingredients. I can use nitrate-free ham and organic cheese, which makes me feel a lot better about packing these for my kids every day.
Conclusion
This recipe for Easy Mini Ham & Cheese Sliders for Lunchboxes has genuinely changed our mornings. What was once a source of stress is now a simple, satisfying routine. I make a batch on Sunday, and we’re set for the week. No more frantic sandwich assembly at 7:15 AM. No more trading lunches at school.
I encourage you to make this recipe your own. Play around with the fillings, try different cheeses, and find the combination that makes your family smile. That’s the beauty of cooking—it’s a conversation, not a lecture. And these sliders are a great place to start that conversation.
I’d love to hear how they turn out for you! Drop a comment below and let me know your favorite variation. Did you try the turkey and pesto? Or did you go rogue with something completely different? Share your lunchbox wins with me. Happy cooking, and here’s to stress-free mornings!
Frequently Asked Questions
Can I make these sliders ahead of time for the whole week?
Absolutely! You can assemble the entire pan, brush with the butter sauce, and then cover and refrigerate for up to 24 hours before baking. You can also bake them, let them cool completely, and then store them in the fridge for up to 4 days. They’re perfect for meal prep.
Can I freeze the unbaked sliders?
Yes, and it’s a great way to have a quick meal on hand. Assemble the sliders without the butter sauce, wrap tightly in plastic wrap and then foil, and freeze for up to 3 months. Thaw overnight in the fridge, then brush with the butter sauce and bake as directed.
My sliders always come out soggy on the bottom. What am I doing wrong?
This is the most common issue! The trick is to let them rest in the pan for at least 10 minutes after baking. This allows the steam to escape. Also, make sure you’re not over-brushing the bottom of the rolls with the butter sauce—focus on the tops.
Can I use a different type of roll?
While Hawaiian sweet rolls are the classic choice, you can use other soft dinner rolls or even slider buns. Just be aware that the flavor and texture will change. If using a less sweet roll, you might want to add a pinch of sugar to the butter sauce.
What are the best side dishes to serve with these sliders?
For a lunchbox, they’re great on their own or with simple sides like carrot sticks, apple slices, or a small salad. For a dinner, try them with a comforting bowl of chicken and dumplings or a creamy loaded baked potato soup for a truly satisfying meal.
Pin This Recipe!
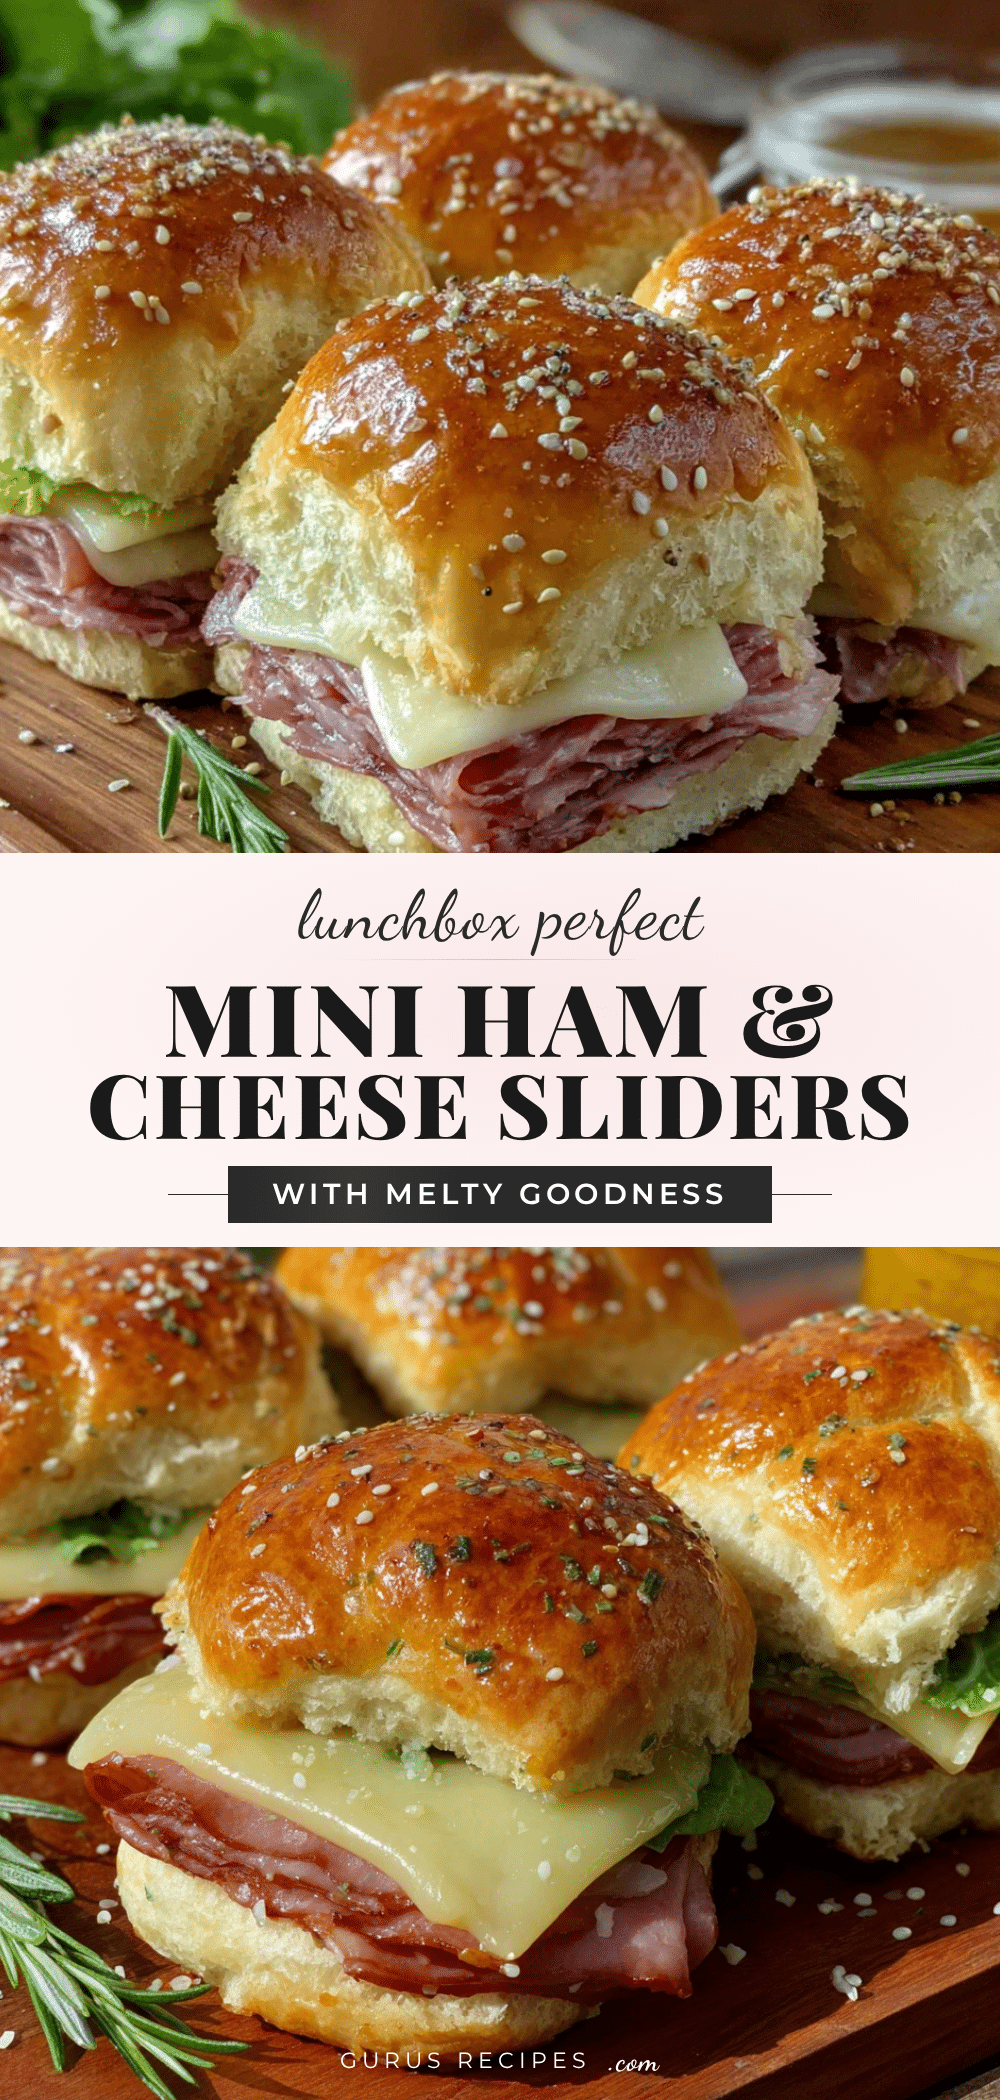

Easy Mini Ham Cheese Sliders for School Lunch
These easy mini ham and cheese sliders are the perfect make-ahead lunchbox solution. Made with Hawaiian rolls, ham, Swiss and cheddar cheese, and a buttery poppy seed topping, they’re kid-approved and freeze beautifully.
- Total Time: 45 minutes
- Yield: 12 sliders 1x
Ingredients
- 12-count package of Hawaiian sweet rolls
- 1/2 pound deli-sliced ham (about 8–10 slices)
- 6 slices Swiss cheese
- 6 slices cheddar cheese
- 4 tablespoons unsalted butter, melted
- 1 tablespoon Dijon mustard
- 1 tablespoon poppy seeds
- 1 teaspoon Worcestershire sauce
- 1/2 teaspoon onion powder
- Pinch of salt
- Pinch of freshly ground black pepper
Instructions
- Preheat oven to 350°F (175°C). Lightly grease a 9×13-inch baking dish.
- Place the entire slab of Hawaiian rolls on a cutting board. Using a sharp serrated knife, carefully cut the entire slab in half horizontally to create one large top half and one large bottom half.
- Transfer the bottom half of the rolls to the prepared baking dish. Layer half of the ham slices evenly over the bottom rolls, slightly overlapping them.
- Place the 6 slices of Swiss cheese over the ham, followed by the 6 slices of cheddar cheese.
- Layer the remaining ham slices on top of the cheese.
- Carefully place the top half of the rolls over the ham and cheese, cut-side down. Gently press down to make sure everything is sitting evenly.
- In a small bowl, whisk together the melted butter, Dijon mustard, poppy seeds, Worcestershire sauce, onion powder, salt, and pepper until well combined.
- Using a pastry brush, generously brush the entire butter mixture over the tops of the rolls, getting into all the cracks and crevices. Let the sliders sit at room temperature for 10 minutes.
- Cover the baking dish tightly with aluminum foil. Bake for 15 minutes.
- Remove the foil and bake for another 10-12 minutes, or until the tops are golden brown and the cheese is bubbly around the edges.
- Let the sliders cool in the pan for at least 5-10 minutes before cutting. Use a sharp knife to cut between the individual rolls.
Notes
For an extra-crispy top, switch your oven to the broil setting for the last 1-2 minutes of baking. Watch them like a hawk so they don’t burn! Letting the sliders rest for 10 minutes after baking is non-negotiable to prevent soggy bottoms. The butter sauce is everything—use your brush to work it down into the seams between the rolls.
- Prep Time: 20 minutes
- Cook Time: 25 minutes
- Category: Lunch
- Cuisine: American
Nutrition
- Serving Size: 1 slider
- Calories: 300
- Sugar: 8
- Sodium: 750
- Fat: 18
- Saturated Fat: 10
- Carbohydrates: 24
- Fiber: 1
- Protein: 16
Keywords: ham and cheese sliders, lunchbox recipes, make-ahead lunch, kid-friendly lunch, Hawaiian roll sliders, easy lunch ideas


