
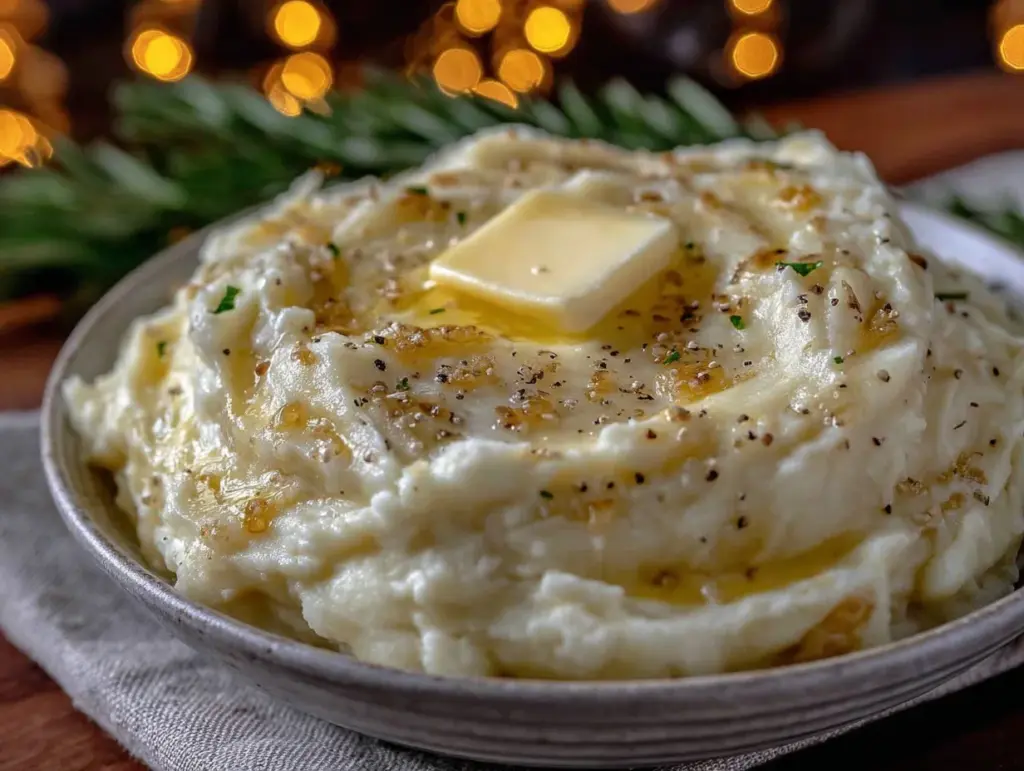
There used to be this little diner on the corner of Fourth and Main called The Copper Pot that made the most incredible mashed potatoes I have ever tasted. Honestly, they were legendary in our town. When they closed their doors three years ago after the owner retired, I felt a real sense of loss. It sounds dramatic, I know, but those potatoes were the reason my then-toddler would actually sit still at a table. After twelve tries — twelve batches of gluey, bland, or just plain wrong potatoes — I finally cracked the code.
The secret, it turns out, was roasting the garlic until it was practically candy and folding it in with a gentle hand. The result? A bowl of creamy, dreamy mashed potatoes with a sweetness that even the pickiest eaters can’t resist. You know that feeling when you take a bite of something and your eyes just close for a second? That’s this recipe. It’s not just a side dish; it’s the side dish that makes the whole meal feel special, even on a random Tuesday night.
I remember the day I finally got it right. My kitchen was a disaster zone, there was flour on my cheek from a different project, and I was about to give up for good. But then I tasted the spoon, and I just knew. My son, who had been suspiciously quiet, wandered in, grabbed a spoon, and after one bite, asked for a bowl for dinner. That was the moment. This recipe is for every parent who wants to serve something that feels like a hug, without the stress or the fancy ingredients.
Why You’ll Love This Recipe
This isn’t just another mashed potato recipe. It’s the one that gets written down on sticky notes and passed to friends. It’s the one that becomes a family staple, requested for every holiday and every ordinary weeknight. Here’s why this version stands out from the crowd.
- Kid-Approved, Parent-Approved: The roasted garlic turns sweet and nutty, losing that sharp bite kids hate. It’s a secret weapon for getting vegetables into a meal without a single complaint.
- Simple Ingredients, Big Flavor: You don’t need a trip to a specialty store. Potatoes, garlic, butter, milk, and a little cream cheese are all it takes. These are budget-friendly staples that deliver restaurant-quality taste.
- Perfect for Busy Weeknights: While the garlic roasts, you can prep the rest of dinner. The hands-on time is minimal, and the result feels like you spent hours in the kitchen.
- Always a Crowd-Pleaser: I’ve served these at Thanksgiving alongside the turkey, and at casual barbecues with grilled chicken. They disappear every single time. Even my friend who swears she hates mashed potatoes asked for the recipe.
- Unbelievably Creamy Texture: The trick is a combination of Yukon Gold potatoes and a small amount of cream cheese. It gives you that silky, rich texture without being heavy. It’s comfort food, perfected.
This recipe is different because it focuses on technique, not complicated ingredients. Roasting the garlic transforms it from a pungent bulb into a spreadable, sweet paste that melds perfectly with the potatoes. It’s not just about adding garlic flavor; it’s about adding a deep, caramelized richness that makes these potatoes unforgettable. This is the kind of dish that makes you close your eyes after the first bite, a little moment of pure satisfaction after a long day.
What Ingredients You Will Need
This recipe relies on a handful of simple, wholesome ingredients. Each one plays a specific role in creating that perfect, kid-friendly texture and flavor. Most of these are probably already in your pantry or fridge, which makes this an easy last-minute side dish.
- Yukon Gold Potatoes (2.5 pounds / about 1.1 kg): These are my absolute favorite for mashed potatoes. They have a naturally buttery flavor and a waxy texture that makes them incredibly creamy when mashed. Russet potatoes can be used, but they are starchier and can become gluey if overworked. Trust me, Yukon Golds are worth the slightly higher price for the texture they deliver.
- Garlic (1 whole head): One full head of garlic is what we need. Roasting an entire head might seem like a lot, but the process mellows the flavor dramatically, turning it sweet, nutty, and spreadable. It’s the star of the show, but in a gentle, kid-friendly way. Look for firm, plump bulbs without any green sprouts.
- Olive Oil (1 tablespoon): A good quality extra-virgin olive oil is used to coat the garlic before roasting. It helps the cloves soften and caramelize beautifully. You can also use avocado oil for a neutral flavor.
- Unsalted Butter (4 tablespoons / 57 grams): Butter adds richness and that classic, velvety mouthfeel. Using unsalted butter lets you control the final salt level of the dish. If you only have salted butter, just reduce the added salt by about ¼ teaspoon.
- Whole Milk (½ cup / 120 ml): Whole milk provides the perfect amount of creaminess without making the potatoes too heavy. You can substitute 2% milk, but the result will be slightly less rich. For an even more decadent version, use half-and-half.
- Cream Cheese (2 ounces / 57 grams): This is my secret ingredient! A small amount of cream cheese adds a subtle tang and an incredible, silky smooth texture. It also helps stabilize the potatoes, so they stay creamy even after a few minutes on the table. Make sure it’s softened to room temperature for easy mixing. I recommend Philadelphia brand for the most consistent results.
- Salt (1 teaspoon, plus more for the water): Salt is crucial for bringing out the flavor of the potatoes and the garlic. We’ll salt the cooking water generously, and then adjust the seasoning at the end. I use fine sea salt for cooking.
- Black Pepper (¼ teaspoon, or to taste): A little freshly ground black pepper adds a gentle warmth. Feel free to skip this if you’re serving very young children who are sensitive to spice.
- Fresh Chives (2 tablespoons, chopped, optional): A sprinkle of fresh chives on top adds a lovely pop of color and a mild onion flavor. It’s completely optional, but it makes the dish look beautiful for holidays or when you’re trying to impress.
Equipment Needed
You don’t need any fancy gadgets for this recipe, which is part of its charm. Here’s what you’ll need to have on hand to make these perfect mashed potatoes.
- Large Pot (5-6 quart): You need a big pot to boil the potatoes with enough room for them to cook evenly without crowding. A heavy-bottomed pot is best for even heat distribution.
- Baking Sheet or Small Baking Dish: For roasting the garlic. A small dish is fine, but a baking sheet allows for better air circulation around the garlic head.
- Aluminum Foil: To wrap the garlic head for roasting. This traps steam and helps the cloves soften perfectly.
- Sharp Knife and Cutting Board: For cutting the potatoes and chopping the chives.
- Colander: For draining the cooked potatoes.
- Potato Masher or Ricer: I strongly recommend a potato ricer for the smoothest, fluffiest mashed potatoes. However, a classic potato masher works perfectly well and gives a slightly more rustic texture. I have both, and honestly, I use the masher more often because I like a few tiny lumps. Avoid using a food processor or electric mixer, as they can overwork the potatoes and make them gluey.
- Small Bowl: For squeezing the roasted garlic out of its skins.
- Wooden Spoon or Spatula: For stirring everything together.
Preparation Method
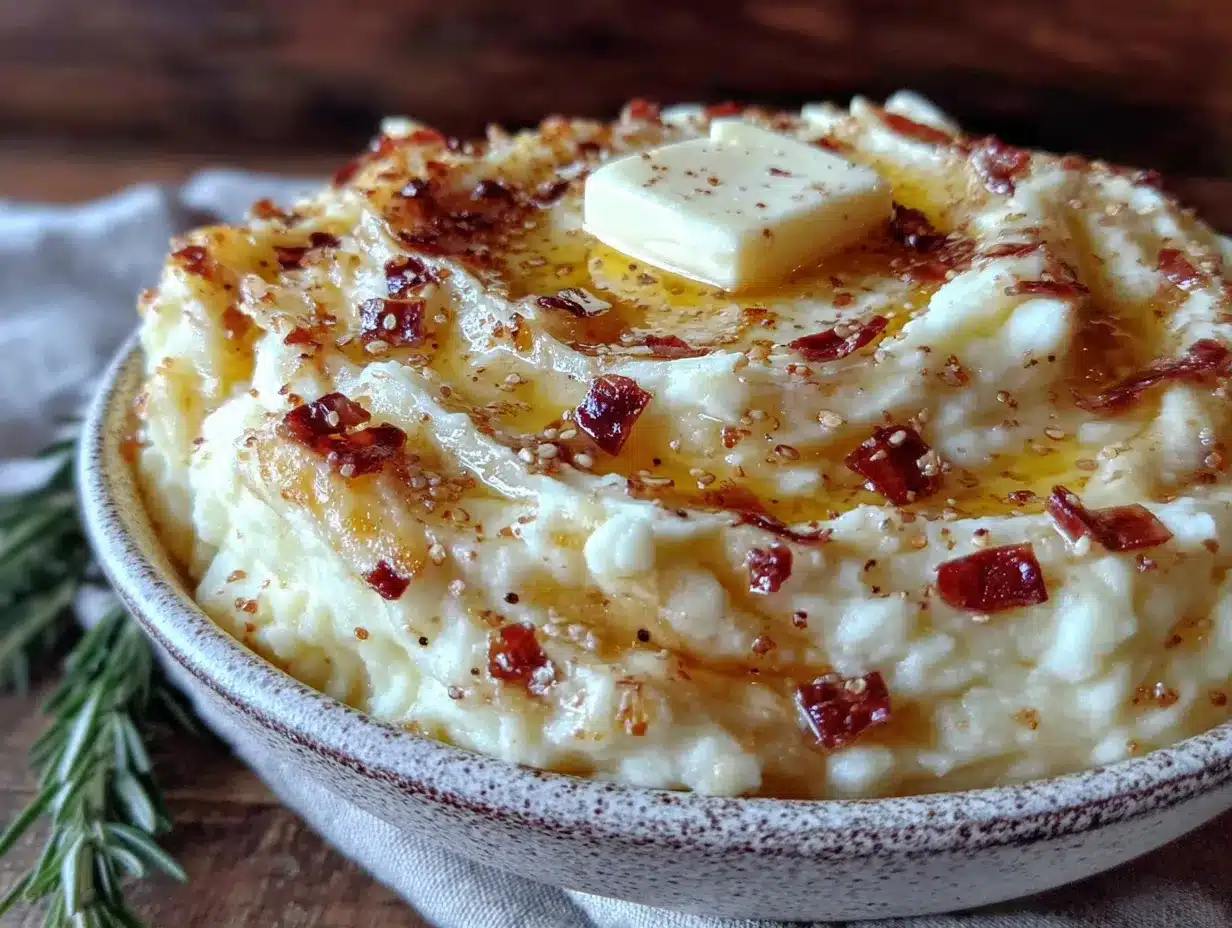
Let’s get cooking! Follow these steps, and you’ll have a bowl of the best mashed potatoes you’ve ever made. The process is simple, but the details make all the difference.
-
Roast the Garlic (45 minutes – 1 hour): Preheat your oven to 400°F (200°C). Take the whole head of garlic and slice off the top quarter-inch to expose the tops of the cloves. Don’t peel the whole head, just the top. Place the garlic head on a piece of aluminum foil large enough to wrap it completely. Drizzle the exposed cloves with the olive oil and sprinkle with a tiny pinch of salt. Wrap the foil tightly around the garlic to form a packet. Place the packet on a baking sheet and roast for 45 minutes to 1 hour, until the cloves are very soft and golden brown. You should be able to easily pierce them with a knife. Let it cool for a few minutes before handling.
-
Prepare the Potatoes (15 minutes): While the garlic roasts, peel the Yukon Gold potatoes and cut them into uniform 1-inch chunks. This is important for even cooking. Place the potato chunks in your large pot and cover them with cold water by about 2 inches. Add a generous tablespoon of salt to the water. This seasons the potatoes from the inside out.
-
Boil the Potatoes (15-20 minutes): Bring the pot to a boil over high heat. Once boiling, reduce the heat to medium-low and maintain a gentle simmer. Cook the potatoes until they are fork-tender. This means you can easily pierce a chunk with a fork and it slides off without resistance. Be careful not to overcook them, or they will become waterlogged. Start checking at the 12-minute mark.
-
Drain and Dry the Potatoes (5 minutes): Drain the potatoes in a colander. This is a crucial step: return the empty pot to the stove over low heat for about 30 seconds to evaporate any remaining water. Then, return the drained potatoes to the hot, dry pot. Let them sit in the pot for 1-2 minutes, shaking the pot occasionally, to allow any excess steam to escape. This helps create a fluffier mash.
-
Extract the Roasted Garlic (2 minutes): Once the garlic is cool enough to touch, unwrap the foil packet. Squeeze the bottom of each clove, and the soft, roasted garlic paste will slide right out into a small bowl. Discard the papery skins. Mash the cloves with a fork until they form a smooth paste.
-
Mash the Potatoes (5 minutes): Using your potato masher or ricer, mash the hot potatoes until they are broken down. If using a ricer, rice them directly back into the pot. Don’t over-mash at this stage; just break them up.
-
Incorporate the Remaining Ingredients (3 minutes): Add the softened butter, cream cheese, and the roasted garlic paste to the mashed potatoes. Pour in about half of the warm milk. Using a wooden spoon, gently fold everything together until just combined. Add the remaining milk a little at a time until you reach your desired consistency. Season with the salt and pepper, and fold one last time. Taste and adjust seasoning. Remember, you can always add more salt, but you can’t take it away.
-
Serve Immediately: Transfer the mashed potatoes to a serving bowl. Garnish with fresh chives, if using, and an extra pat of butter for good measure. Serve hot.
Cooking Tips & Techniques
After many batches of trial and error, I’ve learned a few things that make these potatoes foolproof. Here are my best tips for guaranteed success.
Don’t Overwork the Potatoes. This is the number one mistake people make. When you mash potatoes, you’re breaking up starch cells. Over-mashing, or using an electric mixer, can rupture too many of these cells, releasing excess starch and turning your potatoes into a gluey, pasty mess. Use a gentle hand with a masher or ricer, and stop as soon as the ingredients are combined.
Warm Your Milk and Butter. Cold liquid added to hot potatoes can cause them to seize up and become gummy. It’s a small step, but it makes a world of difference. Gently warm the milk and butter together in a small saucepan or in the microwave until the butter is just melted and the milk is warm to the touch. It doesn’t need to boil, just take the chill off.
Roast Your Garlic Ahead of Time. This is a great meal prep trick. You can roast several heads of garlic at once and store them in the fridge for up to a week. The roasted cloves can be used in salad dressings, spread on bread, or stirred into pasta. Having it ready means you can make these potatoes in under 30 minutes on a busy Tuesday.
I once tried to rush the process and didn’t dry my potatoes properly after draining them. The result was a watery, sad mash that no amount of butter could fix. It was a hard lesson, but it taught me the importance of that drying step. Don’t skip it! That extra minute of letting the steam escape is what gives you a fluffy, not soggy, final dish.
Variations & Adaptations
This recipe is a fantastic base that you can easily adapt to your family’s taste or what you have on hand. Here are a few of my favorite variations.
- Dairy-Free Version: This works surprisingly well! Substitute the butter with a high-quality vegan butter (like Miyoko’s or Country Crock Plant Butter), use unsweetened oat milk or full-fat canned coconut milk for the liquid, and replace the cream cheese with a dairy-free version or a tablespoon of nutritional yeast for a cheesy note. The roasted garlic provides so much flavor that you won’t miss the dairy.
- Loaded Mashed Potato Casserole: After mashing, spread the potatoes in a greased 9×13 baking dish. Top with shredded cheddar cheese, crumbled cooked bacon, and sliced green onions. Bake at 375°F (190°C) for 20-25 minutes, until bubbly and golden. This is a huge hit for potlucks and game day gatherings.
- Herb & Roasted Garlic: Along with the chives, stir in a tablespoon of fresh chopped rosemary or thyme at the end. The earthy herbs pair beautifully with the sweet roasted garlic. I tried this with leftover roast chicken one night, and it was a fantastic combination.
- Cheesy Roasted Garlic Mashed Potatoes: For an extra-decadent version, fold in ½ cup (60g) of freshly grated Parmesan cheese or sharp white cheddar along with the butter and cream cheese. It adds a wonderful savory depth.
- Lower-Carb Option: You can substitute half of the Yukon Golds with cauliflower florets. Boil the cauliflower separately until very tender, drain well, and mash it along with the potatoes. It’s a great way to sneak in extra vegetables without sacrificing too much texture.
Serving & Storage Suggestions
These mashed potatoes are incredibly versatile and serve as the perfect companion to so many meals. Here’s how to serve and store them like a pro.
Serving: Serve these potatoes hot, straight from the pot. They are the ultimate side dish for a Sunday roast chicken, a pan-seared steak, or a simple piece of baked salmon. They’re also a non-negotiable part of our Thanksgiving table, soaking up all that glorious gravy. For a fun presentation, pile them high in a warm bowl, make a small well in the center, and add a pat of melting butter. A sprinkle of fresh chives or a crack of black pepper on top adds a beautiful finish.
Storage: Leftover mashed potatoes are a gift. Store them in an airtight container in the refrigerator for up to 4 days. The flavors actually meld together overnight, making them even better the next day.
Reheating: The key to reheating mashed potatoes is to add a little moisture. Place them in a saucepan over low heat. Add a splash of milk or a tablespoon of butter, and stir gently until heated through. You can also reheat them in the microwave in 30-second bursts, stirring in between. If they seem a little dry, just add another splash of milk. I’ve even been known to form leftover mashed potatoes into patties and pan-fry them in a little butter until golden and crispy. It’s a breakfast revelation!
Freezing: These potatoes freeze beautifully. Place completely cooled mashed potatoes in a freezer-safe zip-top bag or container. They will keep for up to 3 months. To thaw, place the container in the refrigerator overnight. Reheat gently on the stovetop or in the microwave, adding a little extra milk or butter to revive the creamy texture.
Nutritional Information & Benefits
While this is a comfort food dish, it does offer some nutritional benefits, especially when you consider the star ingredient. Here’s a look at what’s in a serving.
Estimated Nutritional Values (per serving, based on 8 servings):
| Nutrient | Amount |
|---|---|
| Calories | ~280 |
| Fat | 14g |
| Saturated Fat | 8g |
| Carbohydrates | 35g |
| Fiber | 4g |
| Sugar | 4g |
| Protein | 6g |
Health Benefits: The star of the show, roasted garlic, is a powerhouse of health benefits. It’s known for its immune-boosting properties thanks to allicin, a compound that is actually enhanced by the roasting process. Potatoes, when eaten with the skin (which we’re not doing here for texture), are a great source of potassium and vitamin C. They also provide resistant starch, especially when cooled and reheated, which is fantastic for gut health. This dish also provides a good source of calcium from the milk and cream cheese.
Dietary Considerations: This recipe is naturally vegetarian. As noted above, it can easily be made dairy-free and gluten-free (always check your specific brands). It is a higher-carb dish, so those on a low-carb diet may want to enjoy it in smaller portions or try the cauliflower variation. The main allergen is dairy.
Conclusion
So there you have it—the recipe that brought a little bit of The Copper Pot magic back into my kitchen. These Kid-Approved Roasted Garlic Mashed Potatoes are more than just a side dish; they are a solution to the nightly dinner dilemma. They’re the thing that makes a simple meal feel like a special occasion, and they’re guaranteed to get even the pickiest eaters to clean their plate.
I love this recipe because it’s proof that you don’t need complicated techniques or expensive ingredients to make something truly wonderful. It’s born from a little bit of patience (for the garlic) and a whole lot of love. I hope you make these for your family and that they become as beloved in your home as they are in mine.
Now, I’d love to hear from you! Did your kids go back for seconds? Did you add your own twist? Drop a comment below and tell me all about it. And if you loved this recipe, please share it with a friend who needs a little comfort food in their life. Happy cooking!
Frequently Asked Questions
Can I use Russet potatoes instead of Yukon Golds?
Yes, you can, but the texture will be different. Russets are starchier, which can lead to a fluffier but potentially gluey mash if overworked. If using Russets, be extra careful not to over-mash them. Yukon Golds are preferred for their buttery flavor and creamy, stable texture.
Can I make these potatoes ahead of time for a holiday dinner?
Absolutely! This is a great make-ahead dish. Prepare the potatoes completely, then transfer them to a buttered baking dish. Cover and refrigerate for up to 2 days. When ready to serve, reheat in a 350°F (175°C) oven, covered, for about 25-30 minutes, or until heated through. You may need to stir in a splash of warm milk before serving to refresh the creaminess.
My roasted garlic sometimes turns out bitter. What am I doing wrong?
Bitter roasted garlic is usually a sign that the garlic was roasted at too high a temperature or for too long. The natural sugars in the garlic can burn, creating bitterness. Make sure your oven is at 400°F (200°C) and that the garlic is tightly wrapped in foil. Check it at the 45-minute mark. The cloves should be soft and golden, not dark brown or black.
Can I use pre-minced garlic from a jar instead of roasting a whole head?
I really don’t recommend it. Pre-minced garlic has a very sharp, raw flavor that completely changes the dish. Roasting a whole head mellows the garlic into a sweet, nutty paste that is entirely different from raw garlic. It’s a crucial step for the “kid-approved” part of this recipe! If you’re short on time, you can roast the garlic a day or two in advance.
How do I fix mashed potatoes that are too thin or runny?
This usually happens if the potatoes were overcooked and absorbed too much water. To fix it, return the pot to very low heat and stir constantly for 2-3 minutes. This will help some of the excess moisture evaporate. You can also try mashing in a little more cream cheese, which will help thicken and stabilize the mixture. If all else fails, you can spread them in a baking dish, top with cheese, and bake them into a casserole.
Pin This Recipe!

Kid-Approved Roasted Garlic Mashed Potatoes: Easy Homemade Side
Creamy, dreamy mashed potatoes with sweet roasted garlic that even picky eaters love. A simple, budget-friendly side dish perfect for weeknights or holidays.
- Total Time: 1 hour 15 minutes
- Yield: 8 servings 1x
Ingredients
- 2.5 pounds Yukon Gold potatoes (about 1.1 kg)
- 1 whole head garlic
- 1 tablespoon olive oil
- 4 tablespoons unsalted butter (57 grams)
- ½ cup whole milk (120 ml)
- 2 ounces cream cheese, softened (57 grams)
- 1 teaspoon salt, plus more for water
- ¼ teaspoon black pepper, or to taste
- 2 tablespoons fresh chives, chopped (optional)
Instructions
- Preheat oven to 400°F (200°C). Slice off the top quarter-inch of the garlic head to expose cloves. Place on foil, drizzle with olive oil and a pinch of salt. Wrap tightly and roast for 45 minutes to 1 hour until very soft and golden. Let cool.
- While garlic roasts, peel potatoes and cut into 1-inch chunks. Place in a large pot, cover with cold water by 2 inches, and add a generous tablespoon of salt. Bring to a boil, then reduce to a gentle simmer. Cook 15-20 minutes until fork-tender.
- Drain potatoes in a colander. Return empty pot to low heat for 30 seconds to dry. Return potatoes to hot pot and let sit 1-2 minutes, shaking occasionally, to release steam.
- Once garlic is cool enough to handle, squeeze cloves from skins into a small bowl. Mash with a fork into a smooth paste.
- Mash potatoes with a potato masher or ricer until broken down. Do not over-mash.
- Add softened butter, cream cheese, and roasted garlic paste to potatoes. Pour in half the warm milk. Gently fold with a wooden spoon until combined. Add remaining milk gradually until desired consistency is reached. Season with salt and pepper. Adjust to taste.
- Transfer to a serving bowl. Garnish with chives and an extra pat of butter if desired. Serve hot.
Notes
For best texture, use a potato masher or ricer; avoid electric mixers. Warm milk and butter before adding to prevent gummy potatoes. Roast garlic ahead of time for quicker prep. To fix runny potatoes, stir over low heat or add more cream cheese.
- Prep Time: 15 minutes
- Cook Time: 1 hour
- Category: Side Dish
- Cuisine: American
Nutrition
- Serving Size: 1 serving
- Calories: 280
- Sugar: 4
- Sodium: 400
- Fat: 14
- Saturated Fat: 8
- Carbohydrates: 35
- Fiber: 4
- Protein: 6
Keywords: mashed potatoes, roasted garlic, kid-friendly, easy side dish, comfort food, Thanksgiving, holiday side


