
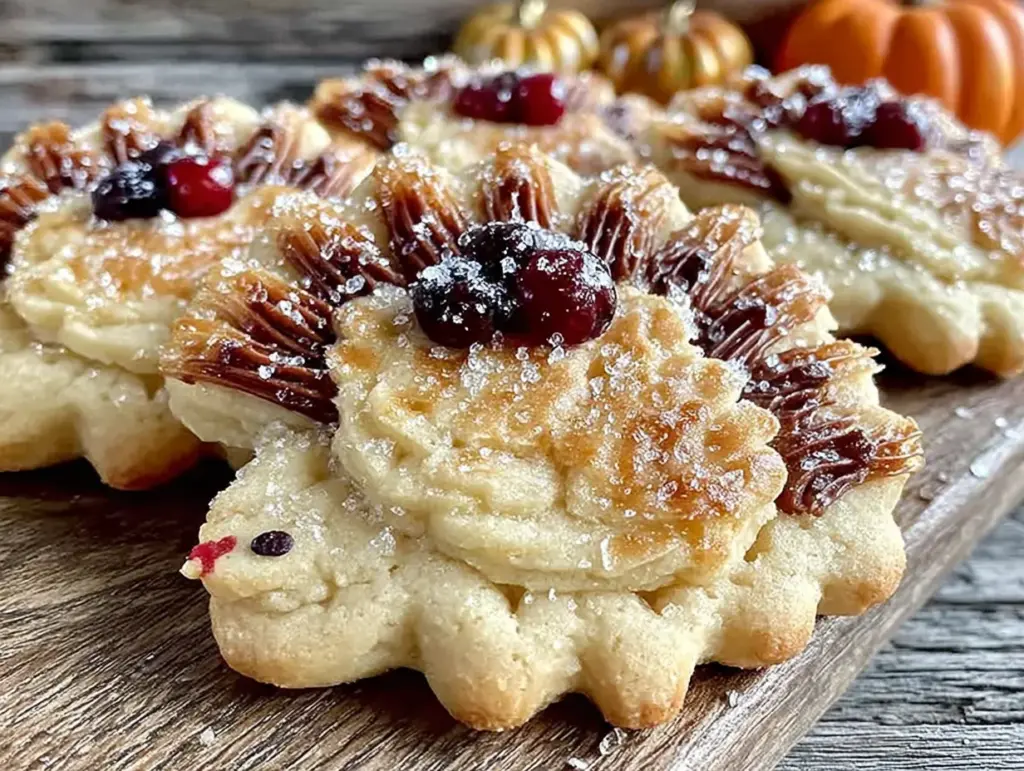
I was elbow-deep in buttercream, trying to fix a batch of frosting that had somehow turned into a soupy mess. It was the night before my niece’s birthday party, and I had promised her fancy decorated cookies shaped like autumn leaves. The kitchen looked like a flour bomb had gone off, and let me tell you, I was this close to ordering a sheet cake from the grocery store. Then I spotted the cookie cutter set my sister had gifted me years ago—the one with the hand shape. Honestly, I grabbed it out of pure desperation.
The sugar cookie dough was already chilling in the fridge, but my leaf cookies were a disaster. They spread too much, the edges blurred, and I had already scraped two batches into the trash. So I rolled out a new sheet of dough, pressed that hand-shaped cutter into it, and thought, “Well, this is going to look ridiculous.” I mean, a hand turkey cookie? That felt more like a kindergarten craft project than a birthday party treat. But I was out of time and out of options.
What came out of the oven was nothing like the plan—and better. The hand shape baked up perfectly, the fingers stayed distinct, and once I added a little royal icing for feathers and a tiny candy eye, it was honestly the cutest cookie I had ever made. My niece’s party turned into a hand turkey decorating station, and the kids went absolutely wild for them. I’ve been making these Light & Festive Hand Turkey Sugar Cookies every Thanksgiving since, and they never fail to bring that same burst of joy. You know that feeling when a mistake turns into a new tradition? Yeah, this is exactly that.
Why You’ll Love This Recipe
These aren’t just cute cookies—they’re the kind of recipe that makes you look like a holiday rockstar with almost zero effort. After testing this dough at least six times (and ruining a few batches with melted butter, I’ll admit), I landed on a version that holds its shape perfectly and tastes like a dream. Here’s why this one stands out:
- Quick & Easy : The dough comes together in about 15 minutes, and the cookies bake in just 8 to 10 minutes. Perfect for those last-minute holiday baking sessions.
- Simple Ingredients : You probably have everything in your pantry right now—flour, sugar, butter, eggs, vanilla. No weird specialty items required.
- Perfect for Thanksgiving : These are the ultimate activity cookie for kids’ tables, classroom parties, or family gatherings. Everyone can decorate their own turkey.
- Crowd-Pleaser : I’ve brought these to three different holiday parties, and they get devoured every single time. Kids love the shape, adults love the taste.
- Unbelievably Delicious : The texture is that perfect balance—crisp edges with a soft, buttery center. The vanilla and almond extract combo gives it a bakery-quality flavor.
What makes this different from every other sugar cookie recipe? It’s the technique. I use a slightly higher flour ratio and chill the dough for exactly 30 minutes, which means no spreading, no blurred edges, and perfect hand shapes every time. Plus, I swap in a touch of almond extract that makes people say, “What’s in these? They taste amazing!”
This recipe isn’t just good—it’s the kind that makes you close your eyes after the first bite. It’s comfort food reimagined for the holiday season: lighter, faster, but with the same soul-soothing satisfaction. Perfect for impressing guests without stress, or turning a simple cookie into something memorable.
What Ingredients You Will Need
This recipe uses simple, wholesome ingredients to deliver that classic sugar cookie flavor with a perfect, shape-holding texture. Every ingredient plays a specific role, and I’ve tested substitutions so you don’t have to guess.
- Unsalted butter, softened to room temperature (1 cup / 2 sticks) — Use good-quality butter like Kerrygold for the richest flavor. The butter needs to be soft but not melted, or your cookies will spread.
- Granulated sugar (1 cup / 200g) — Regular white sugar gives the cookies that crisp edge. Don’t substitute with brown sugar, which adds too much moisture.
- Large egg (1, room temperature) — Bring it to room temp by placing it in warm water for 5 minutes if you forgot to take it out earlier.
- Vanilla extract (1 teaspoon) — Pure vanilla extract makes a real difference here. I prefer Nielsen-Massey, but any pure vanilla works.
- Almond extract (1/2 teaspoon) — This is my secret ingredient. It adds a subtle, nutty sweetness that makes people wonder what makes these cookies so good. (Use 1 teaspoon of vanilla if you don’t have almond extract.)
- All-purpose flour (2 1/2 cups / 312g) — Spoon and level your flour; don’t scoop directly from the bag, or you’ll pack in too much and get dry cookies.
- Baking powder (1 teaspoon) — Make sure it’s fresh. Test it by dropping a little in hot water—if it fizzes, it’s good.
- Salt (1/2 teaspoon) — Fine sea salt works best. It balances the sweetness and enhances the butter flavor.
For the decoration, you’ll need:
- Royal icing (store-bought or homemade) — I use a mix of Wilton gel food colors to get those classic fall shades: orange, brown, yellow, and red.
- Candy eyes (small, about 1/4 inch) — You can find these at any craft store or online. They give the turkey face that adorable, goofy expression.
- Orange sprinkles or candy corn (for the beak) — Candy corn works perfectly and adds a little extra sweetness.
- Piping bags or zip-top bags — Snip a tiny corner off a zip-top bag if you don’t have piping bags. It works like a charm.
Equipment Needed
You don’t need a fancy kitchen to pull these off. Here’s what I use, along with some budget-friendly alternatives I’ve learned the hard way.
- Hand-shaped cookie cutter (about 4 inches tall) — I got mine on Amazon for under $8. If you can’t find one, you can trace around your own hand on parchment paper and cut the dough with a knife. It’s more work, but it works.
- Stand mixer or hand mixer — I use my KitchenAid for the dough, but a hand mixer and a large bowl work just fine. You could even cream the butter and sugar by hand if you’ve got some arm stamina.
- Rolling pin — A standard rolling pin is fine. I prefer a French-style tapered pin, but honestly, a wine bottle works in a pinch (I’ve done it).
- Baking sheets (2, light-colored) — Dark baking sheets can cause cookies to brown too quickly. If that’s all you have, reduce the oven temperature by 25°F.
- Parchment paper or silicone baking mats — Parchment paper is cheap and disposable. Silicone mats are reusable and give even baking. Both work great.
- Cooling rack — Essential for getting cookies to cool evenly. Stacking warm cookies traps steam and makes them soggy.
- Piping bags with small round tips (or zip-top bags) — I use Wilton tip #2 for fine lines. A zip-top bag with a tiny corner snipped off works perfectly for beginners.
Preparation Method
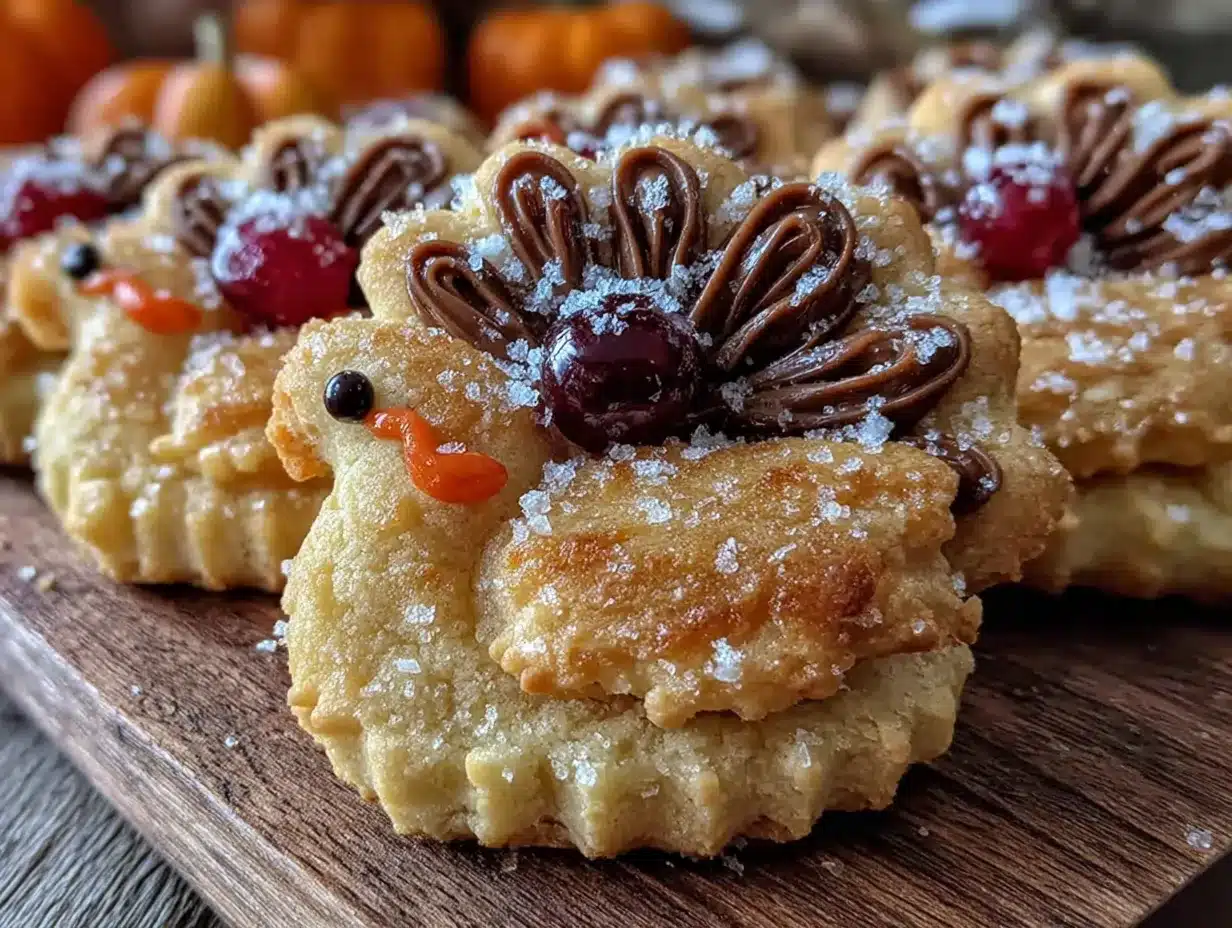
Let’s get baking. I’ve broken this down into clear steps with all the little notes I wish someone had told me the first time.
- Cream the butter and sugar. In a large mixing bowl, beat the softened butter and granulated sugar together on medium speed for about 3 minutes, until light and fluffy. Scrape down the sides of the bowl once halfway through. You’re looking for a pale, airy mixture that looks like wet sand. (Don’t rush this step—proper creaming gives the cookies their tender texture.)
- Add the wet ingredients. Beat in the egg, vanilla extract, and almond extract on low speed until just combined. The mixture might look slightly curdled at this point—that’s totally normal, don’t panic. Scrape the bowl again.
- Mix the dry ingredients. In a separate bowl, whisk together the all-purpose flour, baking powder, and salt. This ensures the baking powder is evenly distributed, so you don’t get one cookie that rises like a balloon while another stays flat.
- Combine wet and dry. Gradually add the flour mixture to the butter mixture, mixing on low speed. Stop as soon as the dough comes together—overmixing develops gluten and makes cookies tough. The dough should be soft but not sticky. If it feels sticky, add 1 tablespoon more flour.
- Chill the dough. Divide the dough into two discs, wrap each in plastic wrap, and refrigerate for at least 30 minutes. This is non-negotiable. Chilling solidifies the butter, which prevents the cookies from spreading in the oven. I’ve skipped this step before, and my hand turkeys turned into blobby mittens. Learn from my mistake.
- Preheat and prepare. Preheat your oven to 350°F (175°C). Line two baking sheets with parchment paper or silicone mats.
- Roll and cut. On a lightly floured surface, roll one disc of dough to about 1/4-inch thickness. Flour your rolling pin and the top of the dough lightly to prevent sticking. Press the hand-shaped cutter firmly into the dough, then lift straight up. Transfer the cut shapes to the prepared baking sheets, spacing them about 2 inches apart. Gather the scraps, re-roll, and cut again. (Pro tip: If the dough gets too soft while cutting, pop it back in the fridge for 10 minutes.)
- Bake. Bake for 8 to 10 minutes, rotating the pans halfway through. The edges should be just barely golden—the centers will look pale and slightly underdone. That’s perfect. Overbaking dries them out. Let them cool on the baking sheet for 5 minutes, then transfer to a wire rack to cool completely.
- Decorate. Once the cookies are completely cool (at least 30 minutes), it’s time for the fun part. Pipe royal icing onto the fingers to create colorful feathers—I like to do each finger a different fall color. Add a dollop of icing for the turkey’s body, press on a candy eye, and use an orange sprinkle or a tiny piece of candy corn for the beak. Let the icing set for at least 1 hour before stacking or serving.
Cooking Tips & Techniques
I’ve made every mistake in the book with these cookies, so you don’t have to. Here’s what I’ve learned after way too many batches.
The biggest mistake: skipping the chill. I know, I know—you’re in a hurry. But warm dough spreads. I once tried to rush the process and ended up with cookies that looked like starfish instead of hand turkeys. The 30-minute chill is your best friend. If you’re really pressed for time, pop the cut-out cookies directly on the baking sheet into the freezer for 15 minutes. That works too.
Flour is your friend, but not too much. When rolling out the dough, use just enough flour to prevent sticking. Too much flour gets worked into the dough and makes the cookies dry and crumbly. I use a light dusting on the counter and on top of the dough, then roll with even pressure.
Rotate your pans. Every oven has hot spots. I rotate my pans halfway through baking and also swap the top and bottom racks. This ensures all the cookies bake evenly. The ones on the back left of my oven always brown faster—maybe yours does too.
Let them cool completely. I know it’s tempting to start decorating while they’re still warm, but the icing will melt and slide right off. I’ve had a few tragic incidents where a perfectly decorated turkey turned into a puddle. Wait the full 30 minutes. Use that time to clean up or make your icing.
Consistency tip for royal icing: If you’re using store-bought royal icing, add water one drop at a time until it reaches a “15-second consistency”—when you lift a spoon, the ribbon of icing sinks back into the bowl in about 15 seconds. This is perfect for flooding the feathers. For piping details like the beak, keep the icing thicker.
Variations & Adaptations
These cookies are endlessly adaptable, and I’ve tried quite a few variations myself. Here are some of my favorites.
Gluten-Free Version: Swap the all-purpose flour with a 1-to-1 gluten-free baking flour blend (I like King Arthur’s). Add 1/4 teaspoon xanthan gum if your blend doesn’t already include it. The cookies will be slightly more delicate, so handle them gently when transferring to the baking sheet.
Vegan Adaptation: Use vegan butter (like Earth Balance) and a flax egg (1 tablespoon ground flaxseed mixed with 3 tablespoons water, let sit for 5 minutes). The texture will be a bit more crumbly, but the flavor is still fantastic. Use vegan royal icing and skip the candy eyes or find vegan-friendly ones.
Flavor Twists: Add 1 teaspoon of lemon zest to the dough for a bright, citrusy kick. Or try 1/2 teaspoon of cinnamon and a pinch of nutmeg for a warm, spiced version. I made a batch with orange zest last year, and they were gone before Thanksgiving dinner even started.
Different Decorating Themes: Skip the turkey theme entirely and use these hand-shaped cookies for other occasions. Decorate them as superhero gloves for a birthday party, or use pink and red icing for Valentine’s Day. I once made them as “helping hands” for a teacher appreciation event, and they were a huge hit.
No-Icing Option: If you don’t want to mess with royal icing, simply dust the baked cookies with powdered sugar, or drizzle with a simple glaze made from 1 cup powdered sugar and 2 tablespoons milk. The hand shape is still cute without elaborate decoration.
Serving & Storage Suggestions
These cookies are best served at room temperature, and they actually taste even better the next day—the flavors mellow and meld together beautifully.
For serving, arrange them on a platter with the turkey faces all facing the same direction for maximum cuteness. They’re perfect alongside a warm mug of apple cider, a cup of hot chocolate, or even a glass of cold milk. I like to serve them as part of a dessert table with other Thanksgiving treats like pumpkin pie and pecan bars.
Storage: Store undecorated cookies in an airtight container at room temperature for up to 1 week. Decorated cookies need to be stored in a single layer (or between layers of parchment paper) so the icing doesn’t smudge. They’ll keep for about 5 days. Do not refrigerate—the moisture in the fridge can make the cookies soft and the icing sticky.
Freezing: You can freeze the unbaked dough discs for up to 3 months. Wrap them tightly in plastic wrap and then in foil. When you’re ready to bake, thaw the dough in the refrigerator overnight, then roll and cut as usual. Baked, undecorated cookies also freeze well for up to 2 months. Thaw at room temperature before decorating.
One thing I’ve noticed: the almond extract flavor becomes more pronounced after a day or two. So if you’re making these ahead for a party, bake them two days in advance and decorate the morning of. The flavor is at its peak, and the icing stays fresh and bright.
Nutritional Information & Benefits
Here’s a rough estimate per cookie (based on 24 cookies, undecorated):
- Calories: 145
- Fat: 7g
- Carbohydrates: 19g
- Protein: 2g
- Sugar: 9g
These are cookies, so let’s be real—they’re a treat. But I love that this recipe uses simple, recognizable ingredients without any preservatives or artificial flavors. The butter provides a small amount of vitamin A, and the egg adds a little protein. If you’re looking to lighten them up, you can reduce the sugar by 1/4 cup (the texture will be slightly less tender, but still delicious).
For those with dietary concerns, this recipe is nut-free (as written) and can easily be made gluten-free or vegan with the substitutions mentioned above. Always check your ingredient labels if you’re baking for someone with allergies—some extracts and food colorings may contain allergens.
Personally, I love that these cookies feel festive without being overly indulgent. One or two with a cup of tea is the perfect little treat, and the portion size feels just right. It’s all about balance, right?
Conclusion
These Light & Festive Hand Turkey Sugar Cookies started as a total kitchen disaster, and now they’re the one recipe I get asked to bring to every fall gathering. That’s the thing about cooking—sometimes the best traditions come from the messiest moments. I honestly think that’s what makes this recipe so special. It’s not fancy or complicated. It’s just fun, delicious, and full of heart.
I hope you give these a try, whether you’re baking with kids, hosting a party, or just want to smile while you eat a cookie. Don’t be afraid to make them your own—use your favorite colors, try different icing techniques, or let the little ones go wild with the sprinkles. The imperfections are what make them charming.
If you make these, I’d love to hear about it. Drop a comment below, tag me in your photos, or tell me about your own happy baking accident. Until then, happy baking—and may your cookies always hold their shape!
Frequently Asked Questions
Can I use a different cookie cutter shape?
Absolutely! This dough recipe works with any shape of cookie cutter. Just adjust the baking time slightly for smaller or larger cookies. For hand-shaped cookies, the 4-inch size is perfect for getting that turkey look.
Why did my cookies spread in the oven?
This usually happens when the dough isn’t chilled enough, or the butter was too soft when you creamed it. Make sure your butter is softened but still cool to the touch, and don’t skip the 30-minute chill. If your kitchen is warm, chill the cut-out cookies on the baking sheet for 10 minutes before baking.
Can I make the dough ahead of time?
Yes! The dough can be refrigerated for up to 3 days, or frozen for up to 3 months. Just wrap it tightly in plastic wrap. Let it sit at room temperature for about 10 minutes before rolling if it feels too firm.
How do I get the royal icing to be smooth?
The key is the consistency. Add water one drop at a time until the icing flows like thick honey. If it’s too thick, it won’t spread evenly. If it’s too thin, it will run off the sides of the cookie. Practice on a piece of parchment paper first if you’re unsure.
Can I use store-bought frosting instead of royal icing?
You can, but it won’t set as hard and may smudge when you stack the cookies. If you use canned frosting, spread it with a knife or offset spatula instead of piping it. The cookies will still taste great, but they won’t have that clean, professional look.
Pin This Recipe!

Light & Festive Hand Turkey Sugar Cookies
These adorable hand turkey sugar cookies are a fun and easy Thanksgiving treat. With a perfectly shaped, buttery sugar cookie base and colorful royal icing decorations, they’re a crowd-pleasing activity for kids and adults alike.
- Total Time: 1 hour 25 minutes (includes chilling and cooling)
- Yield: 24 cookies 1x
Ingredients
- 1 cup (2 sticks) unsalted butter, softened to room temperature
- 1 cup (200g) granulated sugar
- 1 large egg, room temperature
- 1 teaspoon vanilla extract
- 1/2 teaspoon almond extract
- 2 1/2 cups (312g) all-purpose flour
- 1 teaspoon baking powder
- 1/2 teaspoon fine sea salt
- Royal icing (store-bought or homemade)
- Wilton gel food colors (orange, brown, yellow, red)
- Small candy eyes (about 1/4 inch)
- Orange sprinkles or candy corn (for beak)
- Piping bags or zip-top bags
Instructions
- Cream the butter and sugar: In a large mixing bowl, beat the softened butter and granulated sugar together on medium speed for about 3 minutes, until light and fluffy. Scrape down the sides of the bowl once halfway through.
- Add the wet ingredients: Beat in the egg, vanilla extract, and almond extract on low speed until just combined. The mixture might look slightly curdled—this is normal.
- Mix the dry ingredients: In a separate bowl, whisk together the all-purpose flour, baking powder, and salt.
- Combine wet and dry: Gradually add the flour mixture to the butter mixture, mixing on low speed. Stop as soon as the dough comes together. The dough should be soft but not sticky. If it feels sticky, add 1 tablespoon more flour.
- Chill the dough: Divide the dough into two discs, wrap each in plastic wrap, and refrigerate for at least 30 minutes.
- Preheat and prepare: Preheat your oven to 350°F (175°C). Line two baking sheets with parchment paper or silicone mats.
- Roll and cut: On a lightly floured surface, roll one disc of dough to about 1/4-inch thickness. Press the hand-shaped cutter firmly into the dough, then lift straight up. Transfer the cut shapes to the prepared baking sheets, spacing them about 2 inches apart. Gather the scraps, re-roll, and cut again.
- Bake: Bake for 8 to 10 minutes, rotating the pans halfway through. The edges should be just barely golden. Let them cool on the baking sheet for 5 minutes, then transfer to a wire rack to cool completely.
- Decorate: Once the cookies are completely cool (at least 30 minutes), pipe royal icing onto the fingers to create colorful feathers. Add a dollop of icing for the turkey’s body, press on a candy eye, and use an orange sprinkle or a tiny piece of candy corn for the beak. Let the icing set for at least 1 hour before stacking or serving.
Notes
Chilling the dough is non-negotiable to prevent spreading. For best results, use room temperature ingredients. The almond extract is the secret ingredient for bakery-quality flavor. If you don’t have almond extract, use 1 teaspoon of vanilla extract instead. For royal icing, aim for a ’15-second consistency’ for flooding. Store undecorated cookies in an airtight container at room temperature for up to 1 week. Decorated cookies keep for about 5 days. Do not refrigerate. Freeze unbaked dough discs for up to 3 months.
- Prep Time: 15 minutes
- Cook Time: 10 minutes
- Category: Dessert
- Cuisine: American
Nutrition
- Serving Size: 1 cookie
- Calories: 145
- Sugar: 9
- Sodium: 75
- Fat: 7
- Saturated Fat: 4
- Carbohydrates: 19
- Protein: 2
Keywords: hand turkey cookies, sugar cookies, Thanksgiving cookies, easy sugar cookie recipe, hand-shaped cookies, holiday baking, kids baking


