
I was standing in the canned goods aisle of my local grocery store last November, staring at a display of fried onions, when the smell hit me. Not the onions themselves, but something else — that warm, sage-and-butter scent that only means one thing. And suddenly I was eight years old, standing on a step stool in my Aunt Carol’s tiny kitchen, watching her pack a greasy metal muffin tin with what she called “the best part of the meal.” She was right. She always was about that particular thing.
Aunt Carol passed a few years back, and I haven’t had her stuffing muffins since. Honestly, I’d forgotten about them completely until that random moment in the grocery store. I stood there holding a bag of onions, feeling a little ridiculous, trying to hold onto the memory before it slipped away. The way she’d press the mixture into each cup with the back of a spoon, the way the tops would turn that impossible shade of golden brown, the way she’d let me eat one straight from the pan even though it was “burn your mouth hot.” Maybe you’ve had that feeling — when a random smell pulls you right back to a specific person and a specific moment, and you realize you need to make that thing again, not just for the taste but for the feeling.
So I bought the onions. And the bread. And the celery. I called my mom for the recipe, which turned out to be more of a “handful of this, pinch of that” situation. It took three tries to get the texture right — the first batch was a soggy disaster, honestly — but when I finally pulled that pan from the oven and saw those crispy golden tops staring back at me, I knew I’d gotten close. Close enough that I could almost hear Aunt Carol saying, “Not bad, kid.”
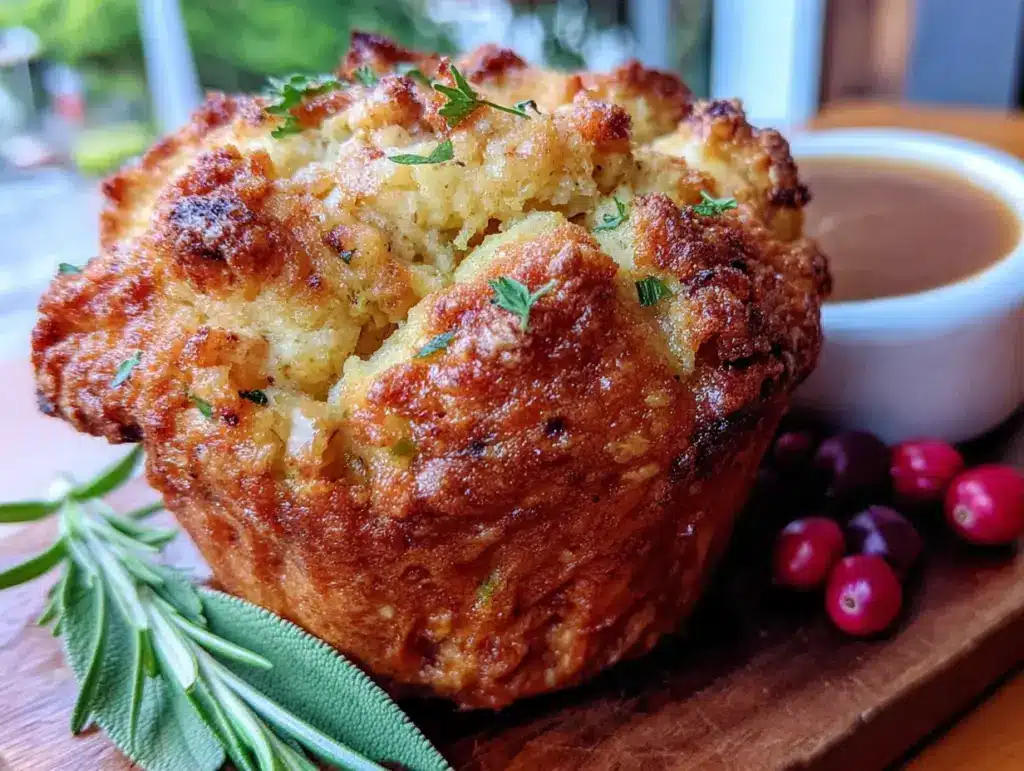
These Perfect Thanksgiving Stuffing Muffins are my attempt to bottle that memory. They’re the best part of the holiday meal, made portable and personal. And they’re exactly what you need this season.
Why You’ll Love This Recipe
Let me tell you why these stuffing muffins are about to become your new Thanksgiving tradition. I’ve tested this recipe more times than I care to admit, and each batch taught me something new about getting that perfect texture and flavor balance.
- Perfectly Portioned: No more fighting over the corner pieces or the crispy edges. Each muffin is its own little packet of golden, crunchy goodness. Everyone gets their fair share of the good stuff.
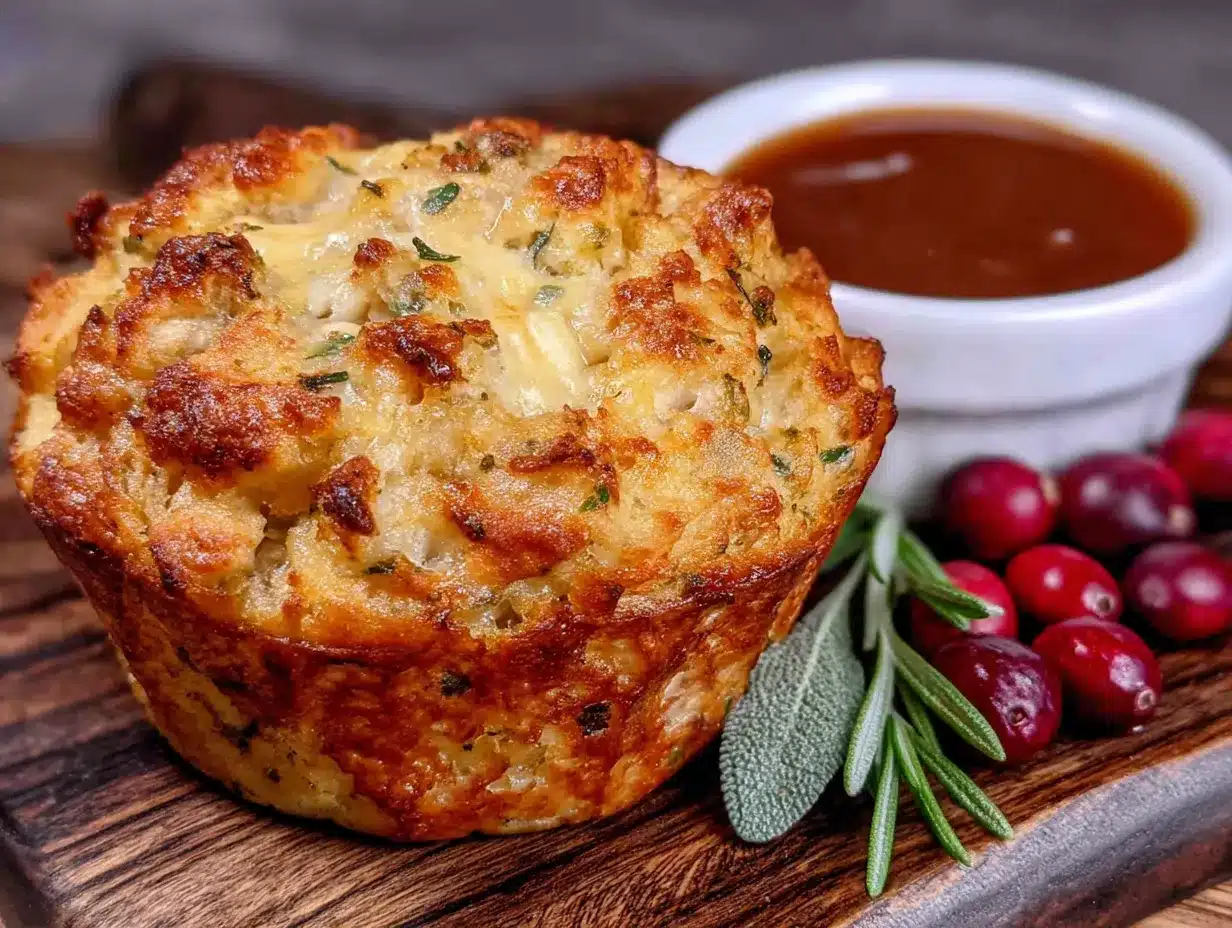
- Crispy on Every Side: Traditional stuffing gets one crispy top layer. These muffins? Every single side gets that beautiful golden crust. It’s a game-changer, I promise you.
- Make-Ahead Magic: You can assemble these a day ahead and bake them right before dinner. Or bake them completely and reheat. They actually get better after a day in the fridge — the flavors meld together beautifully.
- No More Soggy Stuffing: The muffin format allows steam to escape from all sides, meaning you get a perfectly textured muffin every time. No more gluey, sad stuffing lurking at the bottom of the baking dish.
- Stress-Free Serving: No scooping, no serving spoons, no “who got the most stuffing” drama. Just grab a muffin and go. It makes buffet-style serving so much easier.
What makes this recipe different from every other stuffing out there is the technique. Most recipes call for baking stuffing in a casserole dish, which traps moisture and creates that soggy bottom. By using a muffin tin, we’re maximizing surface area for browning while keeping the inside tender and flavorful. It’s the best of both worlds — crispy outside, soft and savory inside.
This is the kind of recipe that makes you close your eyes after the first bite. It’s comfort food reimagined — all the soul-soothing satisfaction of traditional stuffing, but somehow better. Perfect for impressing your in-laws or just treating yourself to the best part of Thanksgiving, one muffin at a time.
What Ingredients You Will Need
This recipe uses simple, honest ingredients to deliver that classic Thanksgiving flavor with an upgraded texture. Most of these are pantry staples during the holiday season, which makes this recipe incredibly accessible.
For the Stuffing Base
- 1 loaf (about 16 ounces) day-old French bread or sourdough, cut into 1-inch cubes (stale bread absorbs liquid better and holds its shape during baking)
- 4 tablespoons unsalted butter, plus more for greasing the muffin tin (I use Kerrygold for its rich flavor, but any good quality butter works)
- 1 large yellow onion, finely chopped (about 1½ cups)
- 3 celery stalks, finely chopped (about 1 cup)
- 3 cloves garlic, minced
- 2 teaspoons fresh sage, finely chopped (or 1 teaspoon dried)
- 1½ teaspoons fresh thyme leaves (or ¾ teaspoon dried)
- 1 teaspoon fresh rosemary, finely chopped (or ½ teaspoon dried)
- ½ teaspoon dried marjoram (optional, but adds a lovely floral note)
- 1½ cups low-sodium chicken or vegetable broth, warmed (use vegetable broth for a vegetarian version)
- 2 large eggs, lightly beaten
- ½ teaspoon salt, plus more to taste
- ½ teaspoon black pepper
For the Crispy Golden Tops
- 2 tablespoons melted butter, for brushing the tops
- ¼ cup fried onions or shallots, crushed (optional, but highly recommended for extra crunch)
- Flaky sea salt, for finishing
Ingredient Selection Tips:
- For the bread, I recommend a sturdy artisan loaf with a good crust. Soft sandwich bread will turn to mush. Sourdough is my personal favorite because it adds a slight tang that balances the rich, savory flavors.
- Fresh herbs make a real difference here. If you can find them, use fresh sage and thyme. The dried versions work in a pinch, but you’ll lose some of that aromatic brightness.
- Low-sodium broth is important — it lets you control the salt level. Regular broth can make the stuffing taste overly salty, especially as it reduces during baking.
- If you’re feeling adventurous, swap half the butter for bacon fat when cooking the vegetables. It adds a smoky depth that’s absolutely incredible.
Equipment Needed
You don’t need anything fancy to make these stuffing muffins, which is part of their charm. Here’s what you’ll need:
- 12-cup standard muffin tin — This is non-negotiable. A mini muffin tin will work for appetizer-sized portions, but the baking time will be different. A jumbo tin will give you monster muffins that need extra time in the oven.
- Large skillet or sauté pan — For cooking the vegetables. A 12-inch pan gives you plenty of room.
- Large mixing bowl — Big enough to toss the bread cubes without making a mess.
- Sharp knife and cutting board — For dicing the vegetables and herbs.
- Pastry brush — For brushing the tops with melted butter. A silicone brush works great and is easy to clean.
- Cooling rack — Helps the muffins stay crispy by allowing air to circulate underneath.
Budget-Friendly Alternatives: If you don’t have a pastry brush, just drizzle the melted butter over the tops with a spoon. If you’re using a non-stick muffin tin, you can skip the greasing step, but I still recommend a light buttering for the best flavor and release.
Personal Note: I’ve made these in both dark non-stick and light aluminum muffin tins. The dark tin gives you a darker, crunchier bottom crust, which I personally love. Just keep an eye on them so they don’t burn.
Preparation Method
Let’s get to the good part. Follow these steps carefully, and you’ll have the best stuffing muffins of your life.
- Preheat your oven to 375°F (190°C). Position the rack in the middle of the oven. Generously butter a 12-cup muffin tin, making sure to coat every nook and cranny. This is not the time to be shy with the butter.
- Prepare the bread cubes. If your bread isn’t already stale, spread the cubes on a baking sheet and toast them in the oven for 8-10 minutes, stirring once halfway through. You want them dry but not brown. Let them cool completely. This step is crucial — dry bread absorbs the broth without turning mushy.
- Cook the aromatics. In a large skillet over medium heat, melt 4 tablespoons of butter. Add the chopped onion and celery, and cook for 6-8 minutes, stirring occasionally, until they’re soft and translucent but not browned. Add the minced garlic and cook for another minute until fragrant. Remove from heat and let cool slightly.
- Combine the ingredients. In your large mixing bowl, combine the dried bread cubes, cooked vegetables, fresh sage, thyme, rosemary, and marjoram if using. Toss everything together with your hands to distribute the herbs evenly. Season with salt and pepper.
- Add the liquid. In a separate small bowl or measuring cup, whisk together the warm broth and beaten eggs. Pour this mixture over the bread mixture. Using a large spatula or your hands, gently fold everything together until the bread cubes are evenly moistened. Don’t overmix — you want some texture, not a paste. Let the mixture sit for 5-10 minutes to allow the bread to absorb the liquid.
- Check the consistency. Squeeze a small handful of the mixture. It should hold together when pressed but still feel moist, not wet. If it seems dry, add a tablespoon more broth. If it’s too wet, add a handful more bread cubes.
- Fill the muffin cups. Divide the stuffing mixture evenly among the 12 muffin cups. Use a spoon or your fingers to press the mixture firmly into each cup. Don’t pack it too tight — you want some air pockets for texture — but make sure it’s compact enough to hold its shape.
- Create the crispy tops. Brush the top of each muffin with melted butter. If you’re using crushed fried onions, sprinkle them over the tops now. Finish with a pinch of flaky sea salt.
- Bake to perfection. Place the muffin tin in the preheated oven and bake for 25-30 minutes, or until the tops are deep golden brown and crispy. The edges should be visibly browned and pulling away from the sides of the tin slightly. Rotate the pan halfway through for even browning.
- Cool and serve. Let the muffins cool in the tin for 5 minutes. Then, run a knife around the edges to loosen them, and carefully lift them out onto a cooling rack. Serve warm, or let them cool completely and reheat later.
Pro Tip: If you want extra-crispy tops, after the muffins are done, turn the oven to broil and watch them like a hawk for 1-2 minutes. This will give you that dark, caramelized crust that everyone fights over.
Cooking Tips & Techniques
I’ve made more batches of these stuffing muffins than I can count, and I’ve learned a few things the hard way. Here’s what I wish someone had told me.
The Bread Matters More Than You Think: My first batch was a disaster because I used fresh, soft sandwich bread. It turned into a gluey, dense mess. Stale, crusty bread is non-negotiable. If you don’t have day-old bread, cube it and toast it in a 300°F oven for 10-15 minutes. You want the cubes to be dry but not colored.
Don’t Skip the Resting Step: After you add the broth and eggs, let the mixture sit for at least 5-10 minutes. This gives the bread time to absorb the liquid evenly. If you bake it immediately, you’ll end up with dry spots and soggy spots. Trust the process.
Packing is a Balancing Act: Pack the mixture too loosely, and your muffins will fall apart. Pack it too tightly, and they’ll be dense and heavy. Aim for a firm but gentle press — think of it like making a snowball. It should hold together but still have some give.
The Butter Brushing is Crucial: Don’t skip brushing the tops with melted butter before baking. This is what creates that beautiful golden crust. I’ve tried using olive oil, and it just doesn’t give the same result. Butter is king here.
My Biggest Mistake: I once tried to rush the process by using hot broth. The eggs scrambled instantly, and I ended up with little bits of cooked egg throughout the stuffing. Always warm the broth to just barely warm — think bathwater temperature — before whisking in the eggs.
Variations & Adaptations
One of the best things about this recipe is how adaptable it is. Here are some of my favorite variations.
Vegetarian Version: Use vegetable broth instead of chicken broth, and add 8 ounces of sautéed mushrooms to the vegetable mixture. Cremini or baby bellas work great. The mushrooms add that savory, umami depth that you’d normally get from meat.
Sausage and Apple Stuffing Muffins: Brown 1 pound of bulk pork sausage in the skillet before cooking the vegetables. Remove the sausage and set aside, then cook the vegetables in the rendered fat (add a little butter if needed). Add 1 diced apple (Honeycrisp or Granny Smith) along with the celery. Fold the cooked sausage back in with the bread cubes. This is my personal favorite variation — the sweetness of the apple against the savory sausage is incredible.
Gluten-Free Option: Use a good quality gluten-free bread. I’ve had the best luck with Against the Grain or Schar brands. The texture will be slightly different — gluten-free bread absorbs liquid faster and can get mushy more easily — so reduce the broth to 1¼ cups and watch the soaking time carefully.
Herb and Cranberry Twist: Fold in ½ cup dried cranberries and ¼ cup chopped pecans along with the herbs. The tart cranberries and crunchy pecans add wonderful texture and flavor contrast. This is great for a holiday brunch or as a side for roasted chicken.
Dairy-Free Adaptation: Use olive oil or vegan butter in place of regular butter. I’ve tested this with Miyoko’s vegan butter, and it works beautifully. Just make sure to brush the tops with the same alternative butter for that golden crust.
Serving & Storage Suggestions
These stuffing muffins are incredibly versatile when it comes to serving. Here’s how to make the most of them.
Serving Temperature: Serve them warm, straight from the oven. The contrast between the crispy exterior and the tender interior is at its peak when they’re fresh. If you’re making them ahead, reheat them in a 350°F oven for 5-7 minutes to restore the crunch.
Presentation Ideas: Arrange the muffins on a large wooden board or platter, garnished with fresh sage leaves and a few sprigs of thyme. For Thanksgiving, I like to serve them in a cast iron skillet lined with a cloth napkin — it looks rustic and inviting.
What to Serve With Them: Obviously, these are perfect alongside your Thanksgiving turkey. But they’re also fantastic with roasted chicken, pork chops, or even a simple holiday salad. For a lighter meal, serve them with a side of roasted Brussels sprouts and a drizzle of balsamic glaze.
Storage Instructions: Store leftover muffins in an airtight container in the refrigerator for up to 4 days. To freeze, place the cooled muffins on a baking sheet and freeze until solid, then transfer to a freezer-safe bag or container. They’ll keep for up to 3 months.
Reheating Tips: The best way to reheat is in the oven or toaster oven. Microwave reheating will make them soggy. For frozen muffins, thaw in the refrigerator overnight, then reheat in a 350°F oven for 10-12 minutes. If you’re in a hurry, you can reheat them directly from frozen — just add 5 minutes to the reheating time.
Flavor Development: Here’s a secret — these muffins actually taste better the next day. The flavors have time to meld and deepen. So don’t be afraid to make them a day ahead. Just reheat them before serving, and no one will know they weren’t made fresh.
Nutritional Information & Benefits
While these stuffing muffins are definitely a treat, they do offer some nutritional benefits worth noting.
Estimated Nutritional Values (per muffin):
- Calories: 220
- Total Fat: 10g
- Saturated Fat: 5g
- Cholesterol: 55mg
- Sodium: 420mg
- Total Carbohydrates: 26g
- Dietary Fiber: 2g
- Sugars: 3g
- Protein: 6g
Health Benefits: The celery and onions provide a good dose of vitamins K and C, along with fiber. The herbs — sage, thyme, and rosemary — are packed with antioxidants and have anti-inflammatory properties. If you use whole grain bread, you’ll get additional fiber and B vitamins.
Dietary Considerations: This recipe can be made vegetarian by using vegetable broth. For a gluten-free version, use gluten-free bread. It’s not suitable for a low-carb or keto diet due to the bread content.
Personal Wellness Perspective: I believe in balance. Thanksgiving is a time for celebration, and these stuffing muffins are part of that joy. Enjoy them without guilt, and pair them with plenty of vegetables and lean protein for a well-rounded meal. Life is too short to skip the crispy, buttery stuffing.
Conclusion
These Perfect Thanksgiving Stuffing Muffins with Crispy Golden Tops are more than just a recipe — they’re a way to bring a little extra joy to your holiday table. They solve the age-old problem of soggy stuffing while giving everyone their own personal portion of crispy, golden goodness. And honestly, they just feel special. Like you put in a little extra effort, even though they’re actually easier than traditional stuffing.
I love this recipe because it reminds me of Aunt Carol and her tiny kitchen, but it’s also become my own tradition. I’ve made it for Friendsgiving, for Christmas dinner, and even for a random Tuesday in November when I just needed a taste of comfort. It always delivers.
Now I want to hear from you. Are you going to try these for your Thanksgiving dinner? Will you add sausage and apples, or keep it classic? Drop a comment below and let me know how they turn out. And if you have your own twist on stuffing muffins, I’d love to hear about it. Share this recipe with someone who needs a little extra crispy goodness in their life this holiday season.
Happy cooking, and may your tops always be golden.
Frequently Asked Questions
Can I make these stuffing muffins ahead of time?
Absolutely! You can assemble the muffins completely, cover the tin with plastic wrap, and refrigerate for up to 24 hours before baking. Just add 5-10 minutes to the baking time since you’re starting from cold. You can also bake them fully, let them cool, and reheat them in a 350°F oven for 5-7 minutes before serving.
Why did my stuffing muffins turn out soggy?
Soggy muffins usually come from one of three issues: the bread wasn’t dry enough, you added too much broth, or you packed the mixture too tightly. Make sure your bread cubes are thoroughly dried (either stale or toasted), and don’t oversoak the mixture. It should be moist but not wet. Also, make sure your oven is fully preheated — a hot oven creates steam that helps the muffins set properly.
Can I use a different type of bread?
Yes, but choose wisely. Sturdy breads like sourdough, French bread, ciabatta, or even cornbread work well. Avoid soft, fluffy breads like sandwich bread or brioche — they’ll break down too much and create a dense, gluey texture. If you want to use cornbread, reduce the broth to 1 cup since cornbread absorbs less liquid.
How do I get the tops extra crispy?
For extra-crispy tops, brush the muffins generously with melted butter before baking. You can also sprinkle crushed fried onions or panko breadcrumbs on top for added crunch. After baking, if you want even more browning, switch the oven to broil for 1-2 minutes, watching carefully so they don’t burn.
Can I freeze these stuffing muffins?
Yes, they freeze beautifully. Bake the muffins completely, let them cool, then freeze them on a baking sheet until solid. Transfer to a freezer-safe bag or container for up to 3 months. To reheat, thaw in the refrigerator overnight and warm in a 350°F oven for 10-12 minutes. You can also reheat from frozen — just add 5 minutes to the time.
Pin This Recipe!
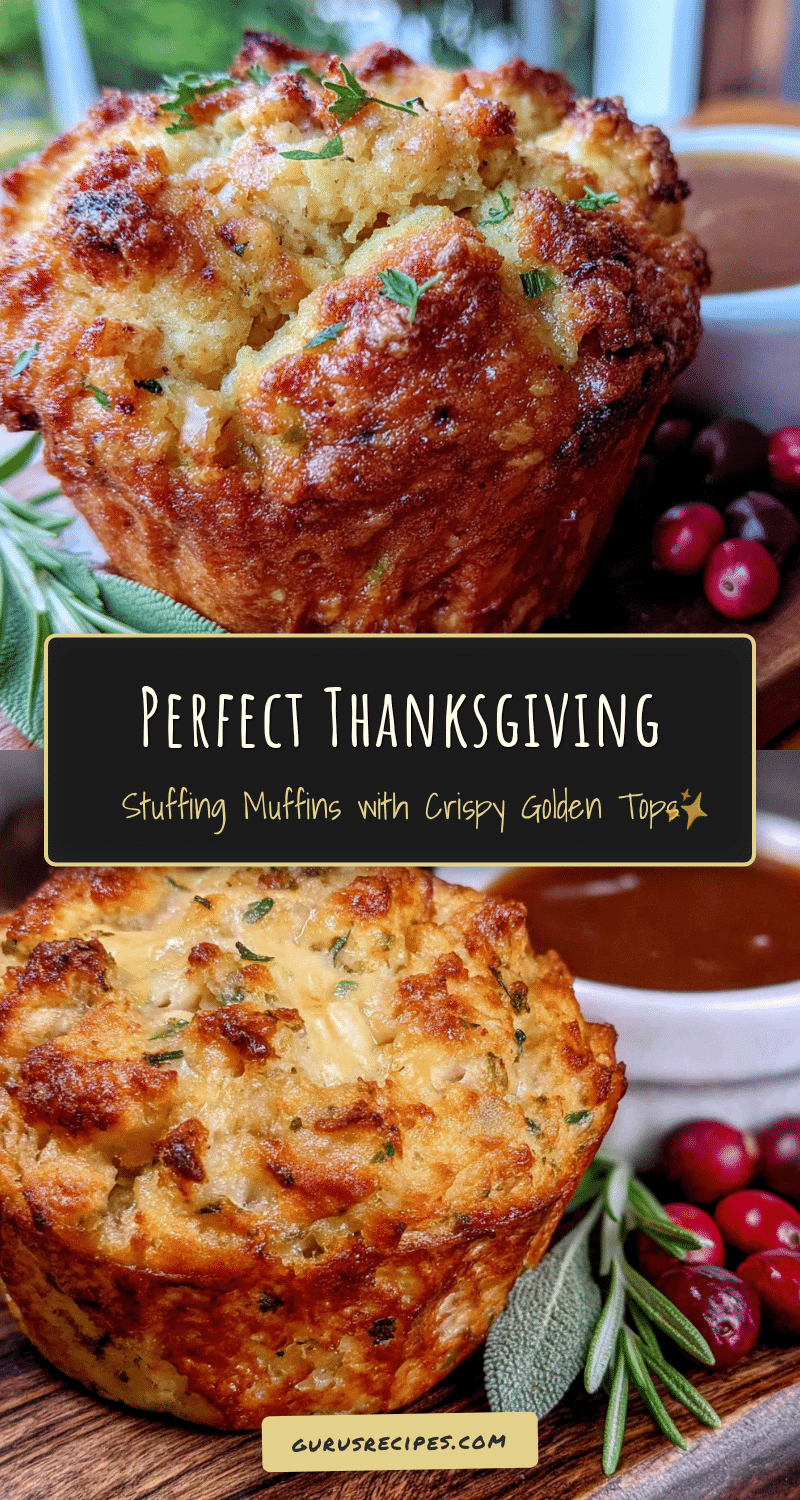

Perfect Thanksgiving Stuffing Muffins with Crispy Tops
These individual stuffing muffins are perfectly portioned with crispy golden tops on every side. Made with simple ingredients and a special technique, they solve the problem of soggy stuffing while delivering all the classic Thanksgiving flavors in a portable, personal format.
- Total Time: 50 minutes
- Yield: 12 servings 1x
Ingredients
- 1 loaf (about 16 ounces) day-old French bread or sourdough, cut into 1-inch cubes
- 4 tablespoons unsalted butter, plus more for greasing the muffin tin
- 1 large yellow onion, finely chopped (about 1½ cups)
- 3 celery stalks, finely chopped (about 1 cup)
- 3 cloves garlic, minced
- 2 teaspoons fresh sage, finely chopped (or 1 teaspoon dried)
- 1½ teaspoons fresh thyme leaves (or ¾ teaspoon dried)
- 1 teaspoon fresh rosemary, finely chopped (or ½ teaspoon dried)
- ½ teaspoon dried marjoram (optional)
- 1½ cups low-sodium chicken or vegetable broth, warmed
- 2 large eggs, lightly beaten
- ½ teaspoon salt, plus more to taste
- ½ teaspoon black pepper
- 2 tablespoons melted butter, for brushing the tops
- ¼ cup fried onions or shallots, crushed (optional)
- Flaky sea salt, for finishing
Instructions
- Preheat your oven to 375°F (190°C). Position the rack in the middle of the oven. Generously butter a 12-cup muffin tin, making sure to coat every nook and cranny.
- Prepare the bread cubes. If your bread isn’t already stale, spread the cubes on a baking sheet and toast them in the oven for 8-10 minutes, stirring once halfway through. You want them dry but not brown. Let them cool completely.
- Cook the aromatics. In a large skillet over medium heat, melt 4 tablespoons of butter. Add the chopped onion and celery, and cook for 6-8 minutes, stirring occasionally, until they’re soft and translucent but not browned. Add the minced garlic and cook for another minute until fragrant. Remove from heat and let cool slightly.
- Combine the ingredients. In your large mixing bowl, combine the dried bread cubes, cooked vegetables, fresh sage, thyme, rosemary, and marjoram if using. Toss everything together with your hands to distribute the herbs evenly. Season with salt and pepper.
- Add the liquid. In a separate small bowl or measuring cup, whisk together the warm broth and beaten eggs. Pour this mixture over the bread mixture. Using a large spatula or your hands, gently fold everything together until the bread cubes are evenly moistened. Don’t overmix — you want some texture, not a paste. Let the mixture sit for 5-10 minutes to allow the bread to absorb the liquid.
- Check the consistency. Squeeze a small handful of the mixture. It should hold together when pressed but still feel moist, not wet. If it seems dry, add a tablespoon more broth. If it’s too wet, add a handful more bread cubes.
- Fill the muffin cups. Divide the stuffing mixture evenly among the 12 muffin cups. Use a spoon or your fingers to press the mixture firmly into each cup. Don’t pack it too tight — you want some air pockets for texture — but make sure it’s compact enough to hold its shape.
- Create the crispy tops. Brush the top of each muffin with melted butter. If you’re using crushed fried onions, sprinkle them over the tops now. Finish with a pinch of flaky sea salt.
- Bake to perfection. Place the muffin tin in the preheated oven and bake for 25-30 minutes, or until the tops are deep golden brown and crispy. The edges should be visibly browned and pulling away from the sides of the tin slightly. Rotate the pan halfway through for even browning.
- Cool and serve. Let the muffins cool in the tin for 5 minutes. Then, run a knife around the edges to loosen them, and carefully lift them out onto a cooling rack. Serve warm, or let them cool completely and reheat later.
Notes
For extra-crispy tops, after the muffins are done, turn the oven to broil and watch them like a hawk for 1-2 minutes. This will give you that dark, caramelized crust. The muffins actually taste better the next day as flavors meld. You can assemble a day ahead and refrigerate before baking. If using fresh bread, cube and toast at 300°F for 10-15 minutes until dry but not colored. Always warm broth to barely warm (bathwater temperature) before whisking in eggs to prevent scrambling.
- Prep Time: 20 minutes
- Cook Time: 30 minutes
- Category: Side Dish
- Cuisine: American
Nutrition
- Serving Size: 1 muffin
- Calories: 220
- Sugar: 3
- Sodium: 420
- Fat: 10
- Saturated Fat: 5
- Carbohydrates: 26
- Fiber: 2
- Protein: 6
Keywords: stuffing muffins, Thanksgiving stuffing, crispy stuffing, individual stuffing, holiday side dish, stuffing muffins with crispy tops, make-ahead stuffing


