
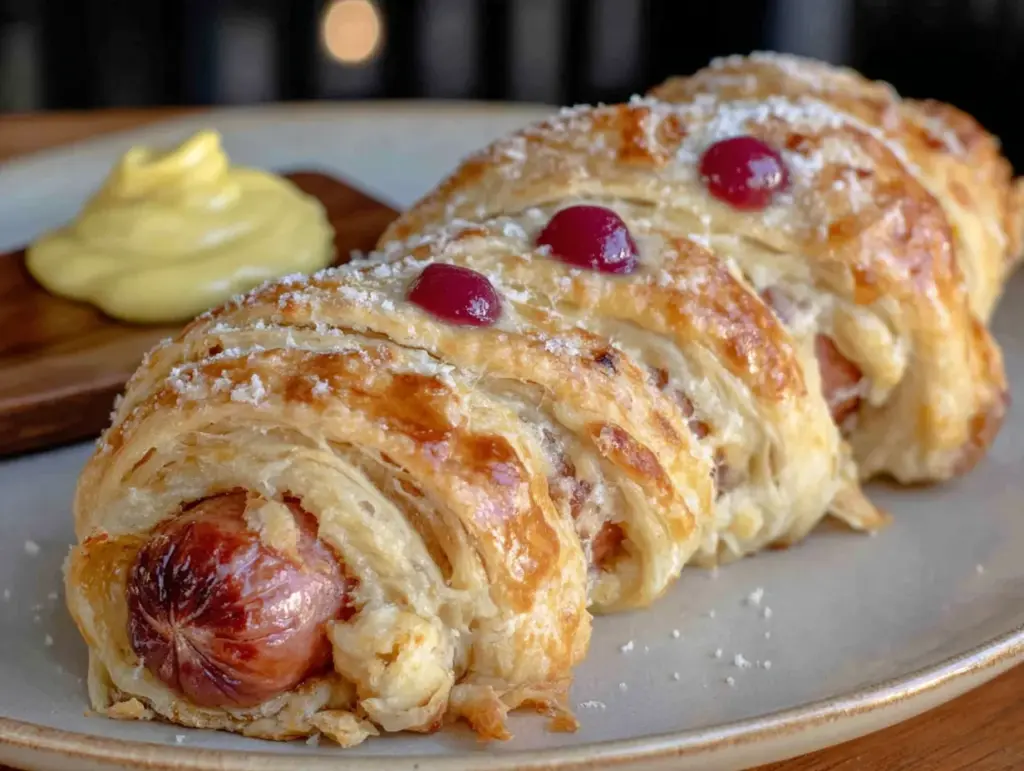
There used to be a tiny, family-run pizzeria in the strip mall near my old apartment called “Luigi’s Little Italy.” It wasn’t fancy—plastic tablecloths, a jukebox that only played Frank Sinatra, and the best garlic knots I’ve ever had. Every Halloween, Luigi’s would close its regular kitchen at 5 PM and transform into “Luigi’s Monster Mash-Up.” They’d serve the most ridiculous, wonderful food. Pizza shaped like jack-o’-lanterns, spaghetti and eyeball meatballs, and these things—these incredibly simple, adorably spooky mummy hot dogs. They were wrapped in a dough that was somehow both flaky and soft, with little mustard eyes that stared up at you from the plate.
When Luigi’s closed two years ago (the landlord tripled the rent, a tragedy I still haven’t fully processed), I knew I had to recreate those mummy dogs. I mean, my Halloween just felt empty without them. After seven tries—some where the dough unraveled, one where the “eyes” slid right off, and one memorable disaster where I used too much dough and ended up with a hot dog the size of a football—I finally got it. Honestly, let me tell you, the moment I pulled that first perfect tray out of the oven, I felt a little piece of my Halloween soul heal. Maybe you’ve been there, missing a food memory that feels unreachable. This is for you.
These Spooky Mummy Hot Dogs are the ultimate easy Halloween recipe. They’re crispy, salty, and just the right amount of silly. Every year, I make a big batch for my neighborhood potluck, and they vanish in minutes. It’s the kind of simple, fun food that brings everyone together—kids and adults alike—and honestly, that’s what Halloween is really about, isn’t it?
Why You’ll Love This Recipe
This isn’t just another hot dog recipe. This is the one that makes everyone at the party stop and say, “Wait, where did you get those?” Let me break down why this version is the absolute best.
- Quick & Easy: Comes together in under 30 minutes, from start to finish. Perfect for that last-minute Halloween craving or when the doorbell is about to start ringing with trick-or-treaters.
- Simple Ingredients: You only need four main ingredients—hot dogs, crescent roll dough, cheese, and mustard. No fancy grocery trips needed for this one.
- Perfect for Halloween Night: These mummy dogs are the star of any spooky spread. Great for parties, potlucks, or just a fun dinner before the candy haul.
- Crowd-Pleaser: I’ve yet to meet a kid (or adult) who can resist a hot dog wrapped in flaky dough with googly eyes. They always get rave reviews.
- Unbelievably Delicious: The contrast between the salty, juicy hot dog and the buttery, flaky dough is pure comfort food magic. Plus, the little cheese eyes melt into gooey perfection.
So what makes my version different from the rest? It’s all in the technique. I learned the hard way that not all crescent roll dough is created equal. I tested three different brands before settling on the one that gives the flakiest, most buttery wrap. And that mustard “glue” for the eyes? A game-changer. It keeps the cheese dots from sliding off during baking, so your mummies actually look like mummies. This isn’t just another version—it’s your best version.
This recipe is the kind that makes you close your eyes after the first bite. It’s Halloween comfort food reimagined—faster, simpler, but with the same soul-soothing satisfaction. Perfect for impressing your guests without any stress, or turning a simple weeknight into a memorable spooky celebration.
What Ingredients You Will Need
This recipe uses simple, pantry-friendly ingredients to deliver maximum flavor and fun. You probably have most of these in your kitchen right now.
- For the Mummies:
- 8 beef or turkey hot dogs (I recommend Hebrew National or Oscar Mayer for the best snap and flavor)
- 1 can (8 oz) refrigerated crescent roll dough (like Pillsbury—this is non-negotiable for the perfect flaky texture)
- 16 small slices of mozzarella cheese or cheddar cheese (for the eyes; use cheese sticks cut into 1/4-inch rounds)
- Yellow mustard (for the “glue” and for piping the pupils—classic yellow works best)
- Optional for Serving:
- Ketchup (for dipping the “blood”)
- Ranch dressing (a creamy, cooling dip for the “bandages”)
- Pretzel sticks (broken in half to make “bones” or “spider legs” on the side)
Ingredient Selection Tips: Look for hot dogs that are all-beef or all-turkey for the best texture. The cheaper ones can get rubbery when baked. For the crescent dough, I’ve tried the store-brand versions, and they just don’t puff up the same way. Trust me on this—splurge on the name brand for this one. If you want a gluten-free option, you can use a gluten-free crescent roll dough, but the texture will be a bit more biscuit-like. For a vegetarian version, swap the hot dogs for your favorite plant-based sausages—just make sure they’re pre-cooked.
Substitution Guidance: No crescent roll dough? You can use refrigerated pizza dough or even puff pastry sheets, just cut them into thin strips. The baking time will vary slightly. No mozzarella? Use provolone or even a slice of American cheese for the eyes—just make sure it’s firm enough to hold its shape. For the mustard, you can use a squeeze bottle of yellow mustard for easy piping. If you only have Dijon, it works, but the color is less “spooky eyeball” and more “mellow yellow.”
Equipment Needed
You don’t need any fancy gadgets for this recipe, which is part of its charm. Here’s what you’ll need:
- Baking sheet (a standard 13×18-inch sheet works perfectly)
- Parchment paper or silicone baking mat (non-stick is a lifesaver here)
- Sharp knife or pizza cutter (for cutting the dough into strips)
- Small bowl (for the mustard “glue”)
- Toothpick or small offset spatula (for dotting the mustard onto the cheese)
- Cooling rack (optional, but helps keep the bottoms crispy)
If you don’t have a pizza cutter, a sharp knife works just fine. I’ve used both, and honestly, the knife gives you more control for cutting those thin strips. For the baking sheet, any rimmed sheet will do—just don’t use a dark, non-stick pan, as it can cause the bottoms to brown too quickly. I learned that one the hard way with my first batch of burnt-bottomed mummies.
If you’re making a big batch for a party, I recommend having two baking sheets so you can rotate them in the oven for even browning. And a tip from experience: line your sheet with parchment paper, not foil. The foil can stick to the dough, and you’ll end up with a mummy that’s missing its “bandages.” No one wants a naked mummy.
Preparation Method
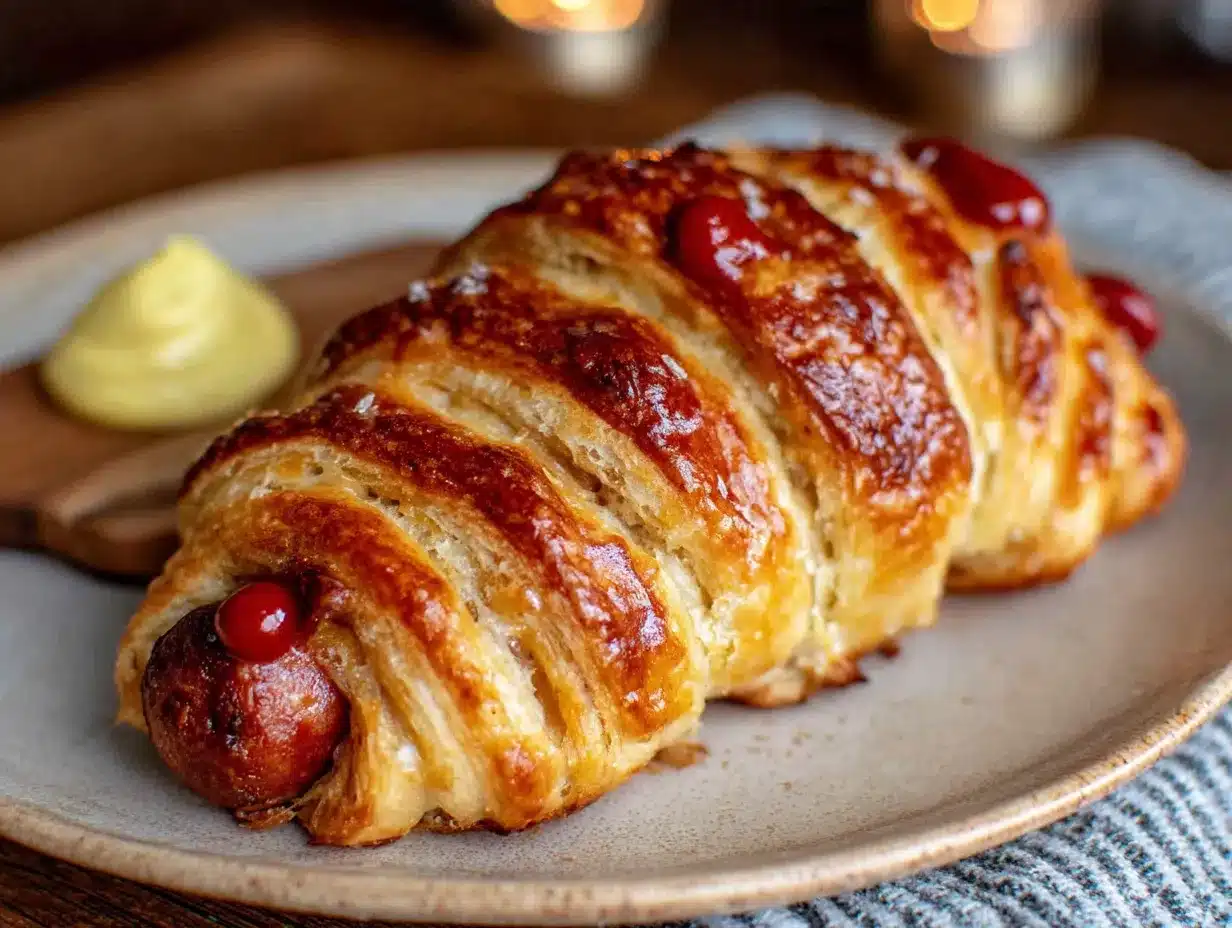
Let’s get cooking! This is where the magic happens. Follow these steps, and you’ll have a tray of adorable, delicious mummies in no time.
- Preheat your oven to 375°F (190°C). Line your baking sheet with parchment paper or a silicone mat. This is crucial for easy cleanup and prevents sticking.
- Prepare your hot dogs. Pat each hot dog dry with a paper towel. This helps the dough stick better. Set them aside on a plate.
- Unroll the crescent roll dough. On a clean, dry cutting board, carefully unroll the dough. You’ll see it’s perforated into 8 triangles. Pinch the seams together to form one large rectangle. Then, using a sharp knife or pizza cutter, cut the dough lengthwise into 8 long, thin strips. Each strip should be about 1/2-inch wide. Don’t worry if they’re not perfectly even—mummies are supposed to look a little messy!
- Wrap the mummies. Take one strip of dough and wrap it around a hot dog, starting at one end and working your way to the other. Leave a small gap at the top (about 1/2 inch) for the face. Don’t wrap too tightly, or the dough won’t puff up properly. Leave a little slack for the “bandages” to expand. Place the wrapped hot dog on the prepared baking sheet, seam-side down. Repeat with the remaining hot dogs and dough strips.
- Bake the mummies. Bake for 12-15 minutes, or until the dough is golden brown and puffed. The hot dogs should be heated through and starting to sizzle. I like to check at the 12-minute mark—if the bottoms are getting too dark, I pull them out early.
- Prepare the “eyes”. While the mummies are baking, cut your cheese slices into small rounds. I use a small round cookie cutter (about 1/2 inch) or just cut them with a knife. You need 2 rounds per mummy, so 16 total.
- Make the mustard “glue”. In a small bowl, put a dollop of yellow mustard. You’ll use this to “glue” the cheese eyes onto the hot dogs and to pipe the pupils.
- Assemble the faces. As soon as the mummies come out of the oven, use a toothpick to dab a tiny bit of mustard onto the exposed hot dog where you want the eyes to go. Press a cheese round onto each dab of mustard. Then, use the toothpick to dot a tiny speck of mustard in the center of each cheese round to create the pupil. Don’t use too much—just a small dot! The heat from the mummy will slightly melt the cheese, making them look perfectly spooky.
- Let them rest. Allow the mummies to cool on the baking sheet for 2-3 minutes before transferring them to a serving platter. This lets the cheese set and prevents the mustard from running.
Pro-Tip from My Kitchen: If you want extra-crispy dough, brush the wrapped mummies with a little melted butter or an egg wash (1 egg beaten with 1 tablespoon of water) before baking. I do this when I’m feeling fancy, and it gives them a gorgeous golden sheen. Also, don’t skip the step of patting the hot dogs dry—moisture is the enemy of crispy dough!
Cooking Tips & Techniques
After seven batches of trial and error, I’ve gathered some wisdom to share. Trust me, these tips will save you from my early mistakes.
The Dough Dilemma: The biggest mistake I made was wrapping the dough too tightly. The first time, I pulled the strips taut like I was bandaging a real wound. The result? The dough didn’t puff up at all, and my mummies looked like sad, flat snakes. Leave a little slack! The dough needs room to expand as it bakes. Think of it as a loose wrap, not a tight bandage.
Timing is Everything: I once got distracted answering the door for trick-or-treaters and left my mummies in for 18 minutes. They came out looking like burnt mummies from a horror movie. Set a timer! And check them at the 12-minute mark. Oven temperatures vary, and you want a golden brown, not a dark brown.
The Mustard “Glue” Secret: This was my biggest breakthrough. In my earlier attempts, I tried using water, egg wash, and even ketchup to stick the cheese eyes on. Nothing worked. The cheese either slid off during baking or fell off when I tried to move the mummies. Then I remembered how mustard acts as a natural adhesive—it’s sticky, and it doesn’t affect the flavor much. Now, I never skip this step. The mustard “glue” is the secret to perfectly placed eyes every time.
Multitasking Magic: To save time, I prep the cheese eyes while the mummies are baking. I also set up a little assembly line on my counter: baking sheet, wrapped mummies, toothpick, mustard bowl, cheese rounds. This way, I can pop them in the oven and have the faces ready to go the second they come out. It makes the whole process feel effortless, even when I’m juggling a dozen other Halloween tasks.
Variations & Adaptations
This recipe is incredibly versatile. Here are some fun ways to change it up.
- Spicy Mummy Dogs: Use spicy hot dogs or chorizo-style sausages instead of regular beef hot dogs. Add a few dashes of hot sauce to the mustard “glue” for an extra kick. I tried this last year, and it was a hit with the adults.
- Cheesy Mummy Dogs: Before wrapping the hot dog, cut a slit lengthwise down the center and stuff it with a thin strip of cheddar or pepper jack cheese. The cheese will melt out as it bakes, creating a delicious, gooey surprise. Just be careful—the cheese is lava-hot when it comes out of the oven!
- Veggie Mummy Dogs: Swap the hot dogs for your favorite plant-based sausages (I like the Field Roast or Beyond Meat varieties). The rest of the recipe stays the same. They’re just as delicious and perfect for a vegetarian Halloween spread.
- Spider Mummy Dogs: After wrapping the hot dog, insert 4 pretzel sticks on each side (broken in half) to look like spider legs. Bake as directed. The pretzels get a little soft, but they look incredibly creepy and cool.
Dietary Adjustments: For a gluten-free version, use gluten-free crescent roll dough (available at most major grocery stores). For a low-carb option, you can wrap the hot dogs in thinly sliced provolone cheese and bake until crispy—it’s not the same texture, but it’s a fun, keto-friendly twist.
Serving & Storage Suggestions
These mummy dogs are best served warm, right out of the oven. The dough is at its flakiest, and the cheese eyes are perfectly melty. I like to arrange them on a large platter, standing up slightly, so their little faces are looking at the guests. It’s a little creepy and a lot adorable.
For dipping, I always set out small bowls of ketchup (for “blood”), yellow mustard, and ranch dressing. The ranch is surprisingly good with the flaky dough and salty hot dog. If you’re feeling extra festive, you can even add a few drops of green food coloring to the ranch for a “slime” dip.
Storage: If you have leftovers (which is rare in my house), store them in an airtight container in the refrigerator for up to 3 days. The dough will lose its crispiness, but they’re still tasty.
Reheating: The best way to reheat them is in the oven or an air fryer. Preheat to 350°F (175°C) and bake for 5-7 minutes, or until heated through. The microwave works in a pinch, but the dough will be soft and chewy. I don’t recommend it unless you’re in a hurry.
Flavor Development: Honestly, these are best fresh. The dough is at its peak right after baking. But I’ve been known to eat a cold one straight from the fridge the next morning, and let me tell you, it’s still pretty good. The flavors meld together, and the cold hot dog has a nice snap.
Nutritional Information & Benefits
Let’s be real—this is a fun, indulgent Halloween treat. But here’s the breakdown per mummy dog (based on using beef hot dogs and regular crescent roll dough):
- Calories: Approximately 280-320 calories per mummy dog
- Protein: 12-15g
- Fat: 18-22g
- Carbohydrates: 18-22g
- Sodium: 800-900mg (hot dogs are naturally high in sodium)
Health Benefits: While this isn’t a health food, there are some redeeming qualities. Hot dogs provide a decent amount of protein, and the cheese adds calcium. If you use turkey hot dogs, you’ll cut the fat and calories significantly. You can also use low-fat crescent roll dough to reduce the overall fat content.
Dietary Considerations: This recipe contains gluten (from the dough), dairy (from the cheese), and soy (often found in hot dogs). For a gluten-free version, use gluten-free dough. For a dairy-free version, use dairy-free cheese and check your hot dog ingredients. For a lower-sodium option, look for low-sodium hot dogs.
My personal take? This is a once-a-year treat. I don’t worry about the nutritional stats too much on Halloween night. It’s about having fun, making memories, and enjoying a little bit of spooky deliciousness. Life’s too short to count calories when there are mummy dogs to be eaten!
Conclusion
So there you have it—my little piece of Luigi’s legacy, recreated in my own kitchen. These Spooky Mummy Hot Dogs are more than just a recipe; they’re a way to bring a little bit of joy and nostalgia to your Halloween night. They’re easy, they’re fun, and they taste amazing. I honestly can’t imagine a Halloween without them now.
I encourage you to make them your own. Add extra spices, try different cheeses, or get creative with the faces. The beauty of this recipe is that it’s a blank canvas for your spooky imagination. And if you do make them, please come back and let me know how they turned out! I love hearing about your kitchen adventures, especially when they involve googly-eyed hot dogs.
From my kitchen to yours—have a wonderfully spooky and delicious Halloween!
Frequently Asked Questions
Can I make these mummy hot dogs ahead of time?
Yes, you can! Assemble the mummies up to the baking step, then cover the baking sheet with plastic wrap and refrigerate for up to 4 hours. When you’re ready, just pop them in the oven. You may need to add 2-3 minutes to the baking time since they’ll be cold from the fridge.
Can I use puff pastry instead of crescent roll dough?
Absolutely! Puff pastry will give you a flakier, more buttery result. Just thaw the puff pastry according to package directions, then cut it into thin strips (about 1/2-inch wide) before wrapping. The baking time may be slightly longer—around 15-18 minutes—so keep an eye on them.
My cheese eyes keep falling off. What am I doing wrong?
This usually happens if you’re not using enough mustard “glue,” or if the cheese is too thick. Make sure you’re dabbing a generous enough amount of mustard onto the hot dog, and use thin slices of cheese. Also, press the cheese down gently but firmly. The heat from the mummy will help it set as it cools.
Can I make these in an air fryer?
Yes! Air fryers work great for this recipe. Preheat your air fryer to 350°F (175°C). Place the wrapped mummies in a single layer in the air fryer basket (you may need to work in batches). Cook for 6-8 minutes, or until the dough is golden brown and puffed. Add the eyes after cooking, just like the oven method.
How do I keep the dough from unraveling during baking?
Make sure you place the wrapped hot dogs seam-side down on the baking sheet. The weight of the hot dog will help keep the dough in place. Also, don’t wrap the dough too loosely—it should be snug but not tight. If you’re still having trouble, you can press the end of the dough strip gently into the wrapped layers to seal it.
Pin This Recipe!
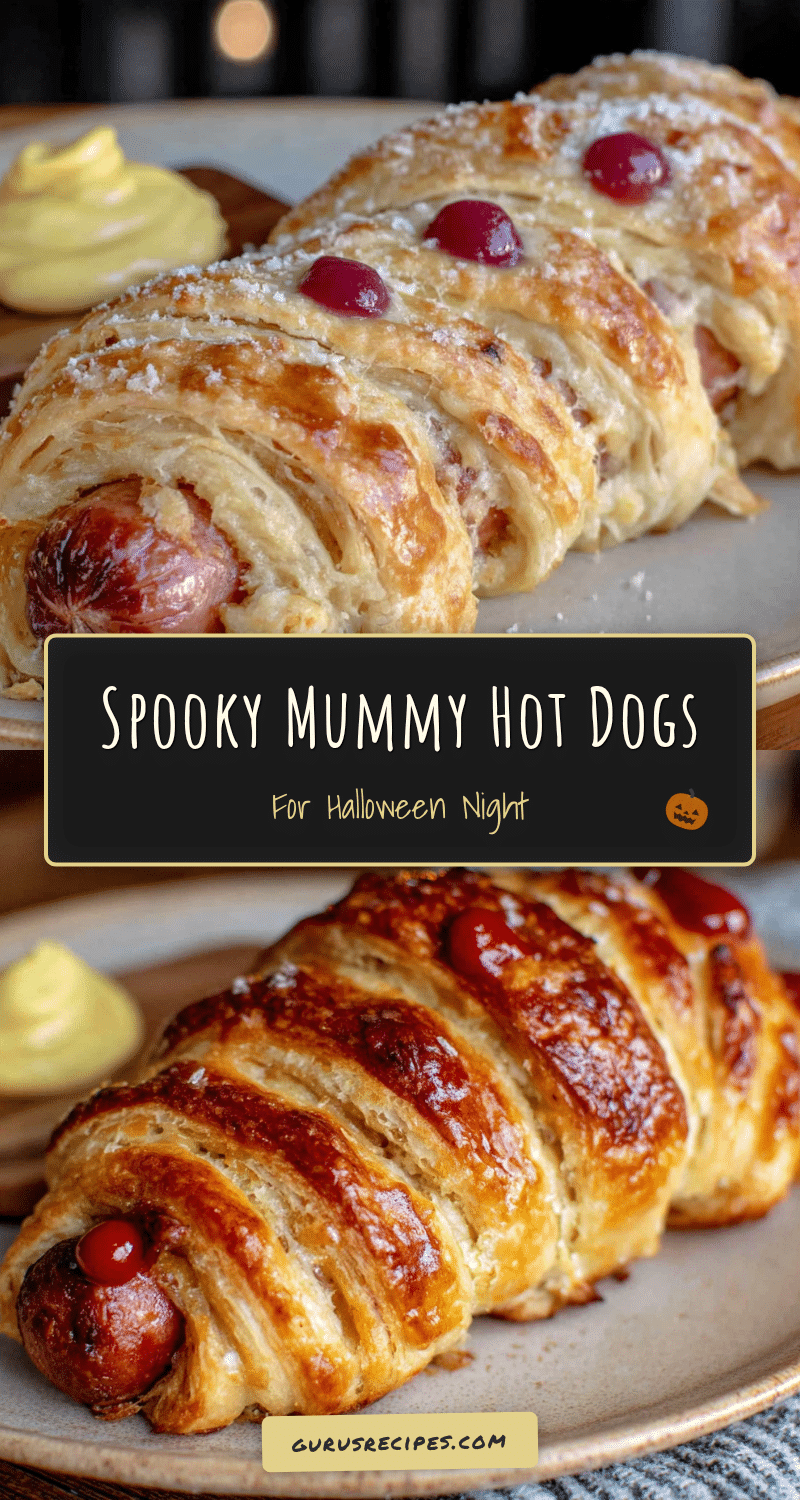

Spooky Mummy Hot Dogs: Easy Halloween Recipe
These Spooky Mummy Hot Dogs are the ultimate easy Halloween recipe. They’re crispy, salty, and just the right amount of silly, made with hot dogs wrapped in flaky crescent roll dough with cheese eyes.
- Total Time: 25 minutes
- Yield: 8 servings 1x
Ingredients
- 8 beef or turkey hot dogs (recommended: Hebrew National or Oscar Mayer)
- 1 can (8 oz) refrigerated crescent roll dough (like Pillsbury)
- 16 small slices of mozzarella cheese or cheddar cheese (for the eyes; use cheese sticks cut into 1/4-inch rounds)
- Yellow mustard (for the ‘glue’ and for piping the pupils)
- Ketchup (optional, for dipping)
- Ranch dressing (optional, for dipping)
- Pretzel sticks (optional, broken in half for spider legs)
Instructions
- Preheat your oven to 375°F (190°C). Line your baking sheet with parchment paper or a silicone mat.
- Pat each hot dog dry with a paper towel. Set them aside on a plate.
- Unroll the crescent roll dough on a clean, dry cutting board. Pinch the seams together to form one large rectangle. Cut the dough lengthwise into 8 long, thin strips, each about 1/2-inch wide.
- Take one strip of dough and wrap it around a hot dog, starting at one end and working your way to the other. Leave a small gap at the top (about 1/2 inch) for the face. Don’t wrap too tightly. Place the wrapped hot dog on the prepared baking sheet, seam-side down. Repeat with the remaining hot dogs and dough strips.
- Bake for 12-15 minutes, or until the dough is golden brown and puffed. Check at the 12-minute mark.
- While the mummies are baking, cut your cheese slices into small rounds (about 1/2 inch). You need 2 rounds per mummy, so 16 total.
- In a small bowl, put a dollop of yellow mustard for the ‘glue’.
- As soon as the mummies come out of the oven, use a toothpick to dab a tiny bit of mustard onto the exposed hot dog where you want the eyes to go. Press a cheese round onto each dab of mustard. Then, use the toothpick to dot a tiny speck of mustard in the center of each cheese round to create the pupil.
- Allow the mummies to cool on the baking sheet for 2-3 minutes before transferring them to a serving platter.
Notes
For extra-crispy dough, brush the wrapped mummies with a little melted butter or an egg wash (1 egg beaten with 1 tablespoon of water) before baking. Don’t skip patting the hot dogs dry—moisture is the enemy of crispy dough! The mustard ‘glue’ is the secret to perfectly placed eyes every time. If you want to make ahead, assemble the mummies up to the baking step, cover with plastic wrap, and refrigerate for up to 4 hours; add 2-3 minutes to baking time.
- Prep Time: 10 minutes
- Cook Time: 15 minutes
- Category: Appetizer
- Cuisine: American
Nutrition
- Serving Size: 1 mummy dog
- Calories: 300
- Sugar: 4
- Sodium: 850
- Fat: 20
- Saturated Fat: 7
- Carbohydrates: 20
- Protein: 13
Keywords: Halloween, mummy hot dogs, easy Halloween recipe, hot dog appetizer, spooky food, party food, kid-friendly


